When you click on links to various merchants on this site and make a purchase, this can result in this site earning a commission. Affiliate programs and affiliations include, but are not limited to, the eBay Partner Network.
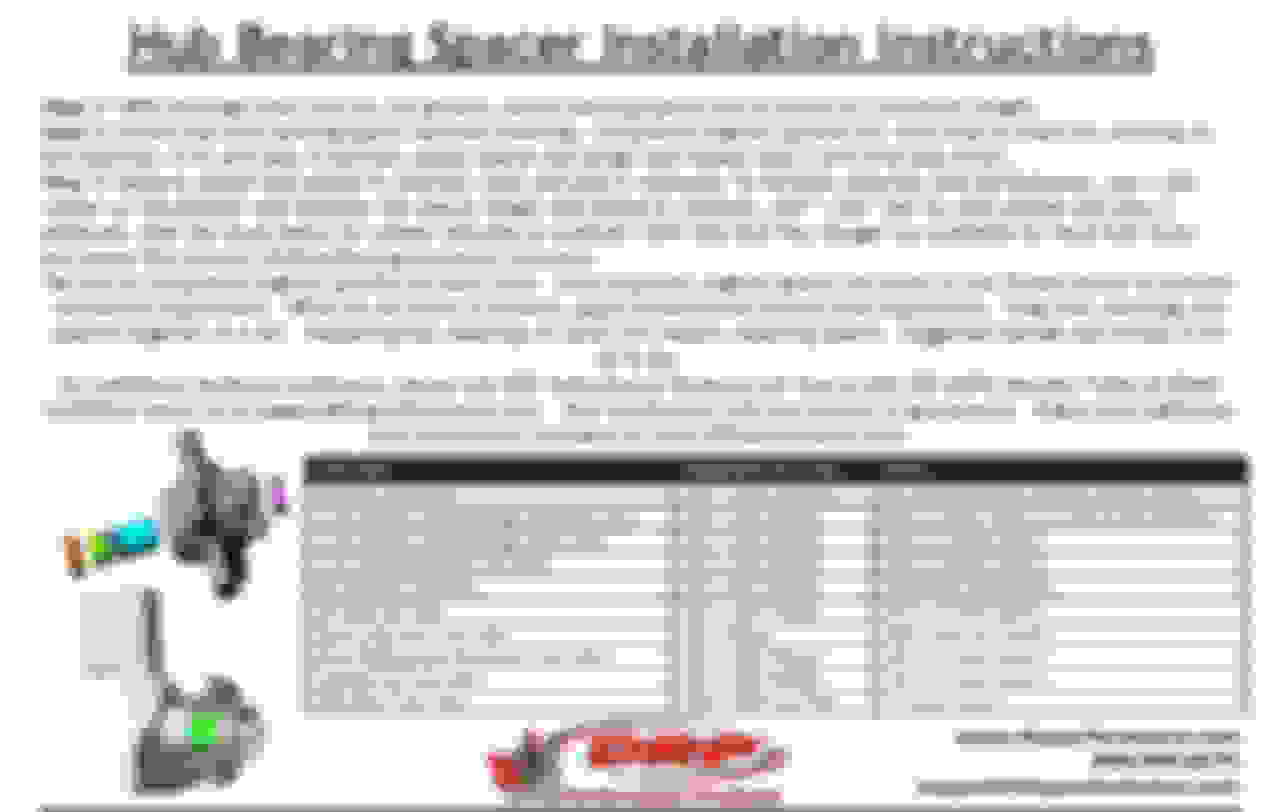
I mentioned I was going to experiment with these front wheel hub bearing spacers in my Brake Upgrade Thread HERE, but now that I have started the install I'm realizing it needs it's own thread.
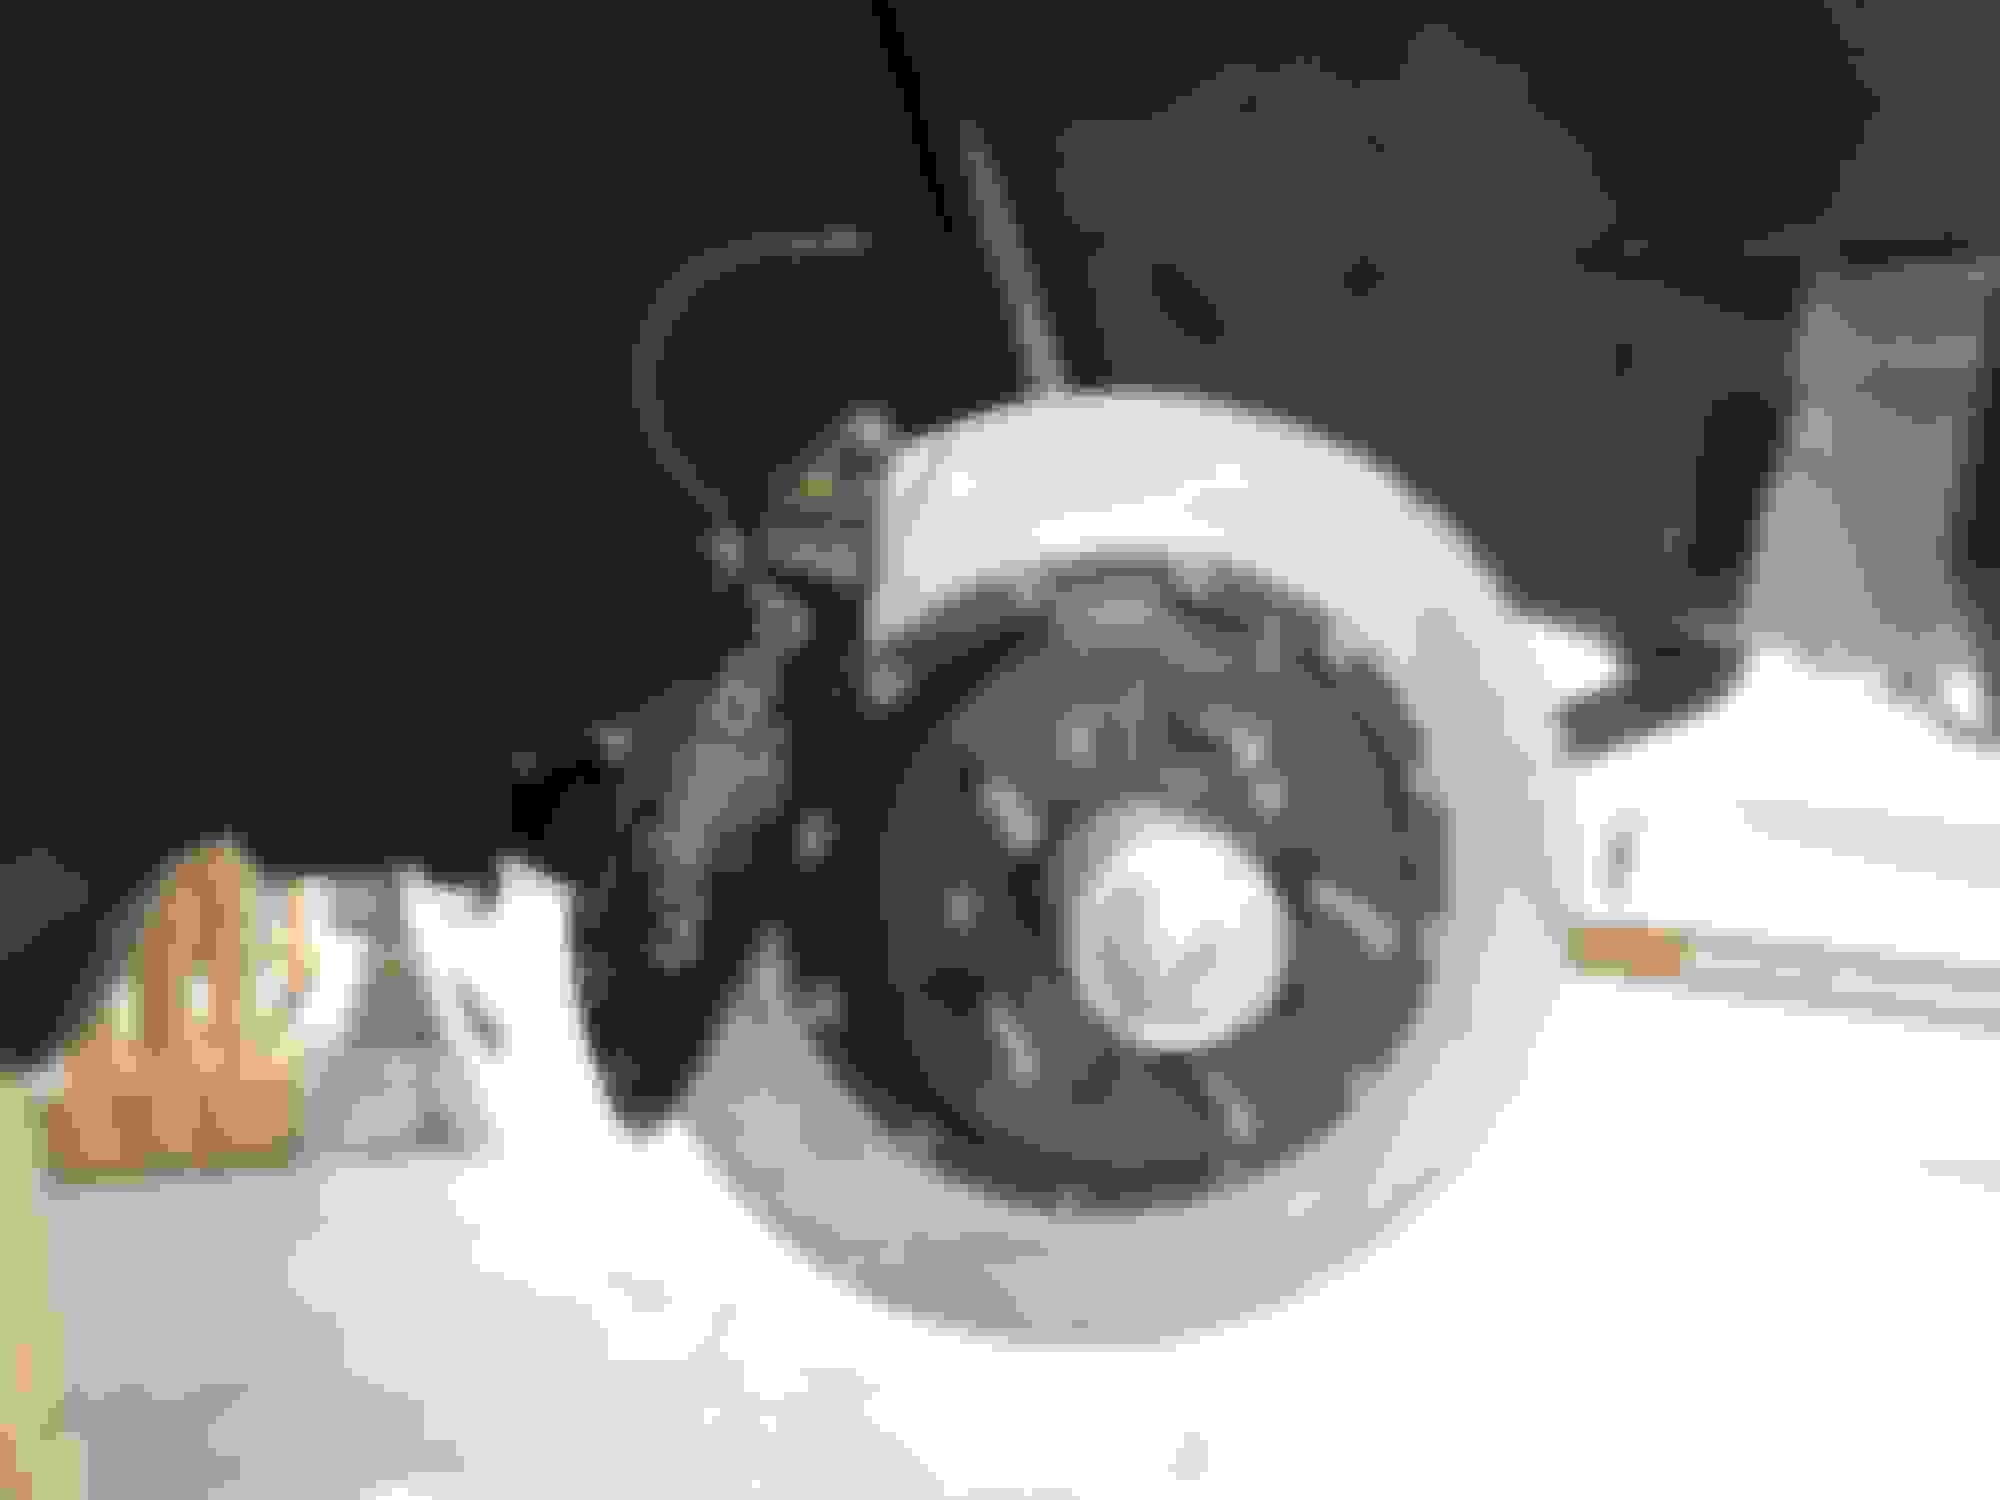
The idea behind these bearing spacers is to eliminate the ridiculous process for setting the bearing clearances (end play) from the factory style of tightening, loosening tightening, then adjusting more just to find a hole in to line up with the castle nut for the cotter pin. It was always my concern, that this was terribly inaccurate, and also did not allow precise adjustment. I always found the bearing settings to be too tight or too loose. With these, you have a fine threaded spacer that goes between the inner races of the bearing set. You expand it to increase the end play of the bearings and you shorten it to decrease the end play, or apply preload to the bearings. Because of the fine thread, you can do this quite precisely. By doing this you can achieve nearly 0 end play, or very slight preload as they suggest, while retaining a very free spinning hub/wheel.
I was turned onto these by Scott from Big Brake Upgrades (https://bigbrakeupgrade.com). He also recommended this special bearing grease, below. He says he has used both the grease and spacers very effectively in racing on other Thirdgen cars. He has been a great help on my brake upgrade as well as this bearing spacer adventure.
Mobilith SHC 220, Synth Grease, 13.7 oz. https://amzn.to/3S2em1n (This amazon seller was also very helpful and communicative)
The process:
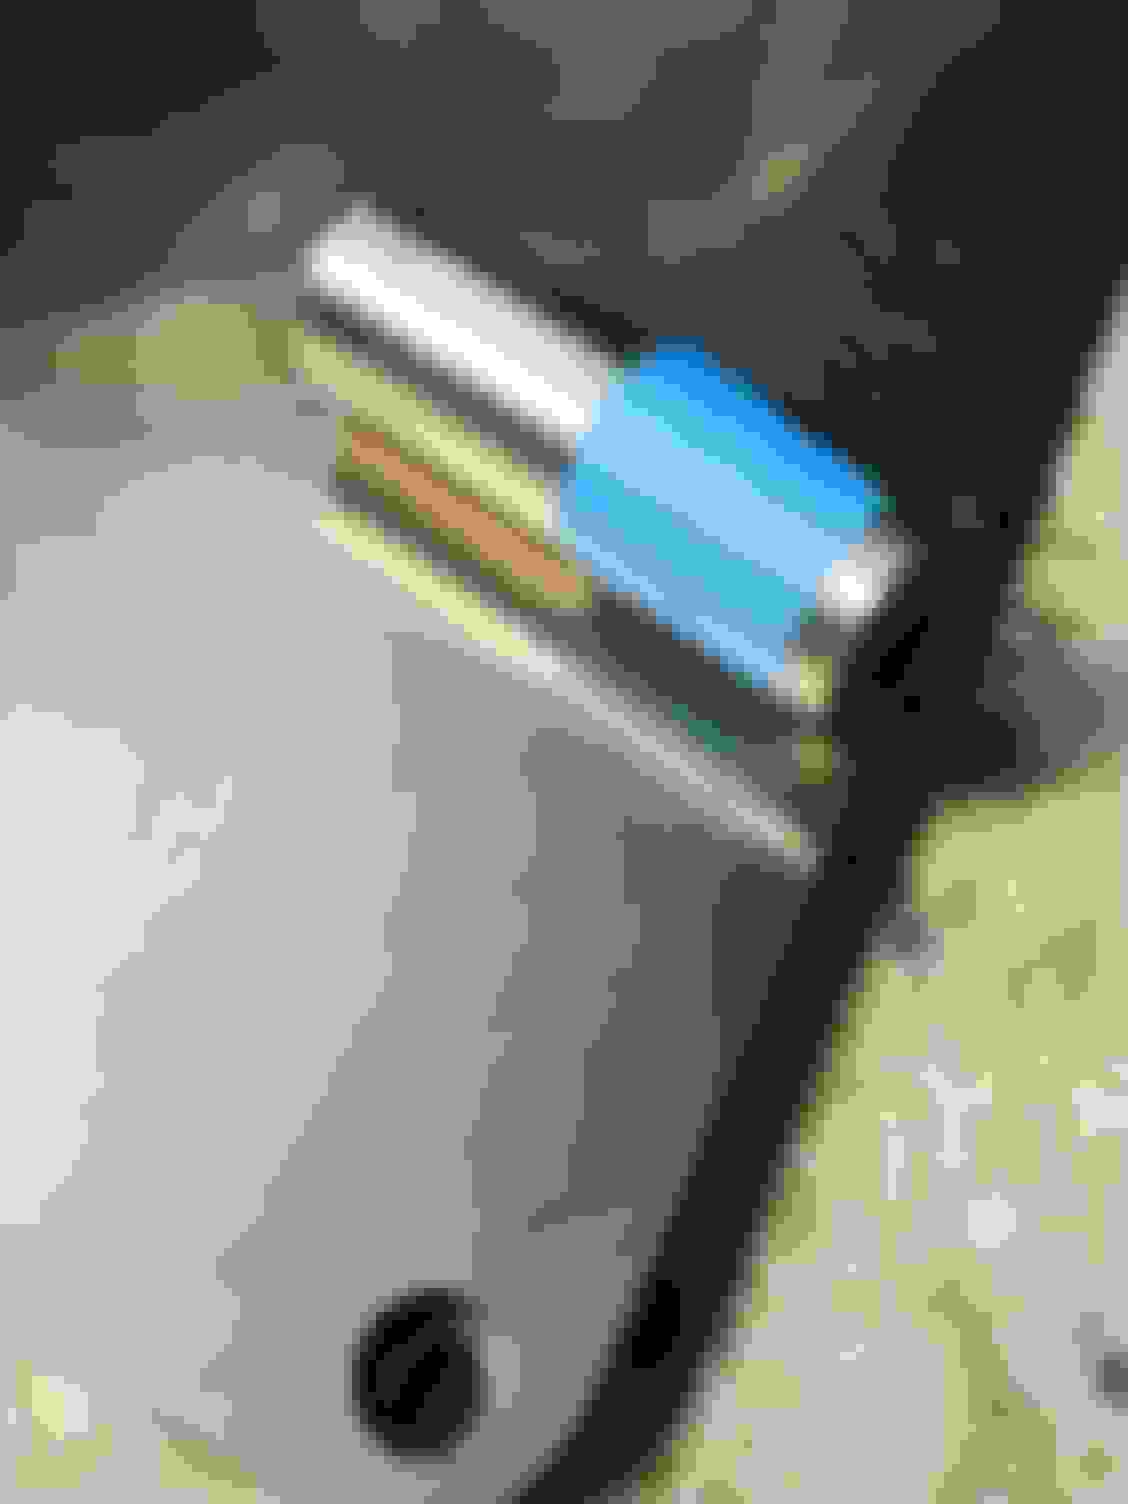
Yesterday, I took everything apart and first painstakingly cleaned all the old grease out of the current hubs, bearings, and seals. I had just done the brakes as I mentioned replacing all the bearings a few months ago, so I figured there was no reason to buy new again. I did have to carefully use a sharp chisel to remove the hub seals so I could remove the inner bearings, but they came out fine and were able to be reused. They instruct you to set end play of the bearings dry (no grease) and with the seals removed, to reduce drag and give you a better feel. They do suggest using an indicator, but since I did not have one I had to do it by feel this time. I did find a video online that have a good process thought.
So using just the hub the two bearings the washer and the nut, I started with the spacer backed out 3/4 of the way, for this spacer that was about 6 turns out from the shortest. I kept fitting it up and feeling the end play. I first started by going a half turn at a time untill it went tight, then wend the other direction a quarter turn at a time till it was loose, then started tigtening it up an eighth of a turn to get it close to where I wanted it. Near the end I was making adjustments to the spacer of as little as ~2-3 degrees to fine tune the feel. The goal I saw on the video was to have the slightest feel of end play when the nut is tightened with a wrench untill it just becomes snug. Then when you torque the nut down, that very slight endplay should go away and everything should feel tight. At this point the hub should spin very freely and have nearly 0 preload, or the slightest amount. DRP suggests 0.001" preload for factory cast iron hubs such as ours. Once this feel is achieved, take everthing apart, pack the bearings, pre-assemble the hub (spacer, inner bearing, then seal) then mount it all up in the car, and torque to 20-40 ft-lbs. I'm still not certain if the cotter pins are necessary with torqued nuts, more below...
When it comes to greasing the bearings, I'm learning more an more, less may be more. I packed the bearings by hand, then slathered up the exterior and installed them. I found on the instructions for DRP's fancy bearing backing tool, they suggest only filling the bearings half full of grease and adding no extra... This is making me think I may have still used too much grease... I used to do this then glob a bunch of extra in which must have been way too much!
Bearings should be packed 50% full. Insert the grease between every other roller in the bearing. Make sure it fills the cavity all the way to the top. For more information, check out our video
I did a simple spin of the hub by itself before and after, with everything greased and seals installed. Before with what I believe was too tight of a bearing setting, the hub would stop spinning almost immediately after my fingers coming out of contact with the stud. After I was getting just under one full rotation. During the setting process with no grease or seals, with the proper endplay adjustment, no perceivable in our out movement movement and a fully tightened nut, the hub would spin 12-14 sec.
Topics of note:
Unfortunately, the bearing spacers I received had a nasty burr on the ID of the adjusting ring, which prevented it from sliding over the larger part of the spindle. At first I thought I had the wrong parts, but after taking measurements of everything and verifying I did get the right parts, I realized this burr. I ended up using a small sanding drum, from a Dremel, but on a drill at low speed, and carefully removed the burr until I could reasonably fit the bearing spacer over the spindle. It was much worse on one than the other, but very evident on both...
Also, if anyone gives these a try, make sure you insert the spacer first, then the inner bearing, then the seal before final assembly. I forgot it had to go in that order, and had to remove the seal again to remove the bearing and drop in the spacer, before buttoning everything back up.
So, I'm still trying to determine if the cotter pins are still necessary now that I am torqueing the castle nut all the way to 40 ft-lbs... I did my manual tighten then went up from 20 to 30 to 40 ft-lbs and found my normal had tightening is around 35 ft-lbs. Looking at the position of the cotter pin holes, going from the 35 ft-lb initial torque up to 40 ft-lbs, I still have no pin hole that lines up. I'm not sure if I need to go tighter to line it up with a hole, or if the pins are no longer necessary since the bolts are torqued. The reality is since the spacer is in there, I could possibly tighten it more to line up the hole without effecting the bearing spacing, I just don't want to over tension the spindle... I hope to call them at lunch to see if they can explain...
Not sure what the difficulty with the normal procedure is? Seems extremely intuitive to me, takes MAYBE 10 seconds. This other thing looks like a solution in search of a problem, to me; at least for cars built like ours. There may be others that could use like the various race setups they talk about (wide 5, Legends, etc.) it but this doesn't seem particularly useful to me for yerbasic street car.
Correct procedure, or at least what I've always done for the last half-century or so, is to tighten the castle nut until the drag of the bearings on the rotor or hub gets to maybe 30 in-lb (a shade more than "barely noticeable", but less by far than "lock up"); loosen until the spinning torque goes back to zero; re-tighten until the spinning torque reaches "barely noticeable" again (maybe 15 - 20 in-lb at that point); continue tightening until the next alignment of hole to crenellation occurs; put in pin. Just doesn't seem like a big deal to me. Kinda like a rear axle, or many manual transmission applications, or any number of other things (including non-automotive) that use tapered roller bearings. You want "some" preload, not "none" but also not "too much". The EXACT value isn't usually super critical as long as it's within a range that (a) guarantees that any axial load applied to the bearing pair doesn't unload either bearing completely, and (b) doesn't destroy either bearing from overloading.
That thing you have there reminds me strongly of a solid pinion bearing spacer. Again, wheel bearings and pinion bearings are arbitrarily nearly identical in principle and in application; they're even a pretty similar size, thus leading to suspicion that they should get a somewhat comparable level of preload. In fact old rear axles (as recently as a 50s Chevy truck for example) used to use a cotter pin to hold the pinion nut still. They got away from that because at the speed that pinions got around to spinning at with a V8 especially, it was too easy to shear a pin. That's when they went to the stoooopid "crush sleeve" fail, where you have to STOP tightening the pinion nut when the right bearing preload is reached, regardless of whether the nut is actually CAPTURED and SECURED by whatever tightness that happens to be, which in my experience usually seems to happen at around 150 - 175 ft-lbs (they tend to take more than that to start crushing but then after they "yield" the sustaining torque goes down). With a solid spacer you can keep tightening the nut until it bleeds, thereby SECURING it POSITIVELY, and not hurt anything. Kinda the same situation here. If you tighten the nut tight enough you wouldn't need a cotter pin, or any other alternate method of SECURING the nut. Of course, with any kind of solid spacer arrangement, the bearing itself is TOTALLY unaffected by the tightness of the nut, as long as it's tight enough to GUARANTEE that the nut won't back off, but not SO tight that you can't take it back apart or the threads strip or something stooooooopid like that.
That said, I have no idea how tight a WB nut would need to be tightened to against a solid spacer, to GUARANTEE that it wouldn't back off. Obviously the nut backing off would be CATASTROPHIC since the wheel would then go zinging off into space. Since wheel speed is so much lower than pinion speed (1 � 3.23 as much, or 1 � 3.73, or 1 � 2.77, you get the point no doubt) I'd think it wouldn't take as much as a pinion nut. Maybe 100 ft-lbs might do the trick, I don't know. They say 40; are they going to pay if your nut backs off and your wheel hits a school bus and the insurance company discovers you've put a non-DOT something or other on your car that might have caused it? Iunno, seems like not worth it to me. The street IS NOT the same thing as a race track.
For a pinion nut, it's pretty easy to get WAAAAYYYY over 200 ft-lbs on the nut. I doubt you can get anywhere near that with a Crescent wrench. With a box-end though, you could probably put enough mustard on it to be confident it wouldn't back off. Still in all, I'd just do it the normal way and use a cotter pin, personally.
Last edited by sofakingdom; 09-06-2022 at 12:13 PM.
I would note also, that the most standard shop method of packing wheel bearings, fills them 100% with grease. It uses a very simple tool like this https://www.tractorsupply.com/tsc/pr...bearing-packer that you screw onto the bearing then shoot it with a grease gun. Similarly, "wheel bearing grease" has been a commodity item for as long as I've known cars. Practically ANY kind of modern grease is totally adequate for our wheel bearings. Not to say that "better" grease might not be "better" in some way; I just can't imagine what that "better" property would be, at least to be enough to be noticeable. WBs like ours typically don't generally "need" greasing more often than every 50k miles or so unless subjected to unusual conditions like submersion. People that autocross, which would seem to be about the most abusive possible use, don't even seem to have any trouble with them. In fact it wouldn't surprise me in the least to find that many cars in the junkyard have lived their entire life with the factory grease still in their FWBs, which the factory probably bought by the pound from the lowest bidder that could meet some "spec" that hasn't been updated since WW2, like about everything else the factory was doing back in the 80s.
In case you can't tell, I'm of the opinion that you're way deep into a "measure with micrometer, mark with spray paint, cut with dynamite" situation here.
Correct procedure, or at least what I've always done for the last half-century or so, is to tighten the castle nut until the drag of the bearings on the rotor or hub gets to maybe 30 in-lb (a shade more than "barely noticeable", but less by far than "lock up"); loosen until the spinning torque goes back to zero; re-tighten until the spinning torque reaches "barely noticeable" again (maybe 15 - 20 in-lb at that point); continue tightening until the next alignment of hole to crenellation occurs; put in pin. Just doesn't seem like a big deal to me. Kinda like a rear axle, or many manual transmission applications, or any number of other things (including non-automotive) that use tapered roller bearings. You want "some" preload, not "none" but also not "too much". The EXACT value isn't usually super critical as long as it's within a range that (a) guarantees that any axial load applied to the bearing pair doesn't unload either bearing completely, and (b) doesn't destroy either bearing from overloading.
Let me clarify a couple of things. I actually AM AutoX'ing the car, so I'm putting these bearings through their paces, and if I can really reduce rolling resistance, it could improve my times. Also, I'm an Engineer and work for a company that manufactures large industrial gear units. We set out end play/preload on tapered roller bearings within a few thousandths of a mm, so it is clear to me that the precision of these settings can be critical, or at least beneficial when you want to get everything out of a bearing set. Lastly, possibly because I'm an engineer, or just crazy, I'm pretty obsessive and a bit OCD. So I never liked the standard bearing setting procedure.
I do understand your point of view, for a lot of people precision here may not be a big deal, but for what I'm trying to do, this seems like a pretty simple and cheap way to make sure the bearing settings are dead nuts on. I'm not intending to give YOU a hard time just explaining my thought process...
When you say, "tighten the castle nut until the drag of the bearings on the rotor or hub gets to maybe 30 in-lb (a shade more than "barely noticeable", but less by far than "lock up"); loosen until the spinning torque goes back to zero; re-tighten until the spinning torque reaches "barely noticeable" again (maybe 15 - 20 in-lb at that point)"It is very hard to quantify barely noticeable, and a shade more than barley nticable... I know you try to give values, but I do not have calibrated arms, I honestly cant tell exactly what 30 in-lbs, or 15 in-lbs feels like... Maybe others with more experience can, but I cant...
You also say, "continue tightening until the next alignment of hole to crenellation occurs; put in pin." On my car at least, going from what seemed perfect to the next alignment hole, brings me from perfect bearing setting to what I felt was way too tight, but backing out to the previous hole gave me what seemed way too loose, very noticeable endplay when you pull and push on the hub.
These bearing spacers eliminate the above issues for me. (As I perceive them...)
I would not even consider running it without a cotter pin, although the pin was used to lock the nut into a position for bearing adjustment it still is required to keep the nut from backing off. (even at 20-40 ft lbs) On the bench when I do the 64-72 billet hubs with these spacers I always have a slot aligned somewhere between 20-40 ft lbs. If for some reason you cannot fall into that situation with yours we can do a different nut with a stamped castle, these actually came on third gens at some point because I have pulled literally 100`s of stock spindles and you do find these under the dust caps sometimes. These use a thin nut and the stamped castle which gives you more slots to align with your pin hole...(there are two in your pin so usually with two holes and 6 castle slots you should be fine), these cages with the thinner nuts can get you more precise if you need.
As for grease..yes packing a bearing full is fine for a daily driver, it will expel what it cannot use anyway. But in a race or endurance situation overloading the bearing can actually create heat, in a competition car where brake heat is transferred into the hub and thus the bearings and grease, these higher temps will outguess regular grease actually pushing the dust caps off, basically separation of the mixed compounds, the oil separates from the strand in liquid form while the strands harden. packing: When you take a wheel bearing out of a hub after thousands of miles, how much grease is really on or in that bearing? not much- grease:The high speed grease allows for higher temps with less out gassing and more tolerance against separation or breakdown. spacers: They simply eliminate the guess at pre-load for faster and consistent reassembly. After proper adjustment locking the races together eliminates any end play cold and per-loads as the bearings warm, rolling resistance is decreased dramatically, these measure make a difference on a track car keeping rolling resistance at the minimum and bearings running cooler, steering (cornering) input is also improved.
These may seem like all small measures at first glance but when you track a car and the grease is bleeding out of the hubs onto the rotors or the dust caps are popping off after you park, or you are cooking your bearings and grease this is what fixes it.
Last edited by BBU.COM; 09-06-2022 at 04:31 PM.
Reason: corrected castle slot amount
Oh and for guys not using bearing spacer..grease seal removal w/o damage.:
After removing the dust cap and spindle nut / washer and outboard bearing, thread the spindle nut back onto the spindle, now with the hub or hub/rotor with it`s weight on the pin- with a quick motion drag the hub on top of the spindle pin pulling toward you....the nut will catch the inboard bearing cone by it`s race and force out the bearing and seal as one without damage to either
Unfortunately those bearing spacers do t work with Scott's billet hubs.
I'll probably end up machining a custom spacer set from titanium eventually.
For those wondering, bearing preload spacers are mostly a race or heavy duty item found on NASCARS or busses.
True, the third gen billet hub I produced has too much material left on the interior between the races to fit the standard DRP spacer, a solid spacer with a shim pack to set preload would be the best fit for these. DRP will make custom spacers, I'm not sure if you interested in that but maybe give them a call to find out
I spoke to Adam at DRP yesterday, He confirmed it is still a good idea to keep a cotter pin in there just to be sure the nut doesn't back off. Because the end play wont change, his suggestion to find a hole the pin would line up with was to loosen the nut completely, torque to 20 ft-lbs while spinning the hub, then reset the torque wrench to 50 ft-lbs (10 more than they advertise) and continue rotating the nut until a hole lines up. I admit, I had to go a little past the 50 ft-lb mark, but I suspect it was only about 52 or 53 ft-lbs. Pins are now installed with the factory castle nuts, and fresh cotter pins. (1/8" x 1.5" long)
Regarding the grease, since its wasn't that hard, I removed the seals again, and basically took my fully packed bearings wiped the whole outside down, wiped down the inside of the hub, and removed a little bit between the bottom of the cage and the race. I'm still probably closer to 80-90% packed, but it's at least better than it was...
I had the same idea about those thinner spindle nuts and the sheet metal "crown" that gives twice the pinning positions. @BBU.COM You may have a gold mine on your hands with those take off nuts. I did a good amount of searching and I believe our castle nuts are 3/4"-20 but are only available in castle configuration. The thin nuts with sheet metal "crowns" only appear to be available these days in 3/4"-16 thread pitch... My thought was to buy two new castle nuts, grind down the tips only as far as necessary, then get two of the spindle nut kits with the crowns. I have to thing the ones intended for the other thread pitch 3/4" nuts will work with ours if they are shortened enough. The parts weren't immediately available in my area, so I just went the route I did, but next time I have the hubs off, I'll definitely get those parts to keep the nut torques more even side to side and still be able to get the pin installed.
I got everything all buttoned up last night, and went for as aggressive of a test drive as I could in my neighborhood.
I'm sure the placebo effect is going strong... but I swear the car feels like it rolls more freely and longer when I lift off the gas. Before, it felt like I was actually noticeably slowing. Also, again maybe the idea was put in my head by web reading, but I swear the steering/front end feels a little more connected. I guess the idea is by adding the spacer then torqueing it between the bearing races, it effectively reinforces the spindle a bit.
Maybe it's all in my head, or maybe it's a result of using less or better bearing grease, but it feels good!
The spacer will decrease knock back in your front mono block caliper brakes, this is a fact, this is a direct result of less deflection - how else can the knock back be reduced ?? , this happens when there is some movement of the rotor out of lateral..sometimes just flex can cause this but guys with these spacers all come back with positive results..The very first guy I set up with these went out to the next event put down the fastest times he ever had and won the event When you get the point of cooking bearings this is where these shine,they fix that problem- you however may never see that now.
I just picked up a set of these spacers since my car has obvious rubbing issues between the rotor and caliper carrier.
Details:
-Ed Miller's C4HD brakes
18x10.5 wheels with 315/30-18 tires (Hoosiers, BFG, and RT 660s)
-1.625"(?) spacers
-multiple sets of factory spindles and new bearings
-car pulls 1.3 lateral G's
Besides the rubbing (rotor to caliper carrier) I found some movement in the spindle assembly. I don't want to call it play between the cast upright and the spindle pin, but there is a dimensional change from the strut mount to very tip of the spindle pin. This video shows a dial indicator with the base on the upright by the strut and the plunger on the pin out passed the threads of the apundle pin. It reaches over the brakes. The brakes are just there so I have something to grab onto. This ignores whatever play you have in the bearings... but I tend to run them tight anyway.
I have no idea what is flexing at this point. Could be anything mentioned above except for the caliper carrier, I guess.
I'm hoping the pin is at blame and that these bearing spacers act like a thicker spindle. With my luck they'll cause other issues!
Setting up these spacers is going to be a royal pain, but if they keep my spindles intact they'll be worth it, right?
WOW! That camera angle is more revealing then I ever imagined ...That kit is using the 1LE hub right ? if so that hub is a bit stouter than the std hub with it`s leverage point in the middle of it`s body, more toward the middle toward the end of the pin. Where would you guess that your bearing end play was adjusted? it sure looks like they were running loose, if not that is a whole lot of flex. The std hubs deck is further back toward the casting by .315, not sure if it would make much of any difference?
I can only think that using the bearing spacer will help that ...with that camera angle you will be able to tell the immediate change of the bearing spacers , looking forward to your results.
I honestly forget which hub it is, shame on me!
The bearings were not set loose by any stretch of the imagination, probably tighter than most would run them.
With the huge spacer I need to fit these wheels, I doubt the difference in hub has any influence. That said, I can't move the wheel in any further.
Okay thanks, just shared this with a top tier auto crosser who struggled with front knock back, the hub itself was the majority of his problem, the bearing spacer made it better. His problem was with the wilwood hubs and we all know those are thin, your 1LE hub is a tank so I can't see it flexing much at all. It has a set 3 outboard bearing correct?
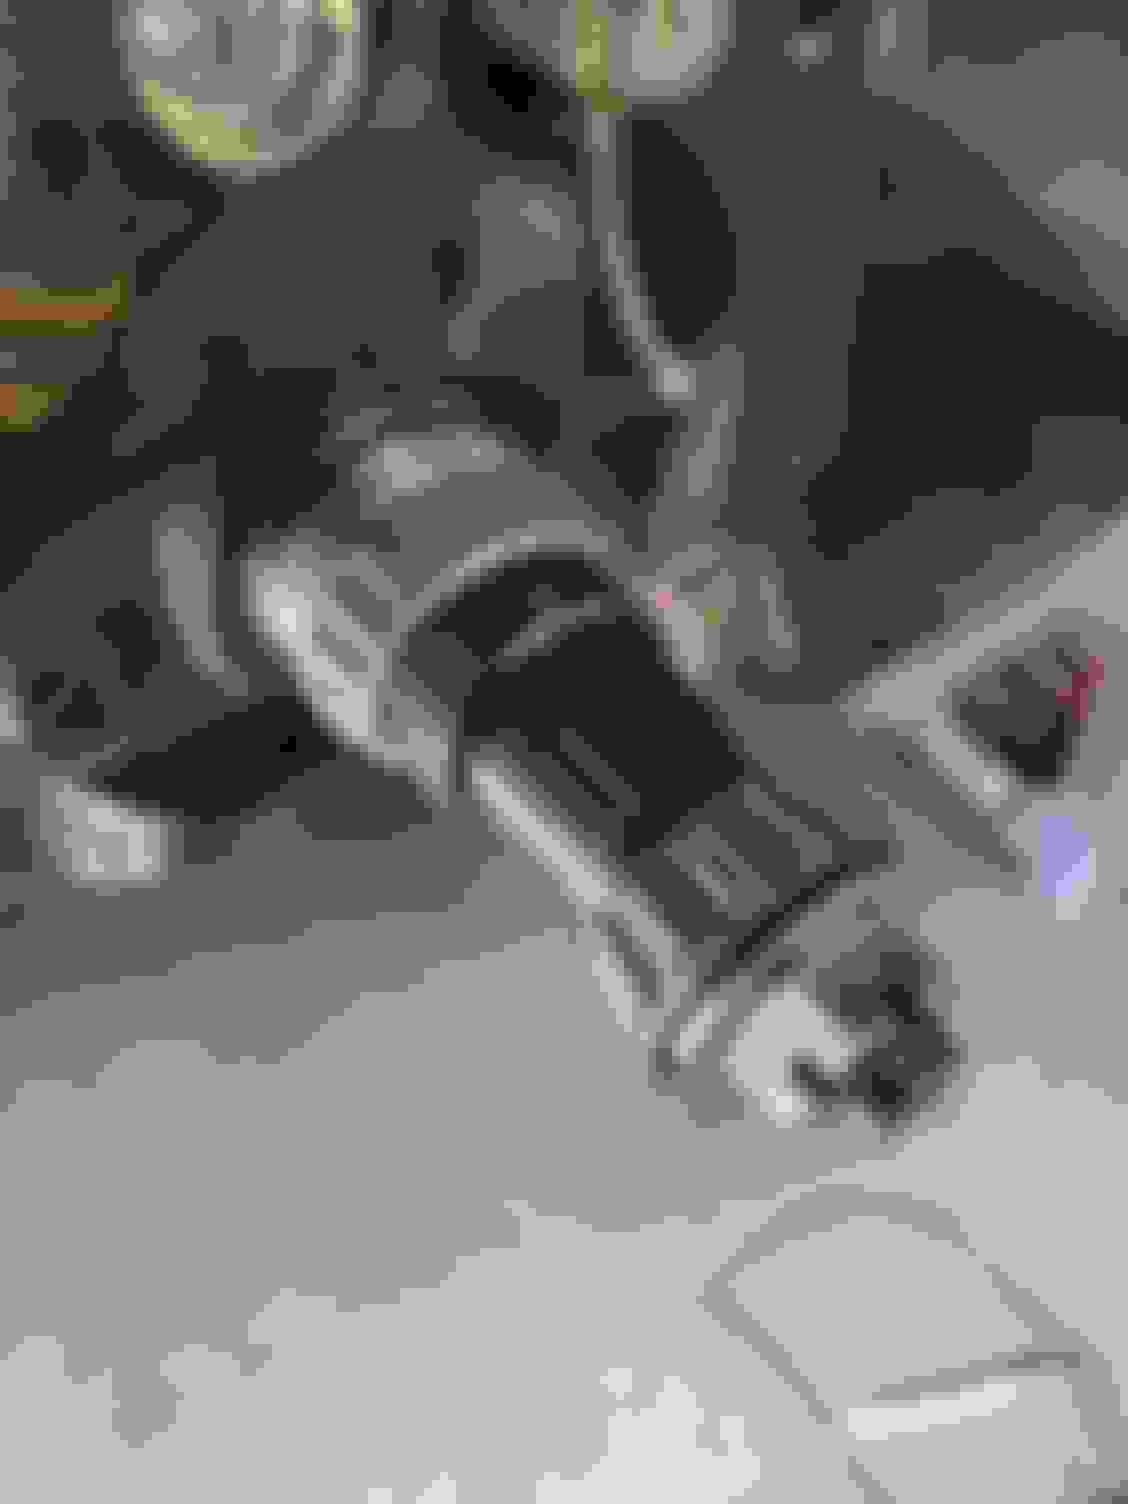
For those of us who might want to install these, what was the height of the spacer in this photo as a starting point? Looks like 4 full threads exposed.
Time for an UPDATE:
It's a new autox season, so I decided it was time to open up and check my wheel bearings and the spacers, then re-grease them. Opening them up everything looked really clean, no noticeable wear that looked problematic. There seemed to be a reasonable amount of grease, and the only slight black/darkness came from the inside seal closest to the seal, where I'm sure you'll always get a little gunk getting in. I was a little worried I may have under-greased them last year so that was a big part of wanting to get back in there...
I took this opportunity to try out the idea from above of using the stamped crown style locks on the spindle nuts. I can confirm the part numbers above all seem to be correct and are cross compatible. Since the thread pitch on the nuts that comes with the stamped crown doesn't match ours, I got new sets of standard nuts for our spindles and cut them down. I first tried matching the height of the nuts provided in the other kit, but they were still slightly too tall to get a cotter pin through the hole. I ended up cutting the second one down to just above where the notches in the castle nut ended and it seemed to be the right height. I did cut them first using a fiber cut off wheel on my angle grinder, then smoothed, leveled and broke the edges on them on a belt sander so the stamped crown would sit properly. I admit there is a small part of me that wonders what I did to the metallurgy of the nuts by cutting them. The first one I got quite hot, the second one, I was actually spraying water on as I cut it to cool it... Hopefully this does not become an issue... It would be ideal to find a 3/4"-20 Jam nut that was the correct size and grade to avoid all the cutting and modification...
Last time to line the standard castle nut up with the cotter pin hole, I ended up having to exceed the suggested torque on the nut. The makers of the spacer said this should have been fine, but this time I wanted to keep it in their range. At first look the stamped crown has 4 positions compared to the standard castle nuts 3, but I didn't realize that you can also index the stamped crown, between its 12 points, which I think effectively gives you 8 positions to line up the cotter pin. On both sides I started with the 20 ft-lbs suggested and was able to find an orientation of the stamped crown where the pin went in properly. So, I just installed them with the 20 ft-lbs. It's in the range so I hope I'm good. If I ever do it again, I may shoot for the middle of their range 30 ft-lbs since it seems like you can line the cotter pin up in almost any nut orientation.
When I spoke to the guys that make the spacer last, they actually explained that our bearings only need the space between every other roller filled with grease, and none on the outside of the bearing. They offer a special tool to do this with basically a syringe. Granted they said that is their suggestion given race use where you want minimal resistance. I was concerned that didn't sound like enough, so I packed the whole bearing, then wiped all excess off from the top bottom and outside, so grease only filled the space between the rollers. It was much less than I had used in years past, but still gave me a better feeling about adequate lubrication. The last time when I installed the wheel spacers, I had realized I over greased them, so I wiped off all the excess grease on the outside of the bearing, but it had already been in use previously, so it was not known how much was still between the rollers, so that made me nervous.
Everything seems to have gone back together pretty well and spins freely. I think I may have been a little hasty on reinstalling either my wheel adapters or wheels themselves and I have a bit of a vibration coming from the front, so I may have to pull them and more slowly torque them down. I had zipped them down this time and then manually torqued them...
Last edited by raptere; 04-25-2023 at 04:35 PM.
Reason: Pictures!
Very nice tutorial on it all, thank you- I`m sure many will use all that info for years to come. As far as height for the spacer, the last one I did was 1.8275 but each hub and each bearing will stack slightly different. Now with the same bearing and my billet hub that should be the same every time...my 64-72 hubs are 1.890 + or - .004 every time
That is why I try to document and share all my projects, when there don't seem to be existing threads on the topic. I have been helped so many times by posts on the forum. I'm always glad to give back however I can!
Kore3 made me a set of custom 7071 aluminum hubs years ago, probably 2011-12 and included the solid setup spacers for the bearings. The benefit, aside from some extra rigidity, is that once setup, you can remove the hubs, repack bearings and reassemble quickly without having to account for changes due to the temperature of the parts affecting preload. Thats pretty helpful on a track day.
I wanted to add to the thread, earlier poster Mclovin1181 added that the billet hubs would not accept the bearing spacers, our last run we did make some changes so that the bearing spacers will fit into the billet hubs, we also added a optional bolt on dust cap, depicted below you can see how many guys opt for those bearing spacers
If anyone is interested.
in few weeks I'll have a video on modifying the previous revision of the billet Hubs to accept the DRP spacers.
Shouldn't be hard, quick trip to my buddies machine shop and that would be it.
(Ignore the bearings in the photo, I think those are the wrong ones)
Ignore the bearings in the photo, I think those are the wrong ones.
I wanted to add to the thread, earlier poster Mclovin1181 added that the billet hubs would not accept the bearing spacers, our last run we did make some changes so that the bearing spacers will fit into the billet hubs, we also added a optional bolt on dust cap, depicted below you can see how many guys opt for those bearing spacers
That dust cap is nice! If thick spacers/adapters are only needed to extent past the end of the hub for the fitment of a center cap, now thinner ones could be used, and that dust cap could be left to protrude through the wheel and BE the "center cap." A little engraving, some color and BAM: a custom center cap. The rear wouldn't match, but one thing at a time lol.
If anyone is interested.
in few weeks I'll have a video on modifying the previous revision of the billet Hubs to accept the DRP spacers.
Shouldn't be hard, quick trip to my buddies machine shop and that would be it.
(Ignore the bearings in the photo, I think those are the wrong ones)
Ignore the bearings in the photo, I think those are the wrong ones.
That looks like an as manufactured nut on the end for use with the sheet metal castle caps which make securing so much easier! Where did you find those, what are their intended application??? I modified two factory style castle nuts which was a PITA!
That looks like an as manufactured nut on the end for use with the sheet metal castle caps which make securing so much easier! Where did you find those, what are their intended application??? I modified two factory style castle nuts which was a PITA!
That nut/retainer style came stock on my '92. I looked in the JY for more but never found any. Dorman/Help rack did carry them for a while. Grabbed some while I could.
IIRC, the spindle thread is a somewhat standard 3/4" fine pitch. Yep, an SAE thread in a world of metric cars...
RBob.
P.S. as far as the Dorman numbers and such, go back up through this thread. It is all there. I only responded to the latest post, jeez, I gotta' be more careful...
I kinda think those spindles (the hub part, that is) goes back to before the metric system was invented. Which was, what, during the French Revolution, when things like "inches" (length of The King's thumb), "foot" (duh), and all such as that, were being forcibly ripped away from any perceived "royal" influence. Which is why that particular part of these cars was still SAE rather than metric.
Very difficult time, that was ... heads were rolling ... not to mention the difficulties we had with the calendar. WWWWWWAAAAAAAAAAAYYYYYY too much powers of 10 when that isn't how celestial events occur. Glad I got through all that with my neck still in one piece.
I made a video installing these DRP bearing spacers.
I was able to set up about 0.0005in of play.
Reducing Brake rotor play by about 0.015in
So that's really 0.03in of pad knockback that is basically avoided now. Or about 1/32.
That's a lot for anyone using smaller master cyl like I am.
and that's with new bearings and the non spacer method. The old bearings after a race season had something like 0.040in of play measured at the top of a 13in rotor.
I always thought my pad knockback came from the rear of my car due to the C-clip axle.
But it turns out it's actually the front hubs.
Scott at Big brake upgrade. Com got me set up for these.
 09-06-2022, 10:41 AM