When you click on links to various merchants on this site and make a purchase, this can result in this site earning a commission. Affiliate programs and affiliations include, but are not limited to, the eBay Partner Network.
Organized Drag Racing and AutocrossDrag racing and autocross discussions and questions. Techniques, tips, suggestions, and "what will I run?" questions.
yup yup. I see what ya mean Matt. I'll keep it in the back of my mind for a possible future project.
one aspect I don't know if I would like is the HolleyEFI logo on every-single gauge. For me, I would maybe want something a little less branded, more sleek. nonetheless, cool stuff tho. keep it up!
While I was under the dash installing my new gauges and had my interior half apart, I decided to change out my stereo headunit as well. The previous owner had installed a big touch screen but it was showing its age... it had an early navigation system in it that didn't work and no Bluetooth. The plastic trim was also cut up around the screen to make it all fit. I just bought a really simple new headunit that has all the modern Bluetooth features while not being too flashy in the looks department. A quick re-wire and it's ready to go:
To mount my new ECU in the interior, I was able to make it fit in the stock location up under the dash on the passenger side. I took the beige plastic mounting bracket and removed the stock ECU, then drilled out 4 mounting holes to attach the Holley ECU using some short button head screws with some rubber washers for isolation from vibration. When I permanently install it in the car, I will also use some velcro on the back side to give it some further isolation from vibrations and bumps:
With, my interior is pretty much buttoned up for now. I just have a few trim pieces to put back but I want to get everything up and running first just in case I need to re-check a few wires.
Next focus is on getting my new intake manifold installed. I've mentioned it before, but I am moving from my current Super Ram setup to a Holley Stealth Ram. With the Stealth Ram, I am focusing on figuring out all the plugs, adapters, fuel lines and sensors I need to install to make it all work together.
The first step was getting the intake powdercoated. With my Super Ram, I had painted it black using Duplicolor engine paint and it turned out great but kept getting chipped every time I whacked it with a wrench by accident. So, I bit the bullet on the extra expense and am trying out powdercoating this time. I think it turned out awesome! This is matte black with a satin clear coat on top:
The trickiest part I am working through now is the driver's side rear corner. This is where all the vacuum ports will be on the intake, plus the big adjustable fuel pressure regulator I want to run, the oil pressure sensor, spark plug wires and the fuel line coming off of the regulator. I think I have a layout that's going to work but I need to order a few more little adapters for it all to fit. I may also move the oil pressure sender to the port right above the oil filter. This takes a bit of time but it's much easier working through this stuff on the bench rather than up against the firewall.
Set the intake on the engine just to get a sneak peak of what it's going to look like:
Last edited by garage_engineer; 03-12-2021 at 02:07 PM.
It seems like my updates are starting be on a monthly basis which is better than nothing.
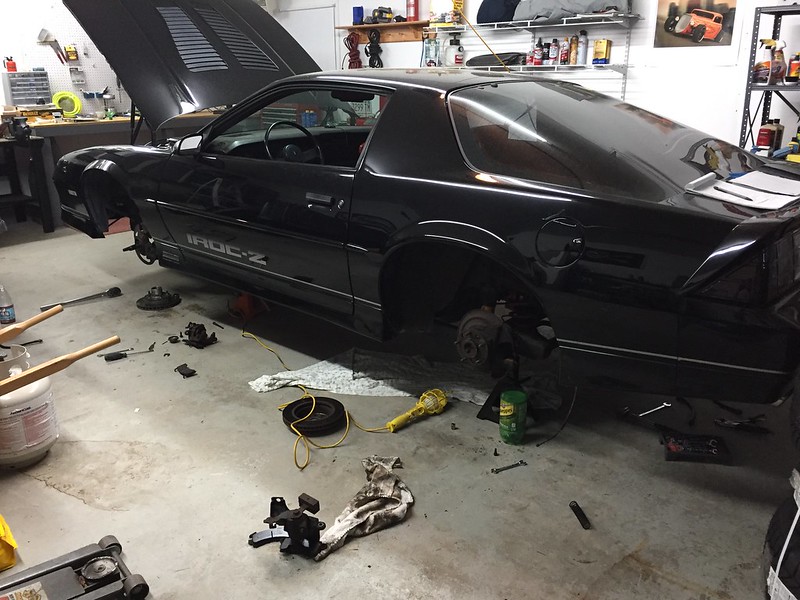
The main focus the last few weeks has been dealing with a stubborn oil leak I was chasing all last year. I had oil dripping out of my bellhousing after a hard drive, and even some smoke coming up through the shifter hole after going full throttle from light to light. The starter was also coated in some oil. I am 90% sure the leak was coming from the back of the intake or a bad valve cover gasket but could never pinpoint it to a specific spot. I am changing my intake and will pay close attention to the seal on the rear china wall, but my OCD had me worrying about the rear main seal and if something was leaking there. I had put a fresh rear main seal on the engine last year, but maybe I had damaged it when trying to stab the input shaft into the pilot bearing? Anyway... out came the transmission just to be sure!
Everything looked ok when I got everything apart, and even the back of the flywheel was relatively dry. The only thing I noticed was the small gasket behind the seal carrier was a bit wet... which could have been contributing to the leak:
I replaced that seal along with a new rear main seal while I was in there. I hate oil leaks (and all leaks in general!) so hopefully now everything stays nice and dry:
So, onward with my Holley Terminator X install! I had sent my "universal" harness out to scooter to modify it to integrate with the 3rd gen Camaro body harness. Scooter typically does harnesses for people doing LS swaps, so we had to work through a few details to make the ECU work for my small block but I think we got all the details worked out. We went back and forth quite a bit on where I would be installing sensors, what inputs I wanted to use, where I wanted to mount the ECU and ignition box and he built the harness to my specs. I would highly recommend working with him for your harness needs, he was patient with all my questions and suggested a lot of good upgrades!
I just got the harness back last week and it looks great. Everything looks like it will plug in where it needs to go. To get my old harness out, I had removed a ton of stuff under the hood since I worked so hard to hide everything. Getting the new harness was the last piece of the puzzle I needed to start putting things back together as I again want to hide it as much as possible. What I had been doing in the meantime is mocking everything up on my workbench, ordering the parts I need for the intake install and generally trying to get ahead as much as I can. Sometimes this can be frustrating as it seems like I'm not getting anywhere, but it should pay off this weekend when I have a few hours to work on the car and parts can start flying on!
Hopefully I'll have some good progress to report at my next update... I should have all the parts I need to get it running again!
good stuff guys! I also hate leaks or drips matt and I tackle them asap just like you have. Good luck with the harness and getting things buttoned up under the hood. Looking forward to see how things come together for ya.
Been following your thread, good stuff, and thought I would share this with you and IROCZman15. You guys are in a different class than I, but thought of you two guys for this... High-performance aftermarket parts manufacturer Aeromotive has announced a new fuel pump solution for those looking to upgrade their Chevy Camaro. https://gmauthority.com/blog/2021/05...-chevy-camaro/
that is awesome. Good that Aeromotive did that, I am sure it will be bought by a bunch of people on the forum. Nice and simple setup.
-I currently have a racetronix 340 lph pump and upgraded wiring kit too, but if i ever need to do something different, I will be sure to remember about this Aeromotive setup. Thanks for sharing!
Been following your thread, good stuff, and thought I would share this with you and IROCZman15. You guys are in a different class than I, but thought of you two guys for this... High-performance aftermarket parts manufacturer Aeromotive has announced a new fuel pump solution for those looking to upgrade their Chevy Camaro. https://gmauthority.com/blog/2021/05...-chevy-camaro/
If the longevity of the pump can be proven OR you can use a stock style pump in it's place I will definitely be buying that. The pickup as a whole actually has some thought put into it to make it better than OE design and allow it to be universal for different electrical and plumbing needs. I'll keep this on my radar. Thanks for posting that!
The main focus the last few weeks has been dealing with a stubborn oil leak I was chasing all last year. !
I'm right there with ya. I believe my problem is with wither the oil pan gasket or the engine oil pan. I think my Summit pan requires a certain seal IE, their seal. What pan do you have and what seal are you using?
I'm right there with ya. I believe my problem is with wither the oil pan gasket or the engine oil pan. I think my Summit pan requires a certain seal IE, their seal. What pan do you have and what seal are you using?
I am using the Canton road racing oil pan specifically developed for our cars with small block Chevys. I think the part number was the 15-244T. For the gasket, I'm using the top of the line Fel-Pro blue rubber gasket installed dry.
I am using the Canton road racing oil pan specifically developed for our cars with small block Chevys. I think the part number was the 15-244T. For the gasket, I'm using the top of the line Fel-Pro blue rubber gasket installed dry.
Time for another update! I've been making some slow and steady progress since my last post.
The quick update - the car starts and runs! However, that revealed a few issues that I am now dealing with. The biggest issue is my hood doesn't fit with the new Holley Stealth Ram intake... more on that coming soon. Working hard to try and get some test miles on the car soon. Yet again one of my "winter" projects is now slipping into July. Gotta do it right though!
I spent a lot of time getting the new Holley wiring harness laid out where I wanted it, wrapped and hidden. Scooter did a great job walking me through the install and getting everything where it needed to go, I just needed to re-organize a couple of things to get it right where I wanted it. Perfection takes a lot of time! One new skillset I've been picking up through this process is using nice, factory-looking Weatherpak electrical connectors in my harness. For less than $100, I was able to grab a bunch of connectors and terminals off Amazon along with a decent set of crimpers. I definitely screwed up a few crimps, but I'm getting the hang of it. Super happy with the results, it looks really professional.
I didn't do a great job of taking pics so here is just a few highlights:
MSD coil mounted on the driver's fender well:
Adding a connector for the ignition box:
New custom made battery cables:
Added an oil temp sensor to the harness:
Fuel and oil pressure sensors mounted behind the intake so they're as hidden as possible:
For the fuel lines, I had 2 options. The stock third gen Camaro TPI fuel rails have the fuel enter and exit at the front of the intake. For the Stealth Ram, it's at the back. I could either reuse the stock hard lines and run an adapter the a flexible line all the way to the back of the intake, or cut the hard lines and run new flexible lines to the back of the intake. I chose to go the harder (and better looking) route of making new fuel lines.
Again, I did not do a great job of taking pics, but I cut the stock hard lines underneath the driver's door and used adapters and new flexible fuel hose from RedHorse performance. You can see the lines in the pictures above of the fuel and oil pressure sensors.
Lastly for today I also upgraded the fuel pump wiring while I was at it. The stock third gen wiring harness has a small 10ga (I think?) wire providing power to the pump so my new harness has a nice big 6ga wire going back there so there shouldn't be any drop in voltage. I just had to wire up a small jumper harness to make it work:
That's all for now, lots more updates coming!
Last edited by garage_engineer; 06-26-2021 at 12:33 PM.
As I got ready to fire it up for the first time with the new Holley ECU, I plugged in my laptop and starting going through the setup procedure. It's a pretty straightforward process of answering some questions about your engine (size, firing order, injector type, etc). I ran into an issue on the step where you set your throttle position sensor. This needs to be completed succesfully before you can start the car. I kept getting an error:
I started digging a bit deeper into the issue and noticed my TPS sensor was not getting the required 5V... not good! This set off a 2-week debugging session trying to figure out why I wasn't getting 5 volts to sensor. Here's the quick version of how I figured out the issue:
1. I started at the ECU and back-probed the terminals that supply power and ground to the sensor to verify I had 5V there. All looked good:
2. Next, I pulled the wrap off the harness and found the junction where the power wire splits to supply 5V to all of the sensors on the engine. (The orange wire in the picture below.) Again, I could probe this and get 5 volts.
3. At this point I had all of the sensors unplugged from some other checks I had been doing. What I did next was start plugging in each sensor that gets power from this junction 1 by 1 and monitoring the voltage. With the just the TPS plugged in I was getting 5V now... hmmm. I then plugged in the fuel pressure sensor and the voltage dropped by 1.5V. Plugging the oil pressure sensor dropped it by another 1.5V!
4. Looking a little bit closer at the harness, it turned out that the power and ground and those 2 sensors was reversed, causing the big voltage drop on the whole sensor 5V circuit. Popping the terminals out of the connectors and putting them back in the proper place got me the right voltage to the TPS and let me calibrate it correctly:
Once the TPS is set, you can cycle the key and the fuel pump comes on to get the engine ready to start. I found a big fuel leak from the fuel rail and was able to trace it down to a damaged o-ring on one of my injectors. Other than having to take apart the whole fuel system that one was an easy fix!
FINALLY after all that I was able to try and start the car for real. And as luck would have it, it fired right up on the first try! The engine ran smooth and sounded good! I was pumped to hit this big milestone!!
I didn't let it run too far, because I noticed it was idling high and the IAC was reading at 100% (meaning it was fully closed and trying to reduce the idle speed.) No problem, I just need to turn down the idle screw on the throttle body and then let the system learn from there. Well, that turned out to not be so easy as the idle adjustment screw on the throttle body has seized and snapped in half when I went to turn it!
I am now trying to repair this screw, and I luckily have a backup throttle body I can try.
My other big issue is my hood won't close! This one is totally my fault... I should have checked this earlier in the process so I could have made some adjustments before getting the car running and then having to take it all apart again. I did research on installing a Stealth Ram into 3rd gen Camaros and some fit great, while others needed some work to fit. I tried trimming back the inner hood structure, but it didn't quite get me the clearance I needed. So, my options were:
1. Lower the motor - I have brand new poly engine mounts which tend to raise the engine a bit over stock (especially if your old mounts are rubber and sagging). I considered going to rubber mounts, or even solid ones if they dropped the engine a bit, but decided to try a simpler solution below first rather than tearing the whole front end apart.
2. Space the k-member down from the body using some spacers - With my focus on handling with this car, I decided to stay away from this one, even though it was relatively simple. With the strut front suspension on these cars, any spacing of the k-member will affect alignment and that's not something I wanted to get into.
3. Modify the intake - This is the option I am pursuing right now. Yes, it sucks to have to take apart a nice running engine right after you finally got it together but in the long run I think this is the easiest solution. The Stealth Ram fortunately has some areas where material can be removed and I'm hoping there's enough there to solve my problem.
My next update will hopefully be a success story with a hood that closes and perhaps a test drive! Here's a quick teaser pic:
Last edited by garage_engineer; 07-04-2021 at 10:40 AM.
I see you're well on your way to remedying the hood clearance issue. I experienced much the same with a carbed intake and a couple of different OEM hoods.
While I appreciate the look of an outward stock appearance, I eventually made the move to low profile glass cowl hood.
Had you considered that?
I see you're well on your way to remedying the hood clearance issue. I experienced much the same with a carbed intake and a couple of different OEM hoods.
While I appreciate the look of an outward stock appearance, I eventually made the move to low profile glass cowl hood.
Had you considered that?
Yes I did consider a cowl hood for sure and I should have listed that in my possible solutions. I decided to try to make my current IROC hood work for a couple reasons though:
1. I love the looks of the IROC hood, especially with the functional louvers I'm in the process of installing while I'm cutting it all up (I'll get into that in my next post)
2. Cost - sourcing a fiberglass hood and getting it painted takes some time and money... both of which I'm running short on now!
Originally Posted by articwhiteZ
Doing the intake Can Be a Pain..but with the right tools at hand..Piece Of Cake..took 8" off the top..
Yes I did consider a cowl hood for sure and I should have listed that in my possible solutions. I decided to try to make my current IROC hood work for a couple reasons though:
1. I love the looks of the IROC hood, especially with the functional louvers I'm in the process of installing while I'm cutting it all up (I'll get into that in my next post)
2. Cost - sourcing a fiberglass hood and getting it painted takes some time and money... both of which I'm running short on now!
That's a cool looking intake!
thank you..I wanted a Hogan sheet mettle intake..but $4000 and 4 to 5 month back log was a bit crazzy..at this point I would have had it in hand..but at the time I wanted to get the intake to shefroff racing to get the engine done..as it was. I Copied some 90's prostock look and todays sheet mettle intakes.. with the runners opened up from the heads to the bottom of the Throttle bodys. (a lot of Aluminum removed)..would still like to get a one made for the looks..but im thinking the gain would be so small. its better to have something Home made.. Holley makes one they sell for the big blocks..I had one sent out to me..nice looking but... the runners will not feed a good 454..let alone a 615cid big block... anyway Necessity is the mother of Invention..and or the guy saying..I can make that.../Hold my Beer
Last edited by articwhiteZ; 07-20-2021 at 09:44 AM.
We got a closing hood! Took quite a bit of work and it's a very tight fit but I'm happy with the end result.
I had my intake machined at a local machine shop and was able to take about a 1/2" height out of it my removing material from the base and also removing the ribs on the top of the air box. Any more than that, and I would have started having issues with the throttle body hitting the fuel rails and water neck. I'll have to get the air box re-powercoated in the future but for now I just need to get some test miles on this thing!
With the intake modified, I still need to remove some of the inner structure from my hood to make everything fit. So I was cutting, and cutting some more, and cutting some more... and it ended up being a lot more than I thought! At some point in the future, my plan was to install some functional hood vents on the car and since I already had the cut off wheel out, I bit the bullet and ordered a set from Trackspec Motorsports. The install was relatively straightforward with the templates they provide, it just took quite a bit of time to fine tune everything with the grinder and flap disk to get ill the cut edges nice and smooth to look like a pro install. I also had to trim back some of the fins to clear the intake and also the throttle linkage... don't want that getting caught up!
First take the old louver off then tape down the template after measuring and checking a few times:
Then cut it up!
Here you can see just how close everything is:
Once I was happy with the fit and all the cut edges were deburred and smoothed up, I painted the underside of the hood so it would all match up:
Final install... I love the look and should really help with underhood cooling:
Here's all the metal I had to remove... a good weight reduction up high on the front end!
Once that was settled I could finally go on a test drive. The first start of the car was uneventful and it fired right up! Everything looked good in terms of the gauges and vitals, and no fuel, oil or coolant was leaking. You can also lock out the timing and verify it with a timing light to make sure everything is where it should be. Fuel pressure is also easy to set using the sensor. Everything checked out so I ventured out on my first test drive. Obligatory gas station pic:
Everything felt pretty good on the test drive except for a couple of small things: the throttle was hanging up a bit (revs wouldn't drop immediately and I put the clutch in) and the idle was high. I had a high idle with my old ECU, but trying to fix it was a guessing game. With the Holley ECU, it's awesome to be able to plug in your laptop to see what's going on and actually fix the problem.
Turned out I had a big vacuum leak coming from my intake manifold. Turning the idle adjustment screw on the throttle body all the way closed and having it still idle at 900+ rpm turned out to be the giveaway. I found the leak between the intake base and the air box... I must have damaged it when I was shifting things during the installation. Next time I may use a gasket adhesive here:
Unfortunately it's taking a few days for the gaskets arrive so I can't get back to test driving but they should be here soon. In the meantime, I'm working on getting my interior back together and cleaning up this mess:
Pumped to be so close to having a running and driving car again! First autocross is next weekend!
you can make the gaskets your self all it takes is a sharp blade..the Material..(thicker even) and a single hole punch. you cut the gasket with the Material held onto the intake..letting the intake Guide the blade (Disposable) blade sliding knife.. any way its a way to make them you self and ya can use better stuff.. shown below.. my intake Gaskets made for my intake I made.
good work dude! I have always liked those functional hood vents, but they wont work on a fiberglass hood like I have. Looks good, and good metal work getting everything all to fit up with the intake trimming too.
good work dude! I have always liked those functional hood vents, but they wont work on a fiberglass hood like I have. Looks good, and good metal work getting everything all to fit up with the intake trimming too.
Thanks, trying to make it at least step above a hack job!
Originally Posted by Ed1LE
Hood looks great! Fingers crossed you get it ready in time!
Should be able to make it, the car is running and driving well. Haven't pushed it much passed 3000 rpm yet though as the ECU does its self learning thing. It's been raining here all week so hopefully I can find a few dry windows to get some more miles on it.
Thanks, trying to make it at least step above a hack job!
Should be able to make it, the car is running and driving well. Haven't pushed it much passed 3000 rpm yet though as the ECU does its self learning thing. It's been raining here all week so hopefully I can find a few dry windows to get some more miles on it.
Looking forward to seeing the upgrades you have done. Friday can't get here fast enough!
Been a LONG time since an update and not quite sure where to pick up! Since July, I've been doing all I can to drive this car on both the street and the track.
My last post left off with my getting ready to leave for the UMI autocross challenge and the car did awesome with no issues. I was really happy with being able to just hop in the car and rip off some autocross laps. Here are a few action pics:
After that event, I was able to attend another local autocross with the Ford SVT club. This event was a little over an hour away and was my first time driving the car to an event as opposed to towing it. Luckily everything went great and the car cruises awesome on the highway:
Unfortunately, I got flagged at the autocross for breaking the sound limit at the start line. Woops, I guess 2 small chambered pipes aren't quite enough. The car was a bit loud for me anyway so I had a local muffler shop add a Magnaflow bullet muffler where the stock cat used to be which quieted to car down a bit:
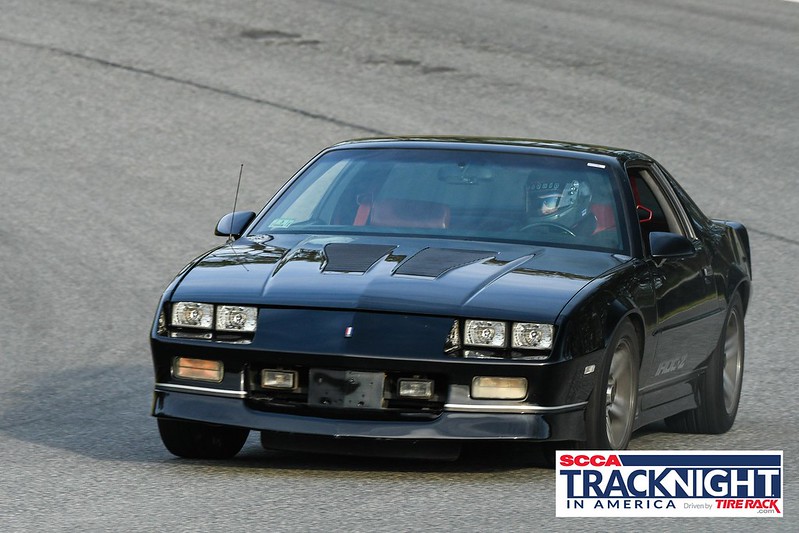
In the fall I was able to get the car out to its first track day at an SCCA Track Night in America event at one of my local tracks (Thomposon Speedway Motorsports Park). This time the drive was a bit further (just under 2 hours) and again I drove the car solo with just my tool kit and a jack in the back. I prefer track driving to autocross and had an absolute blast letting the car stretch its legs a bit. I took it slow and built up speed gradually since this was my first time on a roadcourse with the car. I even hit some traffic and rain on the way home and the car didn't miss a beat... something I really attest to the Holley Terminator X EFI. I'm REALLY learning to trust the car now since I actually trust what the gauges are telling me and can program just about anything.
The car is currently in the garage for some winter work. I'm trying really hard to not take on any major projects this winter that end up creeping into the summer. I've really enjoyed having the car running well over the summer and fall and hope to continue that next year. I'm sure I'll find some trouble to get into but hey that's half the fun.
I'll try my best to be better with some updates moving forward, but you can always find me on Facebook (Garage Engineering) or Instagram (garage_engineer) for some daily updates!
I apologize in advance for the long intro! But I think knowing some of my background and goals will help you to help me make some decisions on the project down the road. I have a thread going over on lateral-g.net as well but will do my best to keep both updated.
My name is Matt and I live in Massachusetts. I own a 1987 Camaro Z28 IROC-Z that I am hoping to transform until a reliable, fast track car that is also comfortable enough to drive long distances. (Aka� Pro touring). All while on a budget. Seems like a tall task but I�m up for the challenge.
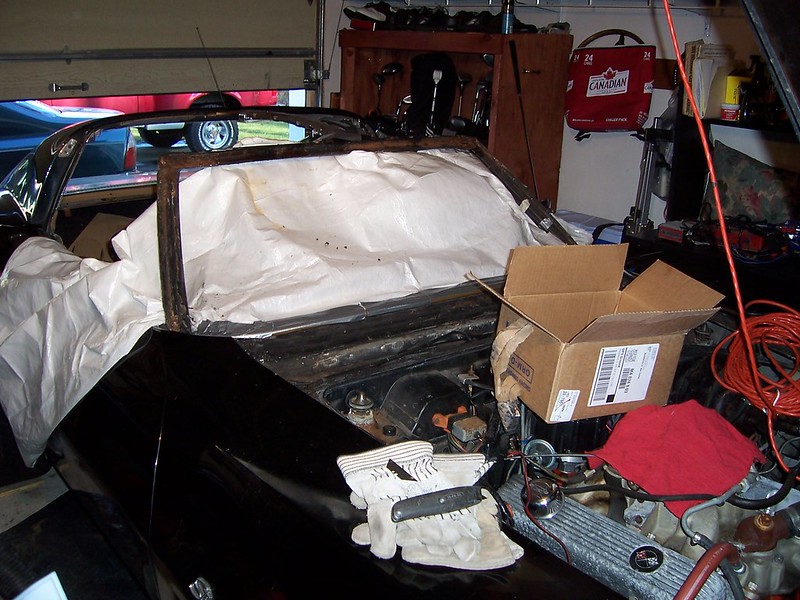
Some background on myself: I am a mechanical engineer and have loved cars from a young age. My first �project car� was a 1975 Corvette that my Dad surprised me with when I was 18. It was sitting under a tarp in someone�s front yard and he knocked on their door one day and made a deal. That was when my passion really took off. Neither of us really knew too much about working on cars, but slowly and surely we took on bigger and bigger projects until we had a nice driver.
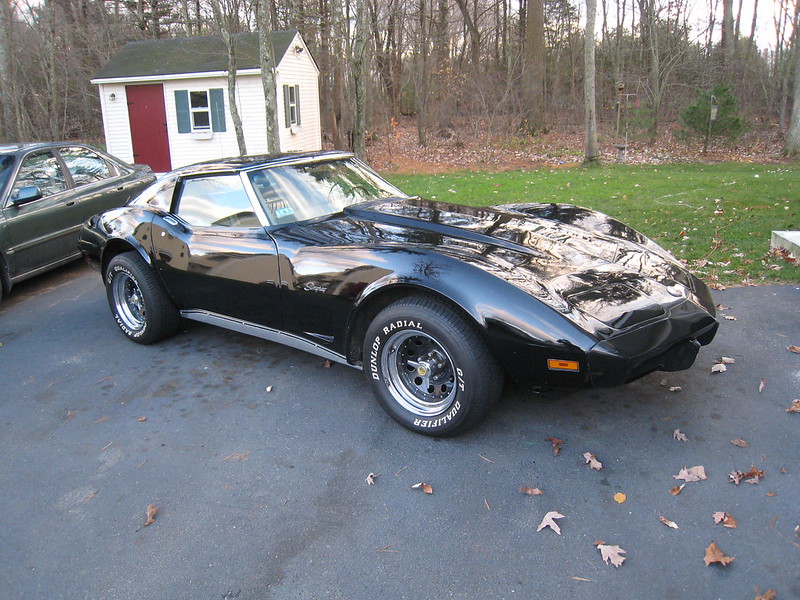
I was starting to get interested in road racing and autocrossing however, and started to realize that making a 1975 Corvette into a reliable track car was possible, but definitely beyond my budget. I just couldn�t afford to upgrade the suspension, brakes, cooling, wheels/tires, etc to get it where I wanted. So, I made the tough decision to sell the car that my Dad and I had spent a lot of time on and bought something a little more suited to track duty right out of the box, a 1997 Corvette:
I owned that car for 4 years, and loved it. What a value those cars are� you can drive it on 400 mile road trips with the A/C on and then lap it all day at the track and drive home.
My passion for cars has not faded over the years and has actually grown. I love being around cars� whether it be detailing them, going to a car show or reading about them� they�re in my head and not going away! Because of this, I have set a goal for myself of someday owning my own garage to help people pursue their own goals of driving their dream car. Life is too short and I want to do something I love, or at least take a shot at it.
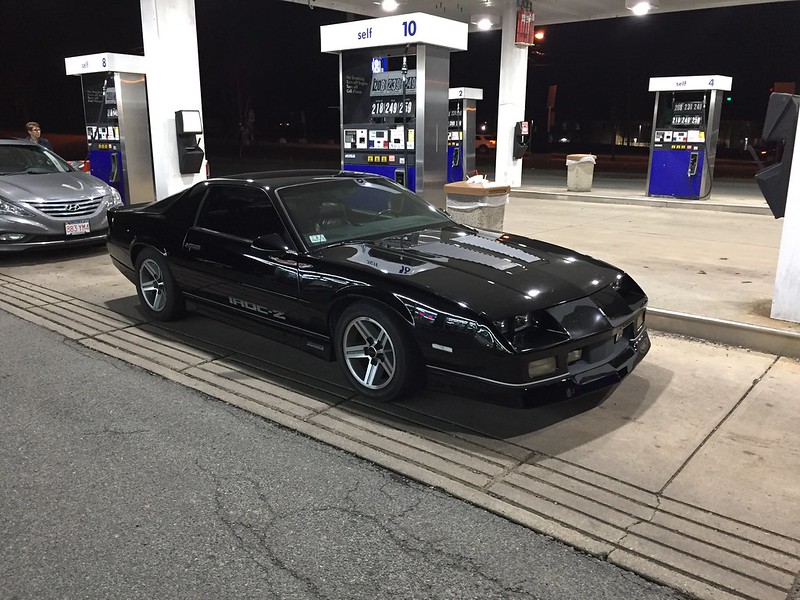
That being said, I needed a car that I could use to grow my "brand" and use as my �advertising� of what I can do. Even though the Corvette was a great car, it just didn�t stand out enough if I wanted to use it for advertising. At any given track day or autocross event, I would be 1 of 5+ Corvettes. I needed something more unique. I also want to learn. I consider myself pretty competent with a wrench, but I have yet to do any hardcore engine or chassis work. The Corvette didn�t need any of this, so I wanted something that needed a bit of attention so I could make it my own and grow my skillset.
After a lot of research, I settled on a third generation (1982 - �92) Camaro as a replacement for the Corvette. You may think I�m crazy, selling a perfectly good C5 Vette to pick up a third gen, but hear me out. There are plenty of these cars around, and they are not old enough where they need a complete restoration (which is most likely the case if I were to get something from the �60s or �70s) so I could focus primarily on performance upgrades. This seems to be a great time to pick up one of these cars as well, since they seem to be gaining in popularity and the aftermarket support is starting to pick up for them. The were also quite capable right out of the box, and are already setup with a 3-link rear suspension and fuel injection.
After doing a lot of searching, I wound up finding my car on Craigslist. It was one of the more expensive ones available in my area, but I have always heard to start with the best car you can afford and you will save money in the long run. It had a good body, and lots of performance parts already installed which was a plus. Seeing the car in person, I was a little scared as it seemed to be a bit hacked together and abused. The parts were there however, and I decided to purchase it with the idea that tidying up the loose ends would be a good learning experience and would be something I could do without spending a ton of money. Here is a picture from the night I drove it home:
As I got the car home, I thoroughly went over it and overall it was pretty clean. It already had weld-in subframe connectors and quite a few suspension bits. A ZZ4 crate engine had been swapped in along with a T56. The car was still rough however, as if someone rushed to get it together and didn�t take their time� lots of things like loose wires hanging on the engine, oil leaks and disconnected hoses jumped out at me.
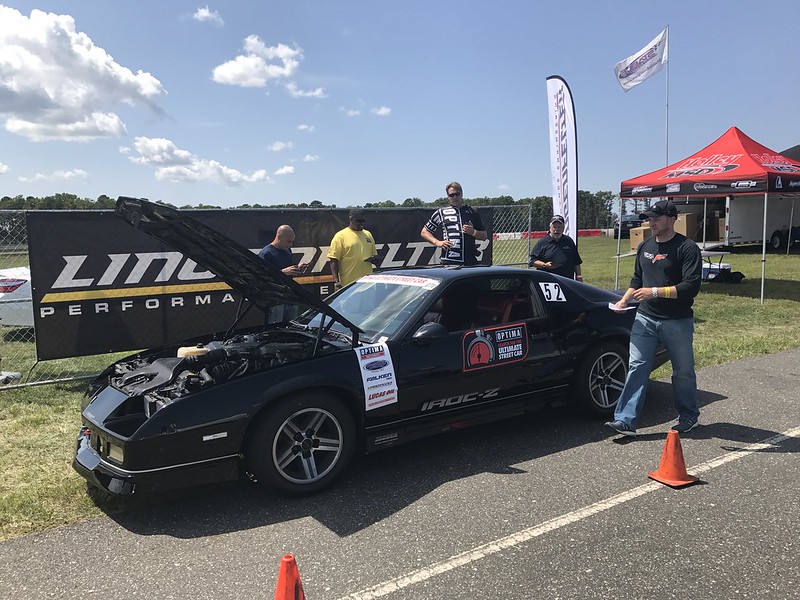
This was in May, and I had signed up to run the Optima event at NJMP in August that year and wouldn�t let myself miss it. Unfortunately, I had a really busy summer which left not much time to work on the car so I had to be selective with what work I could do before the big event. I chose to focus on safety, which meant really going through the brakes and checking all of the suspension bolts. I changed all of the fluids and added a fresh set of tires on the stock 16� wheels. I really wanted to upgrade the brakes and wheels, but there just wasn�t enough time.
I am lucky to have 2 race tracks close to me that sponsor SCCA Track Nights in America, so I attended one at Palmer Motorsports park the week before I had to leave for the Optima event in NJMP. Fortunately the car did great, I ran three 20 min sessions and other than being black flagged for not having my gas cap on tight enough the car ran great and I was super happy!
A week later my Dad and I loaded up the truck and headed down to NJ. I was so fired up for this trip� I follow the Optima series very closely and thought it was so cool to not only be there, but to run with some of the guys and cars I had read about and seen on YouTube. I was so fired up to be going! My only goal for the weekend was to finish with the car in one piece. Luckily, I was able to accomplish that and had a blast. We had awesome weather the whole weekend and the car took whatever I could throw at it. It was definitely not the fastest out there, but that�s mostly because of the driver (and maybe the 245 series tires?)
Now comes time for the winter upgrades. I�ve been going back and forth about whether to pull the engine out of the car (which is running fine by the way), and I think I have decided to go for it. If I really want to organize the wiring and get it cleaned up to the point where I am proud to pop the hood, I think this is the only way to go. I also bought this car to learn, so no time like the present to dive in and pull my first motor.
I�m working with a limited budget and am also making a list of possible upgrades over the winter. I know I NEED a new radiator, as the car was overheating after 15mins at NJMP over the summer. There are lots of things I would LIKE to do, so I will have to prioritize and see what I can afford. I�m sure I�ll be asking for lots of advice in this area before I put out any big bucks.
If you�ve made it this far, thanks for reading. I hope by following this thread you can learn just as much as I intend to.
Champion in CA makes three good radiators for this car. I went with the 3row, good to 700hp. It fit very well and more heating up, even in the hottest weather.
 03-05-2021, 06:12 PM


 Gotta do it right though!