When you click on links to various merchants on this site and make a purchase, this can result in this site earning a commission. Affiliate programs and affiliations include, but are not limited to, the eBay Partner Network.
I went back through with the 80 grit sanding drum and cleaned up the plenum runner holes again, really smoothed them out and made them more uniform. I also stumbled across a NOS SLP cold air intake on eBay...this may be the final piece to my old school TPI build and address the Firebird's weaker (compared to Camaro) air intake system. In a few weeks hopefully I will get around to installing all these goodies and then its waiting for spring to get the car out and drive again.
Nice work! I'm digging the old school performance TPI setup.
Thanks, I always thought it would be cool modifying these cars with what was hot at the time the car was new and have it still appear �factory�. I know I could get more power with some of the newer intakes etc but I just really dig the classic TPI and want to keep it that way.
I checked out Chazy, NY, and looks like a cool place to live. I spent time in West Milton near Saratoga Springs, while in the nuclear Navy. A lot of places in NY do not seem like they belong in NY. Just say'n.
Saratoga Springs is a nice place with a hell of a downtown a d of course the track. Upstate is a lot different than the city for sure, it�s like a different state once you get north of Albany. It is a great place up here close to the Adirondack park with great hiking, lots of outdoor activities and good place to raise a family.
Had a few days with temps above freezing and couldn’t resist so I hit the garage and started the tear down.
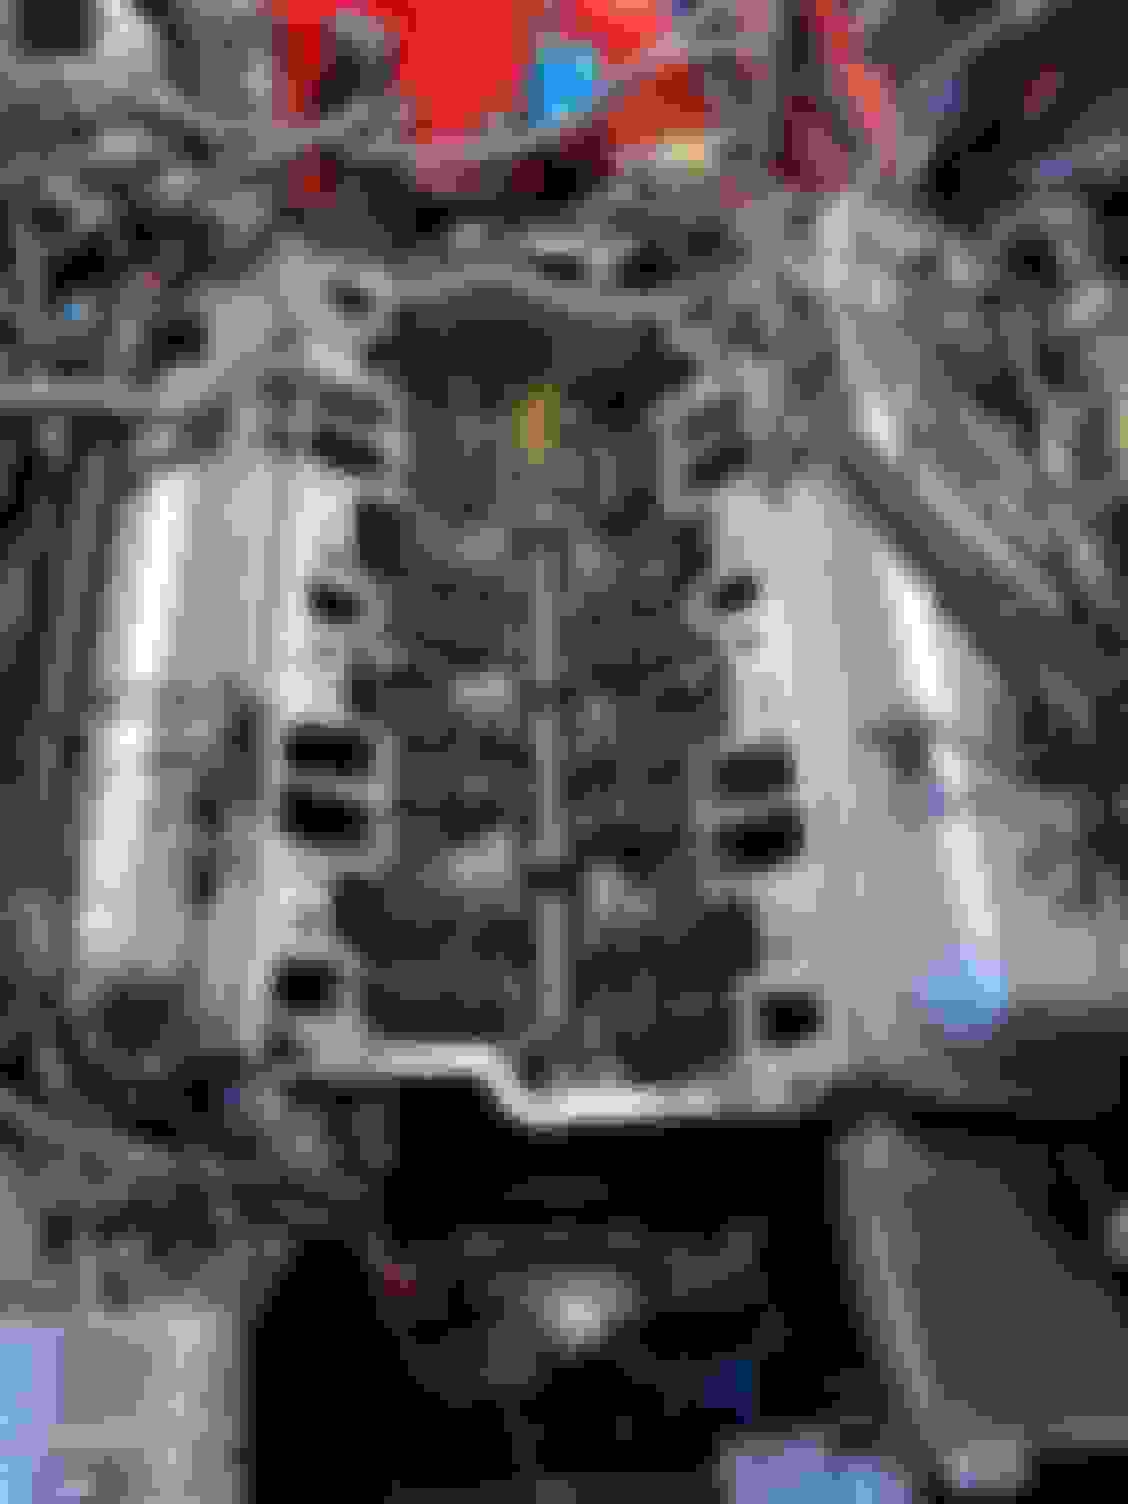
Starting point
About 2.5 hrs later we are here (I also removed the EGR):
The next steps will be fuel rail/disconnect lines, distributor, thermostat housing and finally the factory intake. I have the Fel Pro 1256 gaskets that look like a good fit, TPIS recommended the 1204 but after talking with the tech at fel pro (and a few searches here) I went with the 1256, the 1204 has blocked off exhaust ports while the 1256 does not and the material is different as well IIRC.
All cleaned up and ready to go with the AS&M runners and ported plenum.
Last edited by Reddragon88gta; 04-30-2021 at 02:36 PM.
Reason: Grammar
Finally had the time to do the intake swap, AS&M runners and ported plenum, I have a lot of time into it but I think it will be worth it. I�ve now taken the TPI apart so many times I think I can do it with my eyes closed lol.
After getting the old intake off I found a PO put a ton of RTV near the front driver side area, thinking he was trying to fix a intake leak??? After cleaning up all the old gasket material and getting the surface nice and clean I wound up using the fel pro 1256 intake gasket and it fit perfect and had the exhaust crossover still open so EGR will still work. Made sure to use the right stuff 90 minute by permatex on the water ports and the China walls and looks like it sealed up nice, many guys on here use that and I see why it is good stuff.
Was happy to see how clean the galley was, no sludge.
The only real hiccups I ran into on this was the injectors were Bosch 3s from South Bay that were set up for the factory manifold and they did not fit correctly into the Big Mouth intake but I remembered a thread where a guy claimed washers the height of a injector O ring under the fuel rail will rectify the situation. It worked great with no fuel leaks but I did have to grind the plenum a bit in front and by the AFPR to get everything back in line.
Finally after firing it up it won�t idle but I�m pretty sure the timing is off, my buddy and I had a time getting the distributor back in but he will be by next week with his timing light to get it squared away. I can�t wait to drive it.
Ported plenum and ready to go
Only casualties of this job was a broken heat crossover thing near passenger valve cover( eBay for $30 and already fixed) and my factory radiator, while messing with finding TDC I left the ratchet on the crank bolt and when she hit it popped the radiator. Real bummer because it was in nice shape and no one in my area still repairs them but I found one of the last OE ones at my local dealer and will have it Friday hopefully. Also I need to grind out the coil bracket and get it on the original spot or customize a place for it.
Feeling motivated and yesterday I installed the SLP cold air box, not gonna lie was a little tricky but managed to route the electrical connections and vacuum lines under the passenger side battery tray and mount the charcoal canister under there too right on the floor of the ground effects using some structures on the underbody and zip ties. Turned out to be a pretty clean install, I saw TTop350 did something similar and that inspired me to try that out. Before that I cleaned up a little surface rust in the tray to try and keep it away.
It is a little tight moving the box around to get it situated but after some trial and error it looked good and lined up nice.
I can’t wait for nicer weather to try the car out with all these new mods and see how it all works together.
Had a little more time to mess with the car and replaced the hatch struts for hopefully the last time with AMS4967 from Rockauto. These hatch struts were designed for non spoiler cars and actually worked great for my GTA with Hawks fiberglass aerowing instead of the stronger struts actually meant for the car. With the Strongarm struts they were so powerful they pushed my rear decklid out and these do not but are still plenty strong enough to hold the hatch up.
I even had a chance to replace a few of the rear hatch plastic trim nuts with new ones made by member Lykoloo and was pleased at how well they fit and worked. They are definitely worth it for anyone needing new rear trim nuts.
UPDATE: I just wanted update everyone who reads/searches on those struts I have, I am pretty sure that I blew my rear defrost switch because I never swapped over the plastic bushings on the strut eyelet that connect on the deck lid from the old struts to the new. So be sure to do that. Luckily I kept the old ones that have the plastic bushings so I can switch them over. The struts themselves still work great.
Last edited by Reddragon88gta; 10-06-2021 at 10:29 AM.
Finally had a chance to get the car out and put some miles on it after fixing a few issues after all my mods. The car really performs well and I can feel the power more at higher rpms especially, it used to run out of steam earlier but now has more in the top end. Need some more seat time but I am happy I did it. The Corvette servo also gives slightly faster/firmer shifts in the 1st to 2nd. I might play with the fuel pressure but have it set to stock for now.
Here are a few pics of the new set up:
Last edited by Reddragon88gta; 04-27-2021 at 08:01 PM.
Had a little more time to mess with the car and replaced the hatch struts for hopefully the last time with AMS4967 from Rockauto. These hatch struts were designed for non spoiler cars and actually worked great for my GTA with Hawks fiberglass aerowing instead of the stronger struts actually meant for the car. With the Strongarm struts they were so powerful they pushed my rear decklid out and these do not but are still plenty strong enough to hold the hatch up.
I even had a chance to replace a few of the rear hatch plastic trim nuts with new ones made by member Lykoloo and was pleased at how well they fit and worked. They are definitely worth it for anyone needing new rear trim nuts.
Thanks for this great info on the hatch struts, was just shopping for new ones and I believe my formula has the fiberglass spoiler, will definitely get the lighter 4967 you suggested!
After 250 miles or so I picked up a vibration in the driveline around 60-65mph, looks like my rear U-joint at axle is on its way out along with a torn torque arm bushing. Going to go with the energy suspension poly bushing, new U joints from Moog and Spicer (not a lot of options for the aluminum driveshaft) and new rear coil springs from AC Delco. I should've replaced the rear springs this winter when I was cleaning up the axle area, especially considering I could remove them without taking off the bottom shock bolts lol. Hopefully I will be able to get this sorted out by next weekend and get to enjoy the car.
Had a few minutes tonight after work and decided to finally replace my busted up passenger side seat belt receiver sleeve. Pretty straight forward but that damn torx bolt nearly stripped but after that it was a breeze. I made sure when I re-assembled to be easy on it and seemed to work out. The quality of the Hawks replacement was good, not 100% factory look but close enough IMO.
Today I was off so attempted to replace the rear springs and pull the driveshaft for new U joints. The factory rear springs could be pulled without even disconnecting the shocks...the new AC Delcos looked to be nearly an inch longer give it take so the old ones must�ve been shot. After dropping the shocks at the axle and jacking the car up higher one side at a time new springs are in! Luckily the fronts are still good.
Next up was pulling the aluminum drive shaft, 4 bolts later and a push with a pry bar and it was free and on its way to a local shop to press in new U joints, it was odd looking up the parts and very limited selection with the aluminum driveshaft. I went with the Spicer non greaseable for transmission end and Moog greaseable. I wanted Spicer for both but they only make it for one end etc...hopefully by Friday I have it all back together along with the poly torque arm bushing.
I am sure there is a non greaseable for the axle end, someone just needs to look in the catalog instead of the computer is all
I hit Rockauto, NAPA, O�reilly�s, advance, auto zone and checked spicer and moogs catalogs online...it is a very limited selection for aluminum driveshaft. The only one that might�ve offered it was GMB on rock and that had a delay. I really wanted to stay with Spicer on both ends
Aluminum DS is irrelevant really. Just need to look in the catalog for the correct type and measurements. It's a pain, no doubt, but it's available, I have a Spicer non greaseable at the rear in mine and I put it in my aluminum driveshaft
I did not measure them, I went by what vehicle application on the manufacturers sites. I noticed the caps looked different on one of them, almost looked like they were aluminum but I may be mistaken, I just wanted to make sure they had all the hardware in there. The greaseable one is not a big deal considering I have to grease the panhard and LCAs at about the same time.
The greaseable ones are not as strong
Now that I have started using catalogs I see there are a lot more things available that may not show on websites. It really pays to get into the nitty gritty in these situations.
When I was here (on TGO) in my early twenties I used to ask stuff and not get the answer I wanted, now that I've been here over 20 years I understand why I wasn't getting the answer I wanted. It really is better to do it yourself
I got my driveshaft back in with the new U joints and went for a shakedown cruise tonight, no more noises from driveline and car ran great. I was also amazed at the difference in the rear suspension with those new springs...it was night and day. Lesson learned should have replaced those when I was cleaning up the rear axle area.
Did the shocks all the way around 2 summers ago with KYB excel Gs IIRC, should�ve done those rear springs then but I didn�t think they were bad. I also kept reading about how replacement springs didn�t �look right� either but I was wrong there too.
The rear of my car squats a bit, at least compared to the front. Visually, I'd like to say the front sits too high. But the reality is that it is at the same height as when it was built...it's the rear that has changed.
I know I need shocks (O.E. shock at 33 years and 58k miles = not much left), and I have some Bilstein struts, and Koni shocks ready to go on. Just not sure what I will do for springs when it's time to install them.
I saw both Moog and AC Delco had rear springs and the specs looked pretty similar IIRC and saw a few positive reviews with the Delcos regarding ride height so I went with them. That will be a nice combo for shocks/struts on your car, nice quality pieces. I'd be nice if new Bilstein shocks and struts were available new.
Had nice weather this morning so took a few hours and tried to adjust my fuel pressure to optimize my new mods. I am going with the assumption that now I move more air I can add a little fuel to gain more power. I used my aldldroid app to live stream data to try to monitor for optimum BLM etc., my fuel pressure gauge and the butt dyno. All pressure readings were done with FPR vacuum disconnected.
I started off with factory spec of around 44-45psi and experimented with 48psi and the car felt stronger, especially when you stepped on it. Readings on the scanner looked good as well. I upped it one more time to 50psi and the car seemed to like it even more and I drove it around and it ran great.
Just for curiosity sake and after reading a few threads about how some cars ran better with less fuel I tried it at 39-40psi. Car didn’t run bad, not as good as higher psi IMO, but I didn’t like my scan info looking leaner. I would rather be a little rich than too lean and blow the motor.
I wound up going back to 50psi and let it be for now. I know the computer will compensate for most of the adjustment but a little more fuel at WOT can’t hurt.
UPDATE:
After more testing and driving I settled back down to 48 psi, I will continue to data log and hopefully this year get the car on a local dyno and try some other adjustments.
Last edited by Reddragon88gta; 05-05-2022 at 07:53 AM.
Reason: UPDATED INFO
Another minor setback but one I saw coming, my original Bosch MAF is acting up again once it gets heat soaked so I am waiting on a supposedly tested used Bosch from Hawks. The data logs with an aftermarket were not great so hoping I can get some longevity out of this used one, at least I can still drive the car until this arrives. I guess letting the original Bosch sit in a box for over a year didn't fix it.
Received the new used Bosch MAF from Hawks, it was de screened and someone who knew what they were doing filed down the fins. After install car ran great and the data scans were spot on from what I could see. The only thing that concerns me is the missing screens but time will tell.
After doing a few searches I also decided it was time to replace the cracked and worn vinyl shift boot with a real leather one. After seeing a few reviews and members recommendations I went with Redlinegoods.com, they have a good website that even has instructions on how to replace the boot and have a wide array of color/stitching options. I went with basic charcoal leather with matching stitching to try to keep it close to original look. Also the price was pretty good IMO and I even found a coupon so it was like $20 more for real leather as opposed to a leatherette re-pop from Hawks. Once I receive it and install I will put up some pics. I also might've found a really mint used OEM shift handle to top the whole thing off as well.
Received my redline shift boot all the way from Poland today, shipping was very fast. I was impressed with the stitching and quality of leather used. Install was pretty straightforward and they have Instructions on their website as well. The charcoal leather was somewhat close to factory color and matches the rest of the interior. I should have done the samples to see how they all looked but it was either going to be black or charcoal seeing as I wanted to keep a stock look. I would definitely recommend these to someone needing a new boot or wanting a custom look.
As it came from package Old factory boot all cracked up Mounting base to boot Before install New boot and used replacement shift handle after install
The next project I will be working on is converting the stationary mast antenna back to the correct power antenna...I made the mistake of having a local stereo shop install the stationary when I got the car a few years back and it looks like quite the Jerry rig but at least no real harm (will have a buddy solder the antenna wire that the "pro" twisted the wires together and taped them up lol). I found a few recent threads and some older ones tackling it so I ordered up a 80's-90's Jeep Cherokee Crown replacement power antenna seeing as how mine has been MIA for likely a decade. The Crown unit is nearly identical to the OEM other than you have to 180 the mast so it will mount up correctly. I am lucky because who ever pulled the original cut the wires long and saved the hardware which I've kept since I bought the car and the one missing piece I have found on here. Once OI get the new antenna I will test it to make sure it will work and switch it over.
The next project I will be working on is converting the stationary mast antenna back to the correct power antenna...I made the mistake of having a local stereo shop install the stationary when I got the car a few years back and it looks like quite the Jerry rig but at least no real harm (will have a buddy solder the antenna wire that the "pro" twisted the wires together and taped them up lol). I found a few recent threads and some older ones tackling it so I ordered up a 80's-90's Jeep Cherokee Crown replacement power antenna seeing as how mine has been MIA for likely a decade. The Crown unit is nearly identical to the OEM other than you have to 180 the mast so it will mount up correctly. I am lucky because who ever pulled the original cut the wires long and saved the hardware which I've kept since I bought the car and the one missing piece I have found on here. Once OI get the new antenna I will test it to make sure it will work and switch it over.
Thanks for reminding me, I need to research what type of mast my 1983 came with new. I am almost ready to mount the fender for keeps.
I figured out how to load a thumb drive with a gazillion songs to play on my alpine, so had forgot about needing an antenna, but not sure if it came with a power antenna or just a mast, but should plug the hole with something, lol.
I just Joined, Trying to figure out how to post.
Awesome GTA you Got!! I am trying to sell my 1987 GTA for a parts car.. I have Over 20k in parts, If you plan on upgrading you GTA you may be interested. It was a 500hp 383 stroker motor (blew it up) but have tons of usable parts if your planning on making yours Faster and more H.P.
Even if not intersted in my car, if you could help me navigate the site be much appreciated.
Thanks! I will keep that in mind if I need anything. I�ve got mine set up just the way I want so far�if you want to sell stuff click on the forums tab which will list all the various topics, next scroll down towards the bottom where you will find the classifieds section, click on it and on the next page toward the top it will give you an option to do a new post something new.
Once you post something for sale be sure to include the price and take pictures. It�s pretty easy once you get the hang of it. Welcome to TGO
Well had a little setback on Operation New Antenna, the one I received from Amazon was junk out of the box...wouldn't power the antenna up or down all the way on its own and the motor didn't want to shut off so I'm guessing a junk mast cable right out of the gate. I saw a few reviews that had the same issue, hopefully the replacement that is on the way is not defective.
New power antenna came and tested perfect, now just waiting for the antenna cable and the fun begins on getting that rerouted and back up and going.
I also recently had the valve seals redone, the exhaust ones were completely shot. Also I removed all the AIR and EGR provisions in an effort to clean up the engine bay. Car runs great after all the engine work and emissions delete. No codes being thrown and my data scans look even better than before�I thought for sure the car would run a little leaner but I was wrong. I will continue to monitor it and may get a new tune done if anything comes up.
Today I installed the Crown aftermarket antenna and wired it up, only set back was my antenna cable was a no go and had to try wiring that up without a soldering iron. Functionality of the power antenna is great but now have to wait until my buddy can solder the antenna wire proper to get a good connection. Ultimately it�s not a huge deal because I mostly listen to music via a Bluetooth transmitter on my phone or CDs.
Anyone interested in a aftermarket solution for a missing power antenna that Crown 56003151
is a nearly drop in part other than having to twist the mast 180 degrees which is simple and if you are really wanting factory correct look get the GM finial for $5 and your done.
On the plus side the car has not looked factory correct in the antenna department for a long time and now that is done.
Looking good under the hood! That's good to know about the antenna, mine is some flavor of violently broken and I definitely don't want to install a non-correct fixed antenna.
Looking good under the hood! That's good to know about the antenna, mine is some flavor of violently broken and I definitely don't want to install a non-correct fixed antenna.
Thanks! It�s so much better to look at and easier to work. I ran some more data and it still looks and runs good, a little leaner when just cruising around( 15.1 at the most at brief times) but nothing crazy and still averages out to 14.7ish.
I played around with that aftermarket fixed mast mess when I first got the car and regretted it. You have the right idea, just go with the Crown unit and be done with it. Word of wisdom, remove the lower dash trim on passenger side and test the new unit before tearing into the fender well( it actually plugs into the socket perfectly). That way you can test on it before you get too involved and know for sure your relay is good and no one cut any wires etc. I learned that lesson the hard way lol. If that checks and the master electrician that had your car before left the antenna wire alone you should be golden after splicing the 3 wires together.
Been chasing a fun oil leak from not 1 but 2 defective AC Delco oil pressure senders with one bad right out of the gate. You can feel the oil dripping where the sensor comes together at the bottom of the bell. I shouldn't be surprised these units are proudly made in China...So now I found a lifetime guarantee Wells unit in a Carquest box from Advance with a lifetime warranty and is less money than the Delco which looks just like the OE stuff on eBay. Hopefully the Wells works out better.
Had a little time tonight after work and cleaned up the oil mess again and installed the new believed to be Wells/carquest sending unit. The part definitely looks different than the AC Delco( more thread sealant and materials looked different) plus it went on better. Really hoping this one doesn�t leak oil like the last 2.
Also the gauge now reads more accurate than the prior 2 as verified when I hooked up a mechanical oil pressure gauge my buddy let me use. Not dead accurate but not bad for these old factory gauges.
 02-24-2021, 05:19 PM

 intake. But the Rochesters are 400CFM x 2 so not too shabby.