When you click on links to various merchants on this site and make a purchase, this can result in this site earning a commission. Affiliate programs and affiliations include, but are not limited to, the eBay Partner Network.
So are you doing anything for keyless entry? If so, I gotta suggestion for ya, even if you're not I still gotta suggestion for ya.
You might wanna put in a 4th gen body control module. Some features of it are:
-gm style key fob with built in alarm
-retained accessory power for windows and radio
-programmable interior lights
-replaces the blue box "chime" box in the convenience center, (you had it removed in one of your pictures)
-for it to work you have to replace the stock crappy trunk relay with a newer gm relay (you can prob. get it from the same car you get the bcm from)
-much better built in door lock relay
-overall more efficient and better distribution of power to systems not to mention it prevents battery drain on the part of lights
One of the things I have noticed is that the windows don't put much of a strain on the battery with this. Before this, At idle sitting at a light for instance, putting my windows down or raising them would dramatically make my voltage drop. With this bcm, the indicator doesn't really move much. Anyway it is only an update to the electronics so as for originality, you would be fine.
If you go this route I will give you a step by step, and you would have to pull the dash. That seemed daunting to me at first (like you -- college kid on a budget and not much time on hand), but It was well worth it. I never looked back.
... and you would be surprised what sort of stupid gm mistakes in the 25 year old wiring you could fix
I've heard of a couple folks on the forum doing this sort of add-on / conversion. Certain sounds worthwhile.
It is. The relay for door locks makes them very efficient. The sluggish moving rod is more like popping forward or backwards now. The trunk opens at the first push of the button. The interior lights can be set to turn on and off however you like. For the seat belt light to go out, you actually have to move the belt. Retained accessory power is also pretty cool. Basically all major components in the "cabin" are controlled by a brain. Best of all, you don't have to rely on an aftermarket alarm or keyless entry that can be hit or miss. And its not aftermarket, it's GM.
So over the summer I got my car registered and legal, and I took it down to Ocean City. It was definitely the best part of my year. But since I've been driving it, I have noticed a lot of little things that need to be addressed.
So two weeks ago I did a major tune up: spark plugs, MSD wires, Hypertech coil and cap, coolant flush + new coolant, 180* thermostat, hoses, v-belts, and a custom chip from John Wayne on Facebook. The chip made slight adjustments for the cam, deleted EGR and cold start injector, adjusted for the fans and thermostat to run at 180*, and tuned the prom for performance (originally the proms come from the factory with e"economic" settings). I also put on a new coolant tank, the old one was pretty cruddy.
After the tune up it ran so much better, and picked up some power, and it runs cooler. I also got the A/C working (first 3 speeds, 4th does not work) and some fog lights installed.
I got a decent set of black GTA seat back in the early summer for only $120! Was a pretty good score, but they were worn and dirty. The driver's side is worn on the side, the passenger seat is much better. The rear seats were really nice except on the tops,where the leather has dry-rotted and is pretty much falling off. I used some leather conditioner and that helped the seats a lot, but I'd like to get them recovered eventually.
I've been doing a bunch of little things to make the car look better, which probably aren't necessary, but I feel like they make the car a better. Next on the list of stuff to do is:
- Paint door panels b/c there is some white over spray from the guy I bought them from
- paint the other door armrest and mount it
- refurbish the steering column - new wiper switch (the lettering on the current one is fading), repaint, tighten loose bolts (column is pretty loose), and replace the ignition cylinder, as the one I have currently, I can pull the key out while the car is running.
I also need to go ahead and figure out why the blower speed isn't working; I know it isn't the relay, as I tried replacing it, but nothing happened. And I may go ahead and repaint the valve covers because they don't look so great.
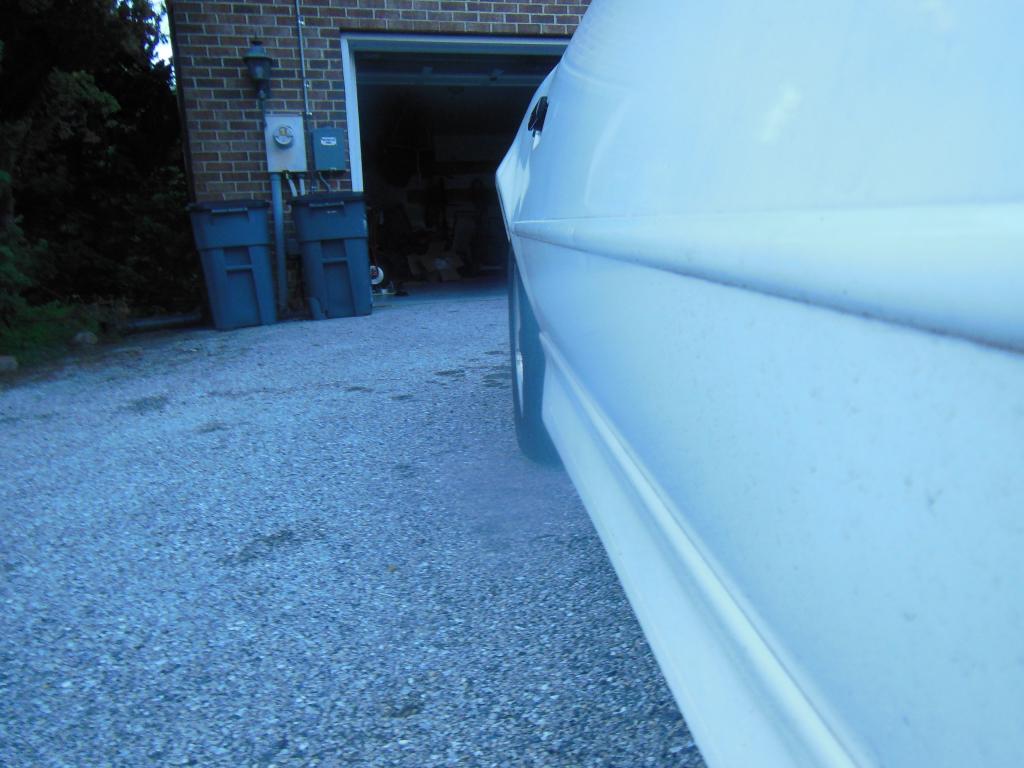
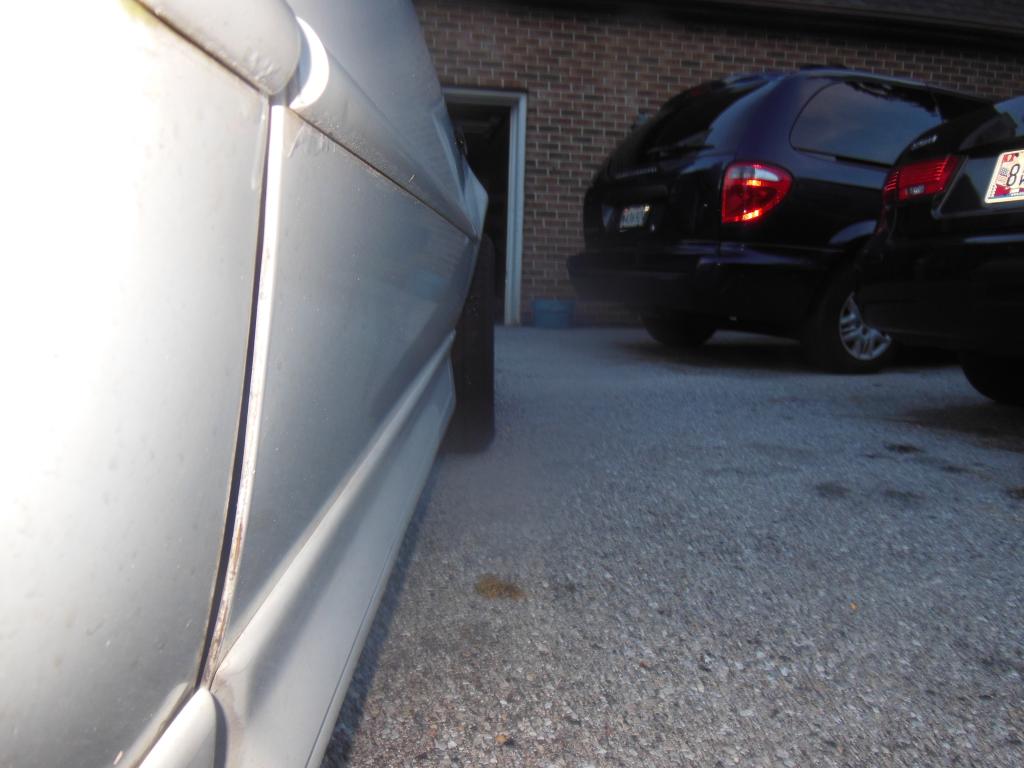
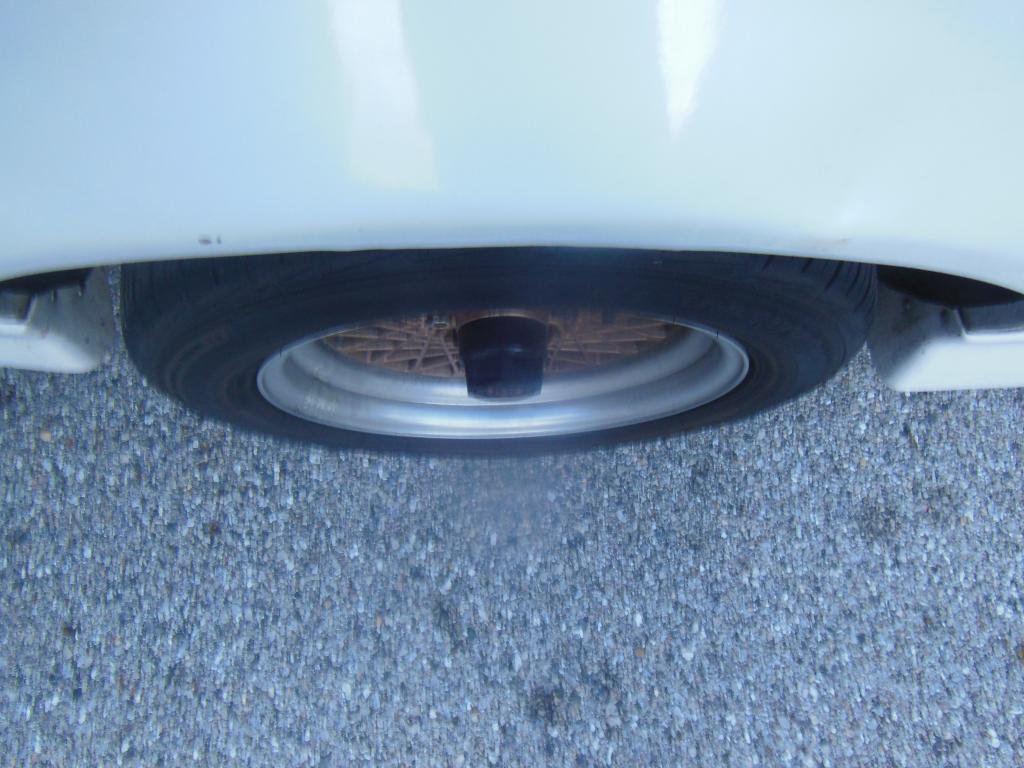
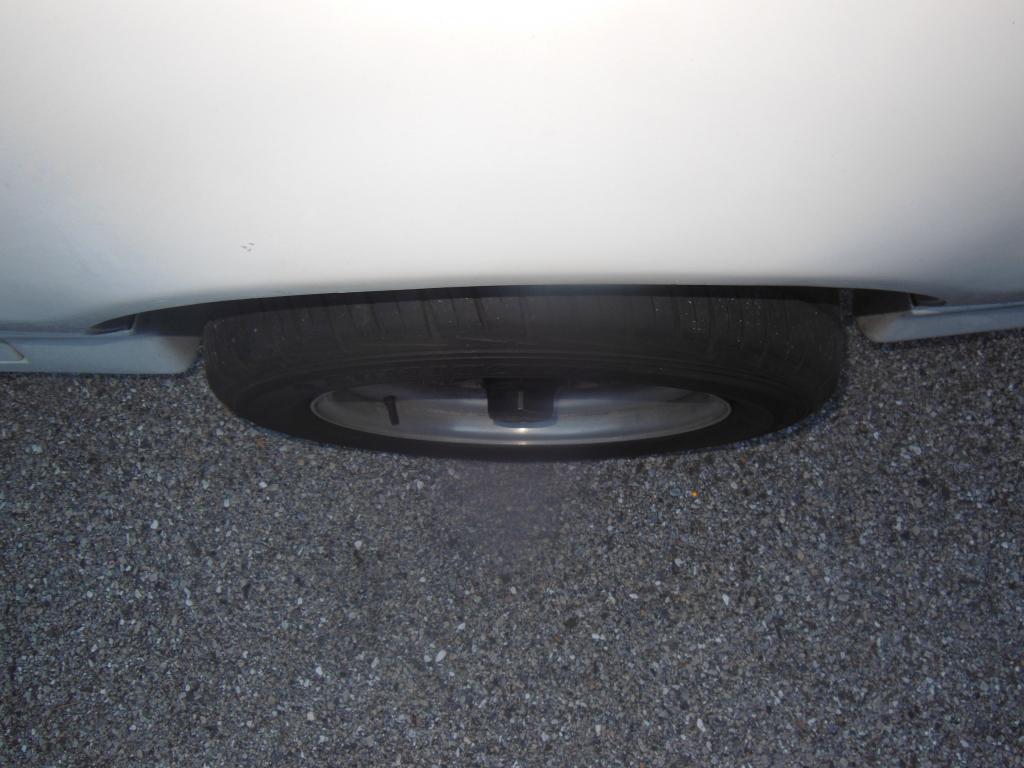
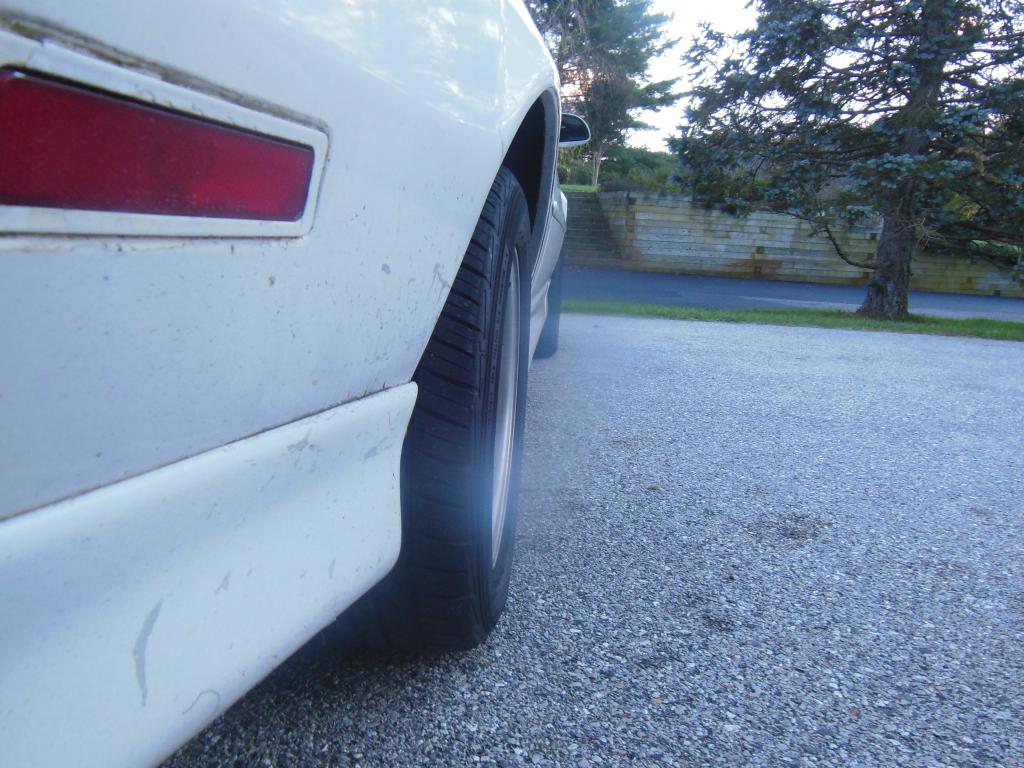
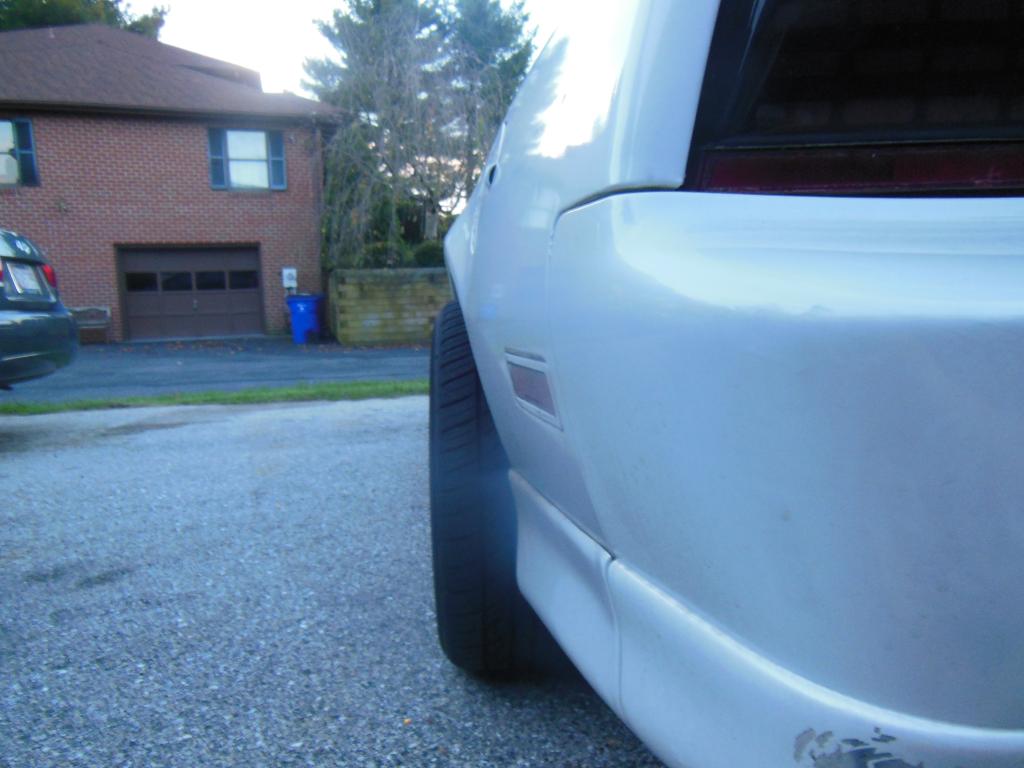
Got some spacers yesterday, I'm not a huge fan of how tucked in the wheels look stock. Don't get me wrong, I think stock looks fine, I just wanted something a little different and more aggressive. So I figured I'd give these a try:
stock spacing
with spacer
stock
spaced
stock
spaced
They're 2" spacers, I think they stick out just a little to far, maybe an 1.5" would've been better, but I got a pretty good real on these, so I'll run them for a bit. I will say it makes the tires look much wider from the back, which I really dig.
I want to take the car up to the drag strip (capitol raceway) for the first time this weekend, if time and the weather cooperates (it's been raining up here for the last two weeks).
They're 2" spacers, I think they stick out just a little to far, maybe an 1.5" would've been better, but I got a pretty good real on these, so I'll run them for a bit. I will say it makes the tires look much wider from the back, which I really dig.
Yea I agree, maybe even 1" spacers would look good. IMO
So over the summer I got my car registered and legal, and I took it down to Ocean City. It was definitely the best part of my year. But since I've been driving it, I have noticed a lot of little things that need to be addressed.
So two weeks ago I did a major tune up: spark plugs, MSD wires, Hypertech coil and cap, coolant flush + new coolant, 180* thermostat, hoses, v-belts, and a custom chip from John Wayne on Facebook. The chip made slight adjustments for the cam, deleted EGR and cold start injector, adjusted for the fans and thermostat to run at 180*, and tuned the prom for performance (originally the proms come from the factory with e"economic" settings). I also put on a new coolant tank, the old one was pretty cruddy.
After the tune up it ran so much better, and picked up some power, and it runs cooler. I also got the A/C working (first 3 speeds, 4th does not work) and some fog lights installed.
I got a decent set of black GTA seat back in the early summer for only $120! Was a pretty good score, but they were worn and dirty. The driver's side is worn on the side, the passenger seat is much better. The rear seats were really nice except on the tops,where the leather has dry-rotted and is pretty much falling off. I used some leather conditioner and that helped the seats a lot, but I'd like to get them recovered eventually.
I've been doing a bunch of little things to make the car look better, which probably aren't necessary, but I feel like they make the car a better. Next on the list of stuff to do is:
- Paint door panels b/c there is some white over spray from the guy I bought them from
- paint the other door armrest and mount it
- refurbish the steering column - new wiper switch (the lettering on the current one is fading), repaint, tighten loose bolts (column is pretty loose), and replace the ignition cylinder, as the one I have currently, I can pull the key out while the car is running.
I also need to go ahead and figure out why the blower speed isn't working; I know it isn't the relay, as I tried replacing it, but nothing happened. And I may go ahead and repaint the valve covers because they don't look so great.
So yeah, lots more stuff to come.
Hey, read your whole post. Great car! Keep up the good work and school.
I noticed you mentioned the blower motor high speed doesn't work. This may be you cause; in fact I'm really sure. Your high speed resistor is fried in the blower box. Replace this $11.00 dollar part and it will get ya going!
Blower Motor Control Module / Resistor
AC Delco #15711968 $10.81 at Rock Auto
Last edited by Bob88GTA; 10-16-2014 at 11:37 AM.
Reason: more info
They would probably look a little better, but it's more money I'd need to spend, and I don't have much.
The spaced look has grown on me a lot. Even my dad, who didn't like them much a first, thinks it looks better after seeing it for a few days, so I don't know if I'll get another set.
Originally Posted by Bob88GTA
Hey, read your whole post. Great car! Keep up the good work and school.
I noticed you mentioned the blower motor high speed doesn't work. This may be you cause; in fact I'm really sure. Your high speed resistor is fried in the blower box. Replace this $11.00 dollar part and it will get ya going!
I already bought one and replaced it, but that wasn't it, so I believe the original relay was probably still good. It has to be a wire or short somewhere, or maybe both relays (new and old one) are bad.
Did you swap the front & rear rims? Fronts have a deeper lip & offset than the rears. They will stick out more without the need of a adapter. Fronts may need a small spacer to clear the tie rod end.
Did you swap the front & rear rims? Fronts have a deeper lip & offset than the rears. They will stick out more without the need of a adapter. Fronts may need a small spacer to clear the tie rod end.
Yes, I'm aware that the fronts will stick out more on the back. I had said in a previous post that I searched for an extra pair of front rims but couldn't find any decently priced. The rear wheels are spaced on the rear; they are 2 inch spacers, that is why they stick out so much.
I have noticed that the car seems to drive a little more smoothly in the rear, my brother came along for a drive yesterday and said that the overall ride seems less bumpy. Does spreading the wheels farther apart actually make it ride smoother? And I have also heard that wider apart wheels help with traction.
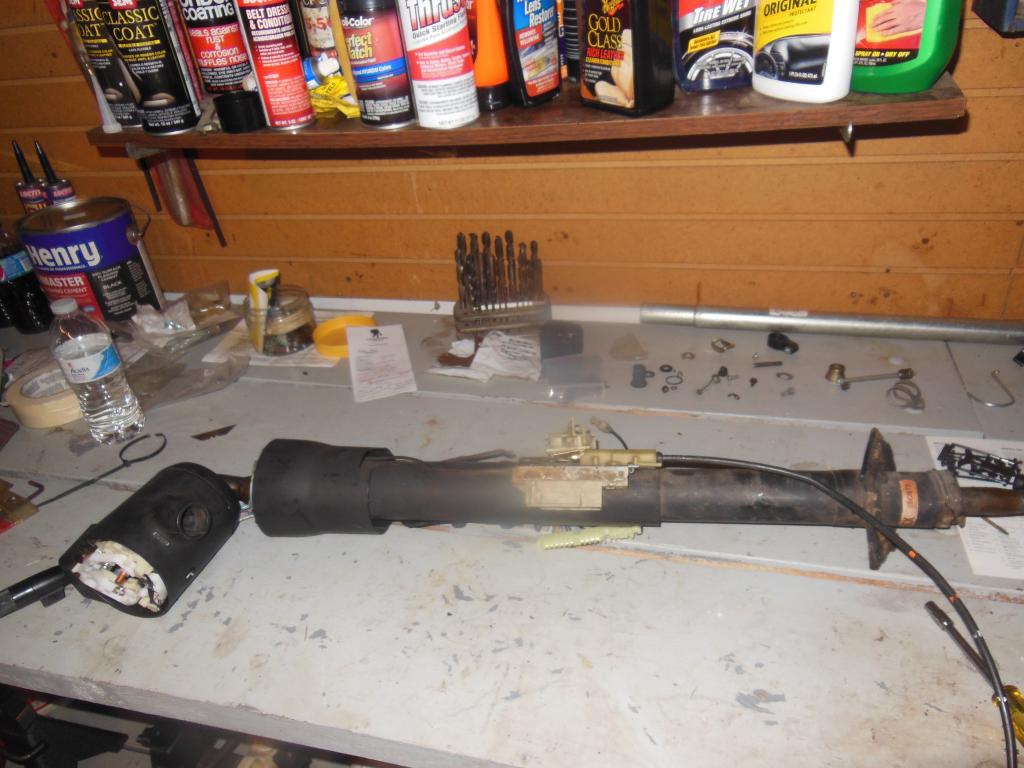
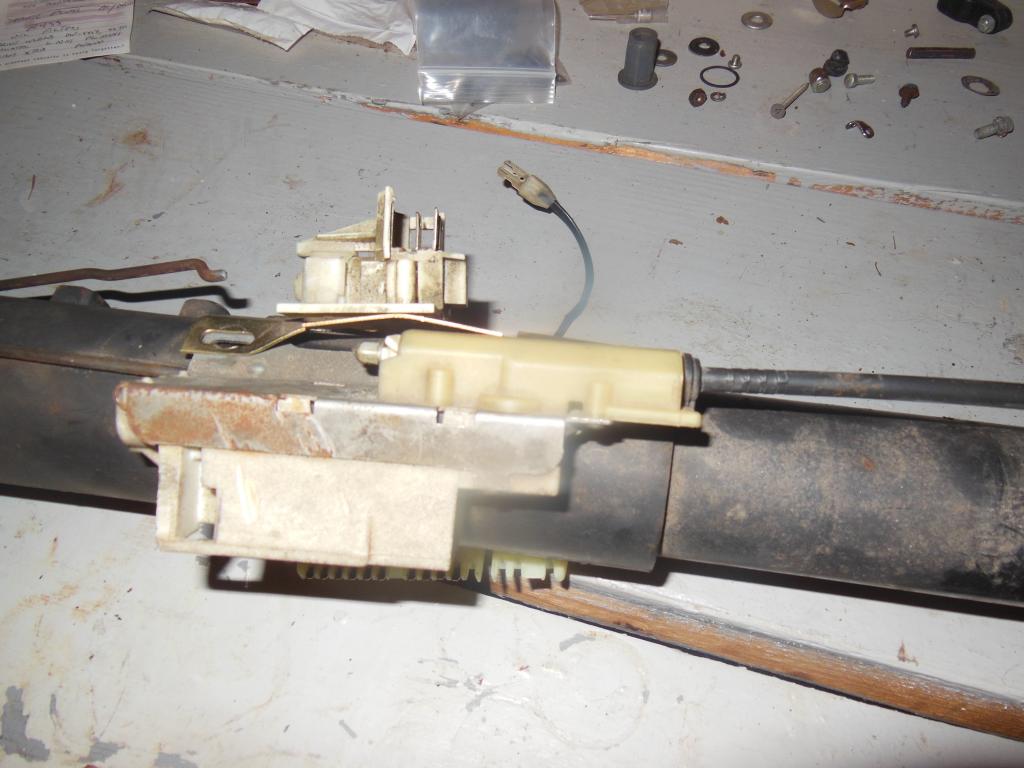
So after having the common loose tilt steering column for a few months, I decided to go ahead and deal with those loose bolts at the bottom of the column. My ignition cylinder is also worn out, I can pull the key out while it is running. One time I took a hard corner and it actually slid out and hit my friend in the passenger seat. So I figured I might as well replace it while it's out.
I'm also gonna replace the turn signal stalk. There's nothing wrong with the one I have now, it's just faded, and I'd rather do this now while while everything's apart.
And the biggest thing is that I'm going to paint it, because this column certainly needs it.
Took some pictures pf the pieces apart.
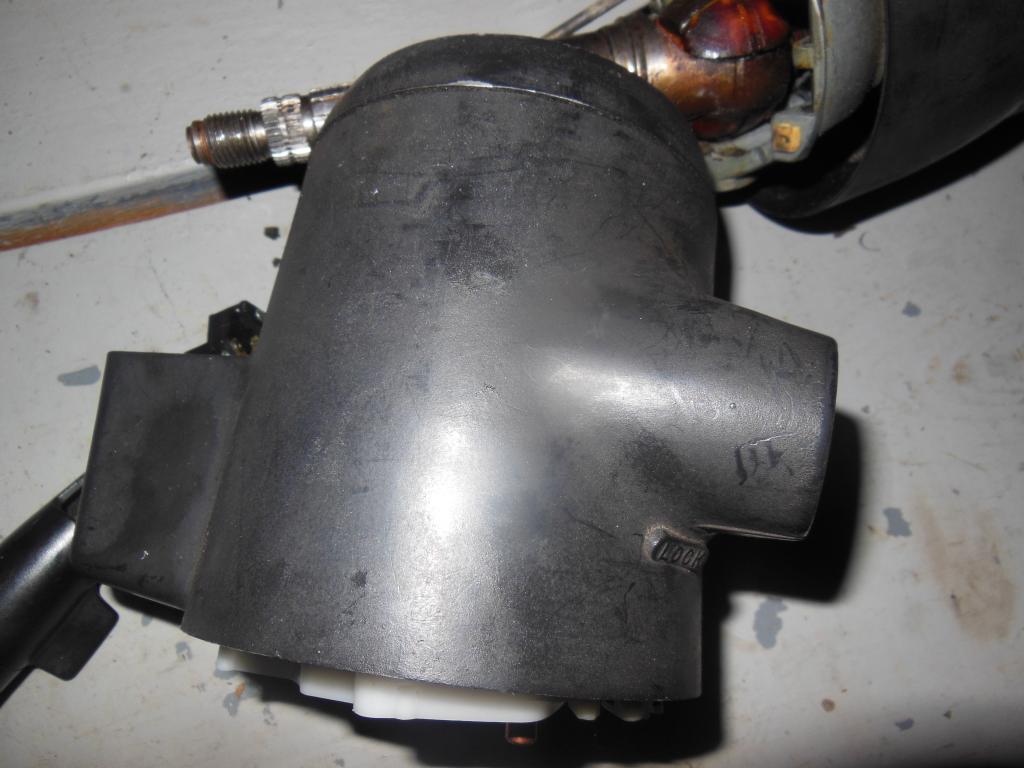
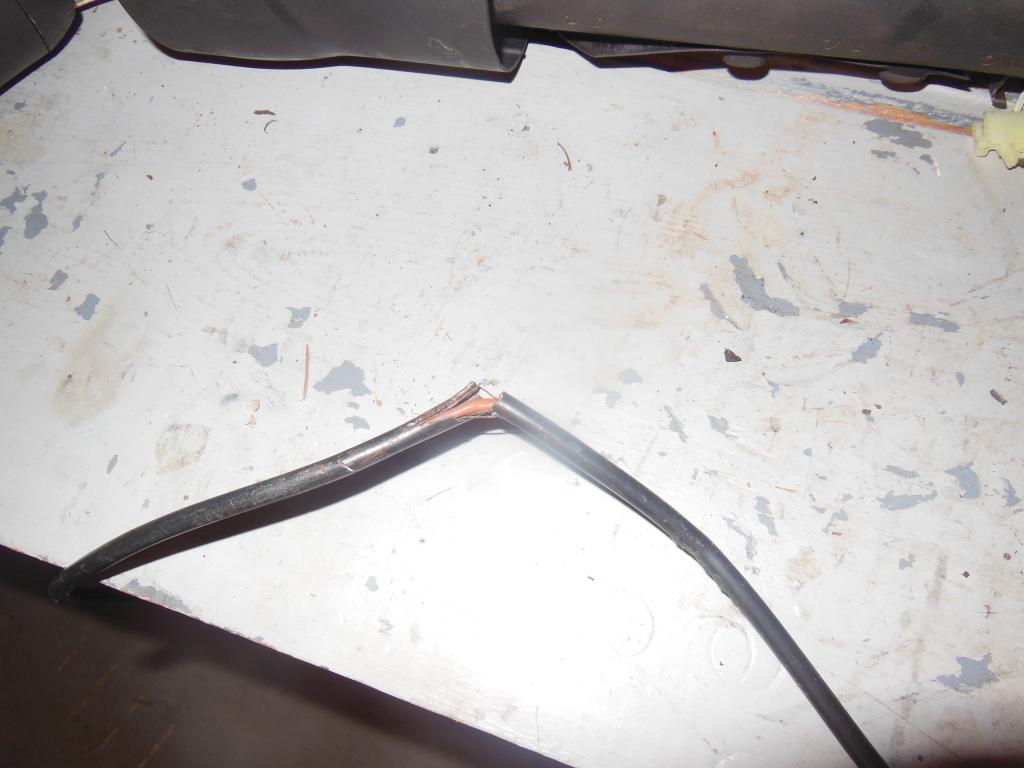
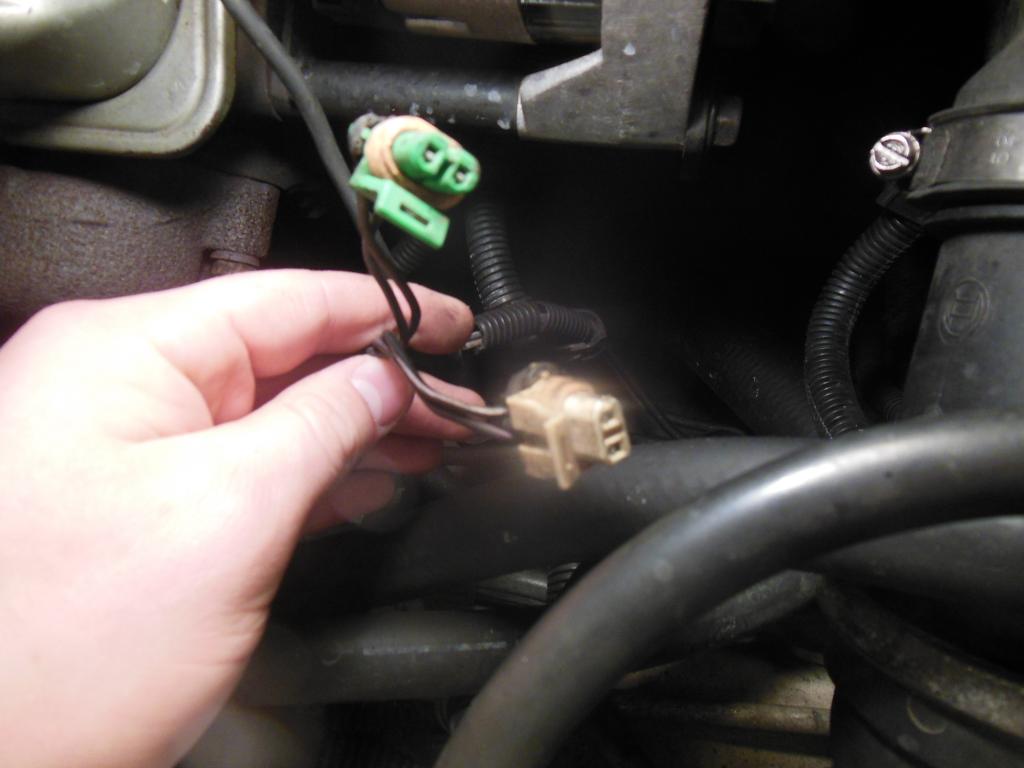
There is this one wire that has been bugging me ever since I got the car. I thought it was a cruise control wire, but I really have no clue. The wire is a hard plastic, and is broken in several places. You can see most of it in the first pic.
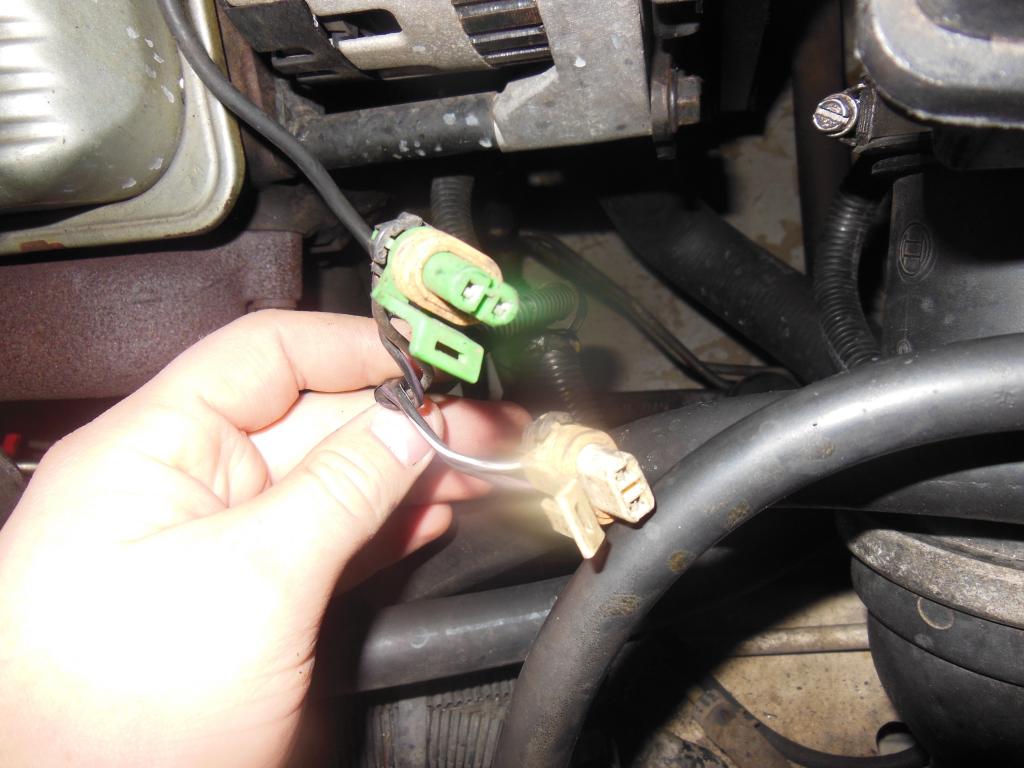
This thing is on the end of it and doesn't go anywhere, it was just tucked up in the dash.
The broken section.
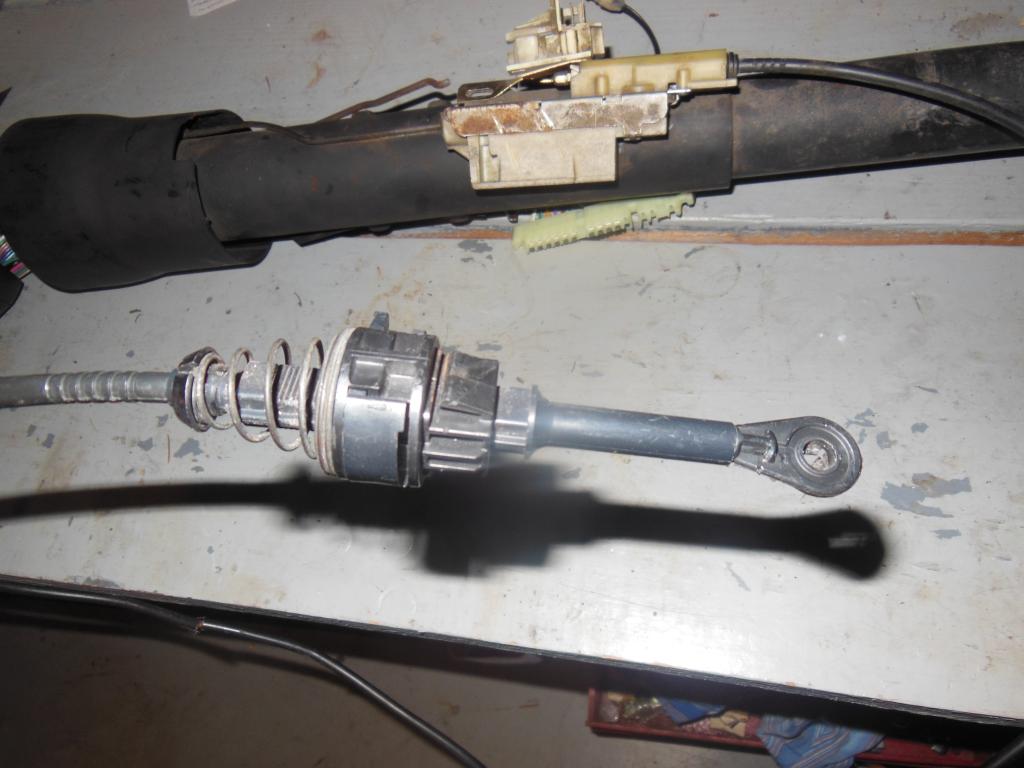
And lastly, what it connects to on the steering column. Two wire connectors go to it on the column here. (it's not the cruise wire sticking up on the top, it is the thick wire that goes off to the right.
Thanks guys, any help is appreciated. I hope to finish this by Sunday night so I don't have to drive the beater van to class on Monday.
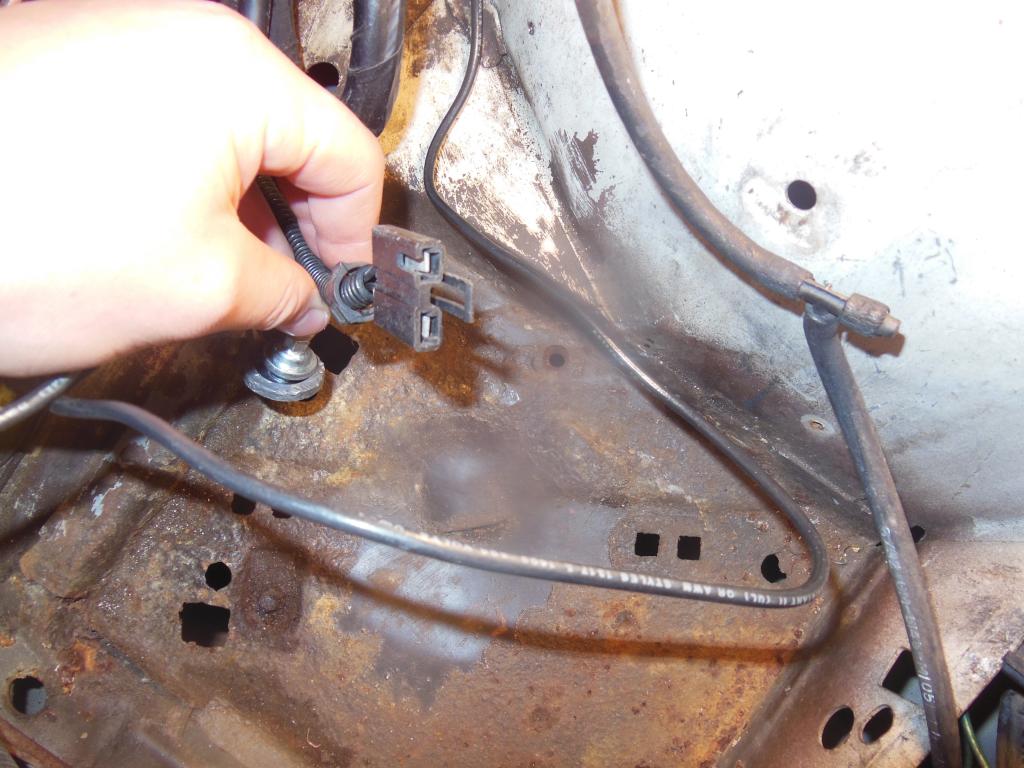
Well, the cord thing on the column turned out to be the shifter lock cable. Hooked it up and it still works! I might get try to get a replacement later because it gets hard to move if the cable bends in the broken part.
The column is in the car now, with a new wiper stalk, new ignition cylinder, fresh paint, and now a functioning shifter lock. For the last few days, I had no headlights; they'd pop up but wouldn't turn on. I eventually found out I forgot to reconnect the dimmer switch on the column when I put it back in.
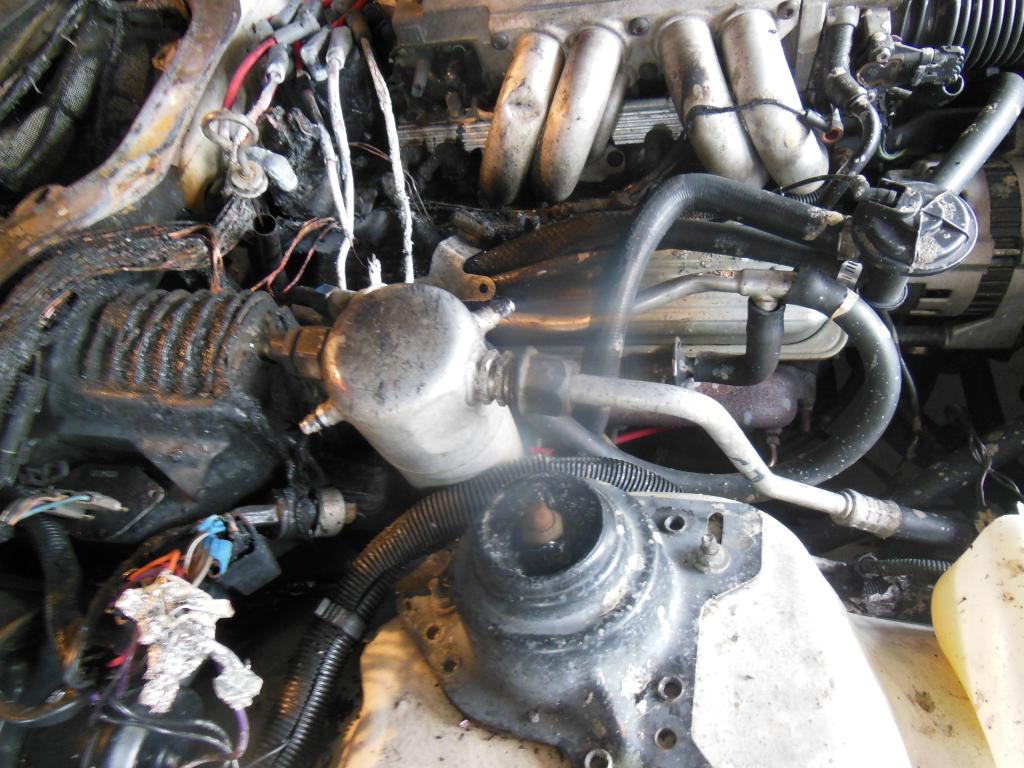
Earlier while trying to figure out the headlight problem, I decided to go ahead and figure out where several wire connectors went, and also to try and fix the cruise control.
I never really thought about fixing the cruise until now, but since it is there, I might as well repair it. The cruise control I think just needs new vacuum lines; the one going from the 't' connector to the intake is missing, and the other two are pretty much dry rotted. I did notice that if I try to turn it on, a clicking noise came from the cruise control module (or whatever it's called) in the engine bay, so I think it'll work after I fix the vacuum lines.
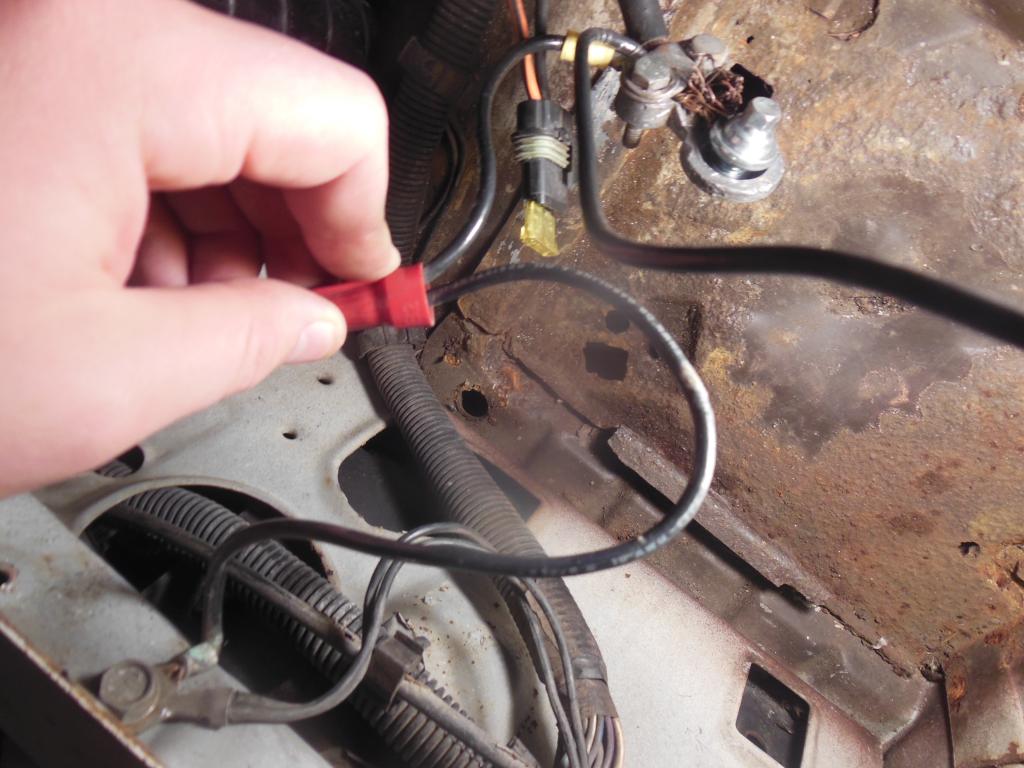
Here are some of the unidentified wires and connectors:
These connectors are on the passenger side, toward the front of the engine. Since the AIR was partially removed (just the pulley part), I believe that is where these go. If so, I may just cut them and tuck them into the harness.
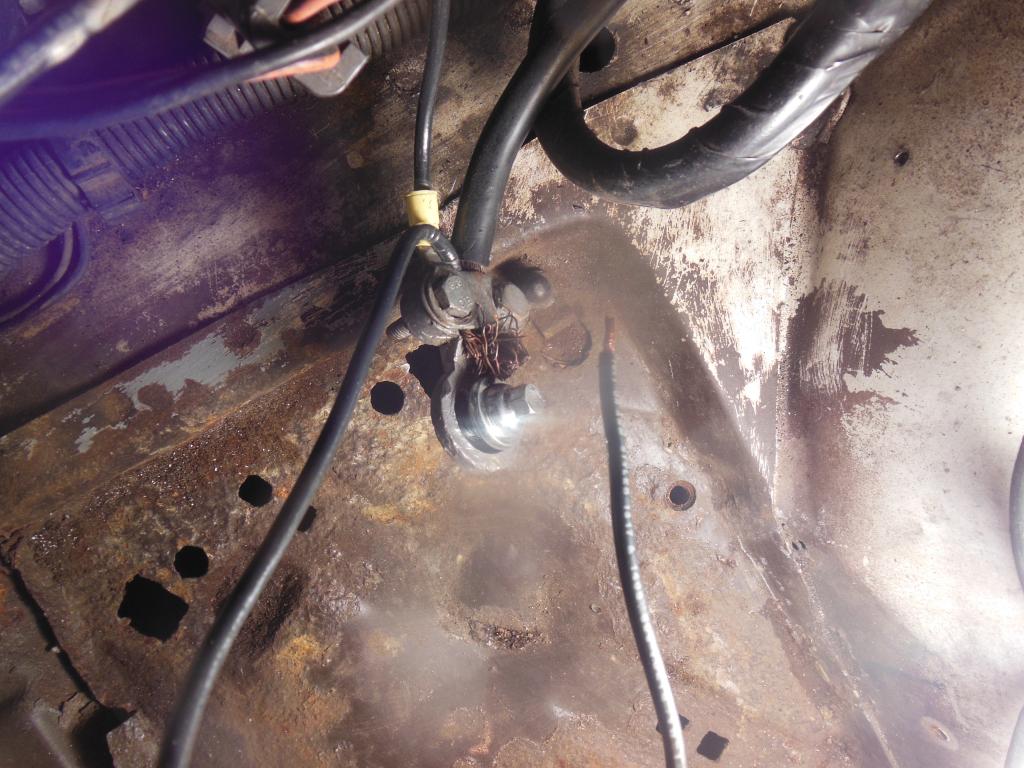
The next one is right next to the battery on the driver's side, I have no clue what this goes to.
There is a wire that goes from the battery and was grounded on the engine thermostat bolt. I pulled it off and grounded it at the radiator firewall, but without it connected, there is no change in anything as far as I can tell. I believe at one point it may have been the battery ground.
This last one is a wire the runs from the negative battery terminal to a red connector, and then to the radiator firewall next to it. In the pic, you can see where it is connected to the firewall and goes to the terminal.
Correct me if I am wrong with any of these, I am just trying to get a feel for where everything goes so I can continue to clean up the engine bay.
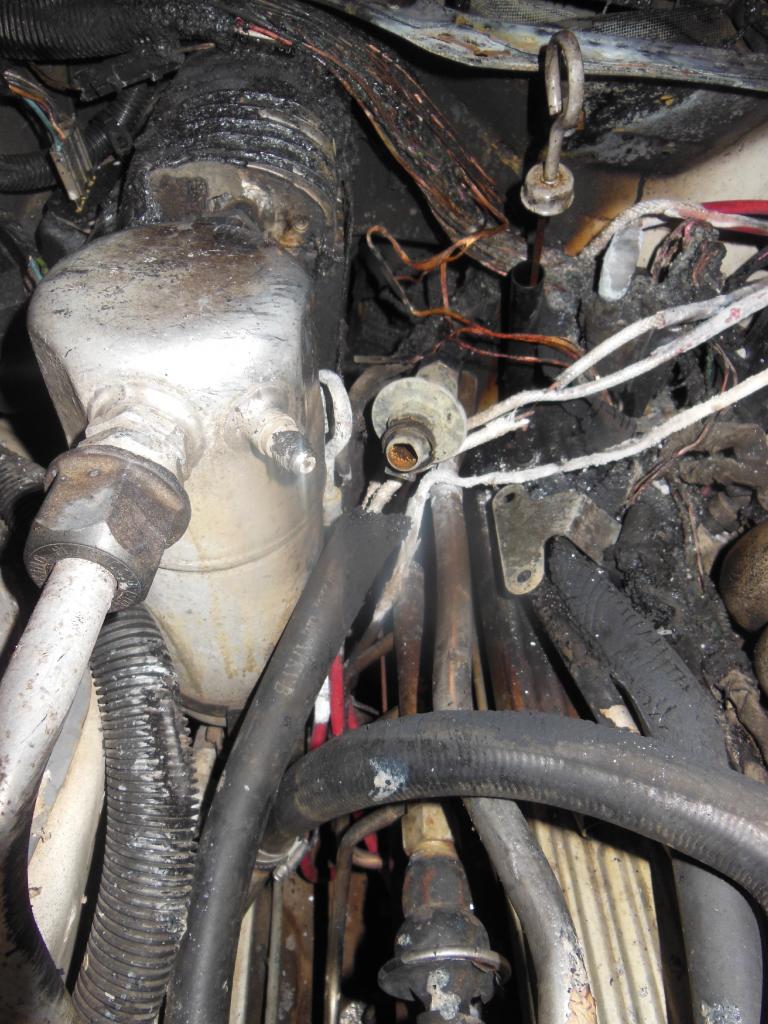
So over the weekend, I finally got to take the GTA out to a drag strip. On my first ever run I ran a 15.8 at 86.7 mph. On the second pass, something in the transmission wouldn't have it, and sort of gave out. On the way home from the strip, the transmission decided to light itself on fire.
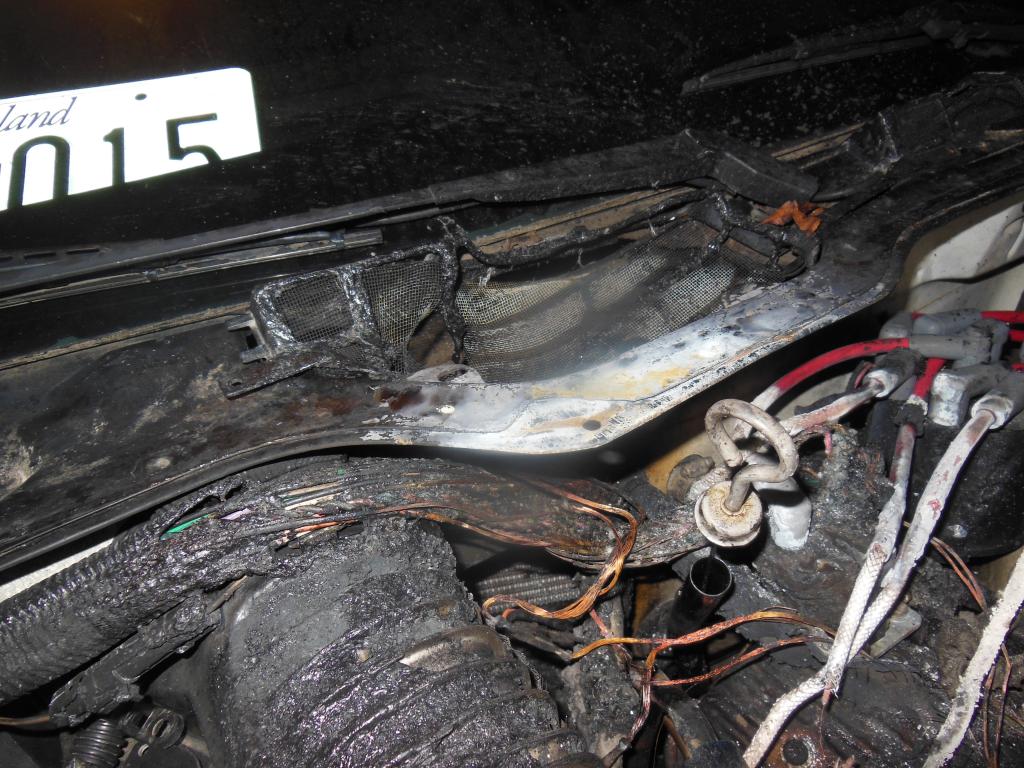
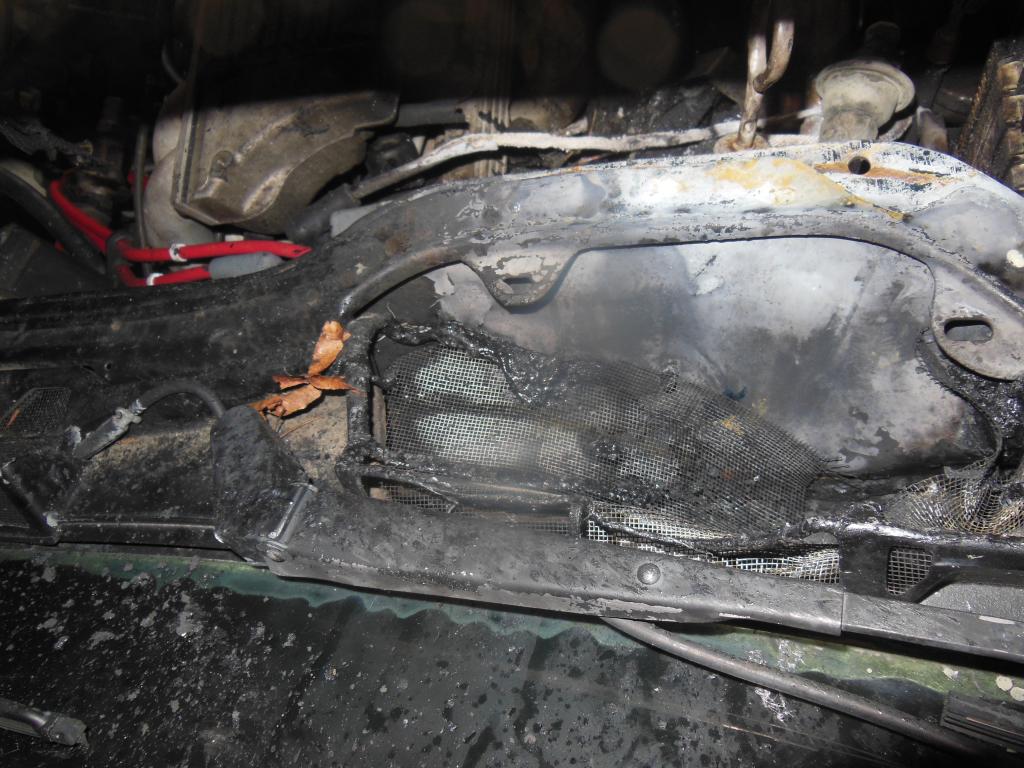
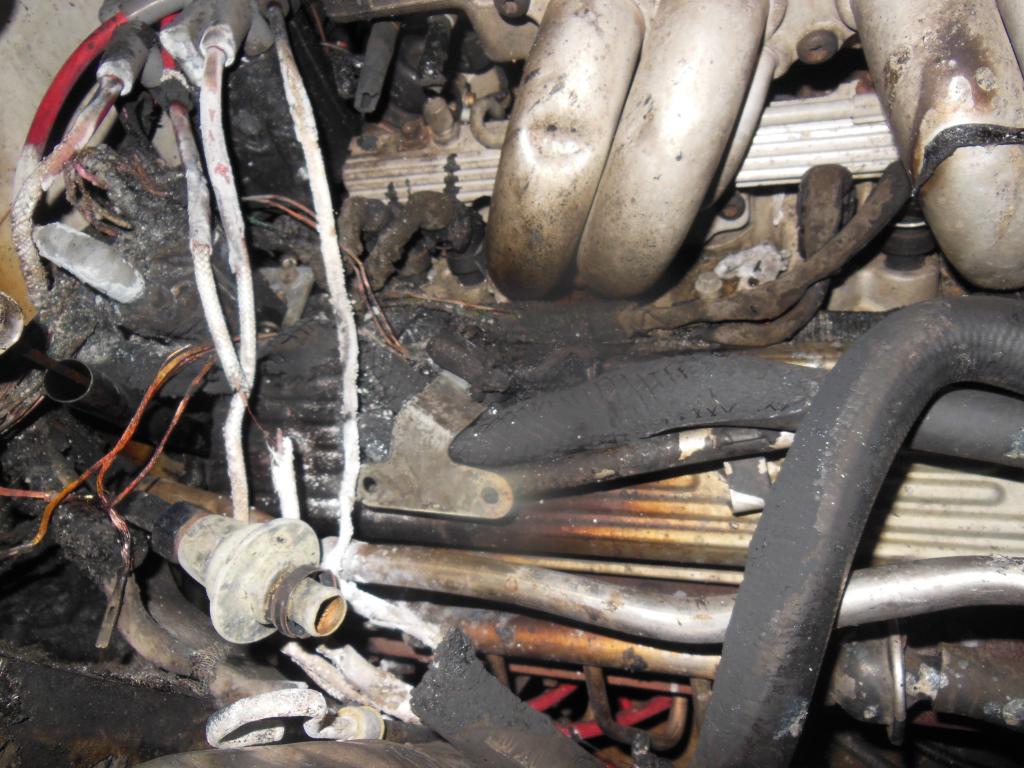
Got the car towed back home. The pics will tell the tale though. So far, only the passenger side seemed to have damage. From the damage that is visible, the wiper cowl melted through on the passenger side, my new spark plug wires are gone, most of the heater hoses melted and collapsed, vacuum lines melted, almost all wiring crossing over the engine bay on the firewall is melted, fuel injectors are melted, A/C plastic cover/condenser (not sure what it is called) melted into the firewall, etc. the list goes on.
I am going to pull the whole engine and transmission out. I will be replacing the exhaust with some hedman headers and custom y-pipe, new a/c system, and I may swap the v-belt system for a serpentine system. I am going to tear the engine down to check all the gaskets as some may have melted.I'm not sure if I am going to swap in another 700r4, as I'd like to get a t56, but they're getting expensive. However, it may be cheaper just to do the swap now and save the hassle down the road. I'm also going to repaint the engine and make everything nice and pretty.
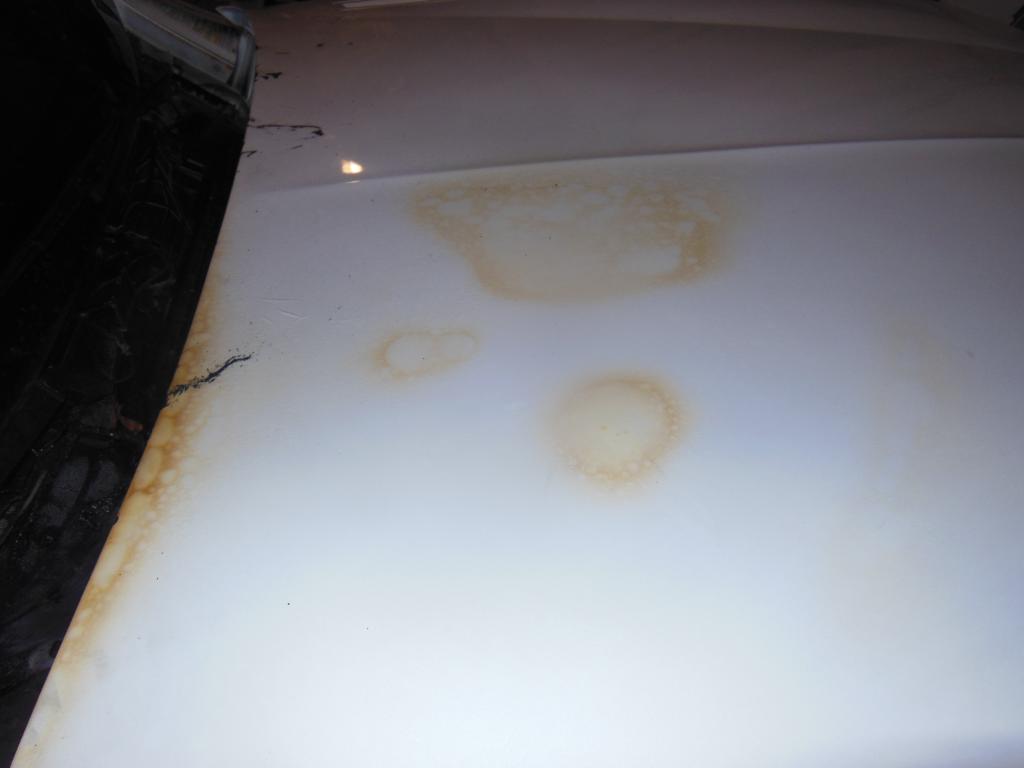
Forgot to mention that the hood insulation burned up and melted some of the paint on the hood. At least I have an excuse to learn how to paint now lol.
This car's life is far from over. It can and will be rebuilt, and with new and fresh parts put in the way I like.
Did you look into an LS build or do you wanna stay original?
The engine and hoses and covers and what not can be replaced. The wiring will be a kicker and the last thing you want is butt splices. Could be the oppurtune moment for a fresh harness.
The wiring harness will definitely be the hardest part, especially since it's a digital dash and has a bunch of extra connectors.
I know LS is one of the better options out there, but I just love the feeling of the seat of the pants torque that the TPI gives. On top of that, it just looks plain awesome. I would like to get a First Fuel Injection later when I build the engine. The idea is to keep the car looking mostly stock with a few hints of something of a built car.
Oh yeah I forgot its digital dash, I really feel for you. With the DIC, any minimal resistance will fu** with it so you can't have any butt splices there. The connectors: you have a couple to worry about: washer and coolant level. If you want to source the connectors yourself look at clips and fasteners .com
If the headlight harness was melted, you simply need a new one that is clean, trying to fix the old will only throw the infamous "F LAMP" error. You could try Modern day Muscle for vac lines - plenum to fuel pressure regulator - that is what I saw a while back
Also look at GM Classic parts they should have some stuff as well. (Not to mention Hawks and fleabay of course.
Damn shame there Transaero. Sorry for your loss.
Seems like your transmission built some pressure and pushed fluid out of the fill pipe and well hot fluid on the exhaust manifold and then fire. Just my guess.
That was a pretty expensive trip to the strip! Hope ya get it all worked out.
True story........An old Indian friend had a customized full size Chevy Van Conversion, beautiful.......got drunk one night and decided to drive to Fresno California from Palmdale Ca., about 250 miles......van started to overheat........his girlfriend was driving.......he said to her "Keep Pushing Iron Horse" so she did........engine seized and blew up. Turned out to be the $2.59 waterpump bypass hose blew. 5 grand later, he sold the van.
Moral of the story is something so small can cause a lot of damage.
So over the past few months, I have been busy tearing everything out of the engine bay. Since I am in college and working a part time job, time and money is limited. I also was stuck for a while because I couldn't get a hold of an engine hoist, but last weekend a friend came over with one and helped me yank it out.
Some of these pics were taken with my old camera, but I recently got a new one; you can probably see the blurriness in the center of some of them from a scratch in the lens.
Pulled part of the intake off and some of the belt accessories.
And here it is with almost everything pulled out. Sorry about the lack of lighting, I was working until 3:00am that night.
A close up of the interior a/c ducting. It melted through, meaning I have to tear the dash apart to replace it
The 'new' transmission that will be replacing the old, burnt up one in the car. It's a TCI 700r4, built to handle something like 5-600 hp. Should be more than adequate for now.
Tomorrow, I'll post some pics of the car as it sits now, with the engine and trans pulled. The next step is to pull the front suspension apart for a rebuild (had planned to do it prior to the fire), clean the engine and bay, and get all of them painted.
So after the trans fought us for a while, we got it and the engine out. Turns out the engine is not a 350, but a 305. But at least it was rebuilt at some point and has a Melling cam in it so it has a little more power. It was pretty windy that day, and a lot of dirt managed to find it's way into the oil galley, so there's another thing to take care of. I probably should've left the intake on. Oh well. I also like the fact that whoever put the flexplate on left one of the bolts off.
The aftermath. She sits a little high. Got that gasser look lol.
Needs a lot of degreasing and paint. I'm not sure yet if I'm going to spend the money for good paint job, or if I should just get some paint match rattle cans.
Decided to go ahead and pull the torque arm. I am going paint it the same gold that is going on my engine. If I end up not liking it, it'll be under the car anyway.
What are you doing for a harness?
I have my TPI harness that I am in the process of disassembling and overhauling. Would you perhaps want it. What part of your harness is still intact if any? At the C100 (drivers side bulkhead connector) there are two halves to it - the engine half and the lights harness (lights harness is smaller)
From the engine pics I saw that the engine harness is bad, how is the lights harness?
It turns out that digital dash cars have the same engine bay wiring harnesses as standard cars. What they have that is different is the HVAC, headlight, (and ECM?) harnesses.
That being said, I got another engine bay harness. The wires of the engine harness that crossed over the engine were completely melted. The headlight wiring was fine, but I still need to get the HVAC wiring.
I've had lots of time on my hands recently so I have done a lot of work on the GTA. Unfortunately, I forgot to take a pic of my torque arm before i installed it, but the gold came out pretty nice.
I have torn apart the 305 to put in new gaskets and to paint it. Taking it apart, I found out that it has a double roller timing chain, and .40 over bored cylinders. Nothing big, but it's good to know. Whoever redid this engine forgot to torque down a good portion of the bolts. The oil pan and the timing cover bolts were all loose enough for me to take then out by hand. The flexplate is also missing a bolt.
There is so much grease, grime, and surface rust, it has taken me a long time to get all the crap of the parts. Right now I only have the other head to clean up, and the then the head and block will be ready for paint.
New and old
I already went ahead and painted the timing cover, one of the heads, and the oil pan. I have to say that I just love this gold on the engine, it looks awesome. Oh, I forgot to wipe the crud of the oil pan before I took the pic.
The whole front of the car has been torn apart, in order to do a full, proper engine bay repaint. Most of the paint has been stripped off, and I am currently finishing up with it.
The only rust I have found has been a few surface rust spots, which were ground down, and the battery tray has rust on the bottomside. Not sure yet if I am going to replace it. I also need a small patch piece where the hood latch cable went threw the firewall. Some water must have rotted it out, because when I went to remove the cable, it pulled out some of the metal with it.
Right now, I am working on getting the second head painted, and then it is on to painting the block The head still needs to be cleaned, but the block is already prepped. Then the intake gets a makeover.
So, the heads are now painted. For some reason the paint on the second head is not a shiny as the first head I painted. The second one seems to have a more dull finish, and it doesn't look as good. It is a little hard to see in the pics, but you can kind of see it. Not sure what I'm going to do there.
Anyways, I ordered all the gaskets I need to put the engine back together, so that means I need to get the block painted for when they come in.
Wow, I didn't realize how long it's been since I've updated! School and life in general has kept me busy, but lately I've been really cranking on getting this thing finished.
The GTA has come a long way since the fire. The engine and trans are in, and me and some buddies were able to get a lot of the car put back together. The engine bay has been painted, but I'll be waiting to get the body painted as I'm pretty much broke now.
I have the dash and new heater box back in, although I'm not quite finished with the interiors side wiring harness. Dynamat has also been laid in the firewall footwell section, but I still need to finish the rest of the floorboards.
The engine is pretty much put back together, I still need to install the coolant hoses, vacuum lines, and most of the wiring. The harmonic balancer needs to be installed (can't find a installer to borrow or rent), along with the pulleys. Headers are in, radiator and ac condenser are in, and the front suspension and steering has been completely re-done.
There are only a few things left before I can revive her; my friend is coming over this evening and we're going to try and knock the last few things out. If we are lucky, we may even fire it off tonight.
I'll try and get some pics for ya'll, I haven't taken any in a while.
Just an update. Got the radiator and a/c condenser installed, along with some of the pulley system. I'm still dealing with the wiring harness. I probably should've marked the original harness when I pulled it out.
I've done a bunch of soldering on my replacement wiring harness, I've found several tied together/taped wires, and have been making sure all the wires have good connections.
The steering column is back in, and my replacement shaft from Walter Racecraft is in, but I have yet to reconnect the majority of the dash wires. The firewall has Dynamat laid down now, and the pedals are painted and installed.
The trans now has its two connectors routed properly and are installed, and has the TV cable and correct speedo snesor and gear in. the crossmember and aluminum driveshaft (with new U-joints) are also in.
There's still a long list of things to cross off before I get to drive her, but the list is getting shorter and shorter. My goal now is to have it back on the road by the end of April. And maybe I can stop slacking and take some pics for ya'll.
This is from Friday night. I am mostly finished up in the engine bay. I started putting the interior back together.
Since I have a bunch of photos that I never posted, I'll put some of them up too.
Here is what the interior has looked like for the last year or so. It's nice too see it coming back together.
And this is after working at it all day:
I have two more connectors in the dash that I need to figure out where they go. Then I need to finish Dynamatting the floor, put in the carpet, then seats, trim paneling, center console, and the radio and speakers. But that's pretty easy stuff. The hard part (wiring) is finally out of the way.
Here is what the engine bay looks like now. Pretty much everything has been cleaned and repainted, and has been replaced with new or refurbished parts. I need to go back over and repaint intake plenum, my buddy accidentally put a large scratch right across the center and it bothers me alot
The intake is painted with VHT cast iron, and the engine in gold. I figured I would try and match the engine to the GTA's gold theme (badges, wheels, trim, etc.). It's not perfect, but I wanted to try something different, and I like it.
I'll post more updates as I finish up. Need to do a little more work, then the fun stiff comes. I'll need to break in the new lifters in the engine, as I dropped the some of the lifters out the engine before, and I ended up just getting a new set to replace them. After the lifter/cam break in, I get to drive her again, can't wait. I'm hoping I can have it all done by next weekend, but it'll be tight as I'm approaching the last few weeks of classes and finals are almost here.
Great work, you have thrown yourself into the task!
It sure has, it's been a long road but it'll all be worth it.
Made some more progress, started laying the rest of the dynamat down. Also got most of the interior lights/accessories working. Power windows and mirrors work, all digital dash icons/gauges seem to work. The only thing not currently working is the turn signals and interior lights
Interior light works if I turn them on with the dimmer switch, but won't come on when the door is open (like they should normally). For the turn signals, the right green arrow/indicator is stuck on on the dash display. I'm guessing that's cause I don't have the headlights hooked up.
Oh, and the fuel pump won't kick on. I was trying to get it to run so I could pump out the old gas, but it isn't working. I'm wondering if it shorted out when the wiring harness melted. I do remember the fuel pump fuse being blown out whe I took the car apart.
Old thread but always curious as to how projects have progressed.
So any new pics of the car?
 04-24-2014, 09:10 PM


 So I figured I might as well replace it while it's out.