Gerrutcamaro's GTA project car
 01-07-2012, 05:27 AM
#1
Junior Member
Thread Starter

Join Date: Nov 2010
Posts: 13
Likes: 0
Received 0 Likes
on
0 Posts
Gerrutcamaro's GTA project car
hi y'all
i've been a regular visitor at thirdgen.org's classified boards for quite some time now, but since posts there don't seem to count, i'll be posting some pics here of my project
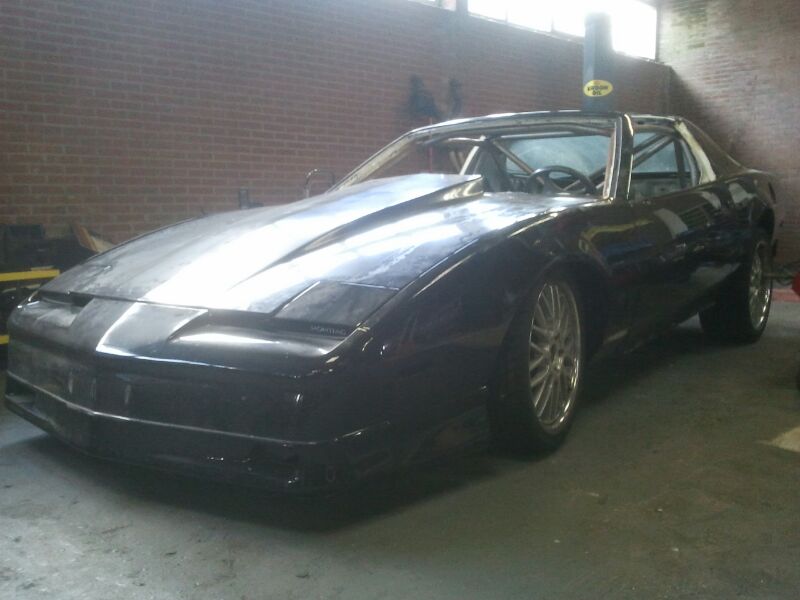
this is how it looked when i got it;
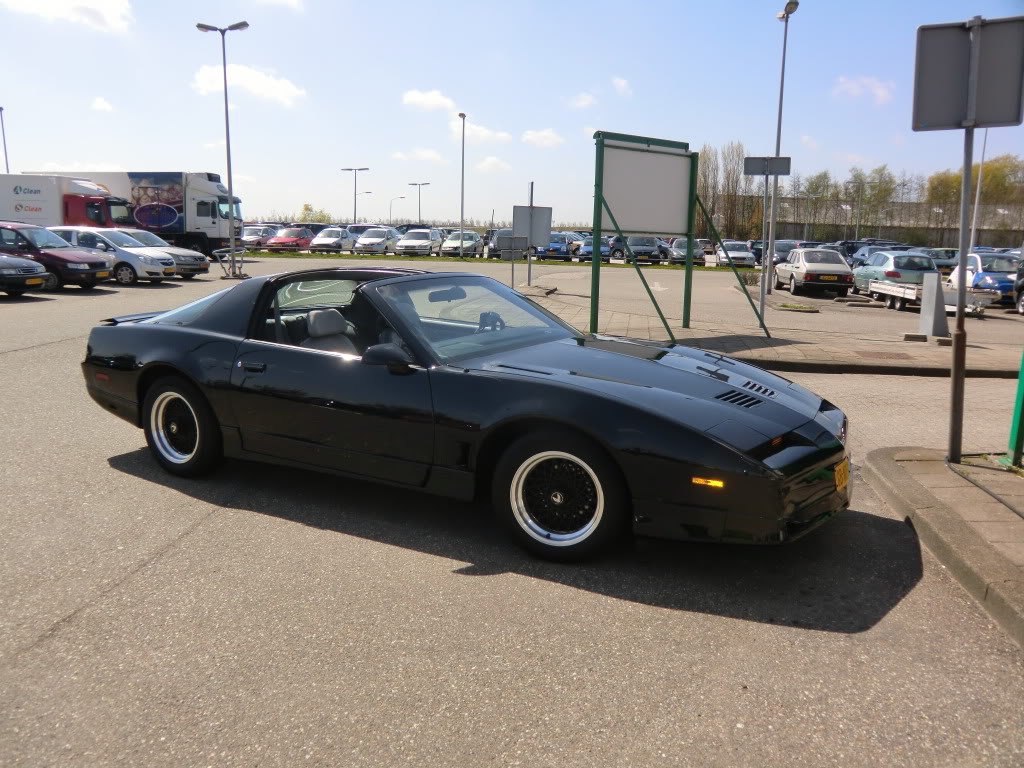
it looked pretty decent for an old car, but the tpi engine was a revised 350 from a truck and all the power came from a lt1 cam, slightly bigger runners and a larger throttle body, it had great low end torque, but was out of power at 3700 rpm, that way it seemed like i was going really fast because of the kick, but actually i wasn't
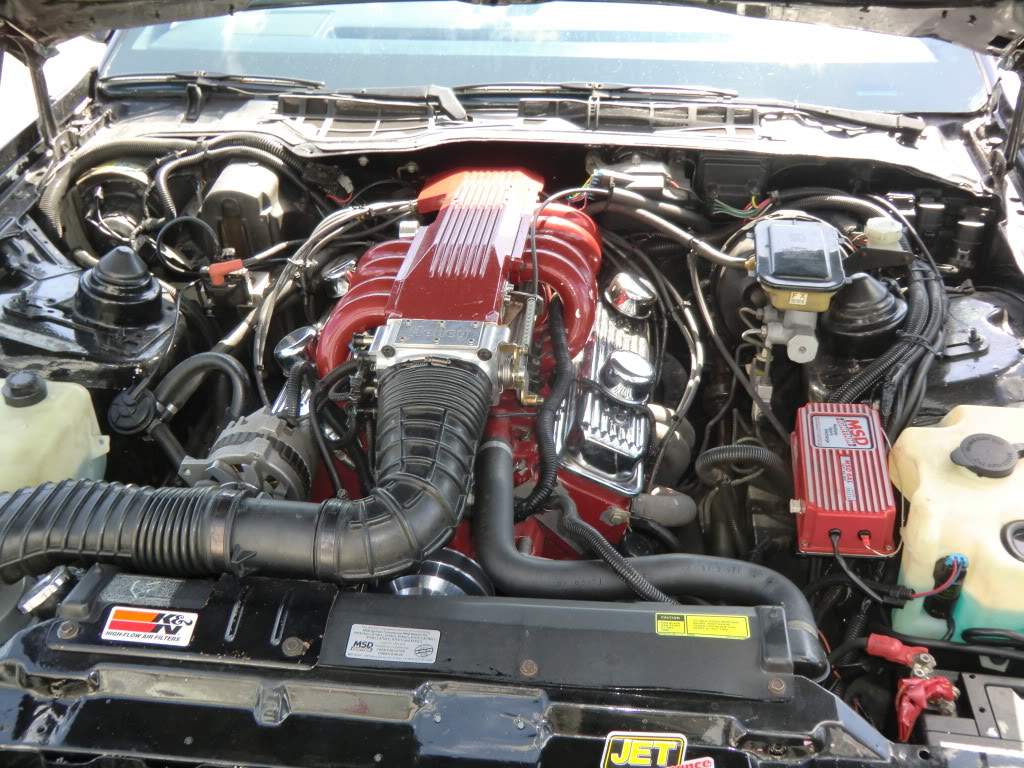
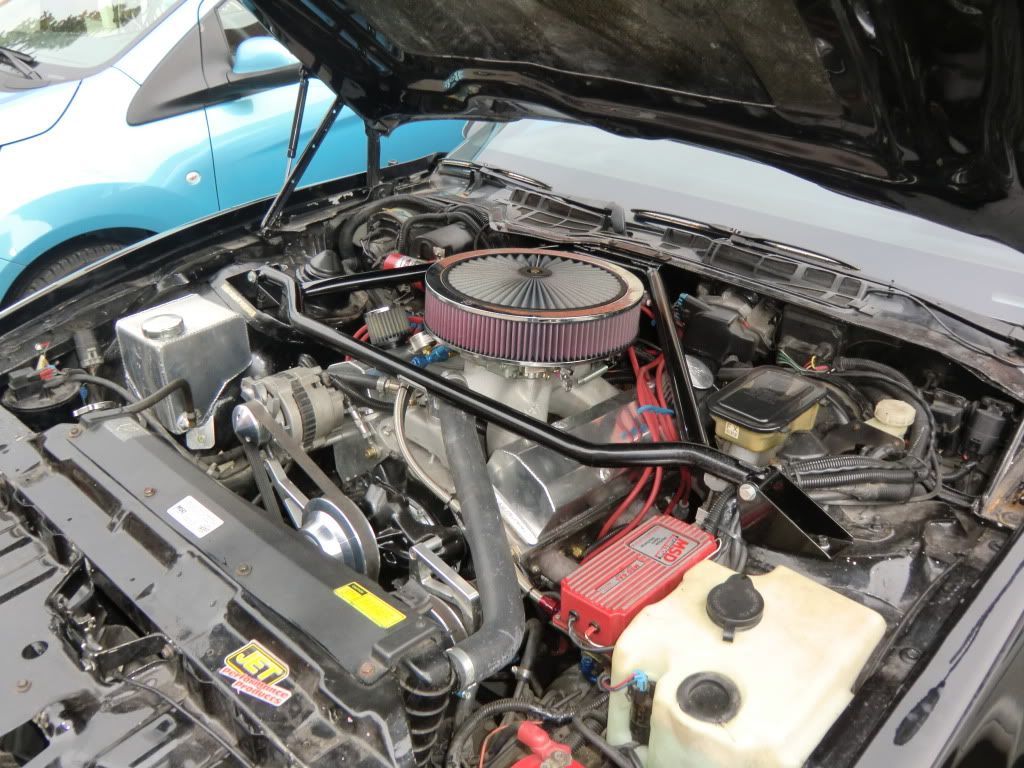
so, when i saw rocksiroc's add here for a brand new 383 i decided to ditch the old engine and go for some real power, it was a pain to get it overseas to the netherlands, but well worth it. i've driven it this summer for about 600 miles and i just love the cam that's inside it, it is easy going under 2000 rpm, but really gets going from 3000 to 6500 rpm, just like driving a turbo car but without the actual turbo
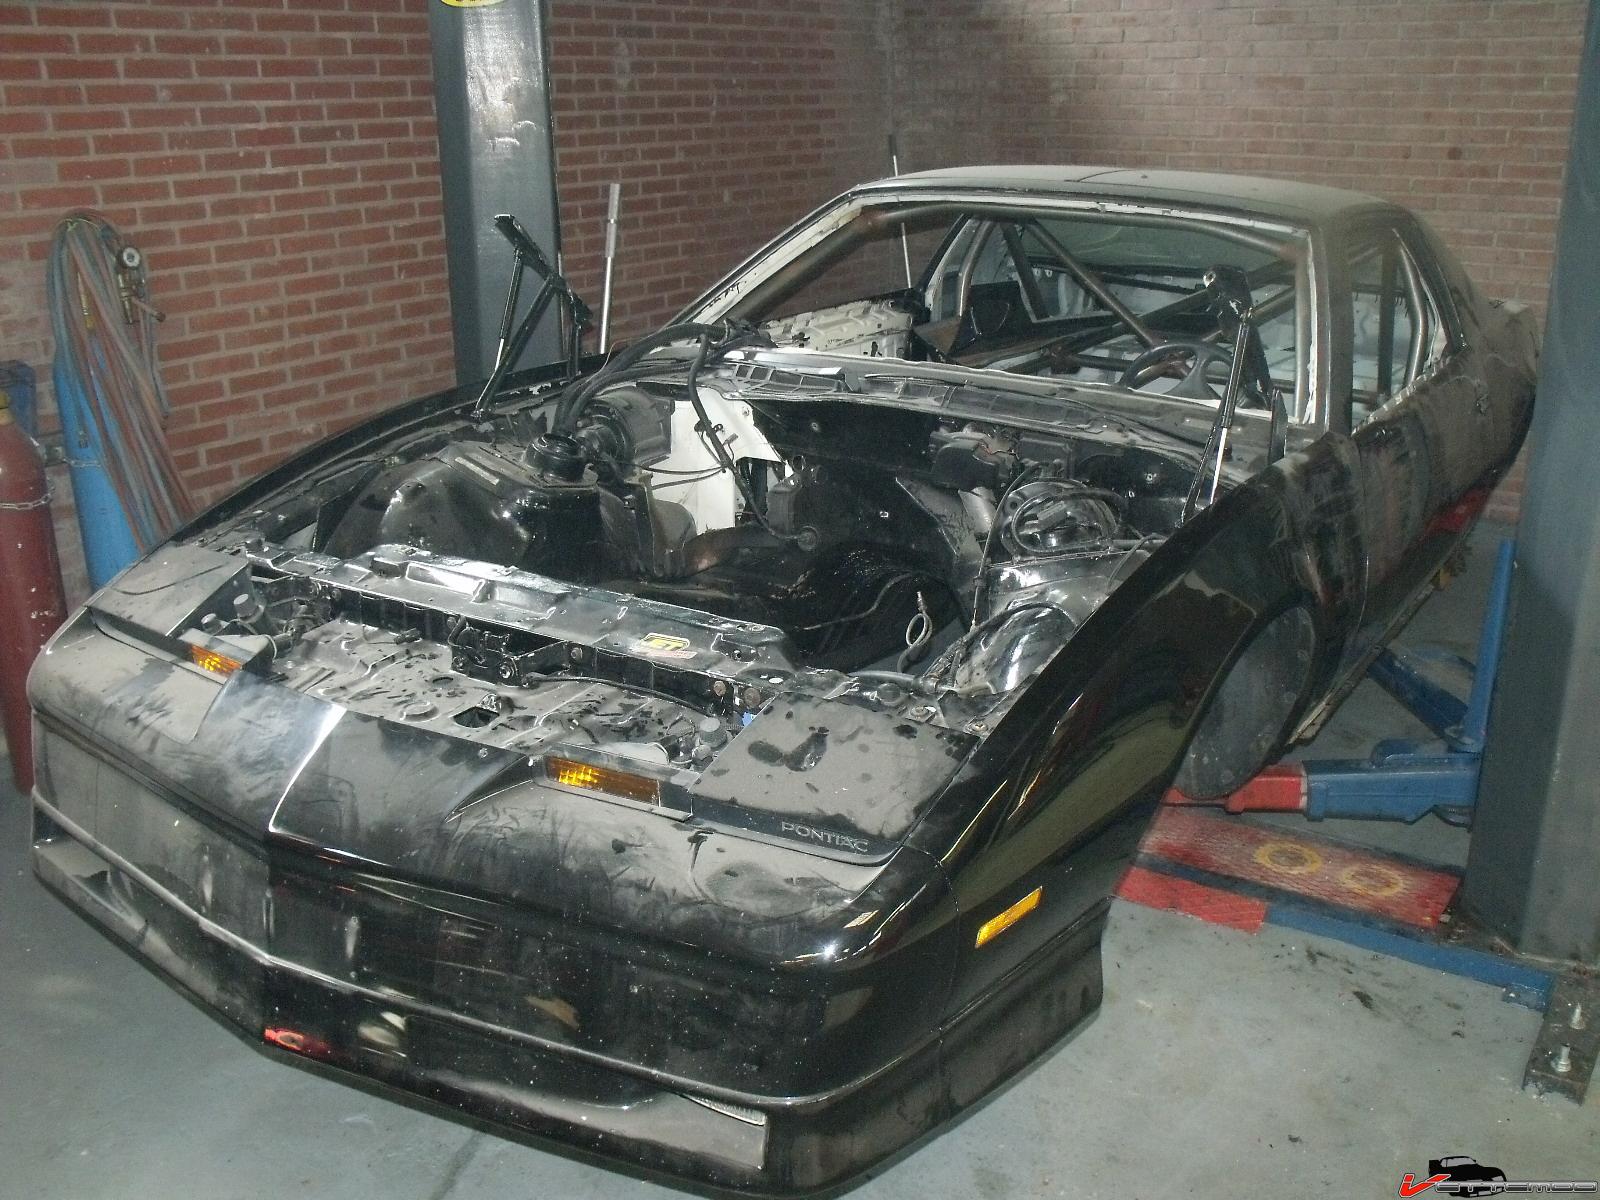
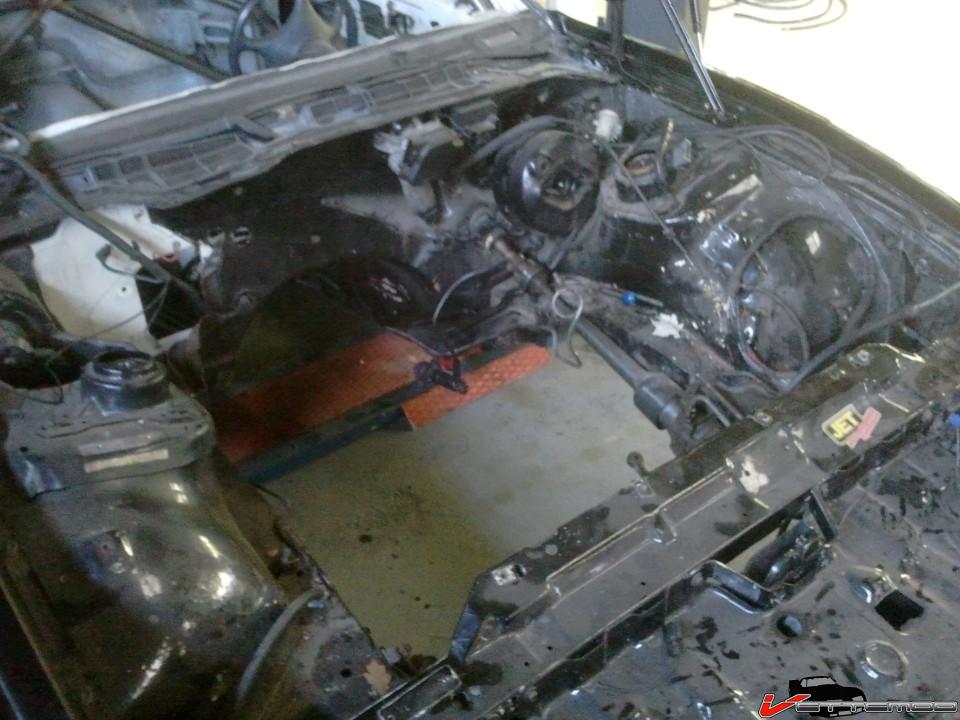
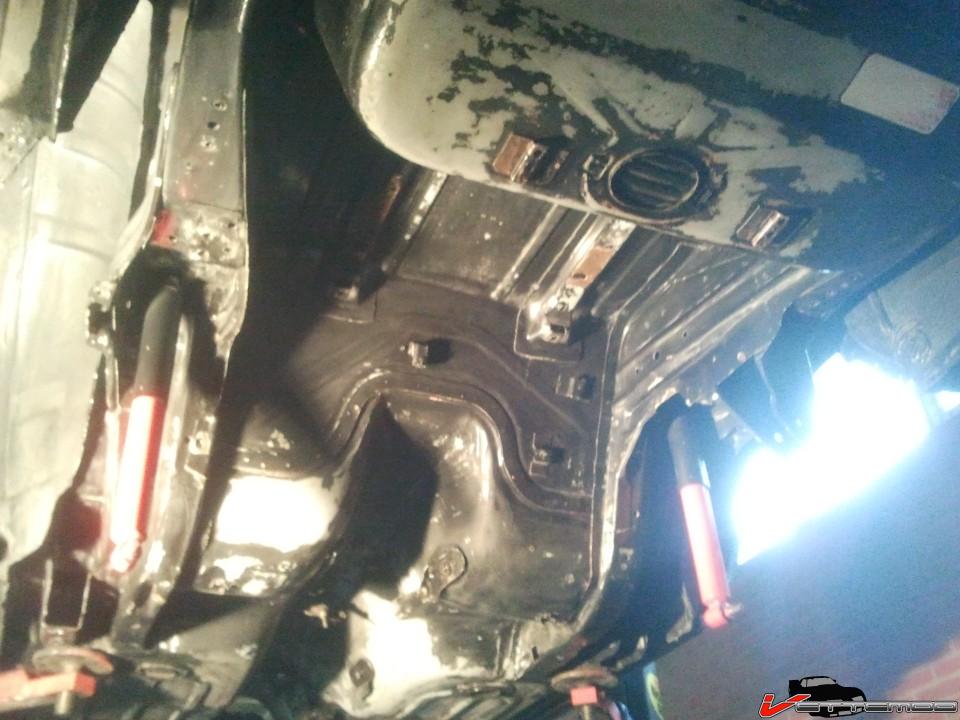
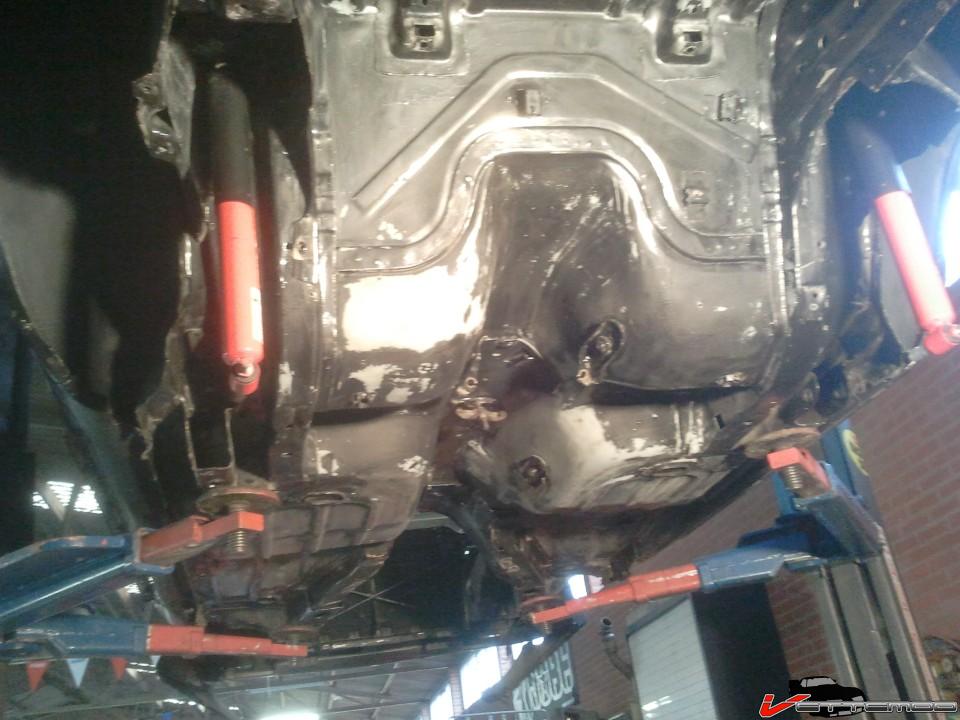
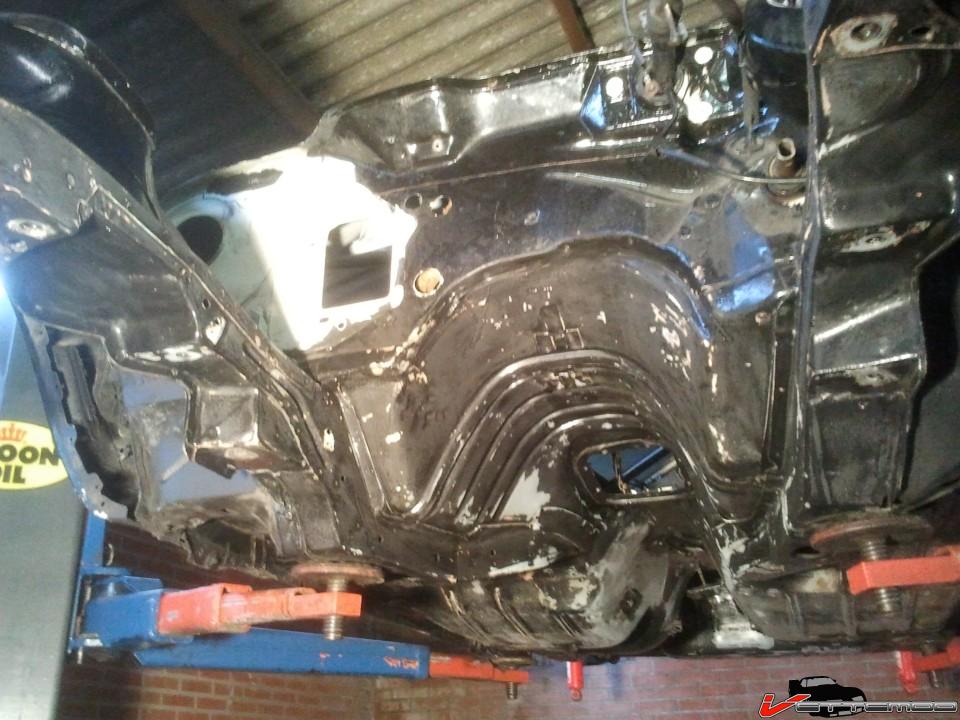
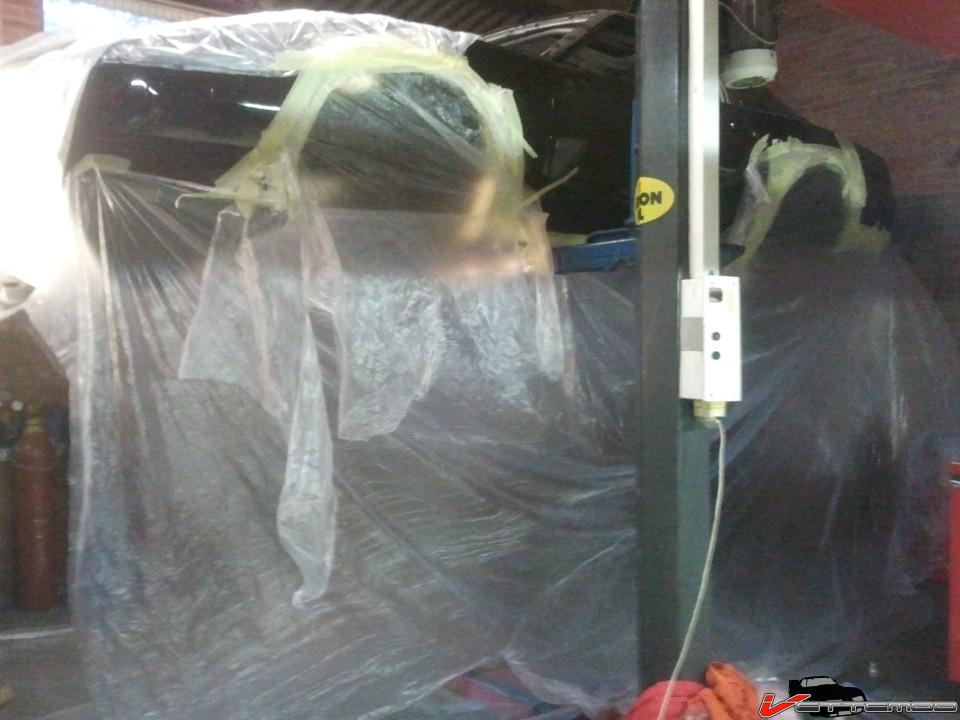
but, after the new engine & trans were installed i decided to go all out and have it restored/customized, i recently have had a roll cage welded in to keep that wobbly targa body straight and now it is being prepped for a HOK candy paint job, it will get new gm weatherstripping, a new windshield and sidewindows as well and most likely a custom spoiler based on the original rubber wrap around (i know you americans don't like that, lol), i've also gotten the stuff i need for a 4th gen dash swap and will probably get some nice recaro or konig seats. i'm also looking into an airride system to safely pass those wretched speed bumbs we have over here, but that will probably be delayed until next winter
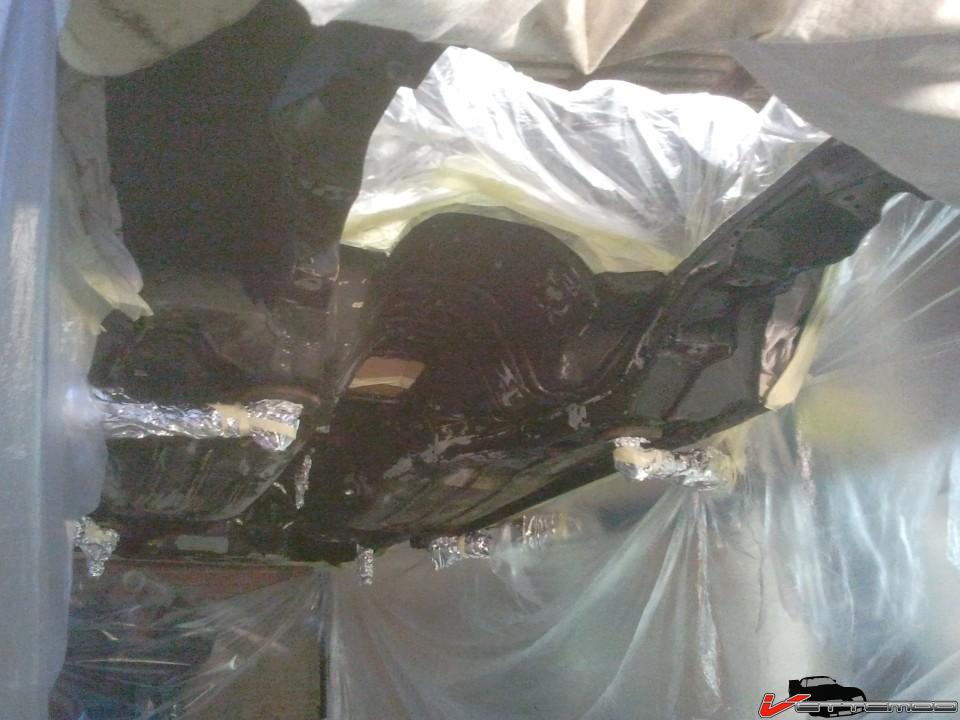
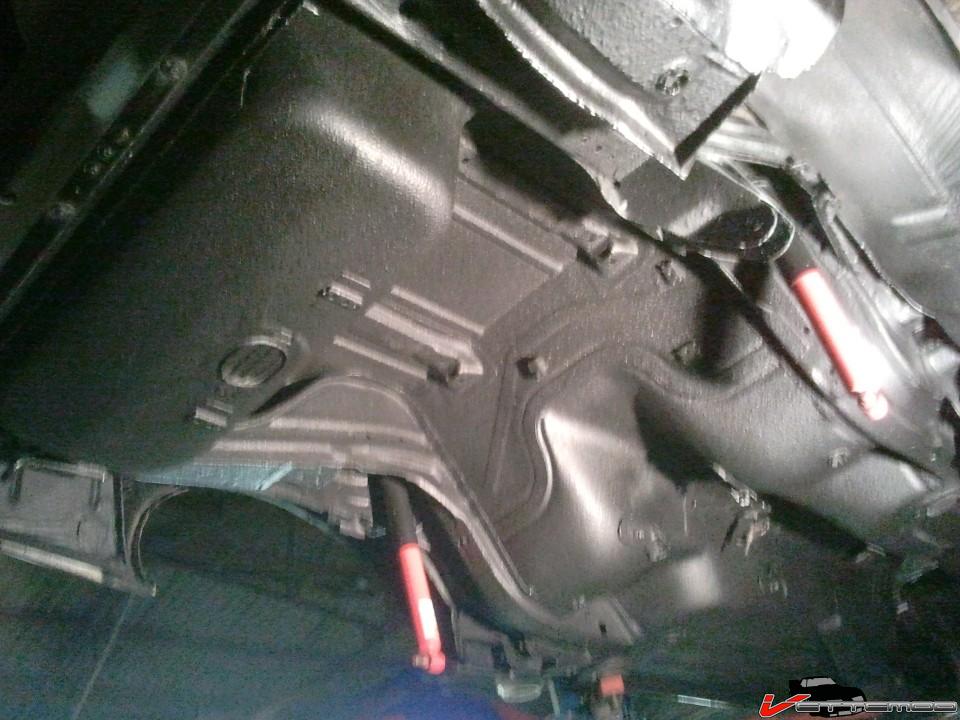
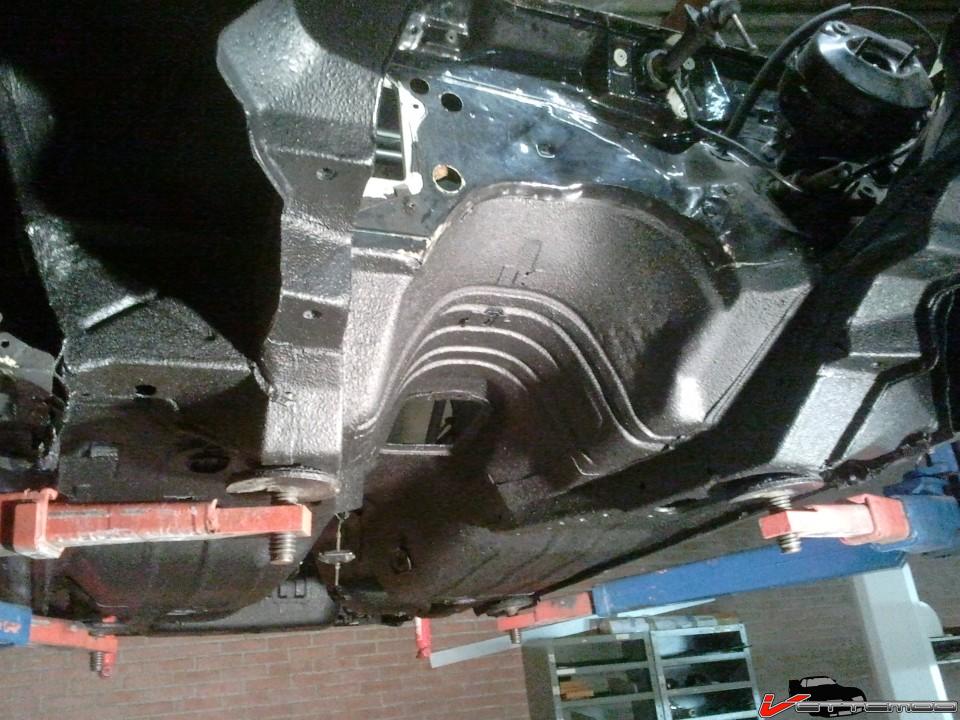
some pics of how it's looking now;


some specs;
� TKO trans (supposed to be a 500, but probably a 3550, some a-hole here scammed me)
� Centerforce dual friction clutch
� lakewood bellhousing
� new gm performance parts 383 stroker block, 1 p. rms, 4 bolt
� Eagle 4340 forged rotating assembly with Probe forged pistons
� Clevite main and rod bearings
� Moroso high volume oil pump
� Milodon stroker oil pan, windage tray
� Comp cams Solid Roller Cam (lift int.577 exh.583, duration int.248 exh.254)
� Solid lifters with oil grooves
� Dart pro 1 aluminum heads 230 cc runners 64 cc combustion chambers compr. 10.7:1
� dart single plane intake manifold
� Mighty demon 825 cc carb
� msd pro billet distr.
� alu-waterpump
� Koni shocks (red)
� E-bach springs
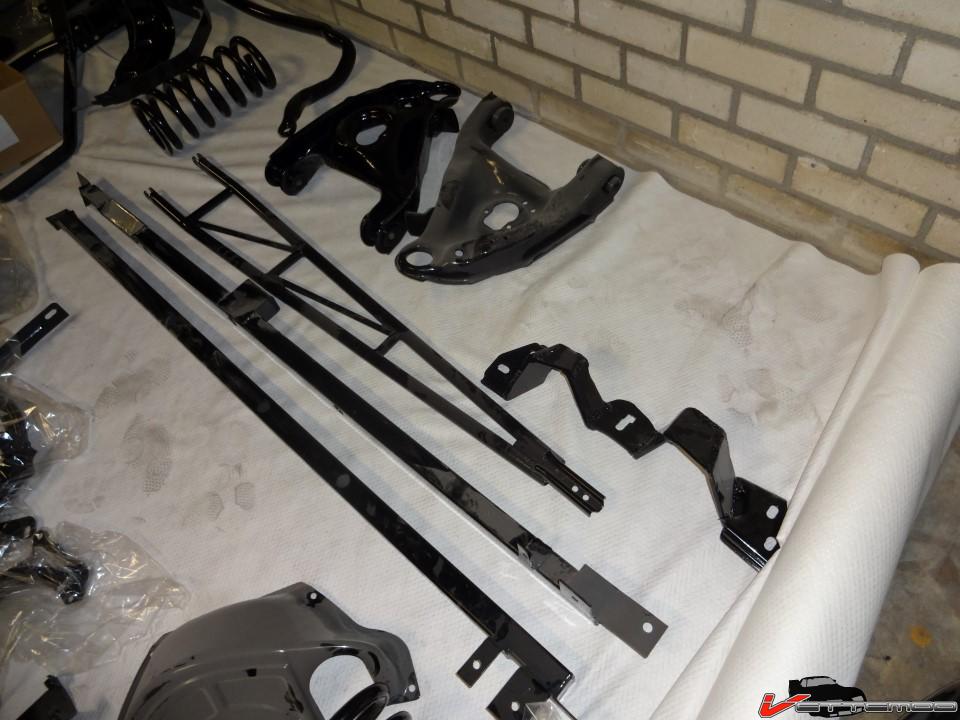
� Frame-connectors
� Full-length headers
� Flow-Master exhaust, 3 inch
� pu bushings
� Summers Brothers rear
i hope i will be able to drive it this summer, but everyone that has done a project (or is having it done, like me) knows nothing ever goes the way it is supposed to
if anyone has a set (or just the left one) of those fine looking '91-'92 gta 2 piece tail lights, plmk
i've been a regular visitor at thirdgen.org's classified boards for quite some time now, but since posts there don't seem to count, i'll be posting some pics here of my project
this is how it looked when i got it;
it looked pretty decent for an old car, but the tpi engine was a revised 350 from a truck and all the power came from a lt1 cam, slightly bigger runners and a larger throttle body, it had great low end torque, but was out of power at 3700 rpm, that way it seemed like i was going really fast because of the kick, but actually i wasn't
so, when i saw rocksiroc's add here for a brand new 383 i decided to ditch the old engine and go for some real power, it was a pain to get it overseas to the netherlands, but well worth it. i've driven it this summer for about 600 miles and i just love the cam that's inside it, it is easy going under 2000 rpm, but really gets going from 3000 to 6500 rpm, just like driving a turbo car but without the actual turbo
but, after the new engine & trans were installed i decided to go all out and have it restored/customized, i recently have had a roll cage welded in to keep that wobbly targa body straight and now it is being prepped for a HOK candy paint job, it will get new gm weatherstripping, a new windshield and sidewindows as well and most likely a custom spoiler based on the original rubber wrap around (i know you americans don't like that, lol), i've also gotten the stuff i need for a 4th gen dash swap and will probably get some nice recaro or konig seats. i'm also looking into an airride system to safely pass those wretched speed bumbs we have over here, but that will probably be delayed until next winter
some pics of how it's looking now;
some specs;
� TKO trans (supposed to be a 500, but probably a 3550, some a-hole here scammed me)
� Centerforce dual friction clutch
� lakewood bellhousing
� new gm performance parts 383 stroker block, 1 p. rms, 4 bolt
� Eagle 4340 forged rotating assembly with Probe forged pistons
� Clevite main and rod bearings
� Moroso high volume oil pump
� Milodon stroker oil pan, windage tray
� Comp cams Solid Roller Cam (lift int.577 exh.583, duration int.248 exh.254)
� Solid lifters with oil grooves
� Dart pro 1 aluminum heads 230 cc runners 64 cc combustion chambers compr. 10.7:1
� dart single plane intake manifold
� Mighty demon 825 cc carb
� msd pro billet distr.
� alu-waterpump
� Koni shocks (red)
� E-bach springs
� Frame-connectors
� Full-length headers
� Flow-Master exhaust, 3 inch
� pu bushings
� Summers Brothers rear
i hope i will be able to drive it this summer, but everyone that has done a project (or is having it done, like me) knows nothing ever goes the way it is supposed to
if anyone has a set (or just the left one) of those fine looking '91-'92 gta 2 piece tail lights, plmk
Last edited by gerrutcamaro; 01-07-2012 at 05:37 AM.
 01-07-2012, 09:14 AM
#2
Senior Member

Join Date: May 2002
Location: Gloucester,England,UK
Posts: 678
Likes: 0
Received 0 Likes
on
0 Posts
Car: '92 RS Camaro
Engine: 406ci D1SC SBC
Transmission: TH400
Axle/Gears: 9" W/Truetrac
Re: Gerrutcamaro's GTA project car
Nice car, I know how it is to do a big project, mines been off the road over 2 years now, still a bit to do 
01-09-2012, 02:28 PM
#4
Senior Member
Join Date: May 2002
Location: Gloucester,England,UK
Posts: 678
Likes: 0
Received 0 Likes
on
0 Posts
Car: '92 RS Camaro
Engine: 406ci D1SC SBC
Transmission: TH400
Axle/Gears: 9" W/Truetrac
Re: Gerrutcamaro's GTA project car
It is the same car, HP is depending on how much boost Im going to use, but would have thought over 700. Its the cost of all the other stuff, like rearend, fuel system etc. which slows it down

Trending Topics
04-14-2013, 06:22 PM
#10
Supreme Member
iTrader: (6)

Join Date: Oct 2006
Location: West of Toronto
Posts: 3,041
Likes: 0
Received 7 Likes
on
7 Posts
Car: 89 IROC
Engine: 305 TPI / ZZ4 cam
Transmission: Stage 2 700R4, LS1 driveshaft
Axle/Gears: Strange 3.42 w/ Auburn
Re: Gerrutcamaro's GTA project car
Looks good so far.
Subscribing...more pics please
Subscribing...more pics please
04-14-2013, 06:27 PM
#11
Re: Gerrutcamaro's GTA project car
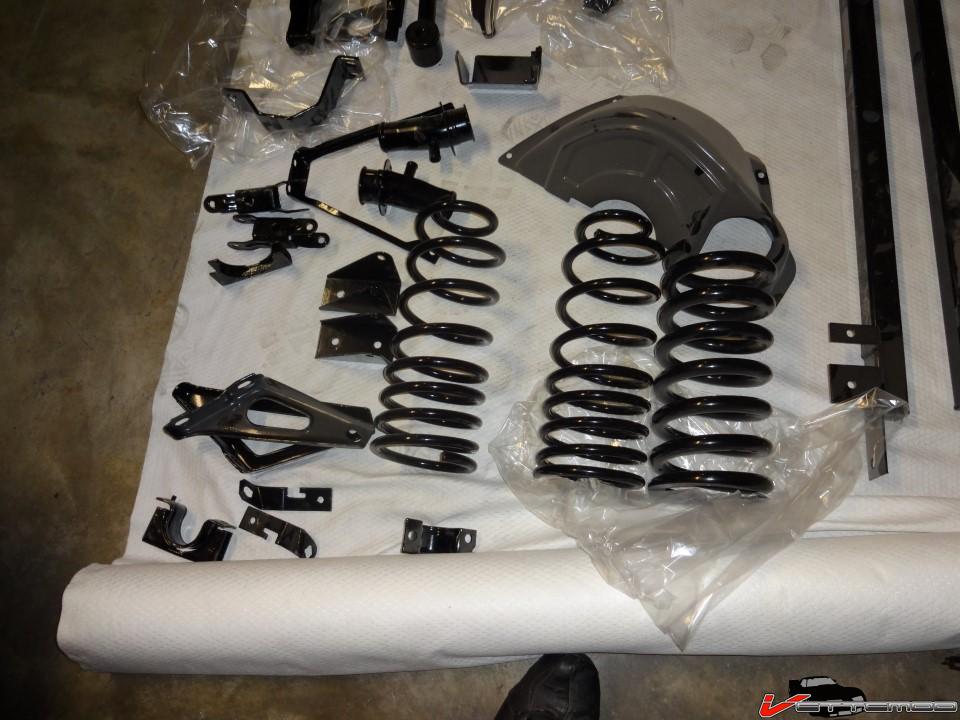
Forgot to take pics, it's a rolling shell now, ready to go to the painters
as it sits now, no front springs installed hence the r3dneck rake. intentionally left the springs out because I still need to get at the motor mounts and I will probably assemble the engine on the front subframe and stick it in from below so there's no chance of messing up the fresh paint job.
IF I have some time left I may roll it back onto the lift and snap some shots


")


 08-04-2014, 10:10 PM
#25
Supreme Member
iTrader: (1)
Join Date: Oct 2008
Location: Charleston SC
Posts: 1,107
Likes: 0
Received 0 Likes
on
0 Posts
Car: 1987 Trans Am GTA
Engine: 350 TPI
Transmission: T56
Axle/Gears: Posi 3:42
Re: Gerrutcamaro's GTA project car
Wow, incredibly done! Excellent, you really must be happy!
08-05-2014, 04:43 AM
#27
Junior Member
Thread Starter
Join Date: Nov 2010
Posts: 13
Likes: 0
Received 0 Likes
on
0 Posts
Re: Gerrutcamaro's GTA project car
yes, i'm very pleased so far, but i haven't seen it in the sun yet & i'm really curious about that
sorry, i don't know, i've left all that up to the painter since he was responsible for the end result and i have not asked about it
sorry, i don't know, i've left all that up to the painter since he was responsible for the end result and i have not asked about it


 03-06-2015, 02:01 PM
#34
Junior Member
Join Date: Nov 2009
Location: Mersea island UK
Posts: 76
Likes: 0
Received 0 Likes
on
0 Posts
Car: 1989 Trans Am GTA
Engine: Procharged 350tpi
Transmission: uprated 700R4
Re: Gerrutcamaro's GTA project car
wow, that is stunning 
love the cage and cowl, not too ott
love the cage and cowl, not too ott

 10-09-2015, 12:54 AM
#36
Re: Gerrutcamaro's GTA project car
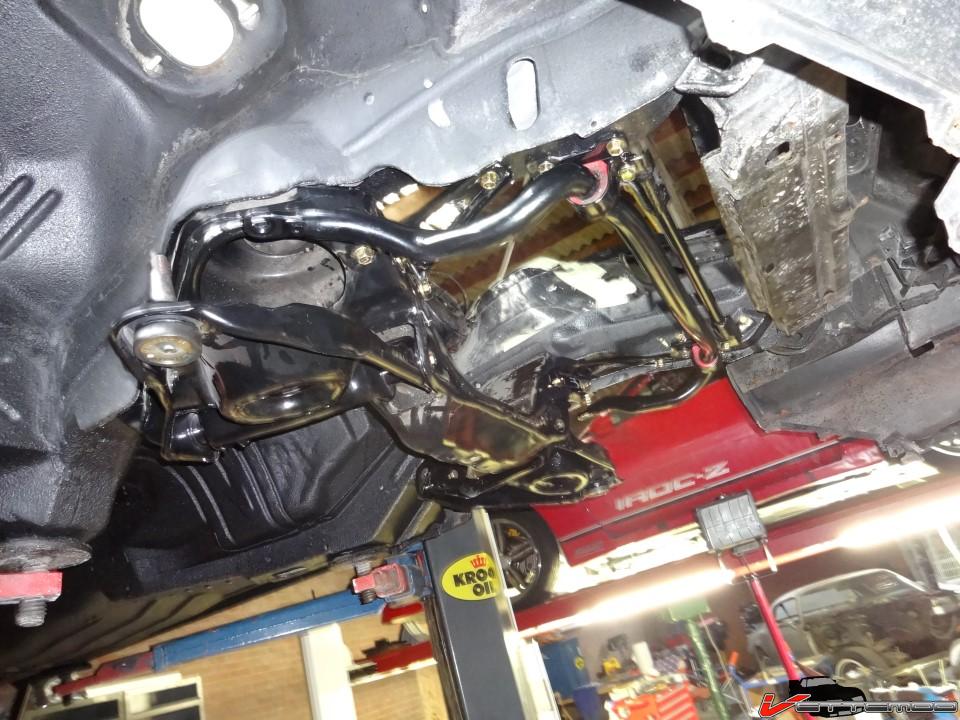
Here's a couple more pics. The whole wiring harness has been gone through and redone. Eliminating everything that is not needed and reqiring it all to use factory fuse holders, factory connectors and as close to factory (clean) wiring as possible. Most of it is still loose in there and needs to be clipped down in the respective holes w/ retainer clips. I like to do it this way for a couple of reasons. Original wiring colors makes it easy for someone else to figure out what's what (on my cars I have used non factory wiring colors since I won't sell them and if I were to I'd have to write a service manual with everything that's been changed from stock). THe whole injection and emissions system has been removed from the harness. Heater converyed to the same high speed blower non AC setup I have on my cars.
This car also got the last of my prototype radiator mounts. I had 3. One is on the black GTA procharged car, the other one (with the flared holes) is on my 87 Procharged Iroc. This one is the same as the one on the GTA apart from some minor details. Custom fan mounts will also be fabricated since it will get a flexalite fual electric setup. Switched off altered factory wiring with staged temp. switches. I should take some new pics sometime soon. ... I will post them here


This car also got the last of my prototype radiator mounts. I had 3. One is on the black GTA procharged car, the other one (with the flared holes) is on my 87 Procharged Iroc. This one is the same as the one on the GTA apart from some minor details. Custom fan mounts will also be fabricated since it will get a flexalite fual electric setup. Switched off altered factory wiring with staged temp. switches. I should take some new pics sometime soon. ... I will post them here
11-05-2015, 11:14 AM
#37
Re: Gerrutcamaro's GTA project car
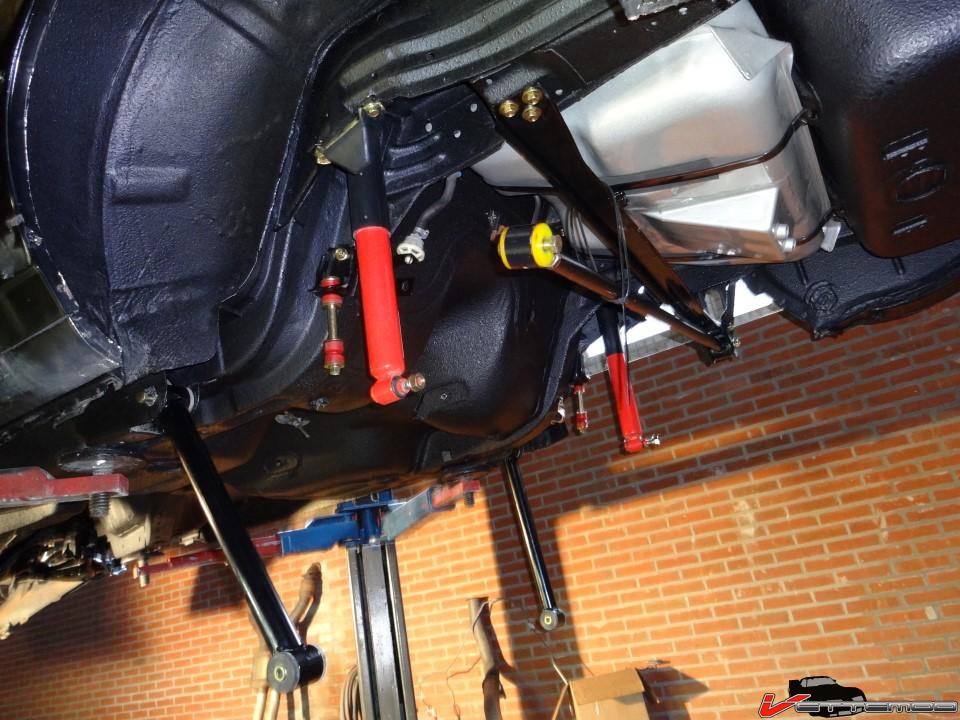
Some more update pics:
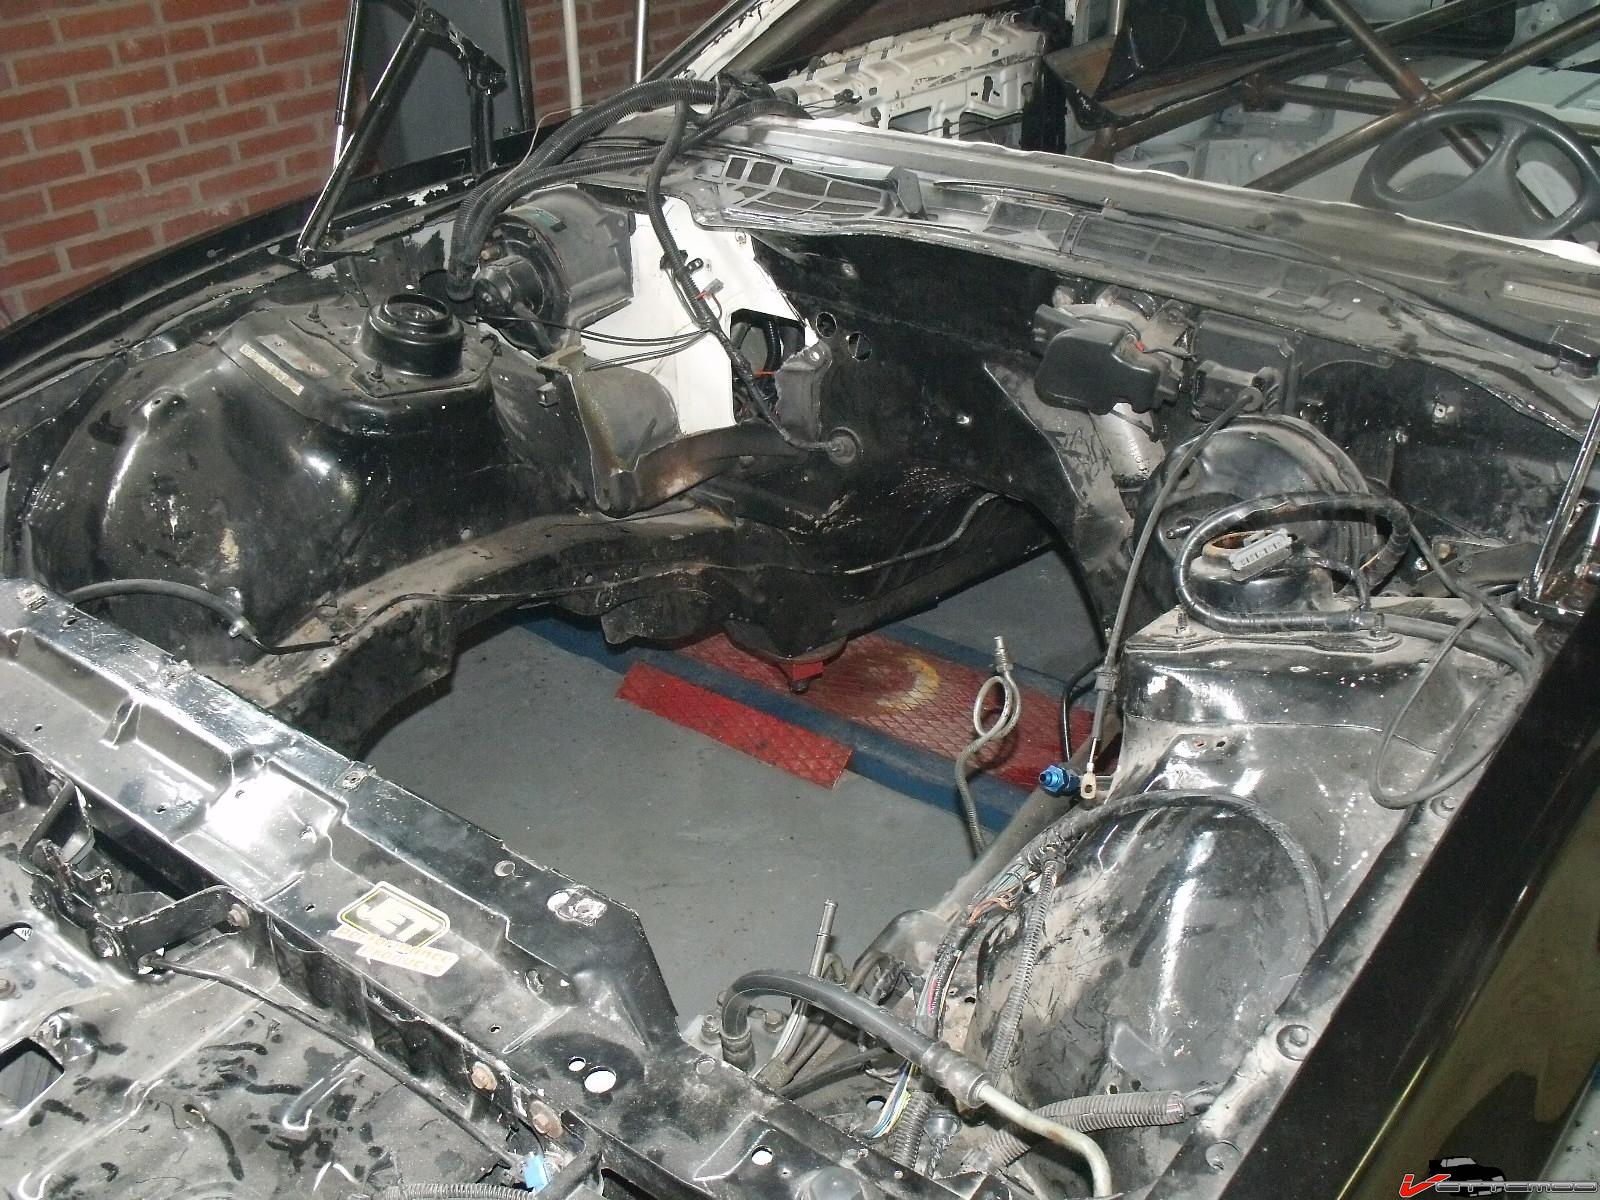
All wiring redone apart from wires for the MSD box, distributor and fans. They just need to be hooked up to these, the rest is all laid out and installed. All custom wiring has been made to OEM specs using OEM connectors and folowing oem wiring as close as possible with some alterations ehre and there. All wiring has been tied down with push in retainers so there's no loose looms anywhere.
Headlamp wiring has also been redone and upgraded to new H4 sockets with flat connectors (old stuff was hacked up) and a lot of wiring was repaired and cut out.

Left over spaghetti

91 92 GTA rear lights installed

Electric fans installed

Canton reservoir looks much better in black


J&M strut mounts, foam added so they do not scratch

Custom boots w/ bump stops


All wiring redone apart from wires for the MSD box, distributor and fans. They just need to be hooked up to these, the rest is all laid out and installed. All custom wiring has been made to OEM specs using OEM connectors and folowing oem wiring as close as possible with some alterations ehre and there. All wiring has been tied down with push in retainers so there's no loose looms anywhere.
Headlamp wiring has also been redone and upgraded to new H4 sockets with flat connectors (old stuff was hacked up) and a lot of wiring was repaired and cut out.
Left over spaghetti
91 92 GTA rear lights installed
Electric fans installed
Canton reservoir looks much better in black
J&M strut mounts, foam added so they do not scratch
Custom boots w/ bump stops
11-05-2015, 11:15 AM
#38
Re: Gerrutcamaro's GTA project car
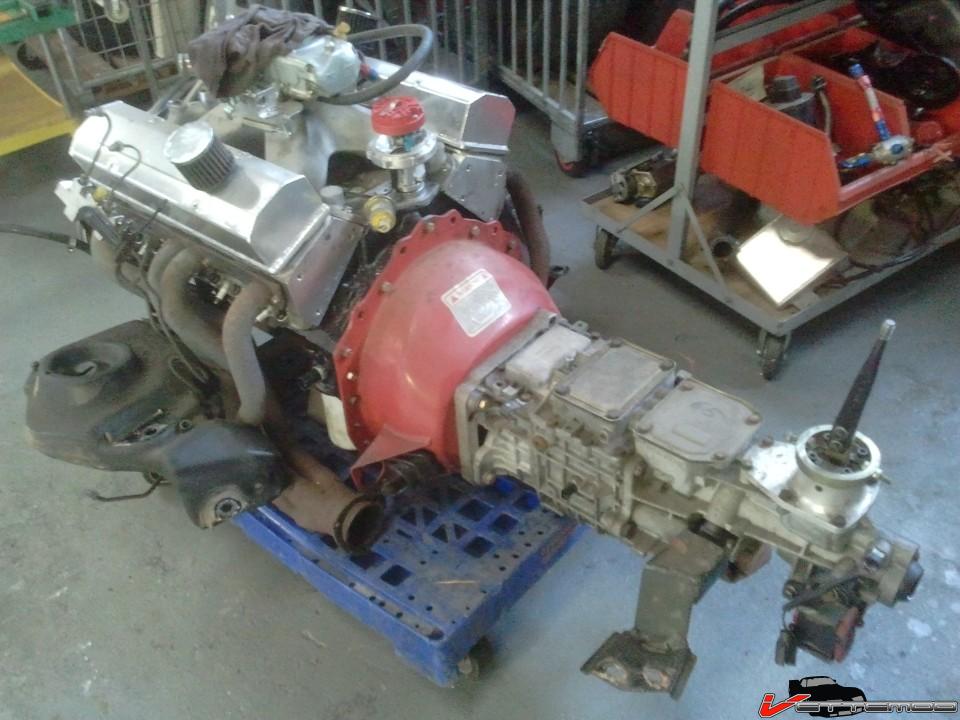
Trans cleaned up


Engine oartially stripped down, headers replaced with these stainless works knockoffs, using Percys dead soft gaskets that actually match the port unlike what came with them. The bolt holes needed massaging also because they were too small allowing 1 bolt on each side not to thread in.


ready to drop in

there she sits


Engine oartially stripped down, headers replaced with these stainless works knockoffs, using Percys dead soft gaskets that actually match the port unlike what came with them. The bolt holes needed massaging also because they were too small allowing 1 bolt on each side not to thread in.
ready to drop in
there she sits
11-05-2015, 11:17 AM
#39
Re: Gerrutcamaro's GTA project car
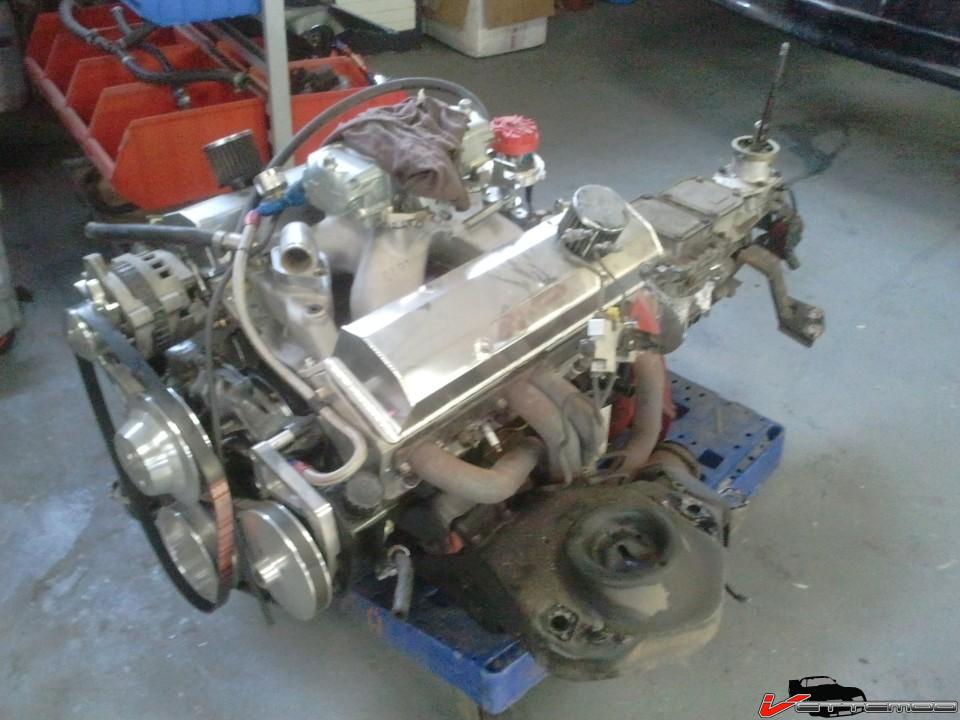
The intake is one of mine, the one that was on there is not ported to 1206 so I'll have to do that. This one is but it's an Edelbrock and it's sized to a 377 SBC w/ AFR heads. I'll modify the dart that was on there and drill and mill it for a rear water port to the heater to cledan up that ugly hose running on the front
11-05-2015, 01:05 PM
#41
Re: Gerrutcamaro's GTA project car
Gerrut,... got a new heater wiring harness, it's installed
More pics..
crappy chinese colletor reducers (2.5") cut off, wil be a tab fastened slip mount system

Billet timing pointer with built in strobe led (has external plug in pickup)

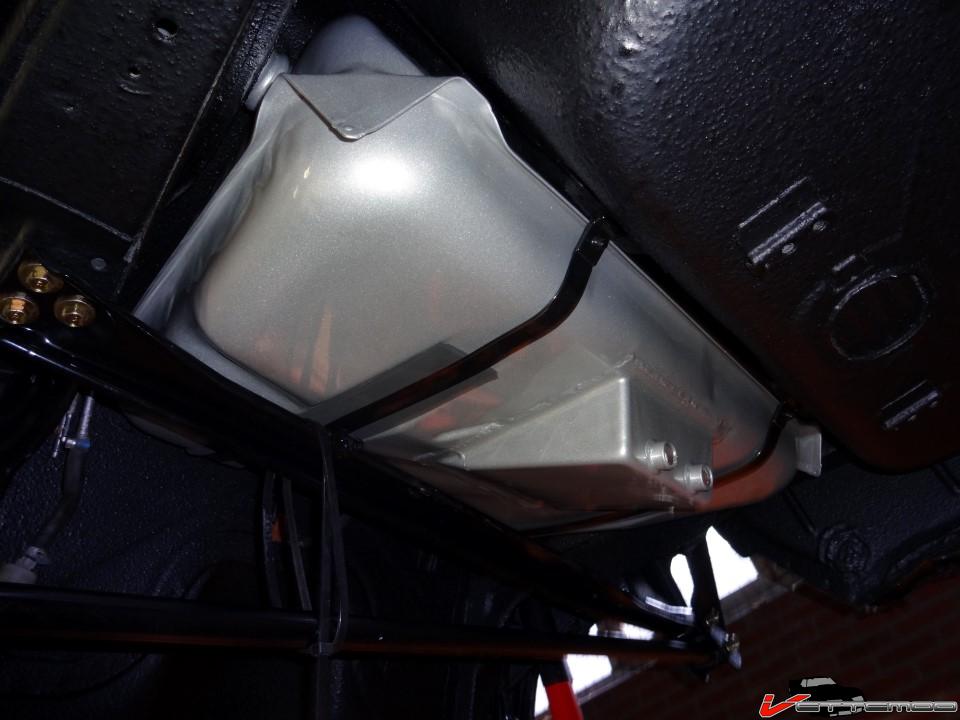
Canton reservoir installed with foam backing (ddi that on more things so they do not rattle and scratch)

front harness all tidy, fastened and using OEM parts. Much better than the heater control wiring that aftermarket stuff comes with (I really like those GM weatherpack relays and use them all the time)

small details like a retainer for the hood release cable. It was long gone but this works just as well

Dash wiring installed as it should be, not with the insulation on top (a lot of stuff was assembled wrong when I got the car back for buildup)

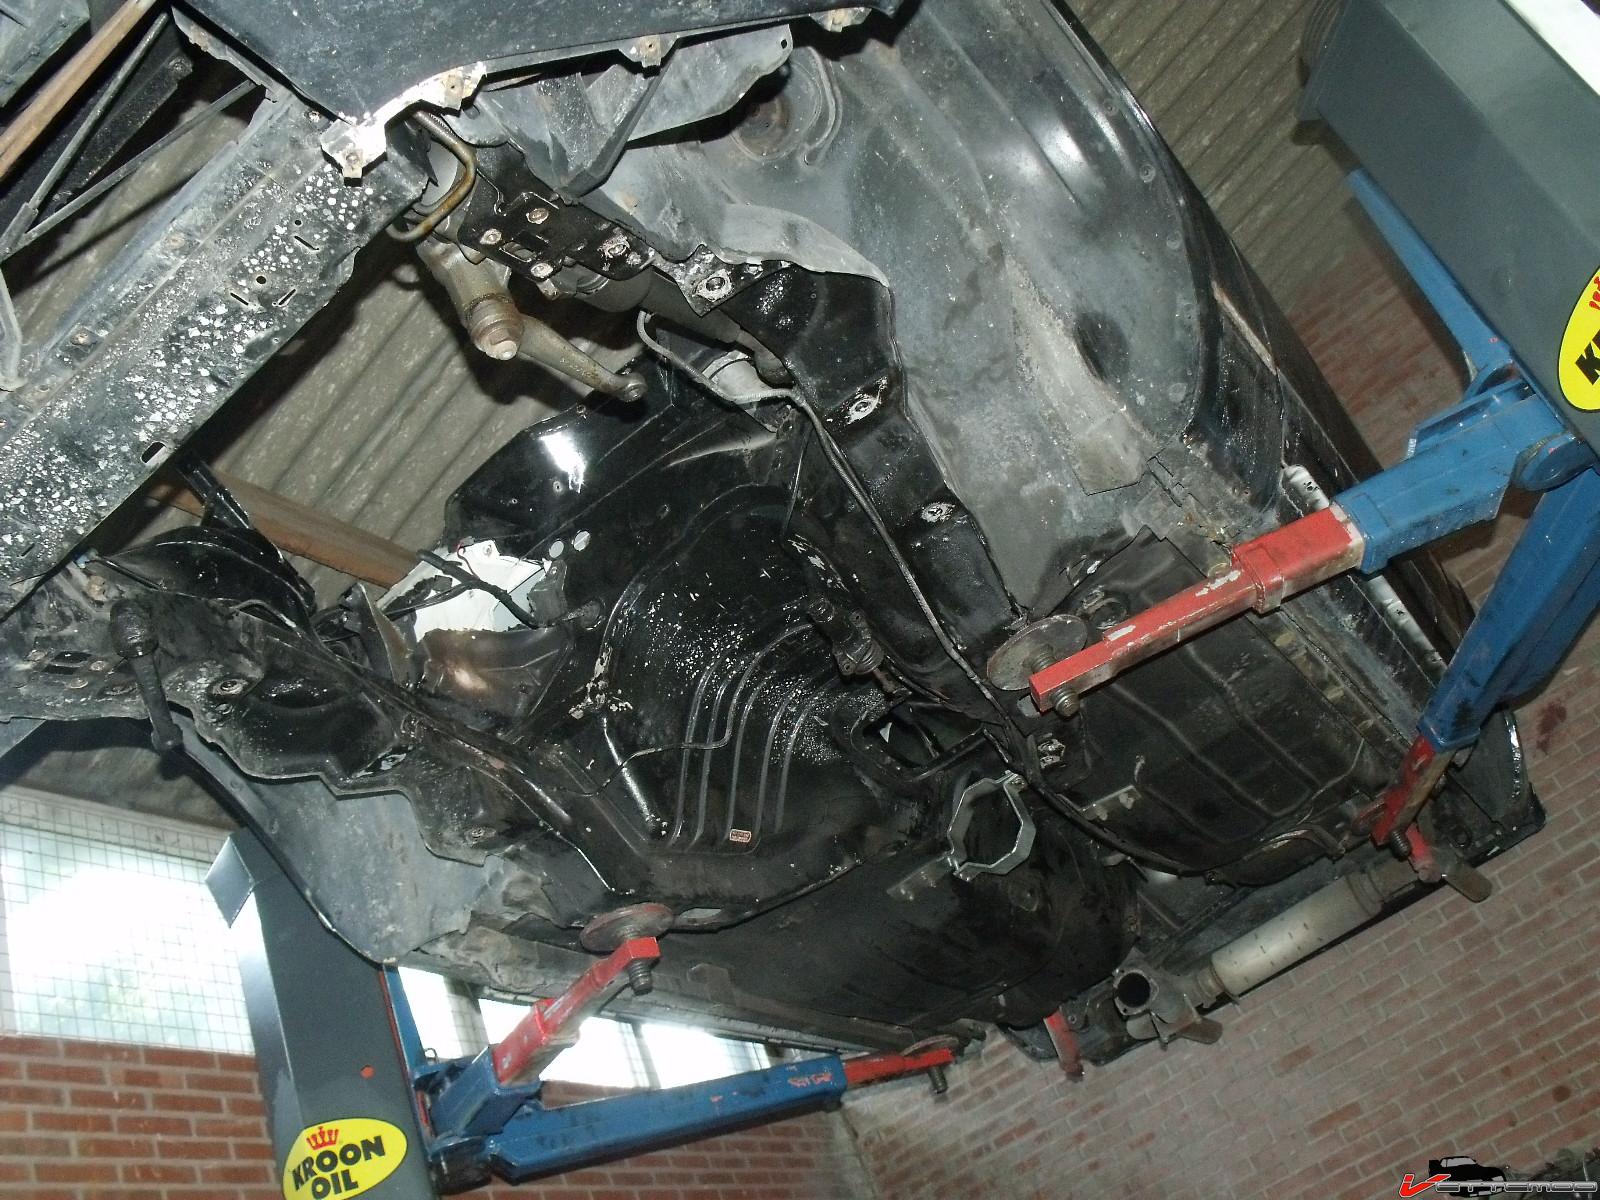
rear harness all laid out...someone forgot the license plate light and harness...ooops (no way I'm taking the bumper off LOL... fixed it by cutting the harness and sodlering back together)

rear compartment and pull down motor wiring, all back to how it should be, the relay hung on a retainer clip and all wires in their proper location and ground wires screwed down.

These light sockets were both messed up. Someone put a new wire on the otuside using masking tape and furhter down a luster terminal ( ) I repaired them by removing the spades and soldering in new wires:


done:

More pics..
crappy chinese colletor reducers (2.5") cut off, wil be a tab fastened slip mount system
Billet timing pointer with built in strobe led (has external plug in pickup)
Canton reservoir installed with foam backing (ddi that on more things so they do not rattle and scratch)
front harness all tidy, fastened and using OEM parts. Much better than the heater control wiring that aftermarket stuff comes with (I really like those GM weatherpack relays and use them all the time)
small details like a retainer for the hood release cable. It was long gone but this works just as well
Dash wiring installed as it should be, not with the insulation on top (a lot of stuff was assembled wrong when I got the car back for buildup)
rear harness all laid out...someone forgot the license plate light and harness...ooops (no way I'm taking the bumper off LOL... fixed it by cutting the harness and sodlering back together)
rear compartment and pull down motor wiring, all back to how it should be, the relay hung on a retainer clip and all wires in their proper location and ground wires screwed down.
These light sockets were both messed up. Someone put a new wire on the otuside using masking tape and furhter down a luster terminal (
) I repaired them by removing the spades and soldering in new wires:done:
11-05-2015, 01:41 PM
#44
Re: Gerrutcamaro's GTA project car
I meant the usual section, not as in normal members and abnormal members. It's here:
https://www.thirdgen.org/forums/members-firebirds/
Third Generation F-Body Message Boards > Tech Boards > Auto Detailing and Appearance > Members Firebirds
https://www.thirdgen.org/forums/members-firebirds/
Third Generation F-Body Message Boards > Tech Boards > Auto Detailing and Appearance > Members Firebirds
 11-09-2015, 09:34 AM
#48
Re: Gerrutcamaro's GTA project car
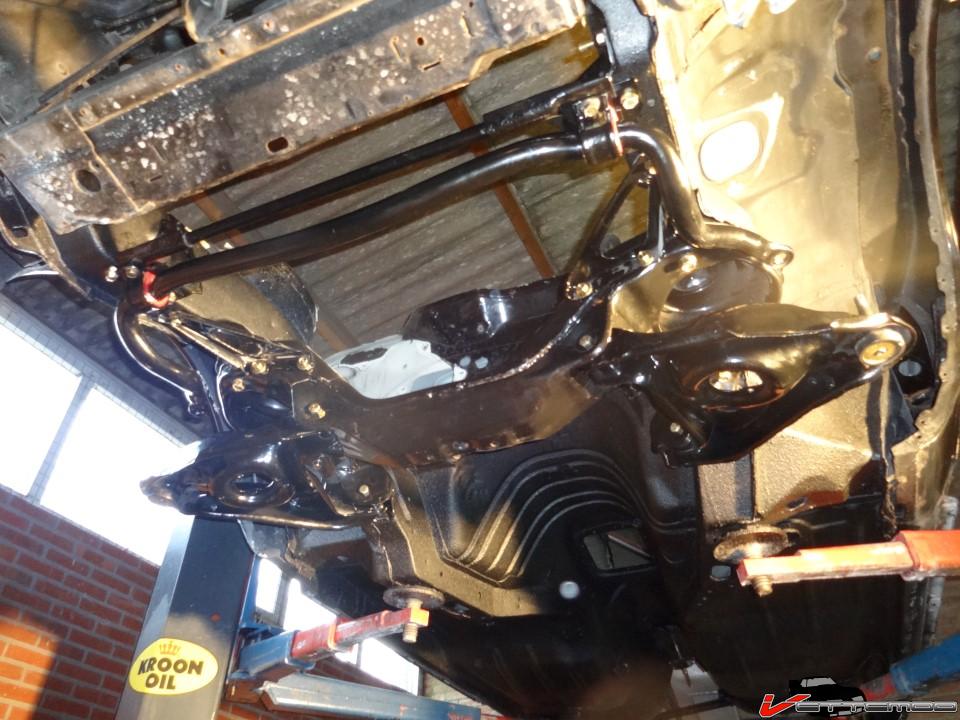
Oh, spoke a little too soon. The starter did not clear, had to machine part off the mounting block

still tight but doable

Also, I did what I do on my cars too. I drill and tap the threads for the trans crossmember to M12 ad use allen heads. Often the threads are stripped or damaged (these were not in tip top shape either)

fresh threads

Done (no I did not fabricate this eyesore of a crossmember. I fricken hate it and in fact, I may even redo it properly if it doesn't allow me to route the exhaust how I want it. This is a hack job not even suited for dixing an old bbq)

Black accessories... black beats shiny every day


still tight but doable
Also, I did what I do on my cars too. I drill and tap the threads for the trans crossmember to M12 ad use allen heads. Often the threads are stripped or damaged (these were not in tip top shape either)
fresh threads
Done (no I did not fabricate this eyesore of a crossmember. I fricken hate it and in fact, I may even redo it properly if it doesn't allow me to route the exhaust how I want it. This is a hack job not even suited for dixing an old bbq)
Black accessories... black beats shiny every day
11-09-2015, 09:41 AM
#49
Re: Gerrutcamaro's GTA project car
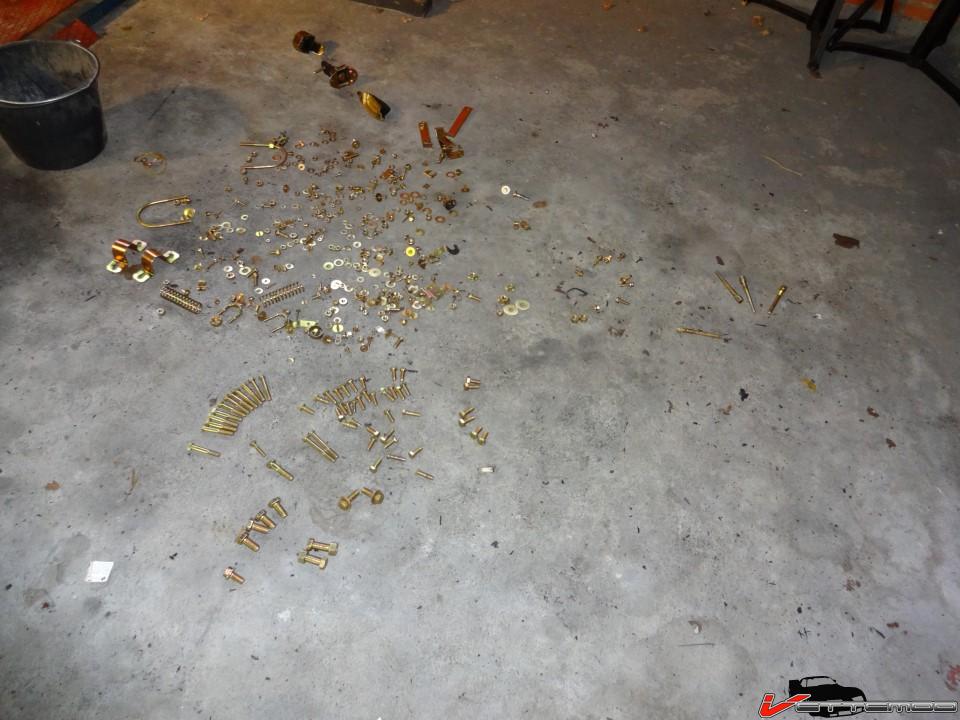
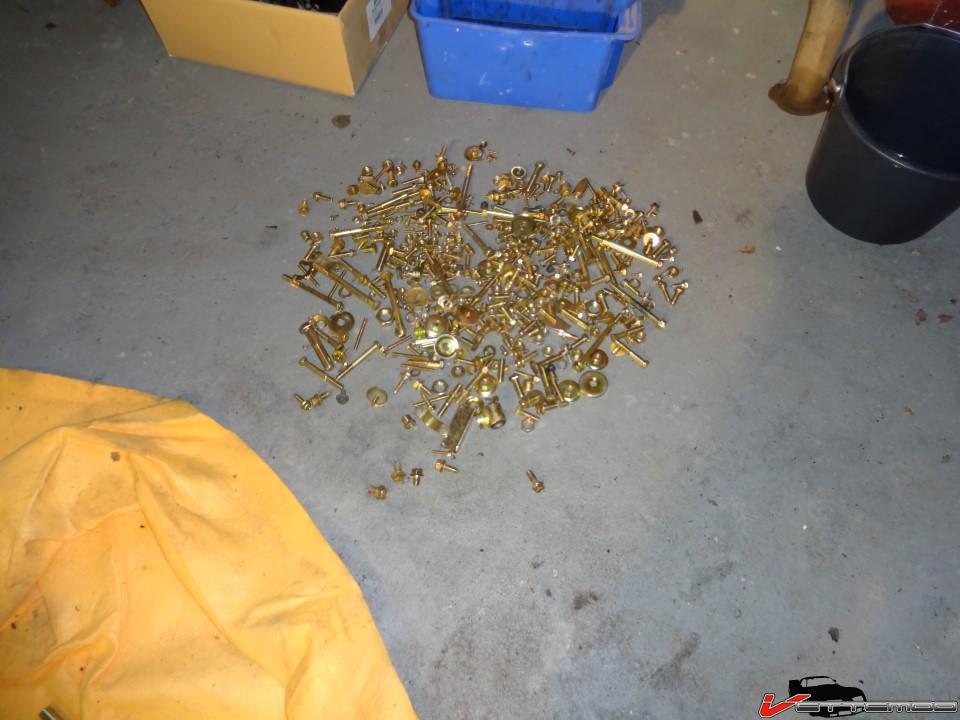
There's a whole bunch of stuff going on with this car that the pics don't show. From loose fasteners, incorrect fasteners, shoddy work and what not. One of the most shocking things I found was the intake matching. I took the thing off because there were some sealing issues with the engine (oil leaking past crank key, non sealing china walls etc) and damn, talk about a mismatch. 1206 on the heads is OK, not perfect but OK. But the intake, sheesh.
heads

intake

These dart manifolds are made to be ported to sized, not to be slapped on. Time to break out the die grinder for sure.
compared to an edelbrock single plane that I did a long long time ago. That one is sized to 1206.

Check out the silicone job someone did on the front pan to timing cover seal. Wanna bet they either have the wrong seal, although it appears to be a fel pro 1pc gasket, or someone cut the 1pc gastket to get the cover off without dropping the pan (one pan bolt was missing, the one hard to get to with the crossmember in the way... just leave it out, no problem...and the others were only had tight).

heads
intake
These dart manifolds are made to be ported to sized, not to be slapped on. Time to break out the die grinder for sure.
compared to an edelbrock single plane that I did a long long time ago. That one is sized to 1206.
Check out the silicone job someone did on the front pan to timing cover seal. Wanna bet they either have the wrong seal, although it appears to be a fel pro 1pc gasket, or someone cut the 1pc gastket to get the cover off without dropping the pan (one pan bolt was missing, the one hard to get to with the crossmember in the way... just leave it out, no problem...and the others were only had tight).
11-10-2015, 08:27 AM
#50
Re: Gerrutcamaro's GTA project car
Some small stuff I fabbed. Coil mount. Still need to finish weld, ran out of argon yet again LOL


and the start of a fuel filter mount (for a fram hpg1 cartridge system)

starting to get there. Last wiring is for the MSD box, the rest is all done

and the start of a fuel filter mount (for a fram hpg1 cartridge system)
starting to get there. Last wiring is for the MSD box, the rest is all done