When you click on links to various merchants on this site and make a purchase, this can result in this site earning a commission. Affiliate programs and affiliations include, but are not limited to, the eBay Partner Network.
I caught f-body fever a while back, and was preparing to pick up a third gen sometime later this year when this car popped up on craigslist for way too much money ($5k). Even better, it was a soggy non-runner that's been sitting for 11 years and had mystery electrical issues, so obviously I had to buy it.
The front wheels don't like to turn so good, but it only took us 2 hours to wrestle the car 45ft onto the trailer after persuading the calipers with a hammer so no big deal. I took these photos the next morning after dragging the trailer out from underneath the car, so this is in absolute beginning condition.
After eliminating the mold with vinegar to make it safe to breathe nearby and briefly checking for fluids (they're all bad), we decided to do the right thing and immediately try to fire up the car. The feller that sold me the car kept a new battery in his garage so we put it in and nothing started smoking so we continued with the investigation. We didn't hear the fuel pump running even with it jumpered at the aldl connector, but I was getting decently pressurized yellow gas coming out of the schrader valve so I decided to turn the key... and nothing happened.
The previous owner replaced the starter trying to fix it, which must have lead to the 'electrical problems' diagnosis. I suspected the VATS system, but my security light was turning off like it was supposed to, so I bypassed the VATS starter enable relay with a jumper wire and it started turning over. The relay was both rusty and oozey, not terribly surprised it isn't working. I decided to crank it for 7-8 seconds and it sputtered to life, but we quickly shut it off because the smog pump was siezed. The catalytic converter is already long gone so I made the decision to just delete the whole air system.
I removed the pump and got a replacement belt. The 96.8" unit was too short for me, the tensioner was almost maxed out, so I used a 99 1/4" belt which works. I think a 99" belt might have been perfect but the tensioner is almost in the same position it was with the smog pump on now. After that the car dialed right to life again, but she's still got the natural linelock on so all it will do is dig holes with the rear tires at the moment.
It's been raining nonstop since so that's where I'm at with the car right now. I'll post updates as I make some progress. More parts arrive next week.
Welcome aboard! Your post sounds like it was written by Derek from Vice Grip Garage on YouTube. You have the same sense of humor. Look forward to the build.
Welcome aboard! Your post sounds like it was written by Derek from Vice Grip Garage on YouTube. You have the same sense of humor. Look forward to the build.
Thanks, Derek and Roadkill Garage are sorta what pushed me over the edge to get back into turning wrenches.
Minor update: I took some hot tips from the rallycross folks and used absolutely the right equipment to get a solid, level platform:
Relentlessly hammered the calipers off of the rotors, as you can see they were once in brand new condition. The pads were almost at new thickness, rotors have no gouges or scuffs. I'm guessing this car was in great shape in about '09 or so, which correlates with the year it got a fresh set of BFG T/As. I lubed up the slide pins, I think one of the driver's side spindle threads got stripped at one point as the bolts didn't match on this side and now the top one spins free although it's kinda also on there? I'm looking for reduced clampalation so we're gonna give that a pass for now as I'm really only looking at getting this car movable so I can nose it into my tiny garage.
Bearings look really good on the driver's side though. Didn't bother to pull the passenger side since I saw this over here:
We've got free spinnage on both fronts now. I sorta kinda completely crushed and cracked a brake pad using an impact driver on a large c-clamp to cram the pistons back into the calipers. Not sure they're gonna come back around. Also sucked the nasty brown brake fluid out of the reservoir and scrubbed out the sediment. Couldn't get the calipers to self-bleed with 20psi of vacuum, but they did weep a sorta thick brown orange sludge. Probably racing fluid, so that's good to go.
Will the calipers slide around now? Or did I just waste my time? Either way I bought myself a single brake activation. Currently plotting my orders of operations to get it self-moved from this location before the rear diff digs into the gravel. I wonder if the e-brake works? Something gives tension when it's pulled. Not sure.
I brought the car down and used a hand pump to get 2-3 gallons of yellow gas out of the tank which I distributed across the empty fuel jugs around the property. I put in 4 gallons of premium and a bottle of Lucas fuel conditioner. It fired back up, CEL came back on.
I put it in gear with the ebrake on. The ebrake isn't strong enough to hold the car back at idle in gear, but it kinda puts it in 'low-range mode' so I left it on and creeped the car towards the garage. Brakes went all the way to the floor not once but twice, I slammed it back into park to get the car to stop moving. After pumping the brakes a little, I decided to try some reverse action and it seems to be able to move and stop itself multiple times. Next up is to get the car up on jackstands on top of concrete, and drain the gassy old oil, delete the rest of the air system, and maybe change the spark plug wires as I guess one of them is arcing on the frame or something.
Drained the old oil out today. Smelled gassy and was fairly dark / thick. Had a not rounded off drain plug which I thought was unusual, and a very resistant to moving NAPA Gold oil filter. I replaced it with an Oreilly's special 5w-30 high mileage and a junky microguard filter, largely because they were the cheapest and on sale. A peek down the filler hole revealed a nice clean steel color so it seems like it was maintained. I did buy it from a professional diesel mechanic so that doesn't surprise me terribly.
Noticed it was low on coolant (foreboding) so I topped it off. When I pulled it back out of the garage, there was a small puddle of coolant for me on the ground. I took a look at it while it was running, and I hadn't tightened down the crusty hose clamp to the for the coolant hose on the intake when I shifted it back to get it off from riding the belt (PO had it on too far down the neck, past the stopper even). Tightened that up and didn't notice any other crazy leaks. Some smoke, but not a lot of smoke. I did hose down the AIR system with PB Blaster recently.
I took the car on its very first powered voyage in over 10 years, just down the street and back. It shifts into 2nd smoothly, instant throttle response, no check engine light. Oil pressure is about 4200psi according to the gauge, probably not accurate. Other than that all the gauges appear to be working. Heater works, heater fan probably has some fun friends inside it. Radio is dead. Ancient radar detector is dead. Smells like a greasy old third gen, very cool.
Brought it back home, idles really smooth. Popped the hood and I've got a pinhole coolant leak absolutely ejecting 4" straight into the air out from between the back of the manifold to head area. So it looks like I'm taking the intake off.
Overall though it's running great and seems to be almost entirely roadworthy. I think the front calipers are still dragging a tad, but they're coming around maybe.
Well fellers, I'm not sure of the RPO code on this one, but I got the self-healing headliner.
Arrival day:
Today, untouched. Only thing I've been doing is a damprid canister sitting on the floor and wiping the moisture off the windows whenever they're fogged:
I showed my buddy the pics and he mentioned he tucked it up when we were getting it running, so case closed on the phantom headliner. It did shrink up as it dried out, it seems.
I had 5/8ths success with the AIR tube delete. 2 bolts fully stripped, one broke the threads off in the manifold. Heated up the tips I brutally hacksawed off and clamped them with pliers. They leak, pretty substantially. Maybe needs more fire and clamping. Snapped the nut off the threads on the manifold that holds the a/c brace rod but it's still got the one on the a/c pump itself so that's fine. The original plug wires crumbled to dust, the new AC Delco plug wires came with dielectric grease so I used it. Probably does something. Fires immediately and idles smooth, and the passenger power mirror came back to life.
Started the teardown of the TPI today, the speed gods blessed me with anti-seize on the runner bolts and they all slid out easy. I did have a couple casualties, the plastic heater core valve thing completely busted off in the hose that goes to the throttle body. I didn't think I was really ripping on it, it looked kinda crushed in the hose so I'm guessing it was compromised from the beginning. Also have some brittle cracking vacuum hoses that go to the back of the plenum, gonna have to replace on those.
Now I could drink a beer with this fella, and it did actually come out fine with a flathead screwdriver, but I think this might be a little too bubba for even my low standards.
Distributor is Chevy racing orange, probly a factory race unit.
Mine is in the same shape right now, I�m tearing down my TPI to change manifold out. That PO was inventive with the improvised screw head. At every bolt you just pray it doesn�t snap lol.
My distributor was racing orange like that before I replaced it, I couldn�t believe it even worked.
The past two weeks haven't been very exciting. A lot of cleaning and ordering stuff. It's coming together, hoping to get the lower manifold off tomorrow.
The rethreading station. Vise was free! It's practically brand new.
We're going to find out if this was a good idea or not.
My black POR15 turned into a solid unit, so I cracked open a can of silver I bought in 2008. Still good. That extra little bit bolted on top is part of the 3 piece upper alt mount. She's custom.
I used that same bolt kit and it worked out pretty well but went top of the line with a $35 harbor freight tap and die set which was worth it�s weight in gold.
Your TPI set up looks spotless, nice work!
Once you get the base off and need to reseal the China walls try the right stuff 90 min, it did the trick there and on the water ports.
The scrubpocalypse continues. A guy could really use a media blasting setup right about now, but scrubbing by hand will have to suffice. Intake was pretty gnarly when I started:
I think my grease had grease on it. Red rtv was used last time, I guess this is why the oil control rtv is important:
This was the leaking zone. Not the best photo but there wasn't a clearly identifiable leak zone, it was all just crusty gunk:
This is where I'm at now. It might have to be good enough, a guy doesn't want that engine opened up sitting outside for too long. The clever observer will notice the ratchet strap holding my chair together. Only the finest equipment for me.
Well, I got updates. Put everything back together and it fired up after a couple cranks, got my fuel pressure at about 45psi, idle was smooth and it revved quick. Had a drip coming out of a heater hose connection so I shut it off, tightened up the hose clamp, checked for leaks and didn't find any others.
Went back to fire it up again, just cranked and cranked, no firing and no SES light. Shortly after, no security light, and no cranking anymore. I get buzzers, headlights, interior fans, power locks. No blown fuses in the fuse block, convenience panel, or the one next to the battery. Maybe I blew a fusible link? Not sure. Jumpering the ecu doesn't flash the light anymore so I'm guessing it's not getting power.
Haha, I nearly called on this car when it was for sale but honestly I'm glad I didn't... The craigslist pictures were "optimistic". Super awesome to watch the process of bringing it back to life. It deserves to be saved.
Haha, I nearly called on this car when it was for sale but honestly I'm glad I didn't... The craigslist pictures were "optimistic". Super awesome to watch the process of bringing it back to life. It deserves to be saved.
I've washed it twice and claybared the whole car since those photos were taken. A lot of the green and grunge did come right off but I'm saving those updates for the surprise reveal after I buff the paint. Lots of rust bubbles on the hood but it'll be a sharp 10 footer.
What I like about this car is that it's not low miles enough, and not clean enough that I'll feel bad about slinging rubber up the backsides, chopping a hole under the battery for a 4th gen overflow tank, deleting the AIR system, etc.
I continue to do little things on it every day, waiting on my science box to be delivered so I can completely bypass VATS and (hopefully) finally let the smoke out of these poor tires.
Here's the engine as it is now, somewhat presentable:
I'll be dipped if I didn't find another key behind the license plate:
Took a trip to the junkyard today, the third gen they got on April 5 was already gone so it was a bust. Stay tuned!
Can't wait to see the pictures of the refreshed exterior. It's right at the perfect nexus of still nice enough to be cool but not so nice that you're afraid to use it like it was meant to be used.
If you're interested in connecting with some local thirdgen enthusiasts, as much as it pains me to say, Facebook is the best way. There's a group called "NW Third Gens" that's been fairly active.
I joined NW Third Gens, it would be fun to do a meetup someday.
Electrical diagnostics continue, no root cause yet for lack of dash lightage. Took a break from that today to mend my seat while I had it out. Not a perfect job, but lots of material was missing and this should slow down further foam erosion.
The damage:
Foam inserted to cover metal parts, glued it in with Super 77:
I used a double needle blind stitch technique. Technically this can be pulled tight and be practically invisible in the right application but I think I was missing a bit too much material:
I'm back with some exciting news. Basically since I got the TPI reinstalled, I had been chasing down a no start / poor running issue. I think my VATS died which was part of the problem, bypassed that with a square wave generator bit but I couldn't figure out why it was barely running until I started poking around behind the fuse box and:
It was packed full of gunk. I cleaned it out with a pick, compressed air and vacuum combo, then hosed it in crc electrical cleaner. Around the same time I also swapped out that negative battery terminal for a new AC Delco unit. Tried the key again, got no fuel pressure, gave the fuse box a squeezy twist, got fuel pumpage, and then she dialed to life:
Running strong, no leaks. I took it on a quick shakedown drive and it didn't do anything too weird, so we're rapidly progressing into the drivability stage. One step closer to getting back on the road.
Been a while since my last update. I wanted my next post to be a successful road test with a shiny car, but we aren't there yet. After getting the car running, it had a hot start issue. Would just crank and crank, but from cold it would start every time. I ohmed the injectors, two were out of spec when cold, and got far worse when warm. Sometimes it would run well, other times it kinda stumbled. Turns out I had no less than 3 sets of injectors in the car, 4 22lb/hr injectors with newer part numbers and black seals (probably replacements), 3 22lb/hr injectors with very old part numbers and viton seals (probably original?) two of which were the failing ones, and 1 19lb/hr injector with rust on it.
So I had the intake off again and installed a fresh set of Delphi injectors from Southbay. They are indeed plug and play and the stock ECM likes them just fine. After I got it back together, the oil was a bit gassy from diagnosis and who knows how leaky the old injectors were. Starting was kinda hard when cold, I had 5w30 in it. Swapped that out for some 10w30 and a quart of Lucas oil stabilizer to help out the rings and whatnot, it's starting easier now and running smooth / quiet.
I've done quite a bit of electrical diagnosis, wasn't getting power to Inst Lps, the next steps in that saga I think is to test the light switch, which may indeed be bad considering my low beams, high beams, and fog lights dimly illuminate when the engine is on. I watched them all turn themselves off, then back on once.
Had a moment of sheer victory on the 4th. I can confirm the limited slip diff is still functional, two piles of rubber powder and two big 'ol black lines for 50ft. Tires are from '09, go figure.
Today I was messing around, giving it another warmup to check the transmission fluid. It could use a flush but isn't terrible, maybe slightly overfilled but I wasn't on the flattest of ground. I hooked up the A/C power a while ago, I've been flicking it on and off to see if I could get the clutch to engage. Once I had the A/C on it spun the other fan, that was kinda neat. Power to the A/C compressor was disconnected when I got the car (foreboding). Turned it to Max A/C, and the blower only worked on low and high, so I flicked the blower to high, and suddenly lost all power. It hasn't come back, no fuses blew, but this is the deadest the car has ever been. No power going to the cabin of the car at all now, no crank, no nothing. Haven't done a lot of diagnosis yet, I'm getting power to the alternator.
I've been avoiding the fusible links this whole time because getting under the car is sketchy for me; I can nose a car into my garage for an oil change but it's too small for a car this size to go fully inside, even if it were to be 100% empty so I've been doing all this in my gravel driveway. It looks like I don't have a choice now, I might build some of those wooden wheel stand things and put my jackstands under the front subframe so I can avoid imminent death. Not a day goes by that I don't wish I had a shop to put this thing in.
Glad to see you are making progress, it seems that once you get the electrical gremlins straightened out you will be cruising.
Good call on the Delphi�s as well, I have Bosch 3s and they have been good but I�m glad I have the AFPR to help dial them in. If I knew then what I know now I would�ve spent the extra $ for the Delphi.
Man I hope you get the electrical stuff worked out. I was so happy to hear about the 2 piles of rubber and 50 ft backmarks, then super bummed to hear the car is dead again. Keep at it!
Built some wheel cribs using 18" lengths of 2x4s and 2 1/2" screws. They seem to be working very well, the car is very stable even when I'm pushing and pulling on it. I'd reccomend this method for working on gravel.
Had a look at the fusible links and they're not as hammered as I was expecting, they are still bendy but I think I'm seeing some splits in the 2 red into 1 rust fusible link which I think is related to the blower motor circuit I taxed.
PO said he changed the spark plugs and the starter. Clearly the starter is new, but I've got rusty old Champion and less rusty Autolite plugs in there so apparently he didn't change all of them.
I checked the resistance of all the links, they all were completing a circuit. Hooked them back up. Took a look at the wiring near the battery, turns out it's still bad. Moved the weatherpack connector above the ac hard line to aid in troubleshooting when I hooked the battery back up. I guess maybe a guy should do something about this situation:
The more you look at it, the worse it gets.
Anyway, hooked the battery back up and I was getting juice to the dome light. Shop manual said the next thing to check was is the neutral safety switch, but I tried the key and got starter action, so I guess jiggling the wires around and/or letting it sit for a few days fixed it.
Got a little smoke coming from the back corner of the engine where I had the coolant issue originally, not sure what that's about. Couldn't really see any leaks. Got a pretty smooth idle for an engine with junky spark plugs though.
I am ASKING, not TELLING. Is this an issue? Should there not be a wire to the small terminal (red arrow) on the starter?
And yes, a fair amount of ugliness here. Green arrow, I hate connectors that don't seal well. This may be fine, but I'd change it. I don't like to see electrical tape either. It looks good when you apply it, but quickly gets loose in a hot under-hood environment. There's another patch of it below that arrow. Heat shrink tube is the best answer IMO. Blue arrows, more taped connections/splices, a cut wire dangling in mid-air, and on the far left end (it's hard to tell) that wire looks linked almost to the point of breakage, and maybe corroded? Red arrows...the upper one, when you can see bare copper wire, that's a bad thing. The lower one, I'd say that connector body is very much used up, and in need of replacement.
I'm sure you saw all of these, and probably more. It's a lot, and a PITA, but remember "The journey of a thousand miles begins with a single step". Hopefully you don't have a thousand miles to go, electrically speaking.
I am ASKING, not TELLING. Is this an issue? Should there not be a wire to the small terminal (red arrow) on the starter?
There is a PPL wire connected to another post that is obscured by the larger terminal in that photo. I believe that small terminal is unused in this application but it's something I'll follow up on.
Originally Posted by DynoDave43
And yes, a fair amount of ugliness here... I'm sure you saw all of these, and probably more. It's a lot, and a PITA, but remember "The journey of a thousand miles begins with a single step". Hopefully you don't have a thousand miles to go, electrically speaking.
I appreciate the analysis and advice. I've started hand sketching some diagrammicals and comparing what I have with what the shop manual says I should have. I'd like to return the fans to stock operation and address the nasty wires at the same time. Currently having difficulty figuring out what the LT GRN (?) on the front end of C101 was doing there since they're both snipped. Fog lights? Why do my fogs work though? Well, one does. One was blown, replaced it, I believe it's blown again. Actually... that could be something. Always a fun time with this car.
Anyway, Richard Holdener says all you gotta do is one thing every day. Today I went spelunking in the spare tire wheel well, and I'll be dipped, everything was factree. I took some pics, then cleaned it up and reinstalled the spare tire holder downer screwy bit. Don't need things getting wild back there when I'm shifting into second with my left foot on the brake.
There are some folks parting cars in the For Sale areas of the forum. It would make repairs a lot easier if somebody had an un-hacked harness for the same model/year/engine. That might be asking a lot, but you never know...
There are some folks parting cars in the For Sale areas of the forum. It would make repairs a lot easier if somebody had an un-hacked harness for the same model/year/engine. That might be asking a lot, but you never know...
I think this car would be a good candidate for a full harness replacement. Ideally I'd like to swap to Holley EFI at the same time, so for now I'd like to see if I can get by with making the minimal corrections needed to what's already there.
Finished up the sparkalator replacement today, not too bad of a job with the air tubes gone. Having under car access for the rear plugs is a must, imo.
6 Champions and 2 Autolites came out, all looked ok except #8 so I'm gonna pretend I didn't see that. Car is running good, took it for the typical test drive circuit I've been doing. The gauge reports 240F or InfinityF depending on how hard I press on the gauge cluster. ALDLDroid reports 165F though, which I'm inclined to believe given that there's no bubbling or otherwise unhappiness coming from the radiator. Kinda hearing a slight knock at crankshaft speed. Do still have exhaust leaks somewhere but it's not crazy. Hardwired primary fan sometimes howls pretty wildly, I'll be picking up a new motor on the next parts order, which might be all new front brakes depending on how sticky these get with some heat in them. Stopalation from 30mph seems adequate as-is, I should probably at least bleed the rest of the old fluid out of the lines. Apparently brake fluid isn't supposed to be opaque orange or black.
I think it might be time for insurance and a drive to the gas station.
I made it! After a brief hiccup where I ran out of gas, I put 4 gallons in the tank and didn't get any red flags on the test drive afterwards, so I took the car on actual roads today for the first time.
It was feeling good after filling the tank, so I took it out for a 1.5 mile drive before heading home. Got up to 45mph, it's pretty smooth no real vibrations or craziness at speed. Brakes were vaguely acceptable, I was able to slow to a stop going down a hill from 30mph.
That completes the first real milestone I had for this car, I need to prioritize next steps and what I need to buy. I've got to get the radiator air dam on the car before I do any serious road driving. I'm going to get an infrared thermometer to independently verify engine temps since the gauges are all whacked. I also need to address the hackjob wiring under the hood, and understand why INST LPS isn't getting 12v. All forward lights being dimly lit with engine running has gotta be bad, current suspect is the light switch. I've got a little whispy white smoke coming from around #7 so unfortunately I think the headgaskets are probably toast. I suspect the fuel pump might not be able to deliver full psi under load, all conventional wisdom suggests I shouldn't rely on the old fuel pump so that's two big jobs this car probably needs before it could really be considered reliable / roadworthy.
My final goal for this car is to be faster in the 1/4 than a 392 Scat Pack Challenger, we'll see what it takes to get there. I'd love to just make it to the track, but I think that's looking like a next year goal given the smoke isn't gonna pass tech.
Phase 2 of this project is reliability enhancement. I decided to start with an analysis of the cooling situation, since the evidence of previous owners hackery in this area was strong. First up was the re-addition of the lower radiator air dam. Got me some hardware I matched to existing hardware underneath the car at Home Depot, turns out that existing hardware was also not factree and was punched into a new location after the previous air dam presumably was violently ripped off. All the bolt holes were stripped, so I did the right thing and zip tied it right good:
I'm thinking rivnuts might be able to fix this situation properly.
Next up is tackling the nightmare fan harness. Turns out it's a modular unit, so I liberated it from the car and cut the green wire connecting the secondary fan relay GRN WHT to the primary fan relay GRN WHT. Not really sure if this was how they hot wired the primary to be always on, doesn't seem like that because I thought this was a ground signal activation wire (e.g. it should cause both to fire when one is grounded), except they weren't doing that. Peeled back the rest of the electrical tape:
So at a cost of merely 25% more than buying a brand new harness, I got a Pertronix weatherpack kit so I can fix up the whole car correctly. I've reattached the secondary fan relay to GRN WHT going into C101 there, which should go back to the fan switch in the block. 238F activation is no good for me, so I got the 87 Grand National 208F fan temp switch coming as well.
I believe this guy is S119, did the factory really leave open splices like this?
Also real nice wire management there, whoever was here last couldn't be bothered to tuck the wires back into the harness and just zip tied them to the outside. Fortunately the plastic harness has some memory of where the wires were originally poking out so I should be able to fully recover this situation.
Finished rewiring of the fan harness, here's a very boring but mostly factory looking view of the battery area:
All splices have been heatshrinked, all bad junk has been chopped out. Lost about 2" overall in the harness but there was enough slack that it didn't cause problems. I also replaced the previously hardwired primary fan motor, you can tell it's bad by the way that it is:
Anyway, decided to swap out the coolant temperature switch for a Standard motor products ts-136 unit. It's the OE switch for an '87 Grand National, supposedly comes on at 208f and off at 188f. Manufacturer says on activation occurs between 204-220f but I've had a little difficulty verifying that. Block might still have air trapped in it.
Turns out the oil dipstick crosses directly in front of the switch, can't swing a wrench through it and can't get a socket over it. No problem I say, I'll pull it out. Well, I can't see the hole to put it back in and it might be dirty back there so I better pull the starter first.
Pulling the starter was such a Fun Time I immediately bought a mini starter off summit. Let me tell you fellers, if you don't listen to sofa and drop it snout first, you're gonna have a bad time. So I get that out, and then the dipstick tube is hitting the AC (condenser? Aluminum tubalator thing in the back), so I pull that. No refrigerant left in the lines, big surprise. Finally get the dipstick tube out and can change the switch. Manifold heatshield was preventing a socket from going over it, needed a little persuasion from a screwdriver. I heeded the advice of everyone else who's changed this switch and bought a Pt308 ac delco connector to go back on it. As expected, the old one was half melted and absolutely crumbled off the old switch. Reassembly went easy, I went with a Powermaster 9100 mini starter. Ended up removing the factory installed inner shim and used no top shims. It passed the paperclip test, doesn't sound weird and no apparent marring on the drive gear or flex plate so I guess it's good. Here's a size comparison:
I left it clocked in the position it came out of the box in, seemed to tuck pretty nice. The solenoid ends up being about an inch further away from the original location. There's enough slack in all the lines but I had to unclamp the factory positive battery cable hold down bracket so I could slide it up an inch.
I also was delighted to find out my inspection cover was hitting the flexplate after I set the car down today. It only tried to kill me the one time it shifted on the gravel. Didn't take photos of the cover, but this is the strip I removed from the cover with a 10mm socket for reference:
It's on the inside near the crank where the mounting block from the mini starter pushes on it.
Did a heat soak test on the car today, took a datalog for 33 minutes of runtime. INT is hovering right around 128 and it seems to be running really well. Primary fan activated around 170f (unexpected to me), got the water neck up to 235f via IR thermometer, datalog indicated a max temp of 206f, secondary fan did not activate. I tested both fans, they are recieving power and can spin so the ground signal isn't being sent / hasn't been sent yet. After shutting the car off I had huge bubbles in the overflow but I know the block was partially drained. Rad stayed full so hopefully it's figured itself out and I can refill once it's cooled.
Took the car out for a test rip today, doubled the max distance driven in one session so far. The plastic connector piece in a heater core hose (non-factory piece I think) started weeping and dripped on the manifold (smoke flavor count: 1). Tightened that up, went back out to the main road, decent cloud of billowing smoke from around where I was wildly soaking everything with penetrating oil (smoke count: 2). I'm hoping that's all it was, I turned it off and let it go out and the smoke didn't come back again.
Brakes were starting to feel grabby at this point so we're returning to natural line lock. Did a decent brake stand until the cabin filled with smoke #3 and took her home. The front wheels were too hot to touch and the pads were letting out a little smoke #4.
Temps seemed solid, engine runs nice and quiet when full warm but is a little cold blooded still. Some say TPS and CTS might be related to that, I haven't messed with them yet so it's possible. I'm also curious about how many issues will remain after 100 miles or so, given that I think I've only put like 8 on the car so far.
Here's some freshly cleaned pics, still some haze in the paint from the beltline down but it's essentially clean at this point.
Got new AC Delco Gold brakes in the mail. Should probably stop parking the Jeep next to it so I can stop getting second hand electrical issues.
This car is really starting to come together nicely! Did you need different starter bolts for the mini starter? That is on my radar if/when the current big boy decides to give up the ghost...I just look at that sometimes and wonder how it will come out of there lol
This car is really starting to come together nicely! Did you need different starter bolts for the mini starter? That is on my radar if/when the current big boy decides to give up the ghost...I just look at that sometimes and wonder how it will come out of there lol
I did, but the mini starter came with them. They didn't have knurled areas like the OEM bolts, so I attempted to use the OEM bolts first but they were too wide to fit through the mini starter holes so I just went with the supplied bolts. I bothered to bust out the torque wrench and set them to 30ft/lbs as instructed so I hope it will be ok. Pushing the butt end up towards the block is key in removing the stock starter. For me, it slipped down pretty easily and got minorly hung up on the exhaust, but I was able to slide it past with a screwdriver and light prying.
The Powermaster 9100 seems to spin the engine over at the exact same speed as my freshly replaced stock starter (done by PO as one of the troubleshooting steps before he sold it), I think claims of improved speed on this unit were noticing differences between a worn out starter and a new one.
Thanks! It's fun to be able to drive it.I did, but the mini starter came with them. They didn't have knurled areas like the OEM bolts, so I attempted to use the OEM bolts first but they were too wide to fit through the mini starter holes so I just went with the supplied bolts. I bothered to bust out the torque wrench and set them to 30ft/lbs as instructed so I hope it will be ok. Pushing the butt end up towards the block is key in removing the stock starter. For me, it slipped down pretty easily and got minorly hung up on the exhaust, but I was able to slide it past with a screwdriver and light prying.
The Powermaster 9100 seems to spin the engine over at the exact same speed as my freshly replaced stock starter (done by PO as one of the troubleshooting steps before he sold it), I think claims of improved speed on this unit were noticing differences between a worn out starter and a new one.
Thanks for the tips I will be curious to see if my Magnaflow Y pipe will give me trouble. I always heard the mini starter had a different sound( maybe faster) than the regular sized one as well or that just might be on the LT1 Corvette one so its interesting to hear they seem the same.
My caliper delivery has been delayed (I wish rockauto would tell you where the warehouses are before you ship, NY -> WA seems unnecessary), so I bothered to check out the rear brakes.
They were not really contributing to the braking event. But that's ok because the fronts are always 30% on to compensate.
They made crispy noises as I opened them up. I sprayed penetrating oil on all the parking brake gear, and then ignored the entire assembly. Neat little calipers, metric everything and the slide pins actually felt good after I freed them up.
This thing fell out of one of the calipers, it defeated my shop vac and would not be sucked. Seems evil, so that's fine.
I changed the fluid with my new pneumatic brake fluid exchanger, worked great. It was reddish brown with chunks, so definitely far past overdue. Probably contributed to the pinhole brake line leak I have somewhere in the center of the car, but I'm gonna pretend I didn't see that. We will see if the lubricated slidy bits and fresh fluid will help these come back around.
Finished product for now, didn't want to scrub them hard without asbestos ppe but they are free from debris with a 100% reduction in corpses. Didn't drive on them but I thought I heard new creaking from the rear area and pedal feel is a little more responsive so it can't be worse.
Coated rotors were out of stock when I put in my orders, so I got the AC Delco Silver stuff and a can of VHT Caliper paint, color matched to the car of course.
Hit them with brake clean and 99% rubbing alcohol before spraying.
Worked fine, we'll see how the paint holds up. I'll be doing the calipers as well when they show up.
I've always wanted to try VHT on the hat, and in the fins and outer diameter....basically any place the pads didn't touch. I had good luck with it on an exhaust system some years ago, warding off rust from Michigan winters. I like the idea...hope it works.
Just finished the post-install inspection of the front brakes overhaul, everything looks good, no leaks, no slop in the rotor. Not a lot of drama about doing a brake job, the various guides here on tgo are more than enough. I test fit the hoses to the caliper on the bench and wasn't liking the interaction between the square end in the rounded hole, so I clearanced the ends with a die grinder to ensure a flush, easy fit into the caliper:
Before on left, after on right. Turns out that was a little more than strictly necessary after they were tightened up but there's plenty of material up there so it's not compromised or anything.
Being the type of person to spend six hours troubleshooting a problem to save five minutes of reading the documentation, I tightened the banjo bolts to "pretty tight" on the bench, followed by "a little more" once the calipers were installed. I expected this to leak massively, but it didn't. Turns out the service manual does indeed call for 33 ft lbs on those bolts, which seems like a lot but I guess you do want the compression on those copper washers. I torqued them down to spec during my inspection today, I'd wager they were in the low 20's before.
Here's what two relatively thin coats of VHT caliper paint looks like after one mount / dismount of filthy wheels:
Some of that is dirt, but it does chip off relatively easy. Probably not as good as a coated solution but somewhat better than nothing.
Brakes feel good, pedal is firm and I can lock up the tires with heavy pressure so that's good enough for now. No more dragging calipers trying to melt my wheels, or scary darting in random directions when slowing down. Plus, I have all my wheel studs again so that's one step closer to passing tech inspection.
Still getting smoke behind #8 after an extended cruise (made it all the way into town!). Valve cover might not be sealed properly, also that back centerbolt is stripped. Don't think I did it, but it's what I got. Had a hell of a time trying to get the cover off previously, I'm going to try and remove the last of the air tube junk to try and increase access to that area.
If I can stop the smoke and clamp down the battery, the car should pass tech IF the inspector gives me a pass on the rather janky external trans cooler setup. I might delete on that setup and get the fluid going back through the radiator sooner than later though, as it's just not a good solution as-is.
Having gauges would also be nice, and all of the forward lights always being dimly illuminated is still... concerning.
More progress today, we are now theoretically passing tech inspection. Turns out a 4th gen battery hold down unit works just fine in a 3rd gen. Picked it up when I got the 4th gen overflow tank.
I finally had success removing the passenger valve cover. The secret was to do a couple things; 1. remove the black valve thing from the air system tube, and then bend the tube back. 2. Remove coil to give the wiring harness easy room to move up and out of the way.
Valve cover gasket had a tear in it, I don't think it was on there right. I thought the rearmost cover bolt was stripped, but actually the guide was just bent:
I bent it back easily, cleaned up the gasket channel, and installed nice new fel pro silicone gaskets dry like they said.
Took it out for 20+ minutes of driving, no billowing smoke! Now I have to do the driver's side, but it's not leaking and can wait for tomorrow.
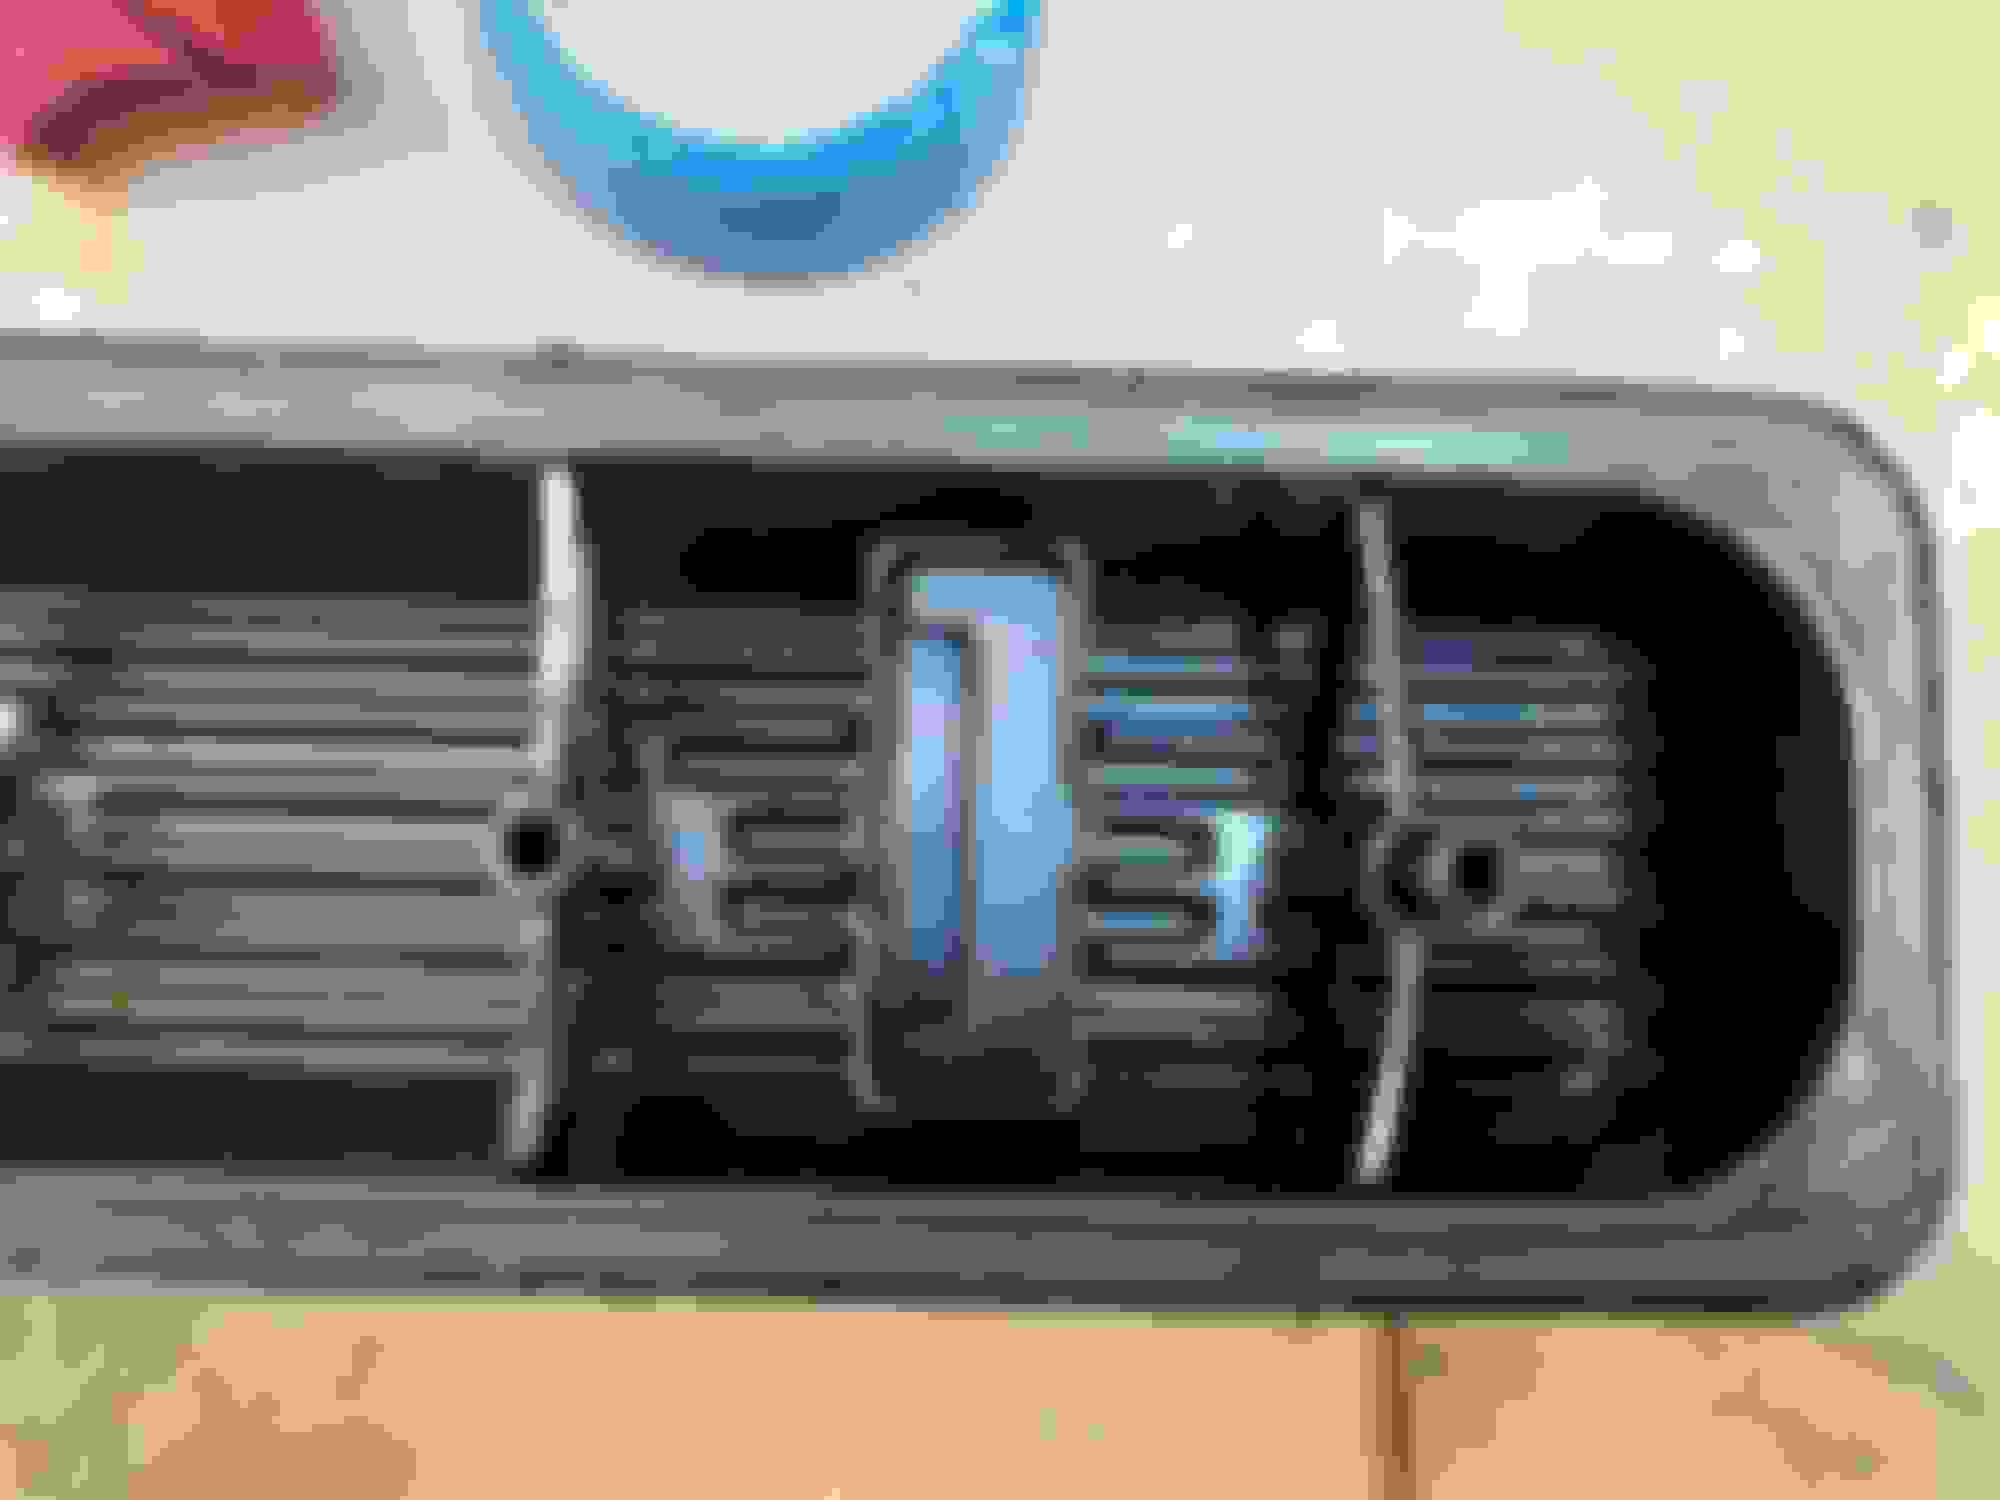
I pulled the cluster, continuing the journey to figure out why it had a stroke and stopped working months ago when I was getting it running after having the intake off for gasket replacement. It was generally crusty:
Pretty obvious water damage. It's almost like the entire cabin was dripping wet when I got it.
So, I got a replacement pcb from Hawks, all new bulbs, and used a dremel wire wheel to clean every electrical connection. I also used some Rustoleum Rust Converter aerosol to clean up the metal cover plate. It's slightly flatter than the oem matte black, but way close enough for how close enough to good looking this car is ever going to be:
Unfortunately, it was not the magic bullet I was hoping it would be. As soon as I pulled the cluster, the headlights were no longer dimly lit with the engine running. I also replaced the headlight switch with a used one from Hawks. No change in functionality but it was $15 and mine was very crusty so no big deal there. The old dimmer output was more of a random voltage generator than a smooth sweep so it wasn't exactly working properly in that sense.
The only new functionality I gained appears to be the brights indicator bulb. Oil pressure gauge doesn't max out anymore but it also doesn't really move. Still no inst lps, no tach, no security or ses light, no fuel gauge (are these gauge needles supposed to be stiff?), no voltmeter. Temp gauge might be working, not sure. It used to kinda just chill at 130f until the engine actually got warm.
I was going to say the headlights aren't on with the engine running anymore, which is partially true, but I fired it back up and caught the brights being dim while the engine was just barely getting going, and it dimmed out to off when the revs dropped. So weird. The gauges themselves could simply be bad, but when I first hooked power up to the car, I did see them operate so I suspect they're being denied a complete circuit.
I'd next look for a bad ground somewhere. Seems like it's getting ground through the head lights? The main grounding point (I think) is behind the engine on the head. Not the best place to get into for sure. Might help the gauge situation too.
There are 3 grounds on the back of the passenger side head, and 2 grounds on the back of the driver's side head. I just hooked mine up today on my 87 that's in the process of a heart transplant.
 02-05-2021, 08:57 PM