Project Procrastination '91Z LS1/T56/currie 9" w/PICS
 11-02-2016, 02:10 PM
#201
Senior Member

Thread Starter
iTrader: (4)
Join Date: Oct 2008
Location: Niles, IL
Posts: 857
Likes: 0
Received 5 Likes
on
4 Posts
Car: '91 LS6/T56/9"
Engine: LS6
Transmission: T56
Axle/Gears: Currie 9"/4.11, detroit truetrac
Re: Project Procrastination '91Z LS1/T56/currie 9" w/PICS
I planned on buying the glass from an install company and doing it myself. Considering it's literally the very last thing you do, I haven't thought that much into it.
 11-03-2016, 07:50 AM
#202
Supreme Member
iTrader: (2)
Join Date: Feb 2005
Location: West Warwick RI, postal code: 02893
Posts: 4,337
Received 55 Likes
on
41 Posts
Car: Building LS3, T56 Z28
Engine: LS3
Transmission: T-56
Axle/Gears: Moser/ 4.11
Re: Project Procrastination '91Z LS1/T56/currie 9" w/PICS
Got it. Thanks for the reply.
I think it will be the last thing I do too. Just haven't pulled mine yet so I was on the fence about if I should do it or not.
I think I will.
I think it will be the last thing I do too. Just haven't pulled mine yet so I was on the fence about if I should do it or not.
I think I will.
11-08-2016, 03:05 PM
#203
Senior Member
Thread Starter
iTrader: (4)
Join Date: Oct 2008
Location: Niles, IL
Posts: 857
Likes: 0
Received 5 Likes
on
4 Posts
Car: '91 LS6/T56/9"
Engine: LS6
Transmission: T56
Axle/Gears: Currie 9"/4.11, detroit truetrac
Re: Project Procrastination '91Z LS1/T56/currie 9" w/PICS
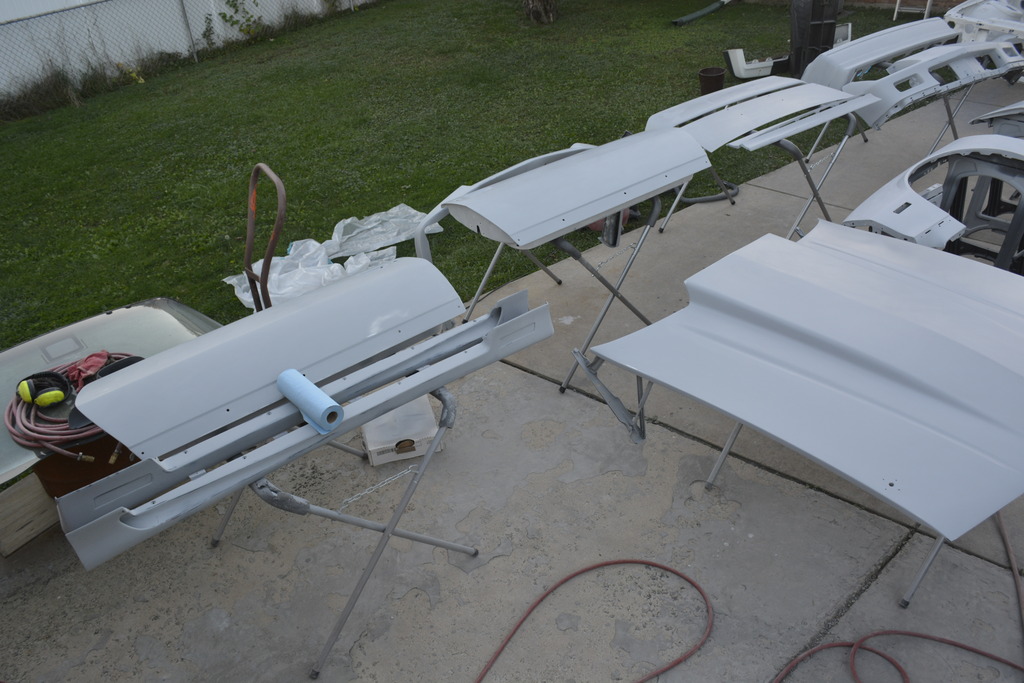
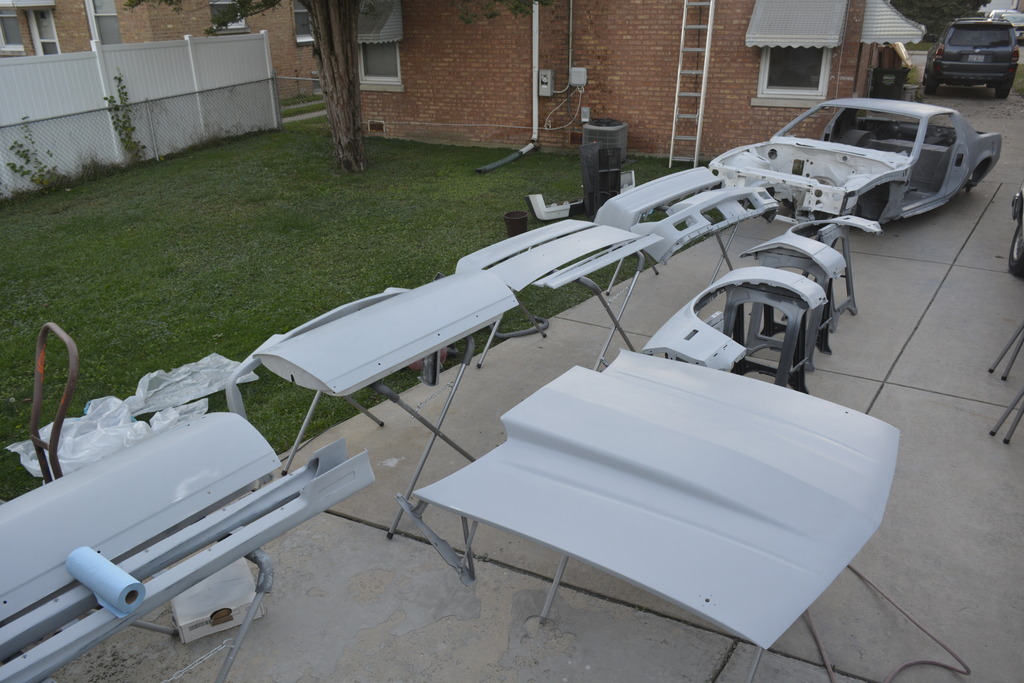
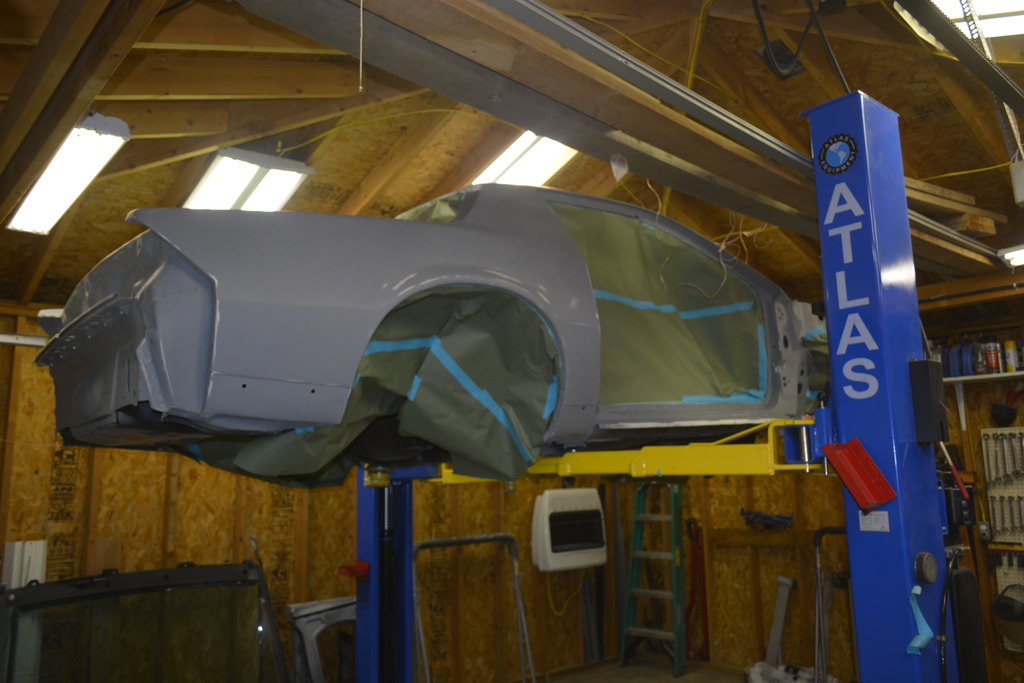
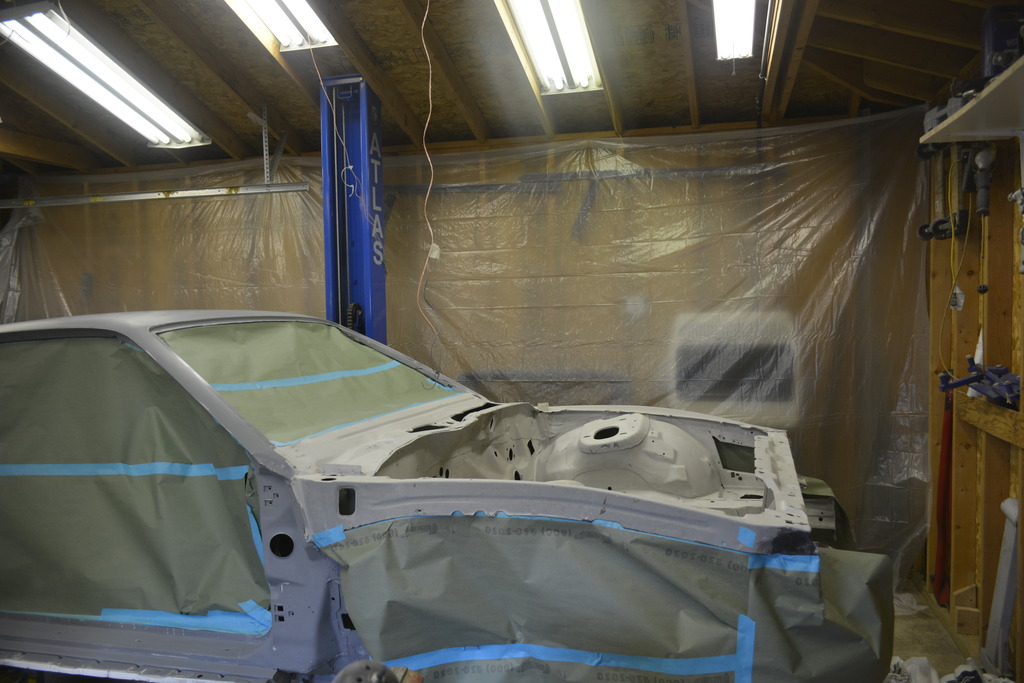
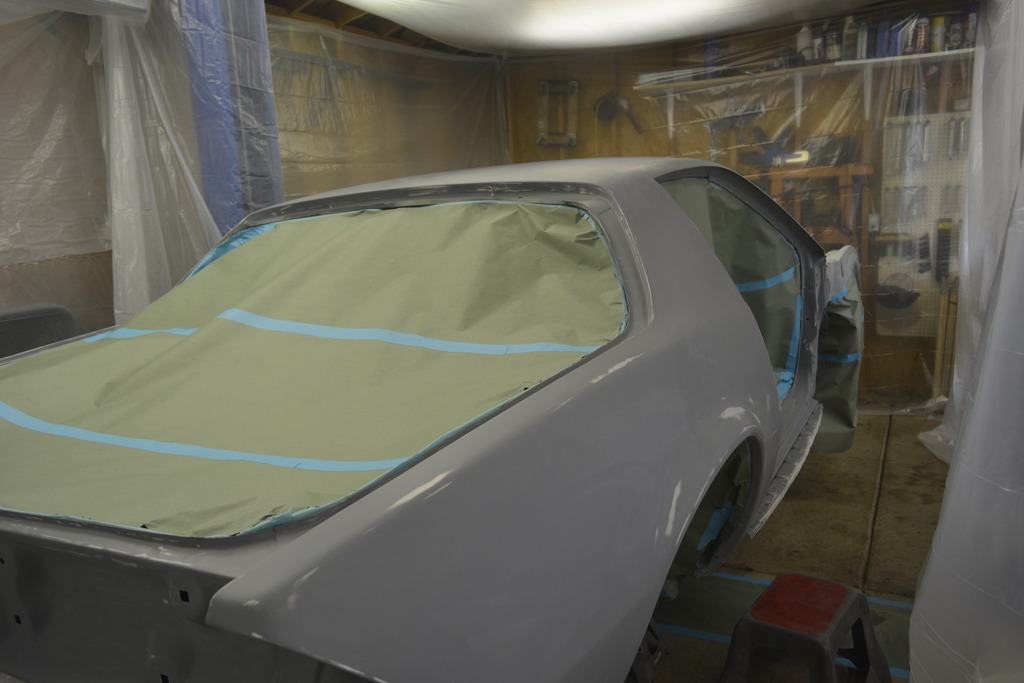
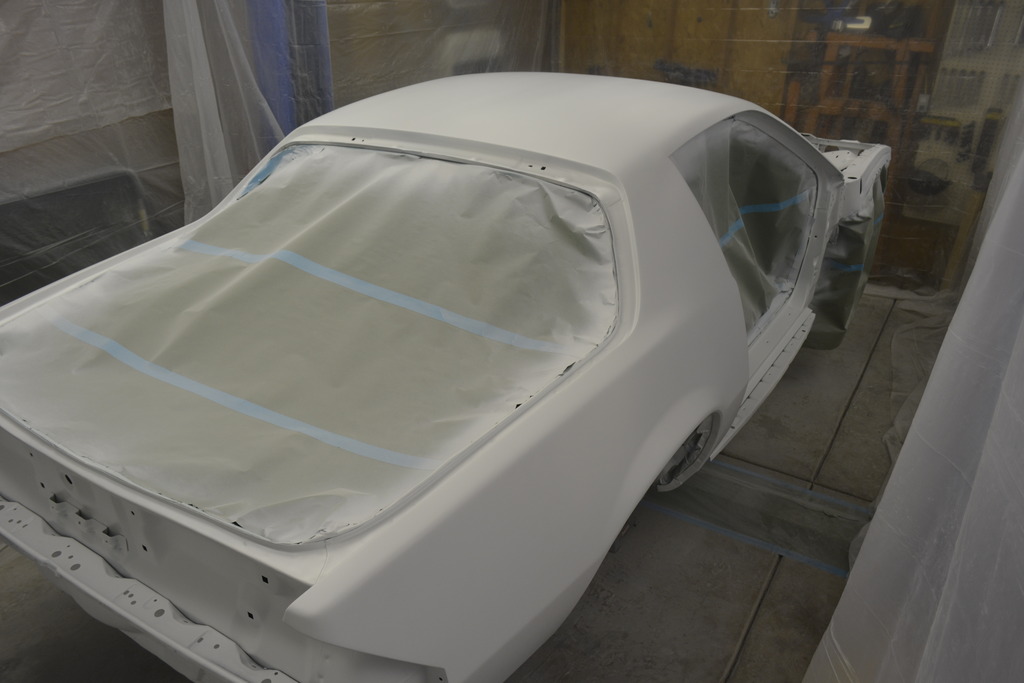
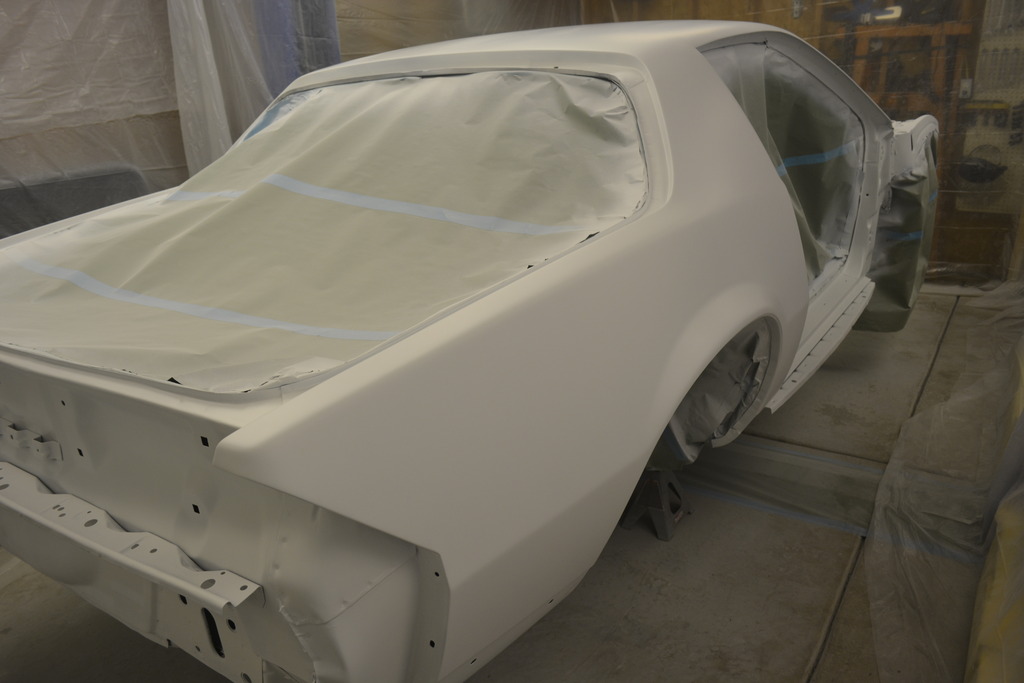
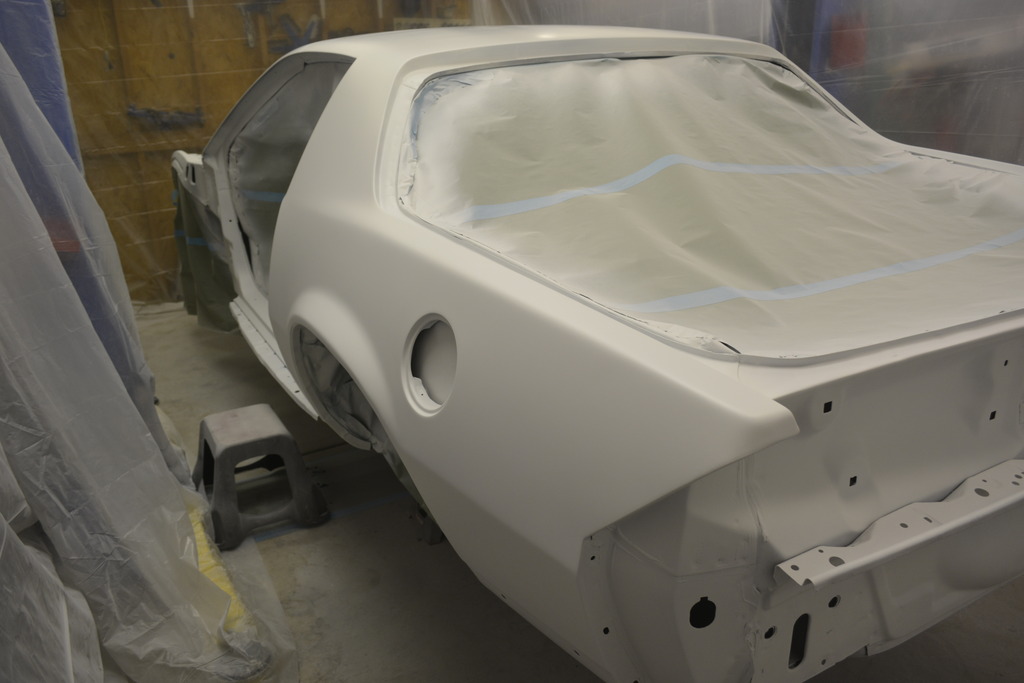
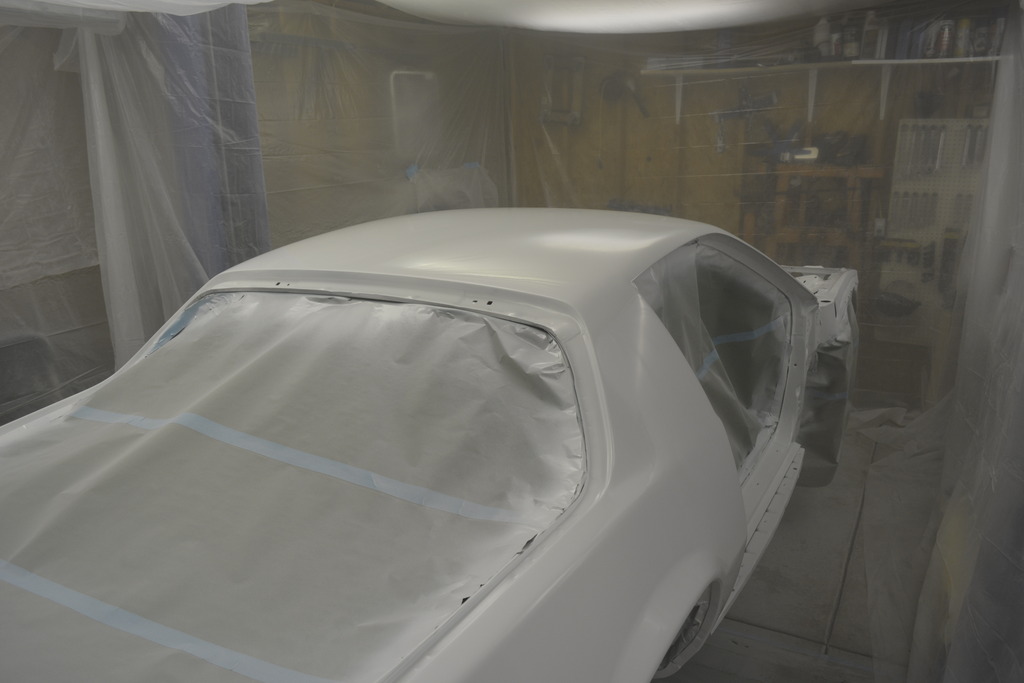
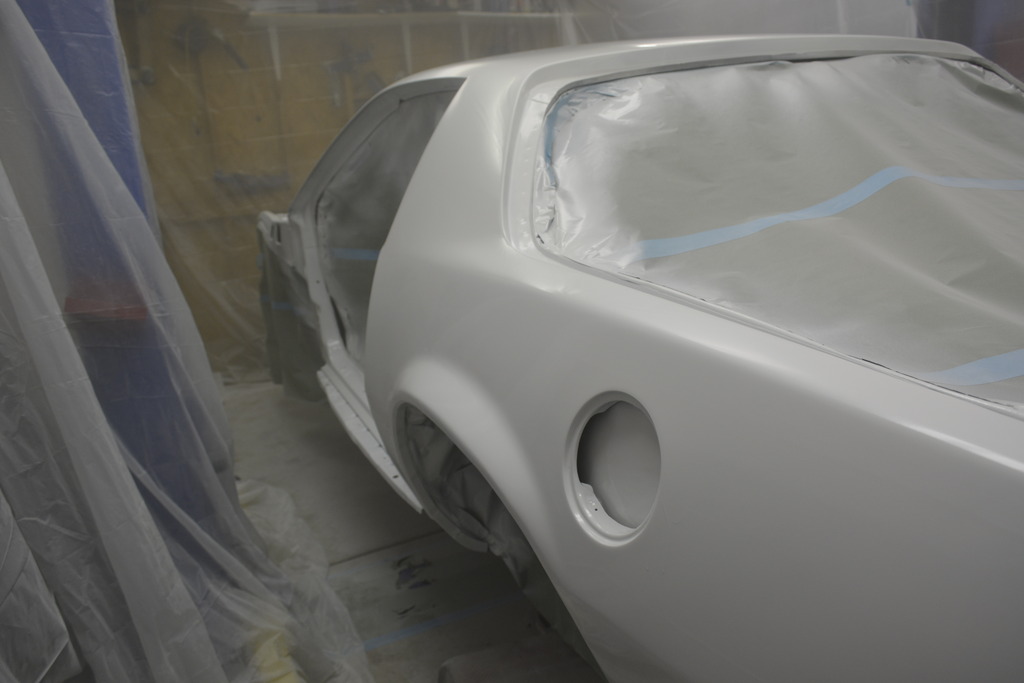
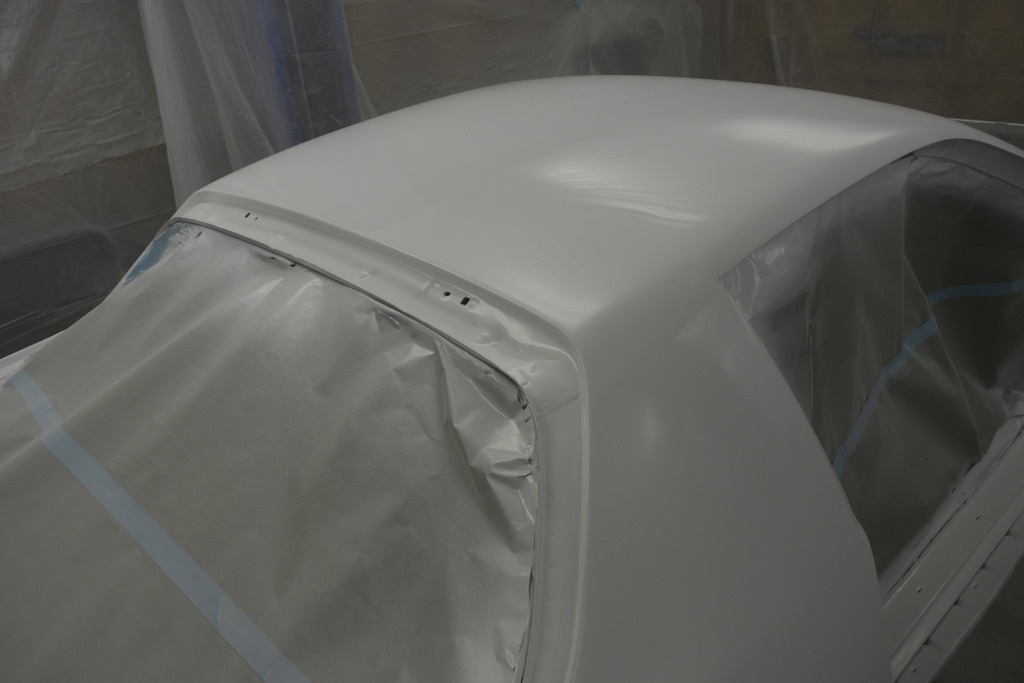
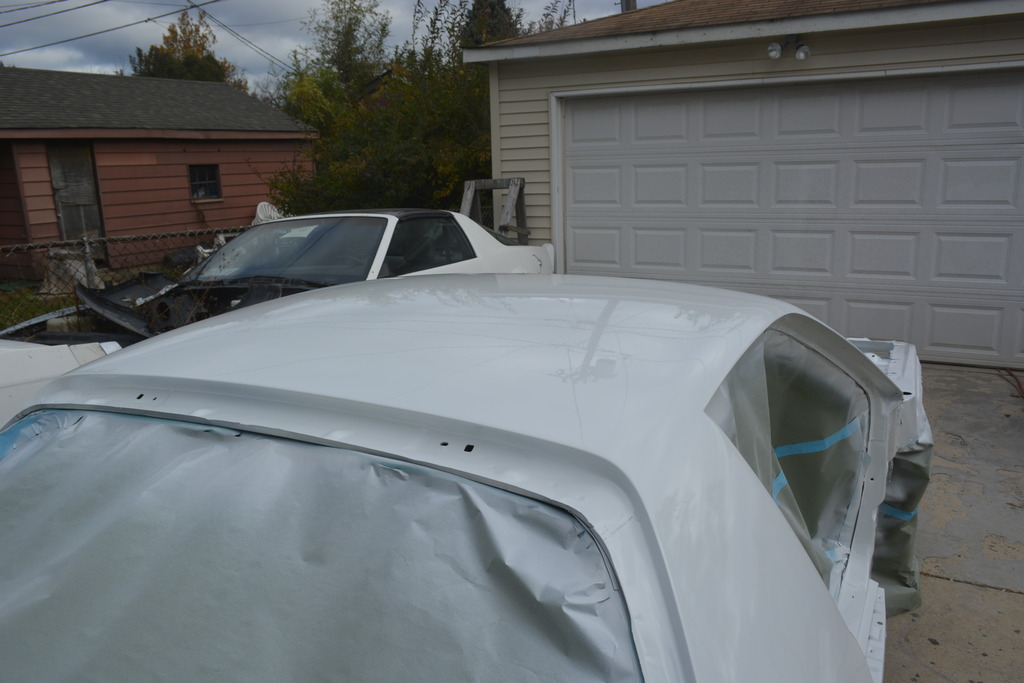
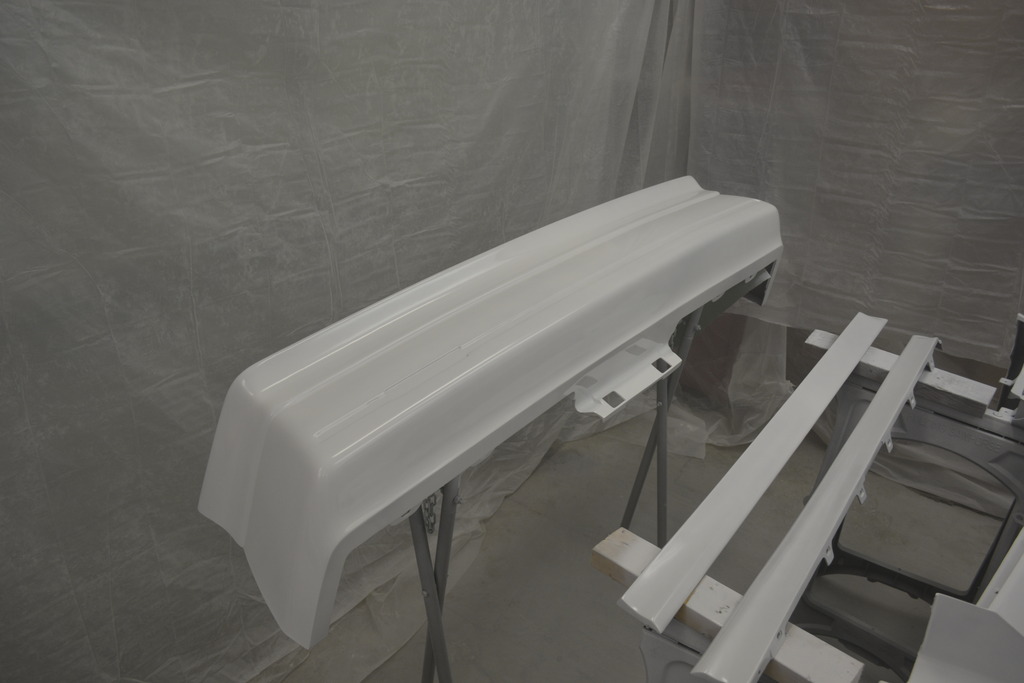
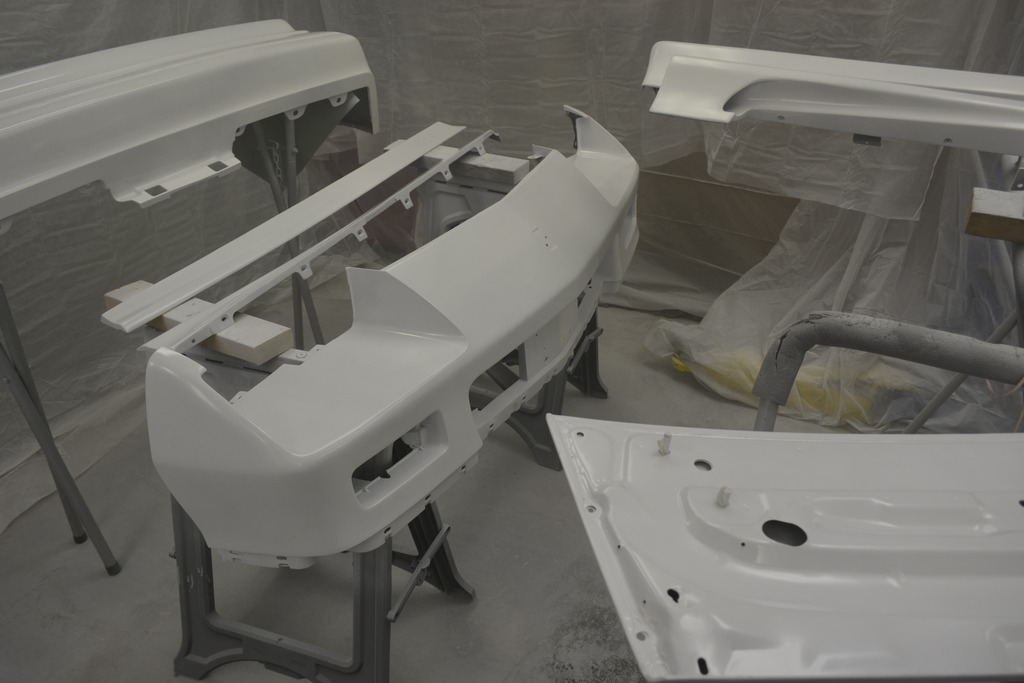
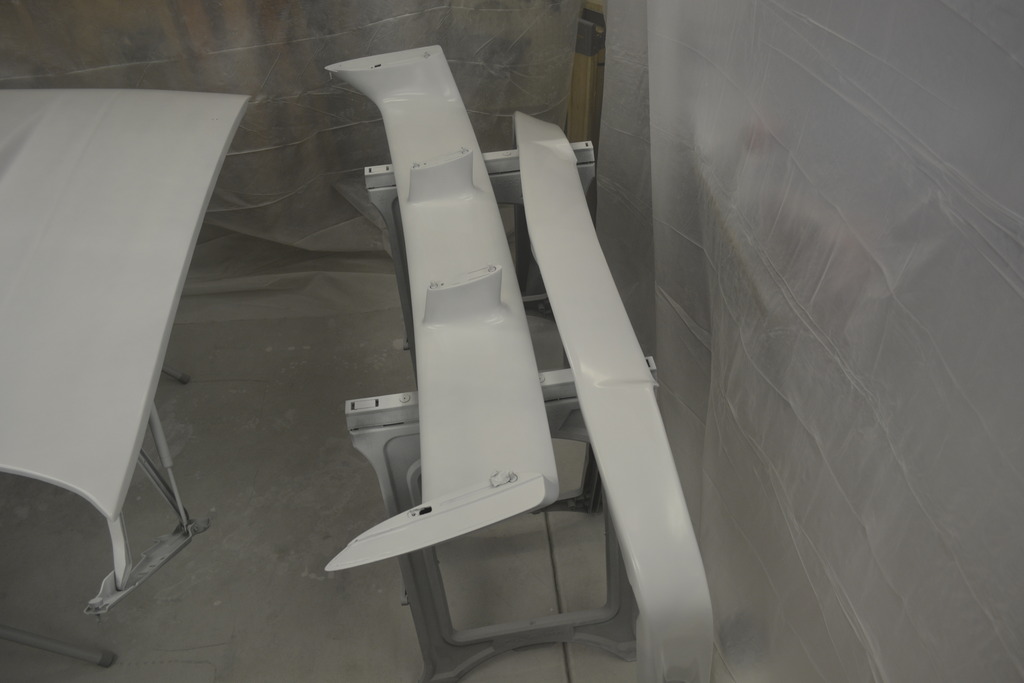
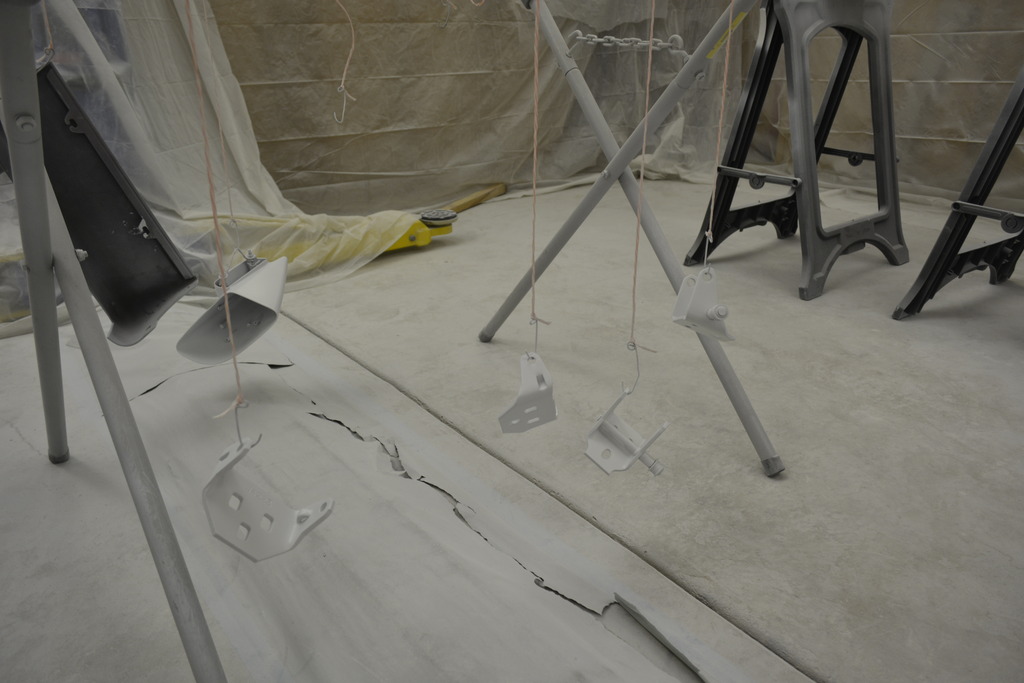
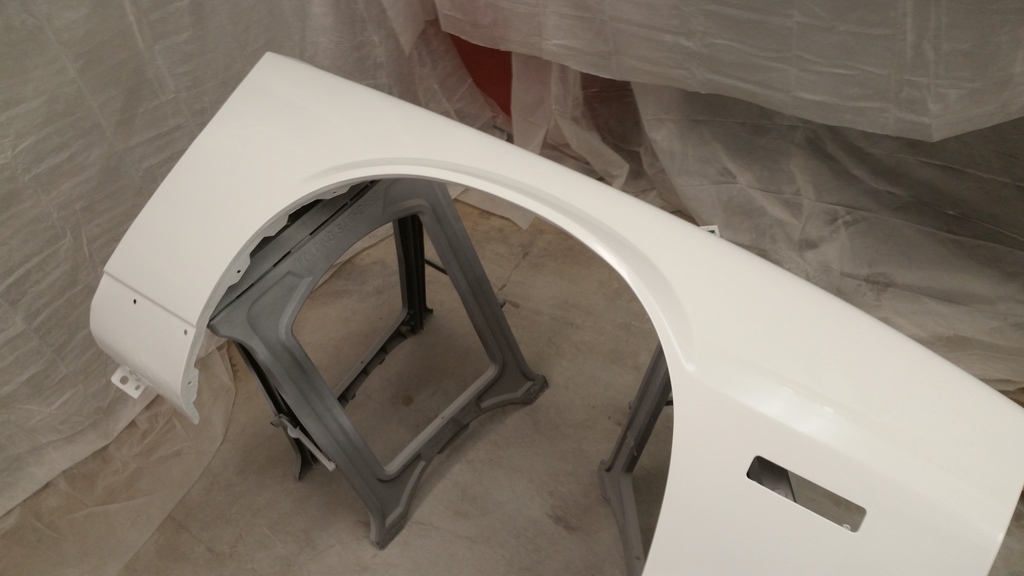
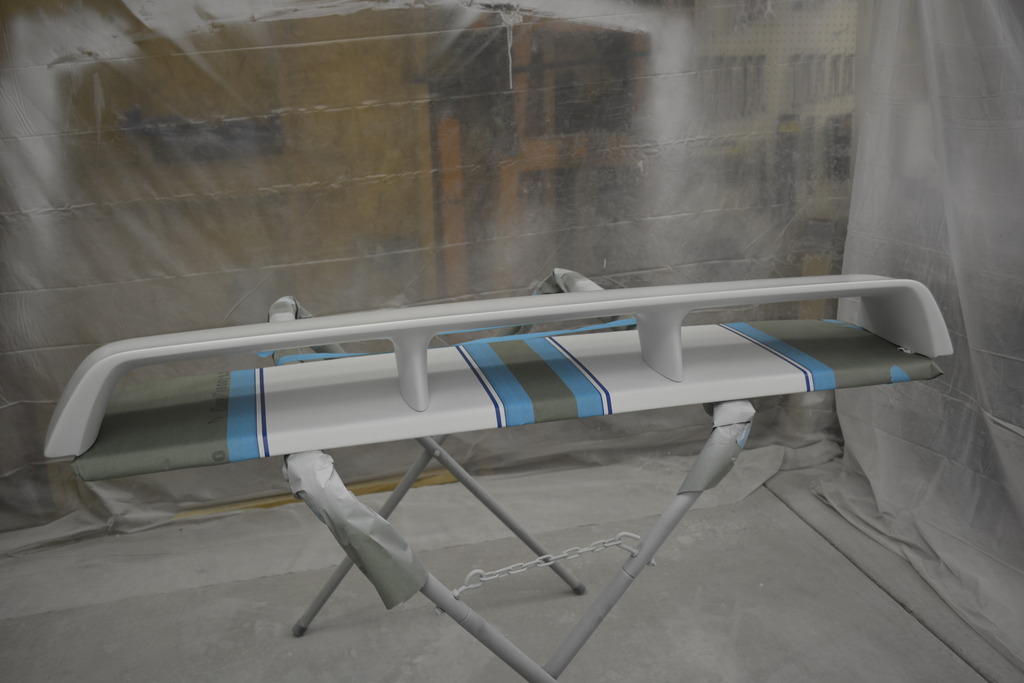
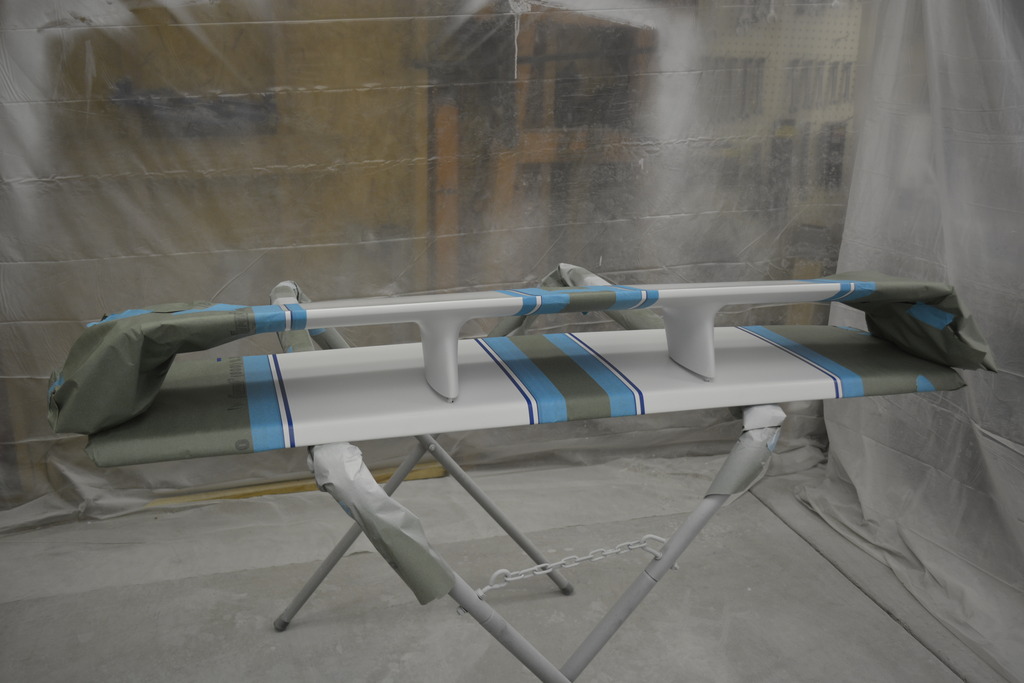
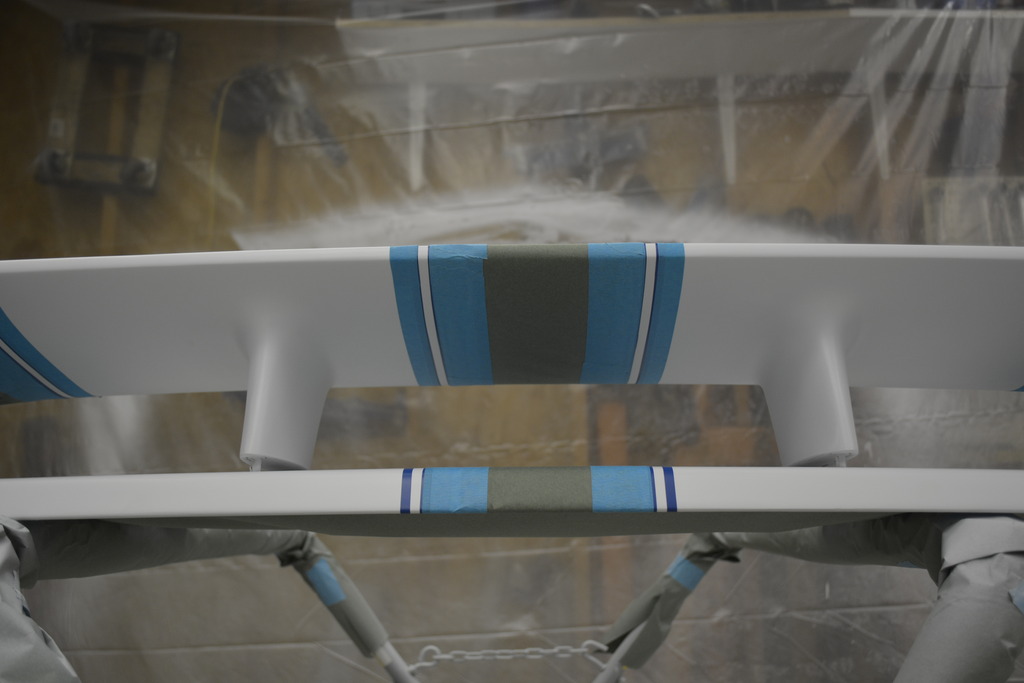
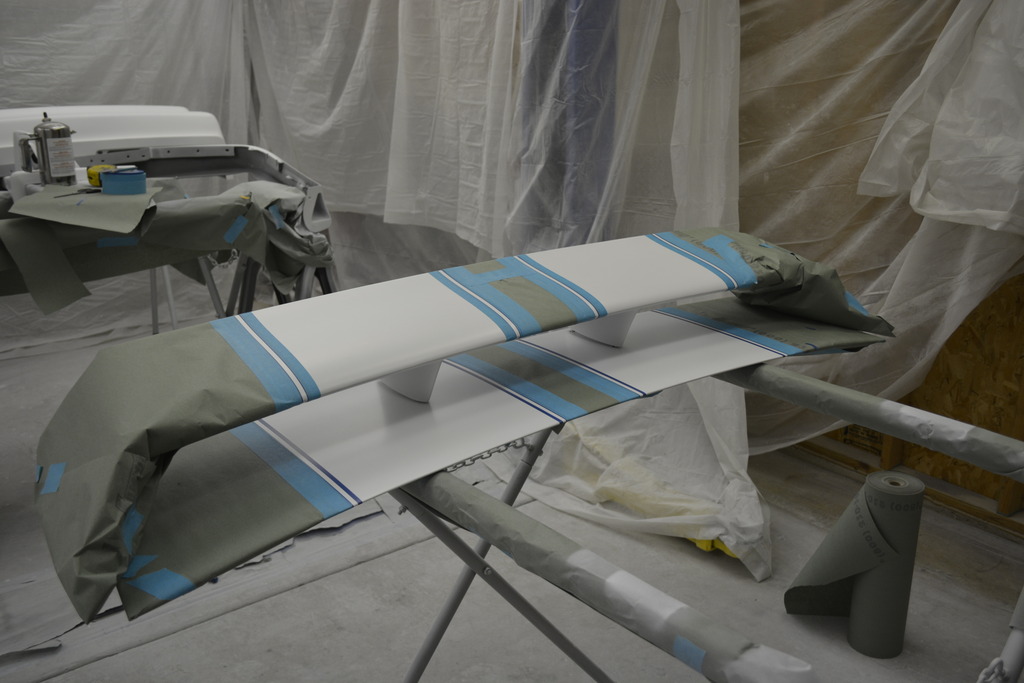
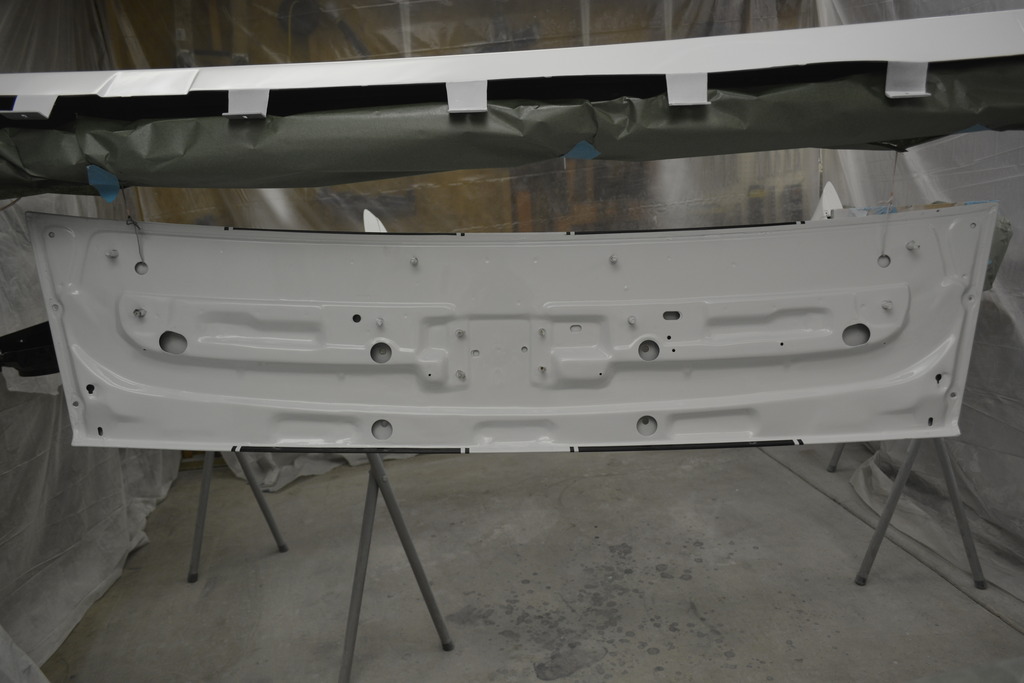
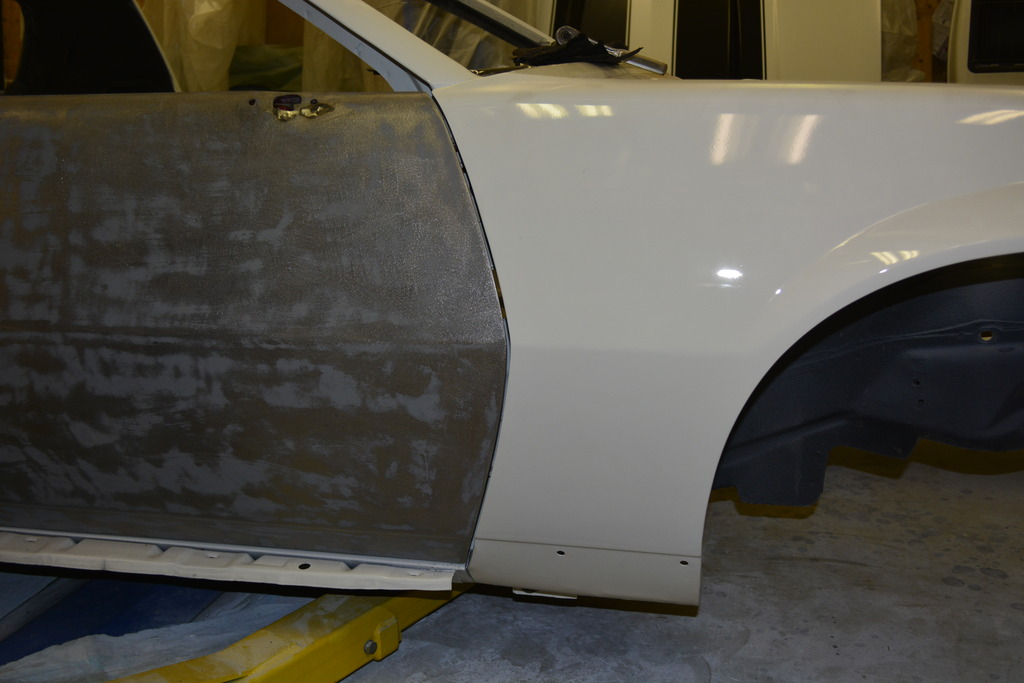
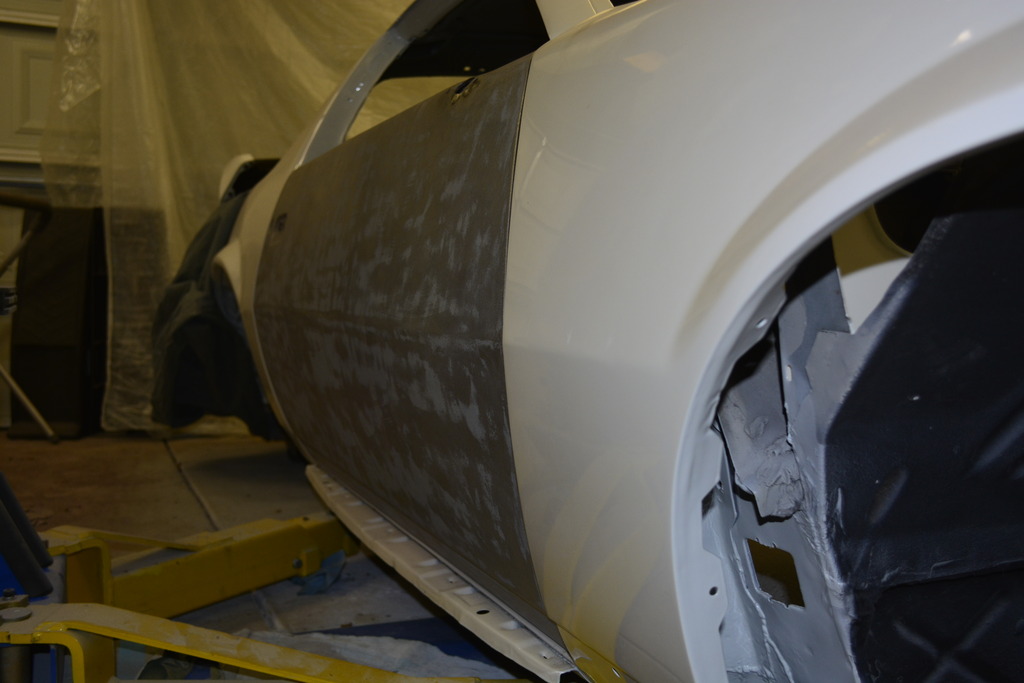
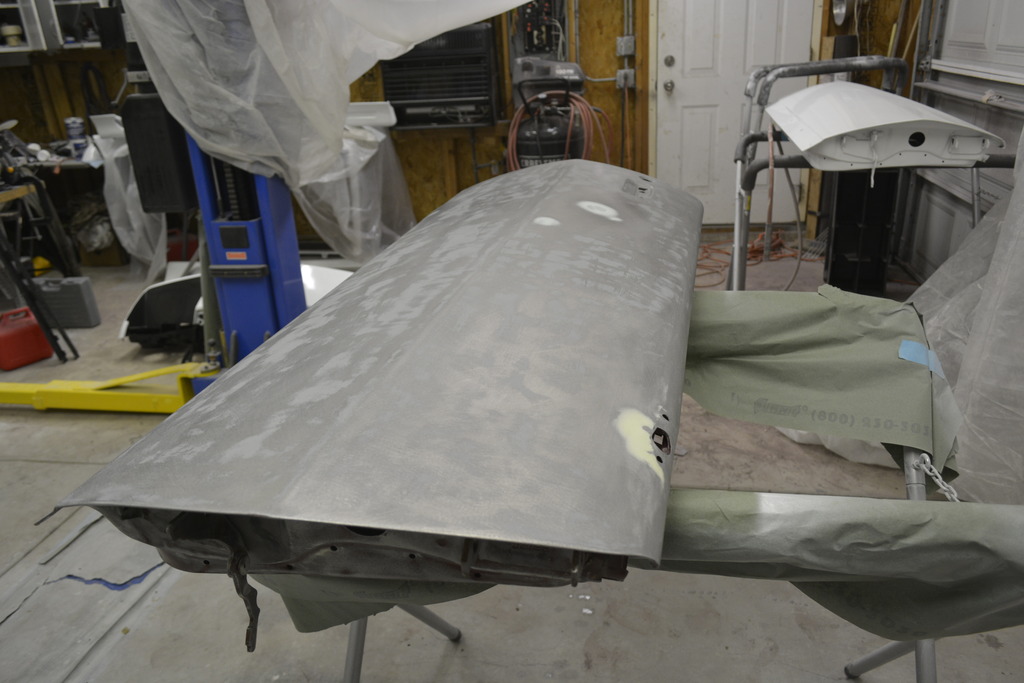
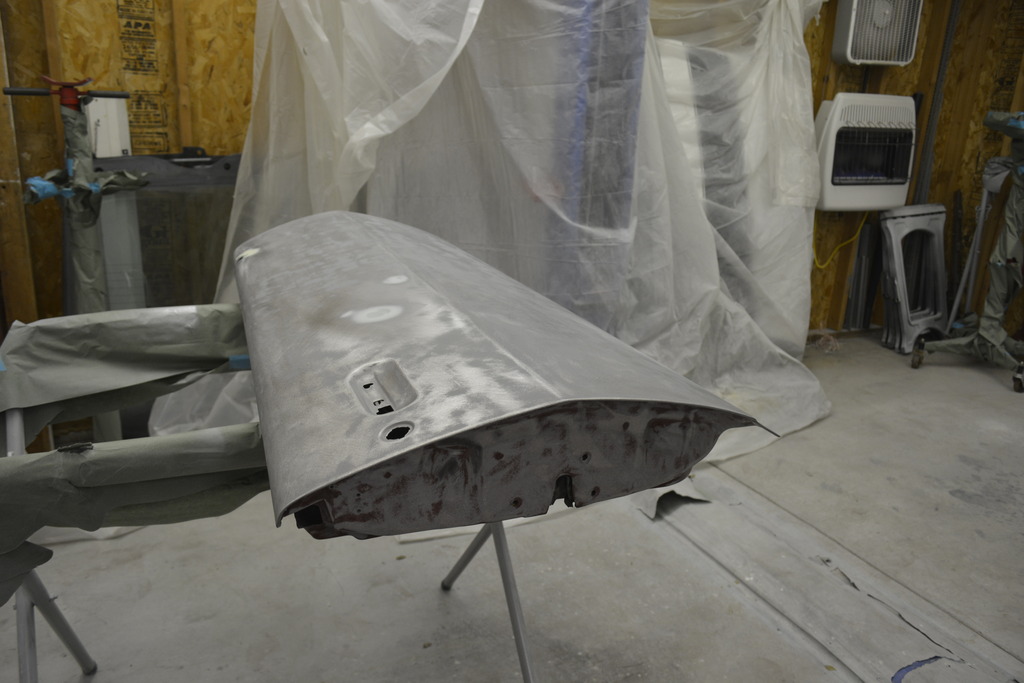
EVERYTHING is finally prepped for paint. The shell, doors, fenders, hood, hatch, spoiler, mirrors, rear bumper, front bumper, all GFX.
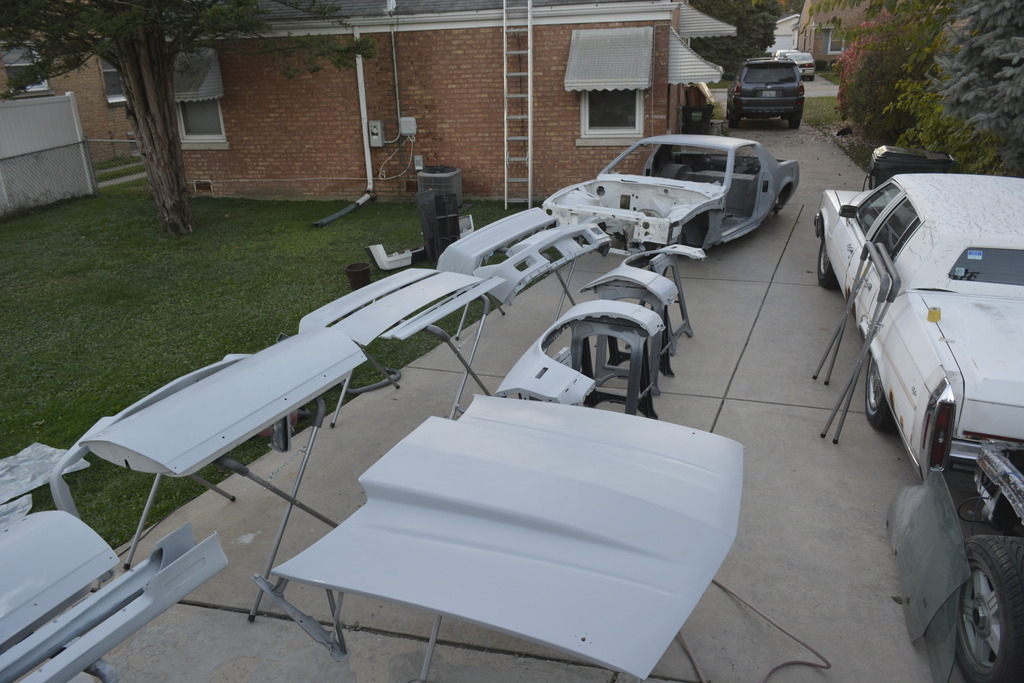
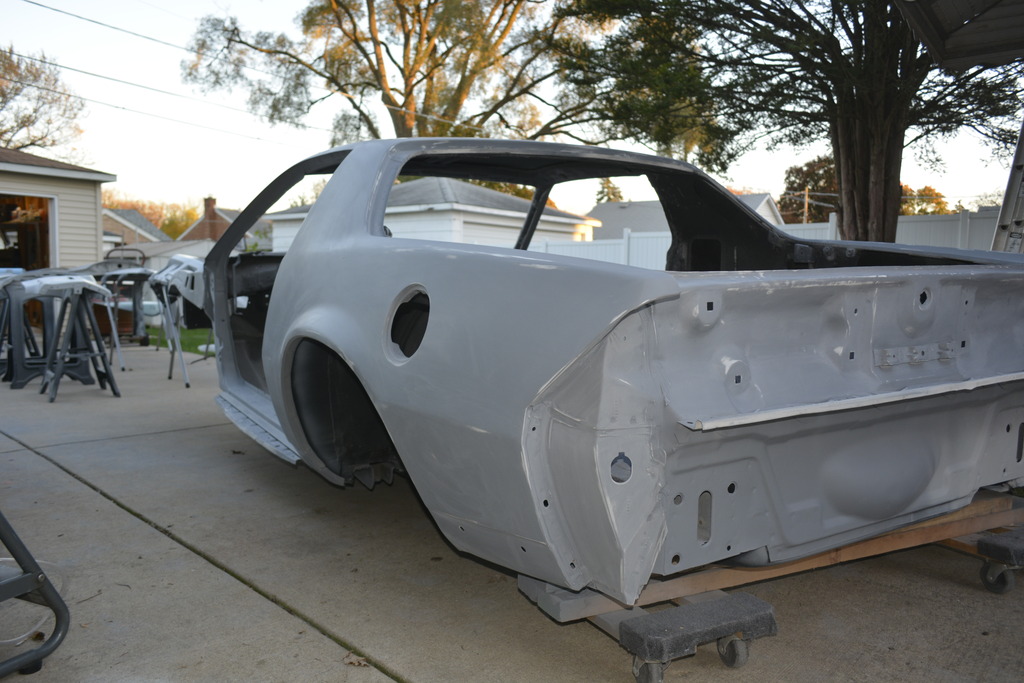
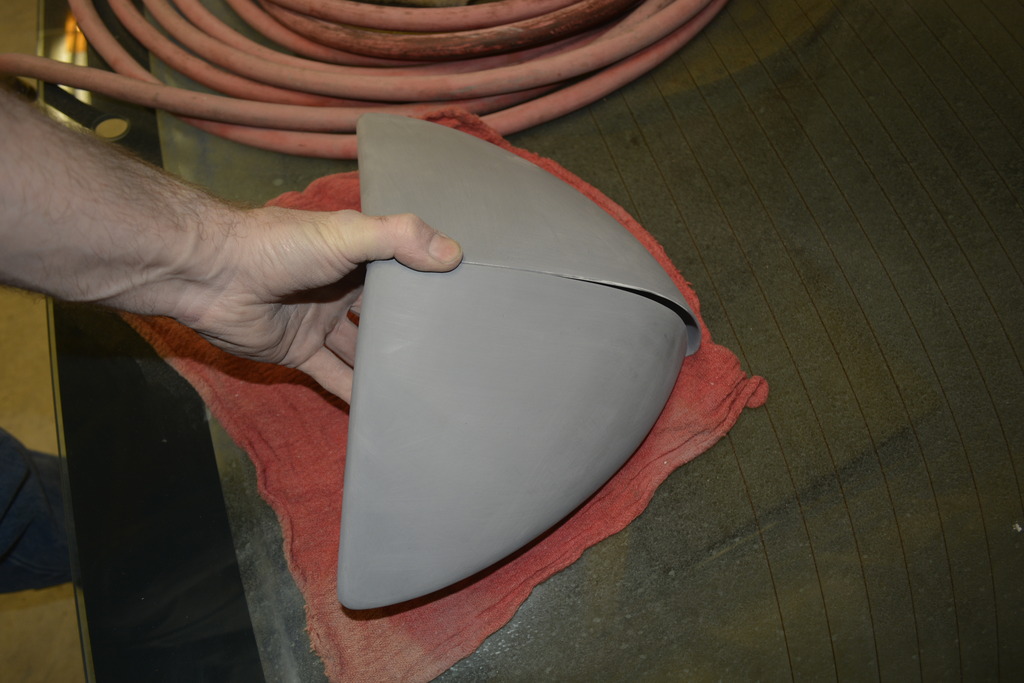
Of course I got almost done with prep and realized I'd forgot the mirrors. So the passenger mirror I'd always had because it was on the door when I got it from the junkyard, but I pulled the drivers mirror off my parts car and it was bent up like it'd been dropped before.
Also the drivers side mirror is the manually cable driven adjustable version. Is this correct for 1991?
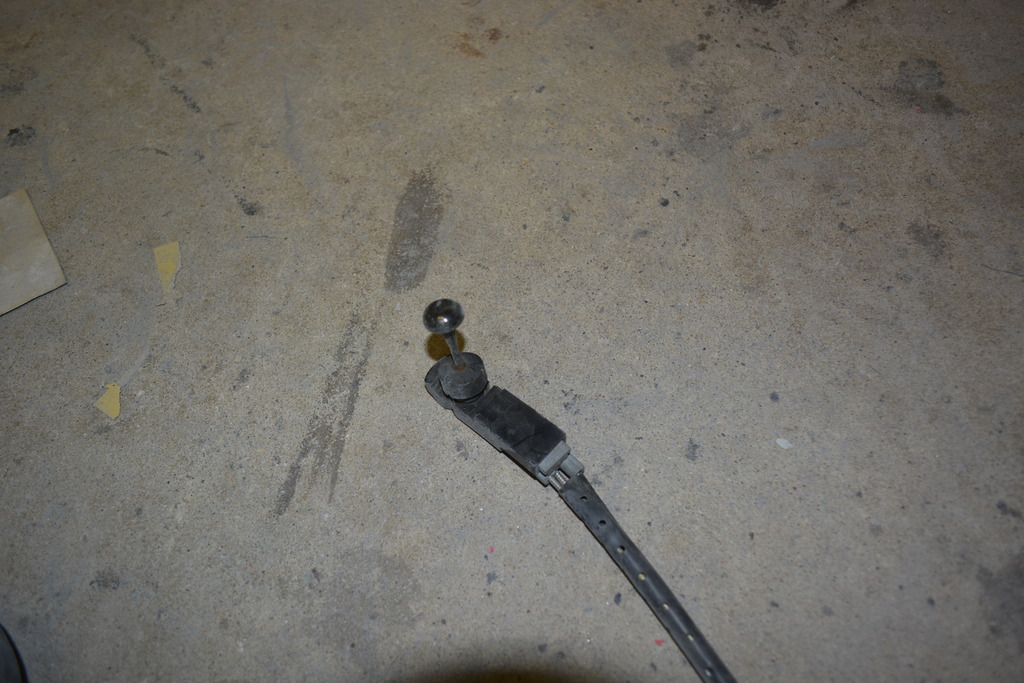
It's also slightly smaller than the passengers side:
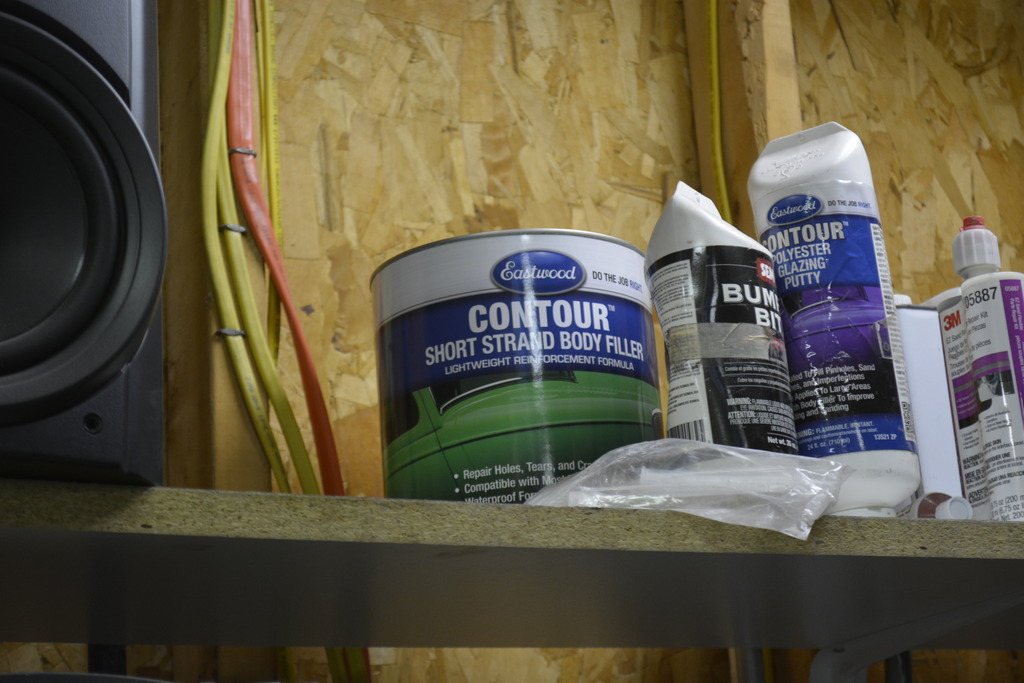
Used some some short strand filler and primed:
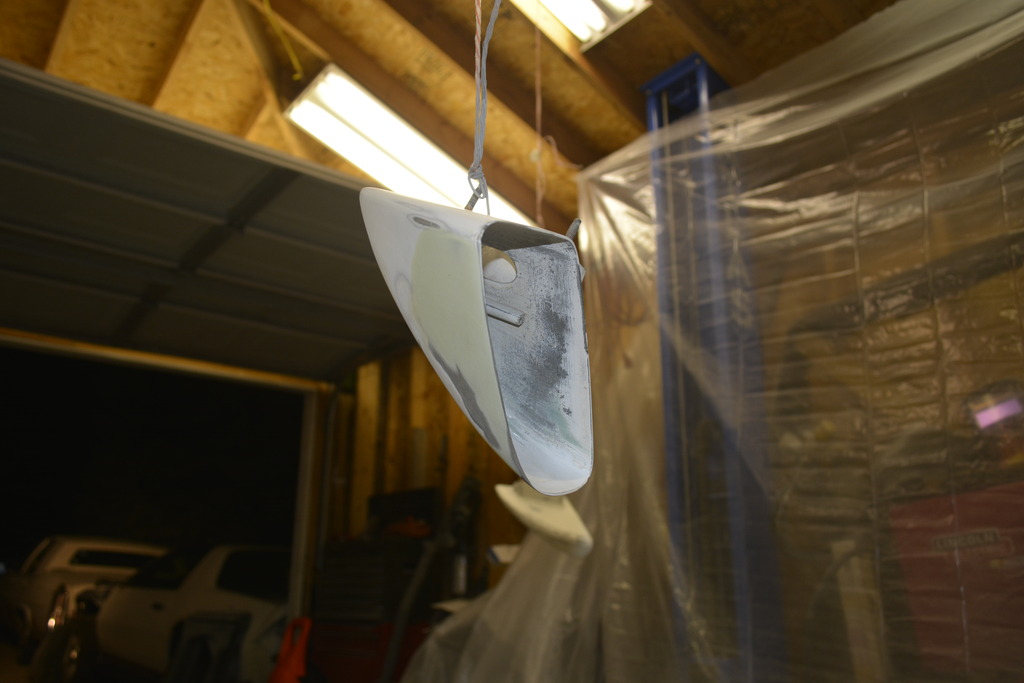
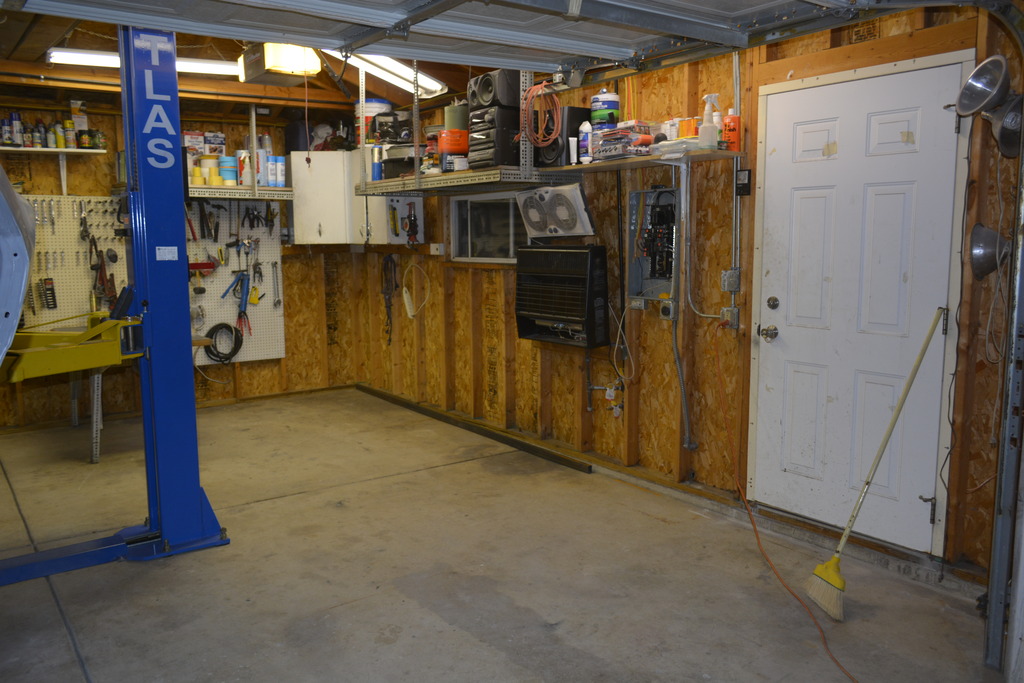
Now everything is packed in and I'm cleaning the garage before paint. What a chore....but it has to be done.
Of course I got almost done with prep and realized I'd forgot the mirrors. So the passenger mirror I'd always had because it was on the door when I got it from the junkyard, but I pulled the drivers mirror off my parts car and it was bent up like it'd been dropped before.
Also the drivers side mirror is the manually cable driven adjustable version. Is this correct for 1991?
It's also slightly smaller than the passengers side:
Used some some short strand filler and primed:
Now everything is packed in and I'm cleaning the garage before paint. What a chore....but it has to be done.
Last edited by robguitargod1; 01-11-2017 at 04:18 PM.
11-10-2016, 01:23 PM
#204
Senior Member
Thread Starter
iTrader: (4)
Join Date: Oct 2008
Location: Niles, IL
Posts: 857
Likes: 0
Received 5 Likes
on
4 Posts
Car: '91 LS6/T56/9"
Engine: LS6
Transmission: T56
Axle/Gears: Currie 9"/4.11, detroit truetrac
Re: Project Procrastination '91Z LS1/T56/currie 9" w/PICS
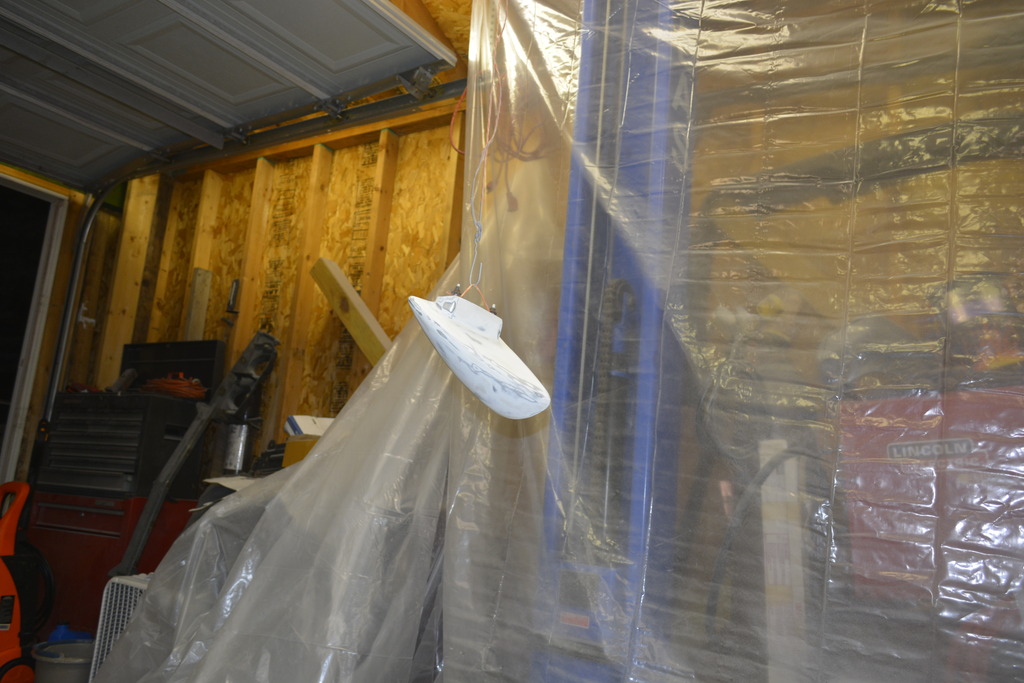
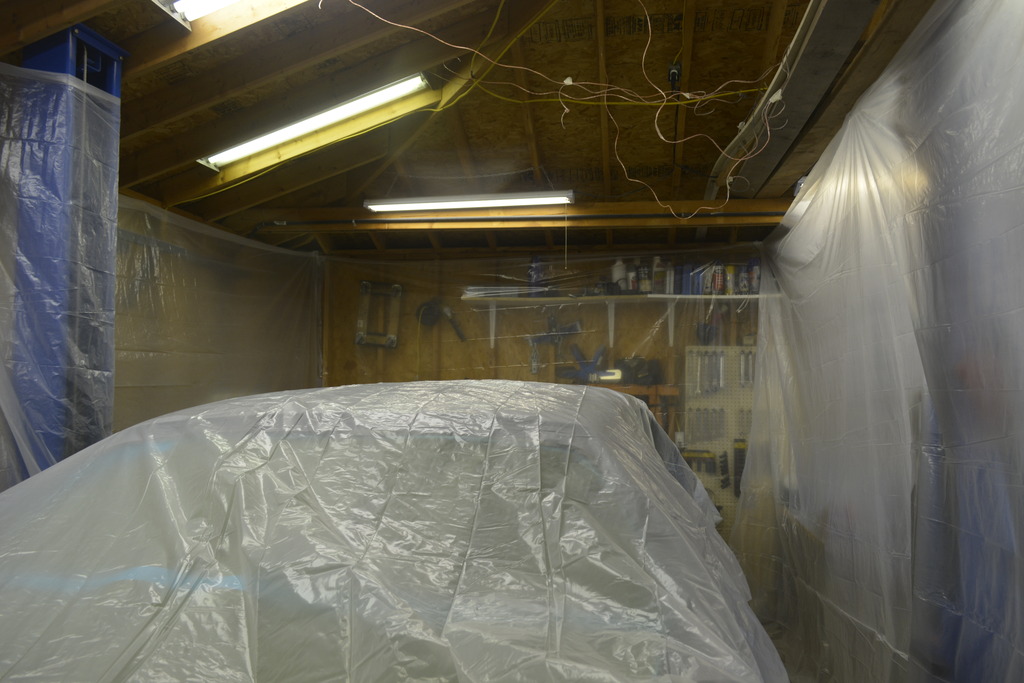
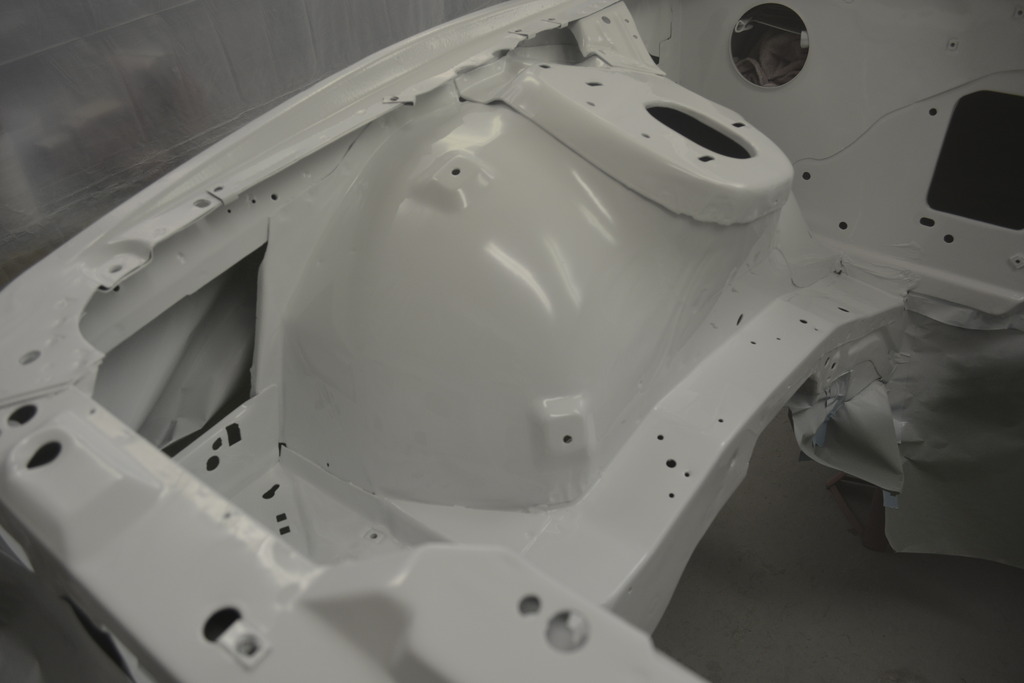
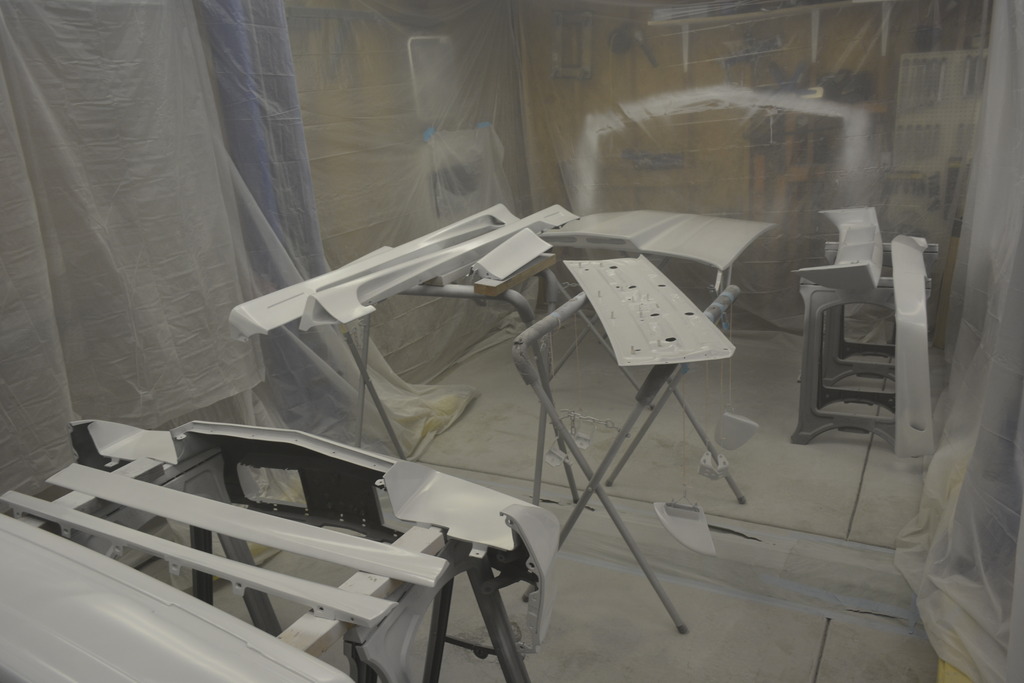
Pulled everything out of the garage and cleaned everything. Vacuumed every crack and used air to blow off everything else.
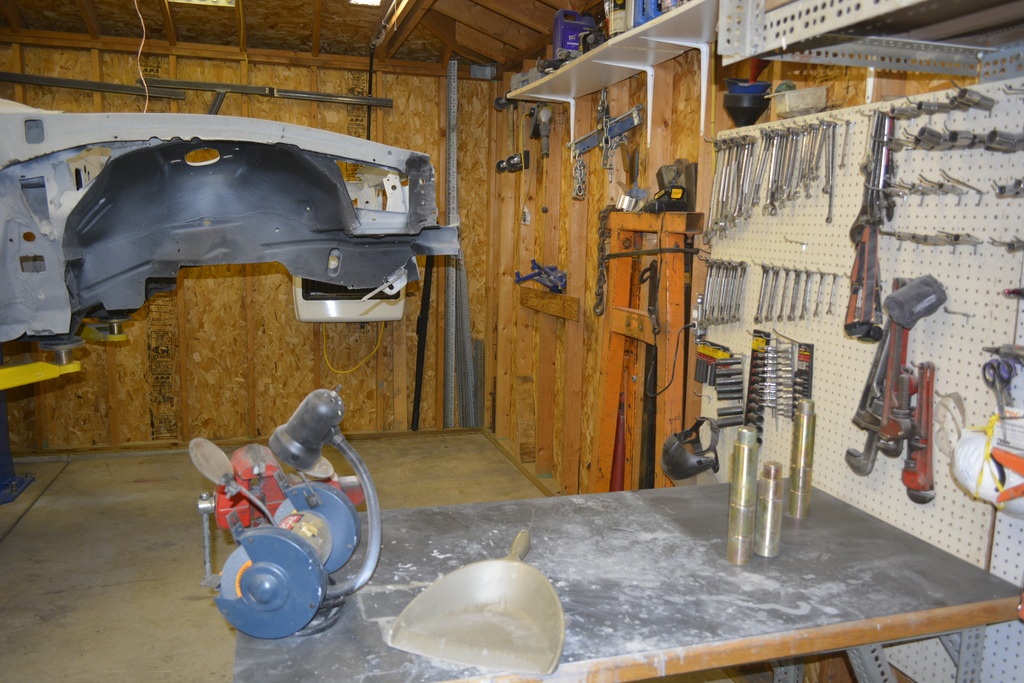

So now tonight I'll pull everything out, vacuum everything again, and hang plastic.
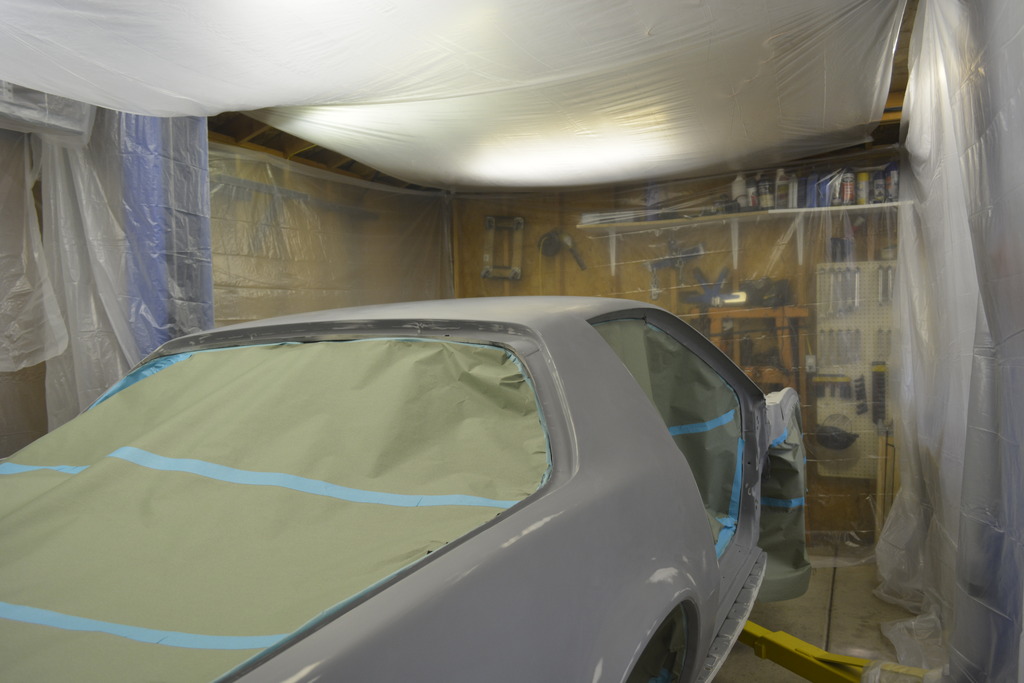
Then I'll clean all of the parts and start masking.
The goal is to paint everything off of the car but at the same time. Not 100% sure it will fit but we'll see.
So now tonight I'll pull everything out, vacuum everything again, and hang plastic.
Then I'll clean all of the parts and start masking.
The goal is to paint everything off of the car but at the same time. Not 100% sure it will fit but we'll see.
Last edited by robguitargod1; 01-11-2017 at 04:20 PM.
11-13-2016, 07:09 PM
#205
Senior Member
Thread Starter
iTrader: (4)
Join Date: Oct 2008
Location: Niles, IL
Posts: 857
Likes: 0
Received 5 Likes
on
4 Posts
Car: '91 LS6/T56/9"
Engine: LS6
Transmission: T56
Axle/Gears: Currie 9"/4.11, detroit truetrac
Re: Project Procrastination '91Z LS1/T56/currie 9" w/PICS
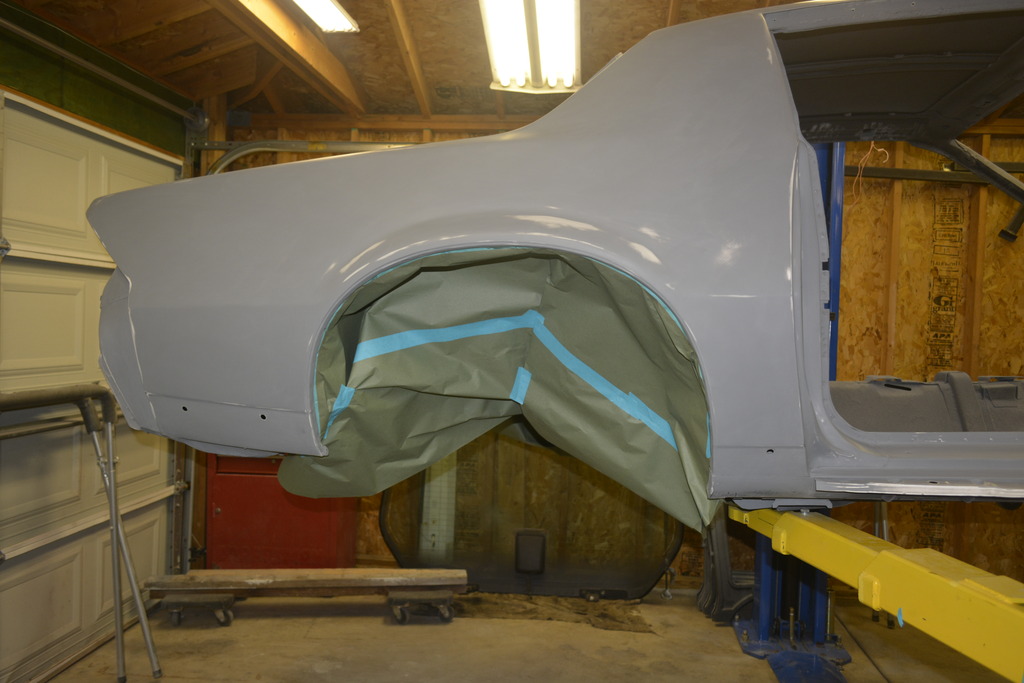
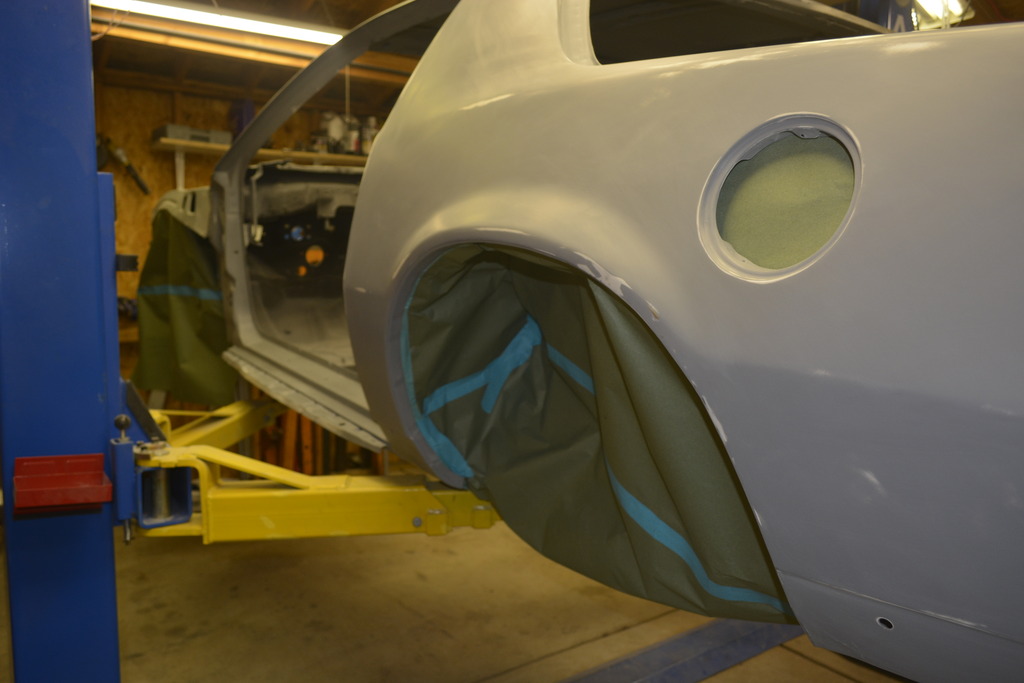
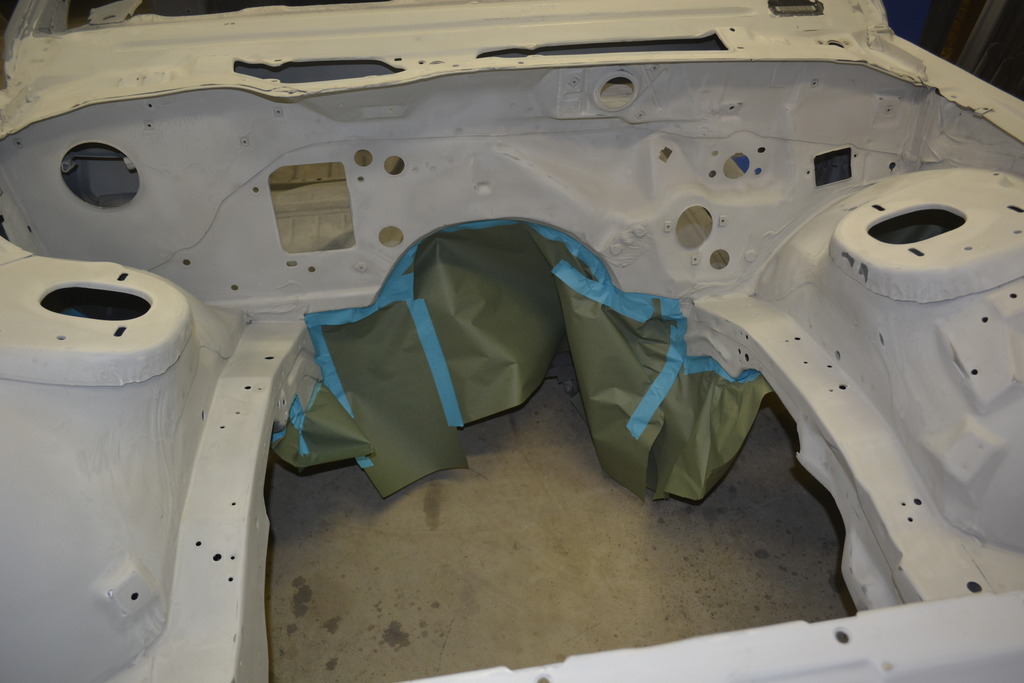
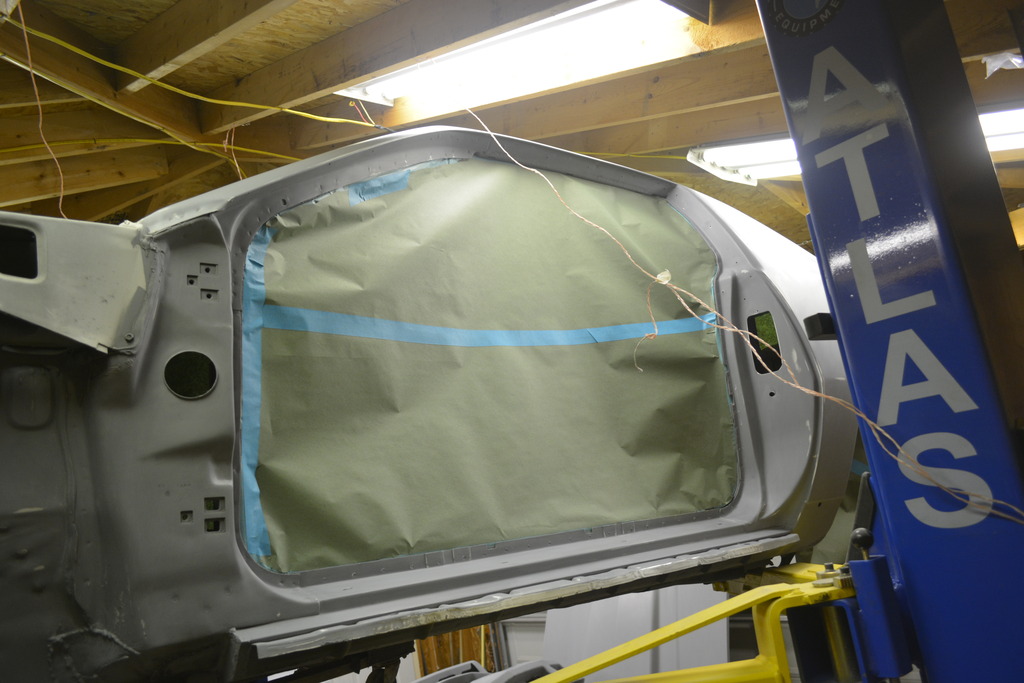
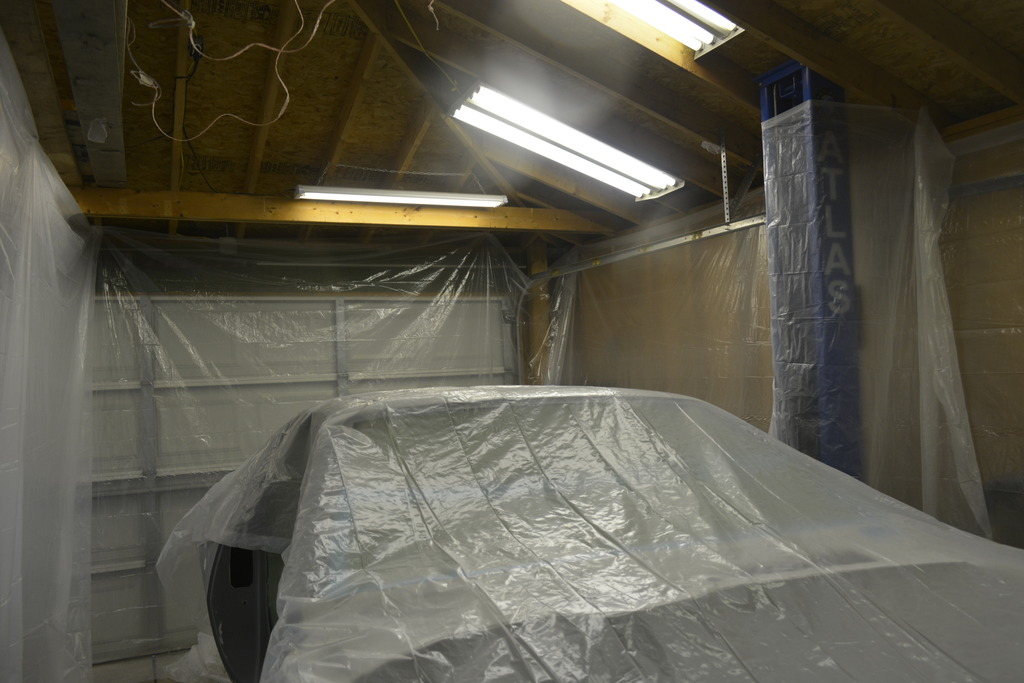
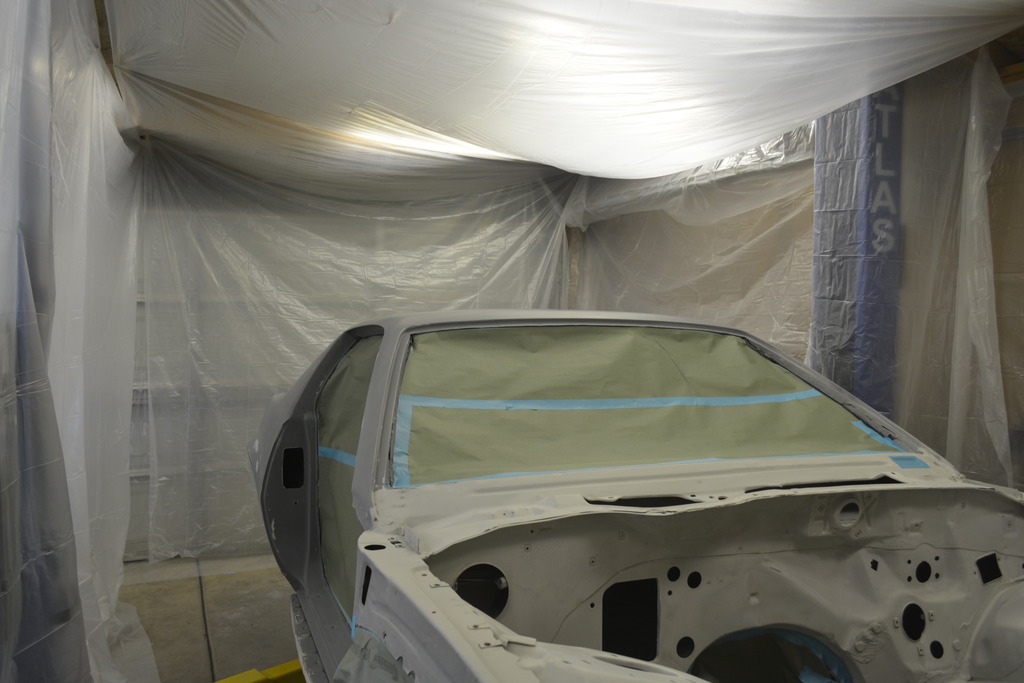
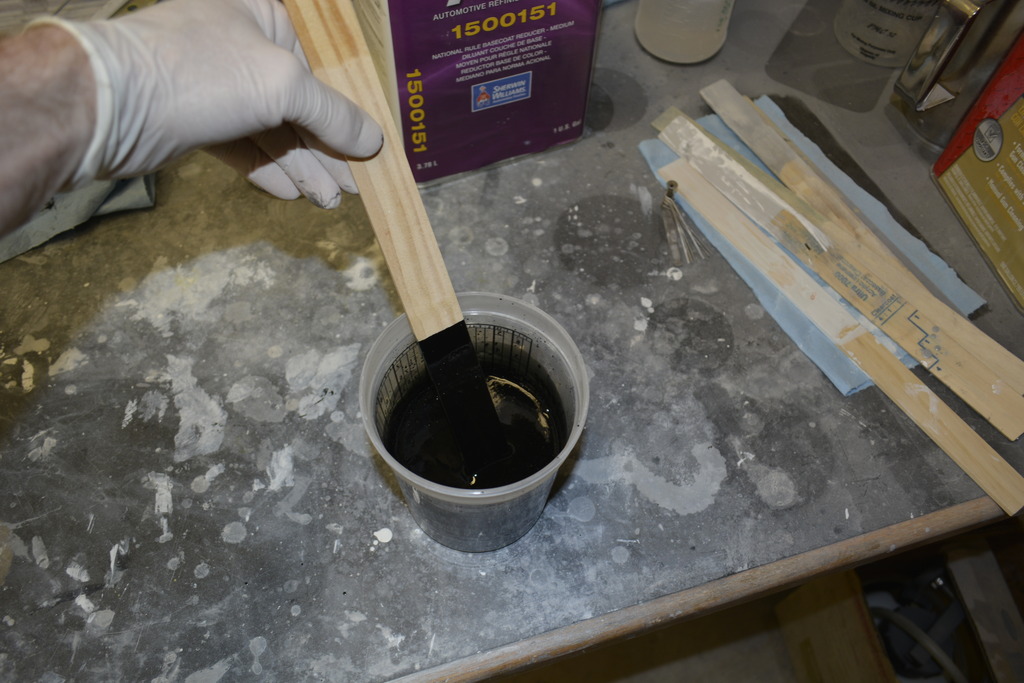
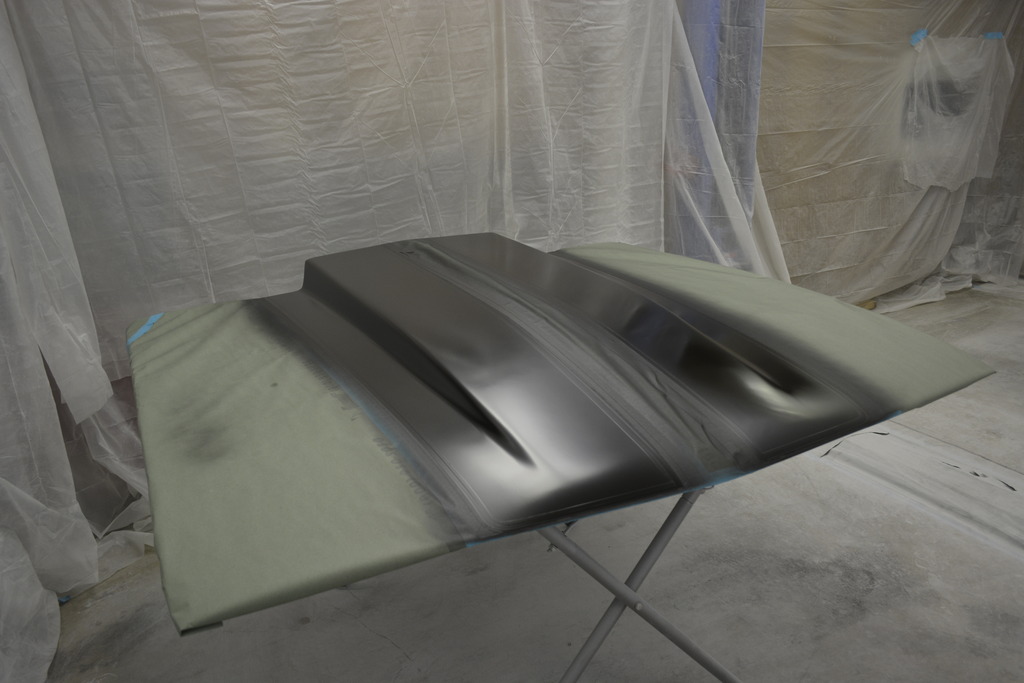
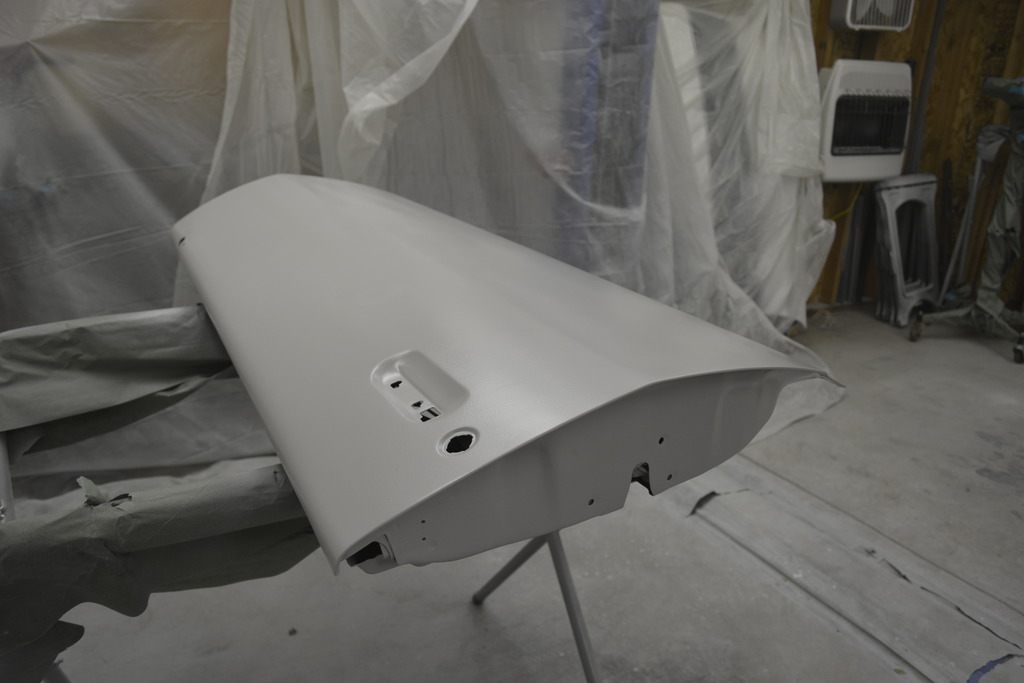
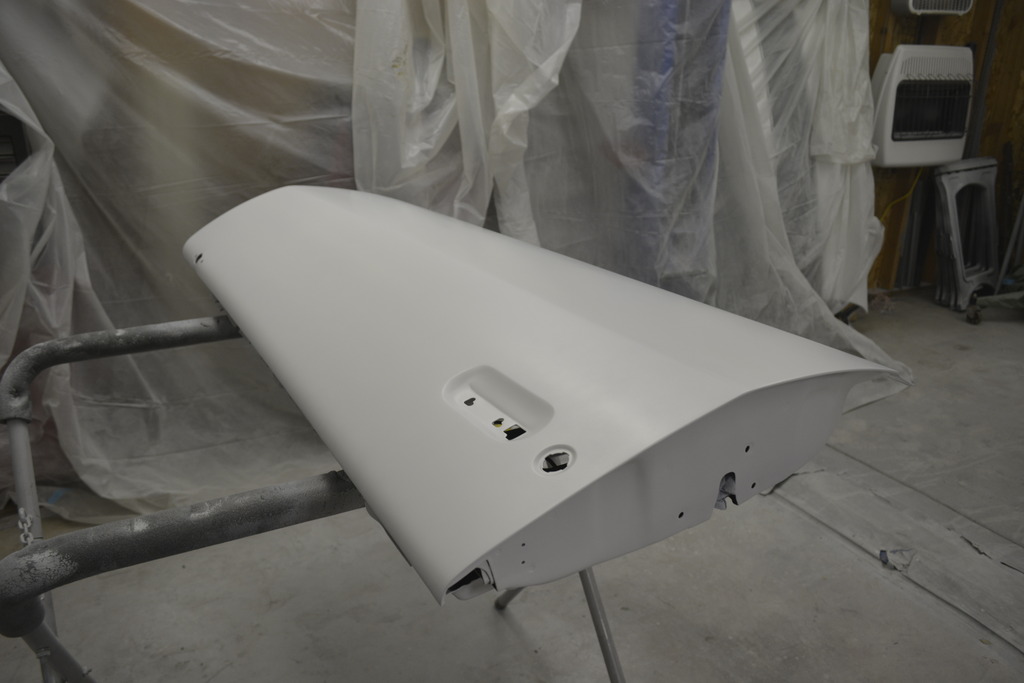
Finally started painting. Before I started I took care of sealing the drivers side of the cowl hood:
Then my pressurized sprayer died. What a headache. I took it apart, had to find some replacement washers, and discovered some debris in the tip. Took 2 hours of screwing around though:
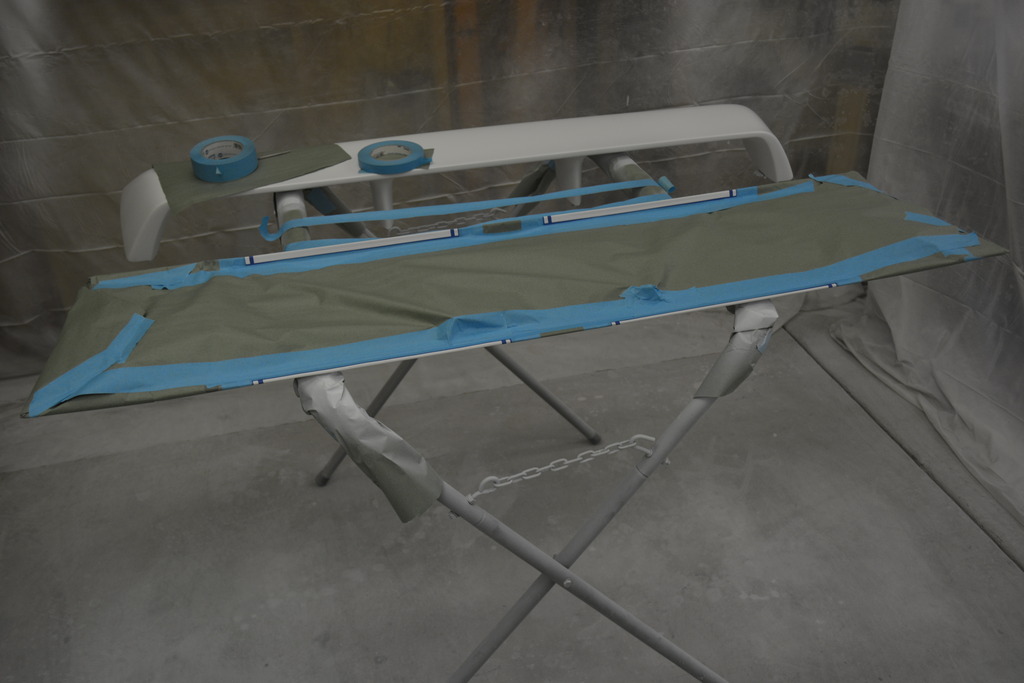
Then I started masking:


Then my pressurized sprayer died. What a headache. I took it apart, had to find some replacement washers, and discovered some debris in the tip. Took 2 hours of screwing around though:

Then I started masking:


 11-13-2016, 07:13 PM
#206
Senior Member
Thread Starter
iTrader: (4)
Join Date: Oct 2008
Location: Niles, IL
Posts: 857
Likes: 0
Received 5 Likes
on
4 Posts
Car: '91 LS6/T56/9"
Engine: LS6
Transmission: T56
Axle/Gears: Currie 9"/4.11, detroit truetrac
Re: Project Procrastination '91Z LS1/T56/currie 9" w/PICS
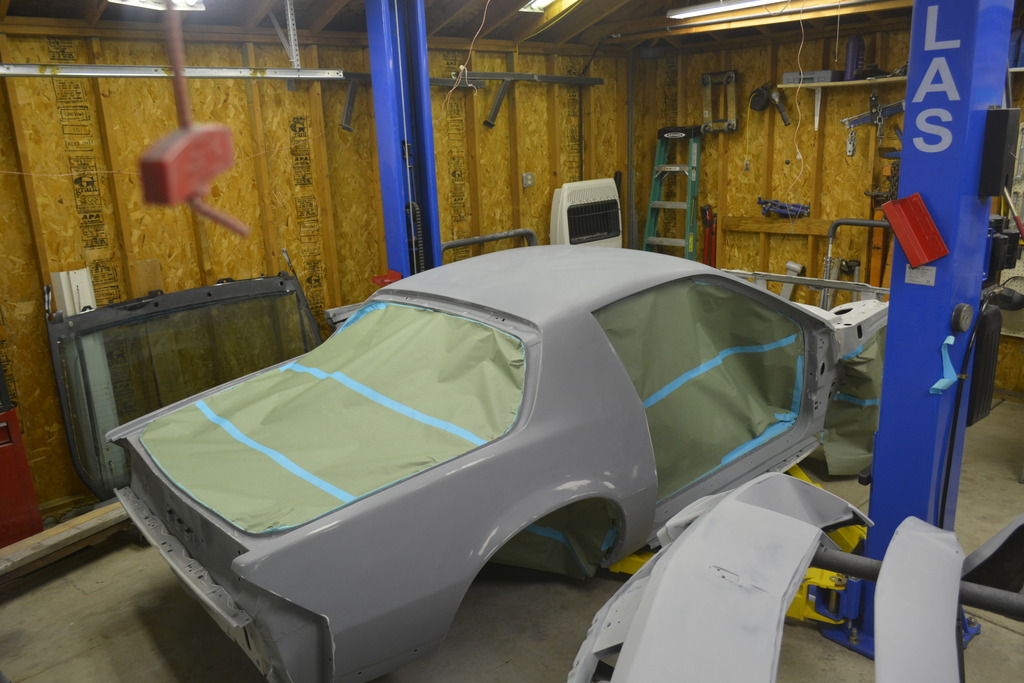
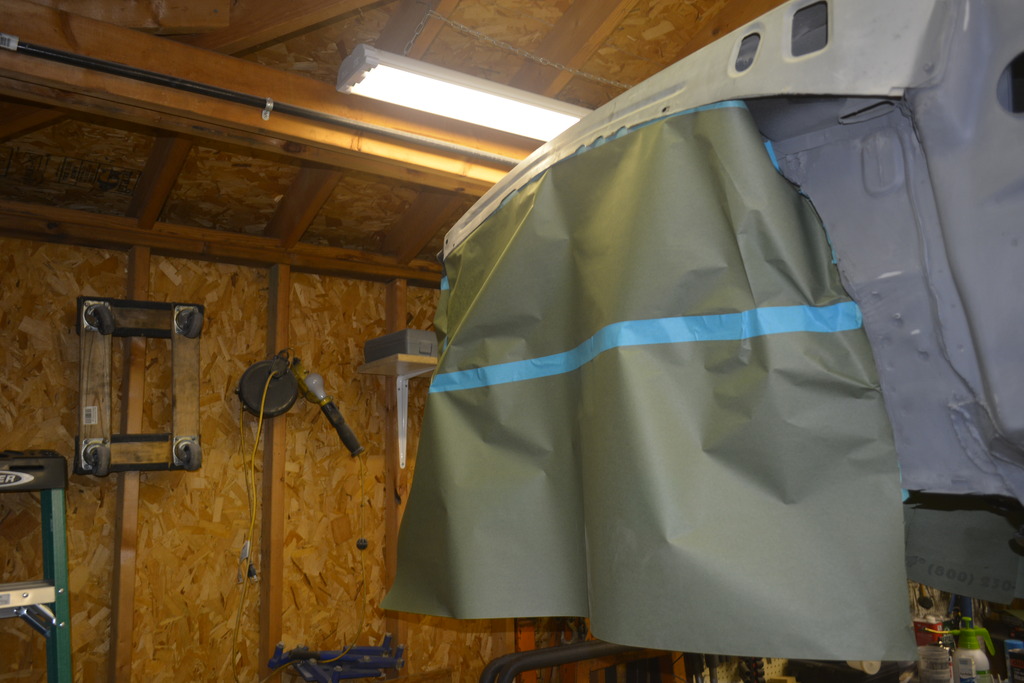
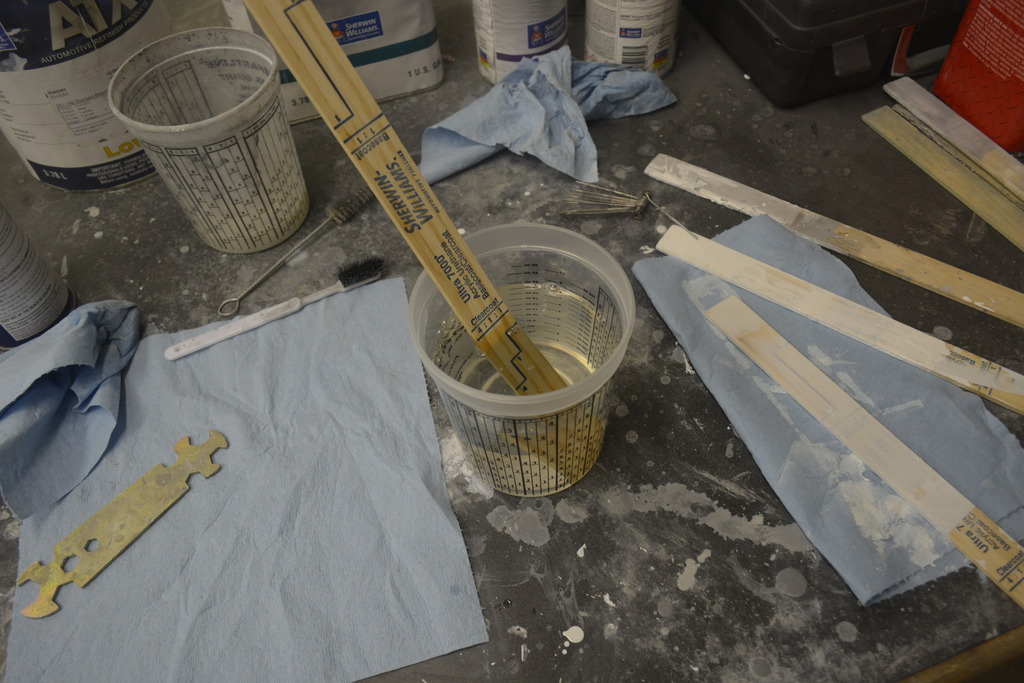
Then I started mixing the sealer. This stuff, like everything else, takes some time to mix. After that, started hanging plastic:
Last edited by robguitargod1; 06-06-2017 at 08:15 AM.
11-13-2016, 07:14 PM
#207
Senior Member
Thread Starter
iTrader: (4)
Join Date: Oct 2008
Location: Niles, IL
Posts: 857
Likes: 0
Received 5 Likes
on
4 Posts
Car: '91 LS6/T56/9"
Engine: LS6
Transmission: T56
Axle/Gears: Currie 9"/4.11, detroit truetrac
Re: Project Procrastination '91Z LS1/T56/currie 9" w/PICS
Fixing pictures
Last edited by robguitargod1; 06-06-2017 at 08:22 AM.
11-13-2016, 07:41 PM
#208
Senior Member
Thread Starter
iTrader: (4)
Join Date: Oct 2008
Location: Niles, IL
Posts: 857
Likes: 0
Received 5 Likes
on
4 Posts
Car: '91 LS6/T56/9"
Engine: LS6
Transmission: T56
Axle/Gears: Currie 9"/4.11, detroit truetrac
Re: Project Procrastination '91Z LS1/T56/currie 9" w/PICS
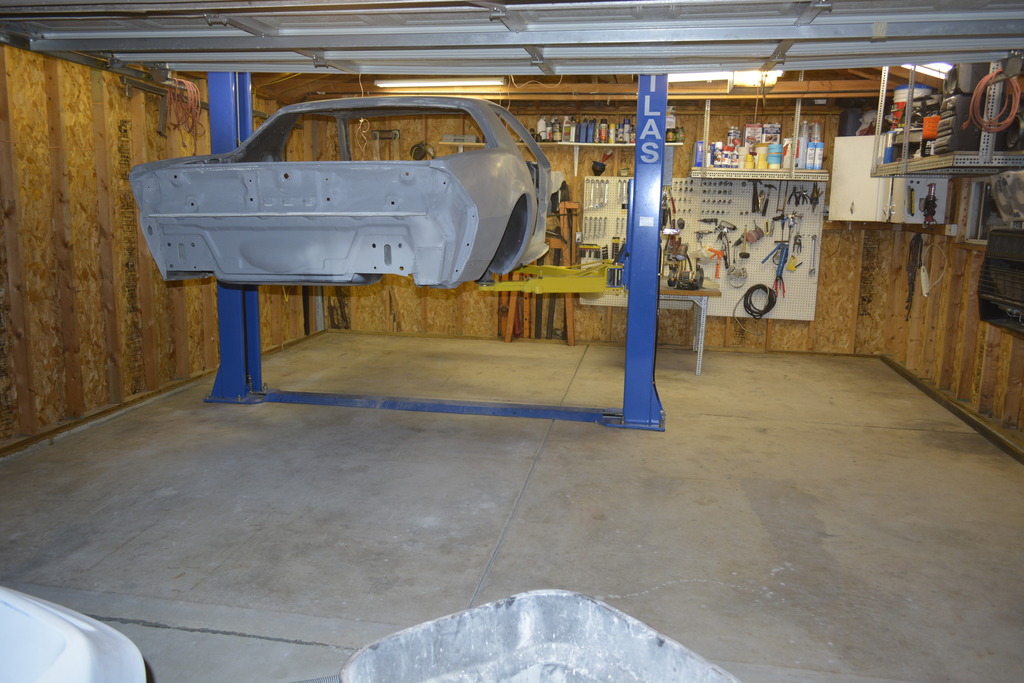
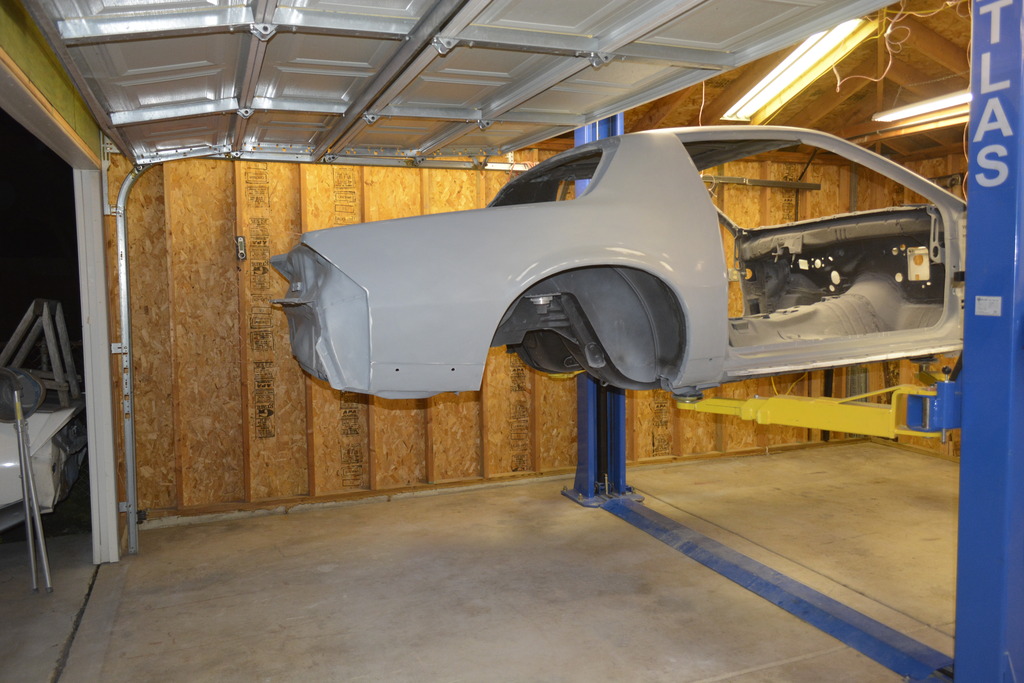
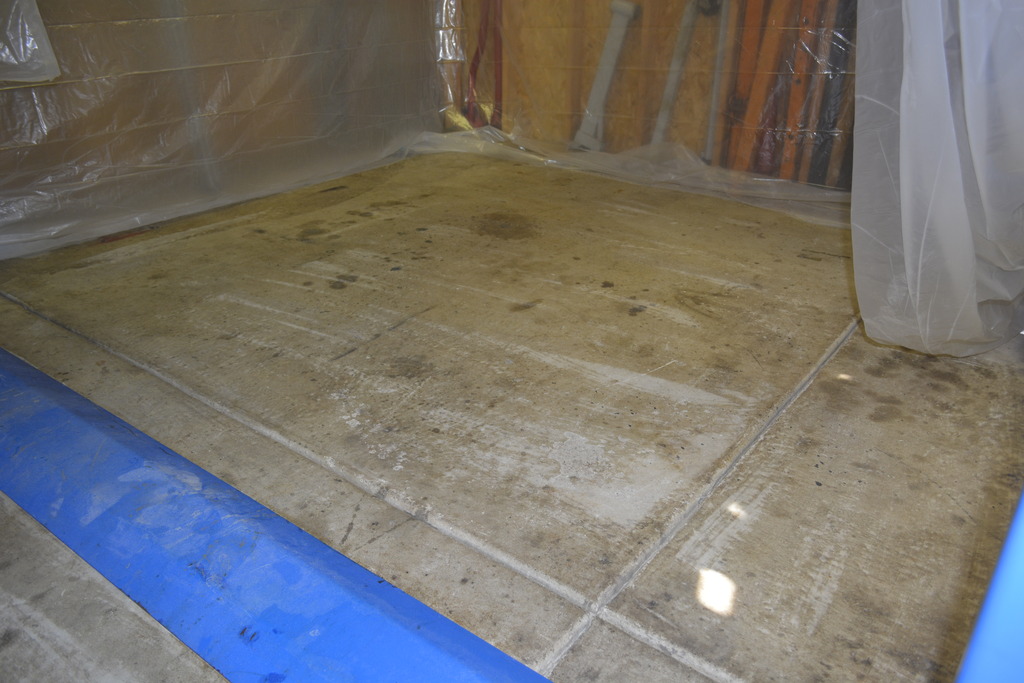
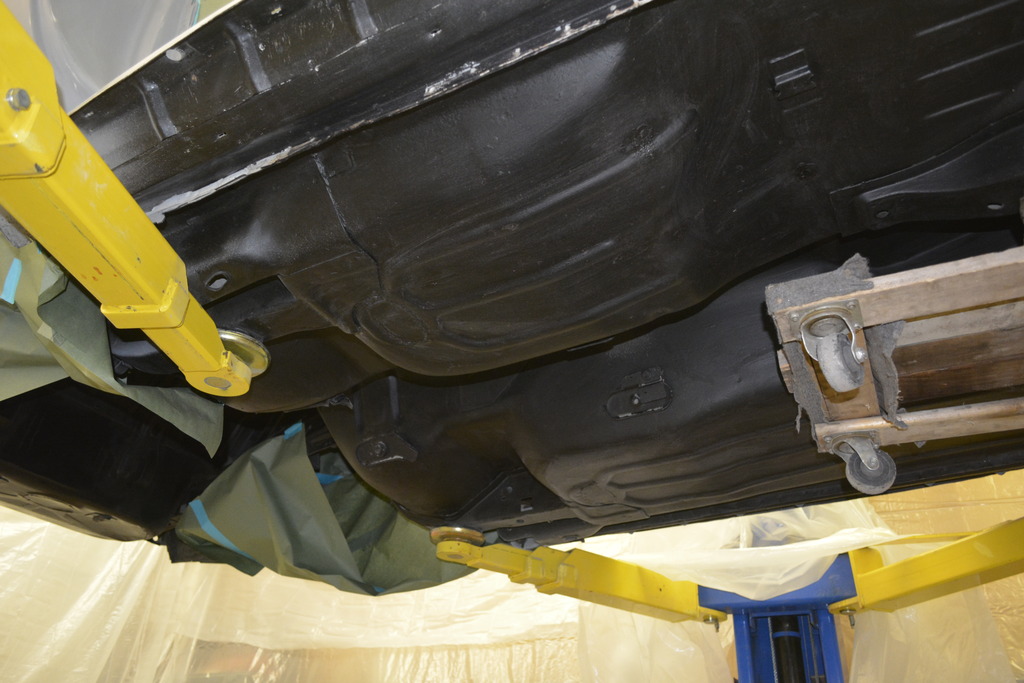
Then I raised the car and wiped down the under side with a wet cloth to keep dust from blowing into the paint. I also mopped the floor, let it dry, then masked off the lift. Once that was done I used my pump sprayer and water to keep the floor wet.

Last edited by robguitargod1; 06-06-2017 at 08:24 AM.
11-13-2016, 07:42 PM
#209
Senior Member
Thread Starter
iTrader: (4)
Join Date: Oct 2008
Location: Niles, IL
Posts: 857
Likes: 0
Received 5 Likes
on
4 Posts
Car: '91 LS6/T56/9"
Engine: LS6
Transmission: T56
Axle/Gears: Currie 9"/4.11, detroit truetrac
Re: Project Procrastination '91Z LS1/T56/currie 9" w/PICS
Tacked off and ready:
Sealer:

Sealer:
Last edited by robguitargod1; 06-06-2017 at 08:27 AM.
11-15-2016, 08:08 AM
#211
Senior Member
Thread Starter
iTrader: (4)
Join Date: Oct 2008
Location: Niles, IL
Posts: 857
Likes: 0
Received 5 Likes
on
4 Posts
Car: '91 LS6/T56/9"
Engine: LS6
Transmission: T56
Axle/Gears: Currie 9"/4.11, detroit truetrac
Re: Project Procrastination '91Z LS1/T56/currie 9" w/PICS
Your car is has been very motivational for me over the years. The paint color, big wheels, and stance are all things I'm ripping off from you.
My wheels are giving me a headache though. I REALLY want stock widened wheels (91-92 Z28) but nobody makes a really wide 16" tire! Do they and I just don't know about it??
The other option is buy 18" IROCS and have them widened. That would still be a stock wheel, I'm just not sure.
Or buy an aftermarket 17X12 or 18X12 wheel? I just don't know.
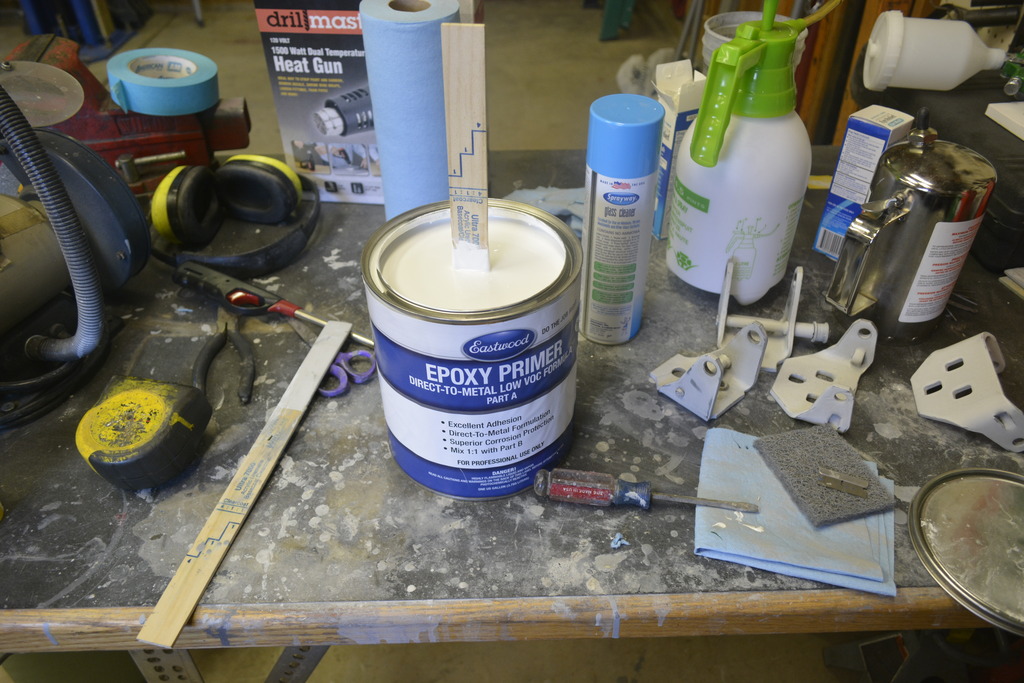
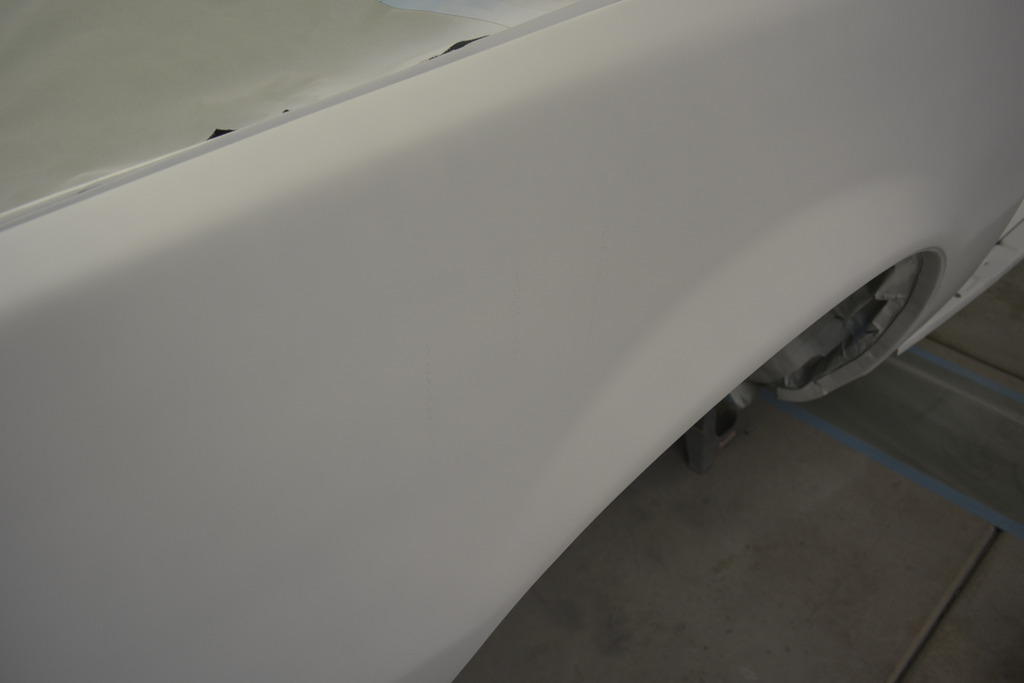
What I do know is that the sealer (eastwood white epoxy primer) is taking forever to cure. I know this is normal but I'm anxious to finish the shell so I can start on everything else (doors, hood, fenders......)
I'd planned on just letting the sealer flash for a few hours then paint basecoat over that right away but nope, couple problem areas I have to repair.
In the engine bay a piece of tack rag got stuck and I didn't see it, I brushed up against the drivers door jam, and something touched the passenger quarter.
So instead of being able to paint after the sealer flashed, it has to cure long enough for me to sand those areas with 600 and/or 800. That will take 2-3 days according to the spec sheet.
My wheels are giving me a headache though. I REALLY want stock widened wheels (91-92 Z28) but nobody makes a really wide 16" tire! Do they and I just don't know about it??
The other option is buy 18" IROCS and have them widened. That would still be a stock wheel, I'm just not sure.
Or buy an aftermarket 17X12 or 18X12 wheel? I just don't know.
What I do know is that the sealer (eastwood white epoxy primer) is taking forever to cure. I know this is normal but I'm anxious to finish the shell so I can start on everything else (doors, hood, fenders......)
I'd planned on just letting the sealer flash for a few hours then paint basecoat over that right away but nope, couple problem areas I have to repair.
In the engine bay a piece of tack rag got stuck and I didn't see it, I brushed up against the drivers door jam, and something touched the passenger quarter.
So instead of being able to paint after the sealer flashed, it has to cure long enough for me to sand those areas with 600 and/or 800. That will take 2-3 days according to the spec sheet.
11-16-2016, 09:39 AM
#212
Re: Project Procrastination '91Z LS1/T56/currie 9" w/PICS
Been watching since day 1. Nice progress.
Random question, how big is your garage? Should be signing papers on a new house today, will finally have a (small) garage to work in.
Just wondering about dimensions for reference purposes.
Random question, how big is your garage? Should be signing papers on a new house today, will finally have a (small) garage to work in.
Just wondering about dimensions for reference purposes.
11-16-2016, 10:03 AM
#213
Senior Member
Thread Starter
iTrader: (4)
Join Date: Oct 2008
Location: Niles, IL
Posts: 857
Likes: 0
Received 5 Likes
on
4 Posts
Car: '91 LS6/T56/9"
Engine: LS6
Transmission: T56
Axle/Gears: Currie 9"/4.11, detroit truetrac
Re: Project Procrastination '91Z LS1/T56/currie 9" w/PICS
19'3" square (231") Measured just for you.
11-16-2016, 10:33 AM
#214
Senior Member
Thread Starter
iTrader: (4)
Join Date: Oct 2008
Location: Niles, IL
Posts: 857
Likes: 0
Received 5 Likes
on
4 Posts
Car: '91 LS6/T56/9"
Engine: LS6
Transmission: T56
Axle/Gears: Currie 9"/4.11, detroit truetrac
Re: Project Procrastination '91Z LS1/T56/currie 9" w/PICS
Installing the lift, modifying the garage for better overhead clearance, running the gas and electric(with permits)....I did it all so don't let anyone say "it" can't be done. Just use common sense and you'll be fine.
11-16-2016, 01:12 PM
#215
Re: Project Procrastination '91Z LS1/T56/currie 9" w/PICS
Define small. LOTS of people told me I could't have a real lift in my garage. Well a LOT of people were wrong. If you want that small garage to be a great usable space, go for it.
Installing the lift, modifying the garage for better overhead clearance, running the gas and electric(with permits)....I did it all so don't let anyone say "it" can't be done. Just use common sense and you'll be fine.
Installing the lift, modifying the garage for better overhead clearance, running the gas and electric(with permits)....I did it all so don't let anyone say "it" can't be done. Just use common sense and you'll be fine.
Thanks for measurment. Mine will be 16x22 with 8' walls. Needs some work but it already has power(may need improving) and running water/sink.
I can live without a lift for now, but having one at work has spoiled me. I'm just glad I'll finally have concrete at this point.
11-21-2016, 08:18 AM
#216
Senior Member
Thread Starter
iTrader: (4)
Join Date: Oct 2008
Location: Niles, IL
Posts: 857
Likes: 0
Received 5 Likes
on
4 Posts
Car: '91 LS6/T56/9"
Engine: LS6
Transmission: T56
Axle/Gears: Currie 9"/4.11, detroit truetrac
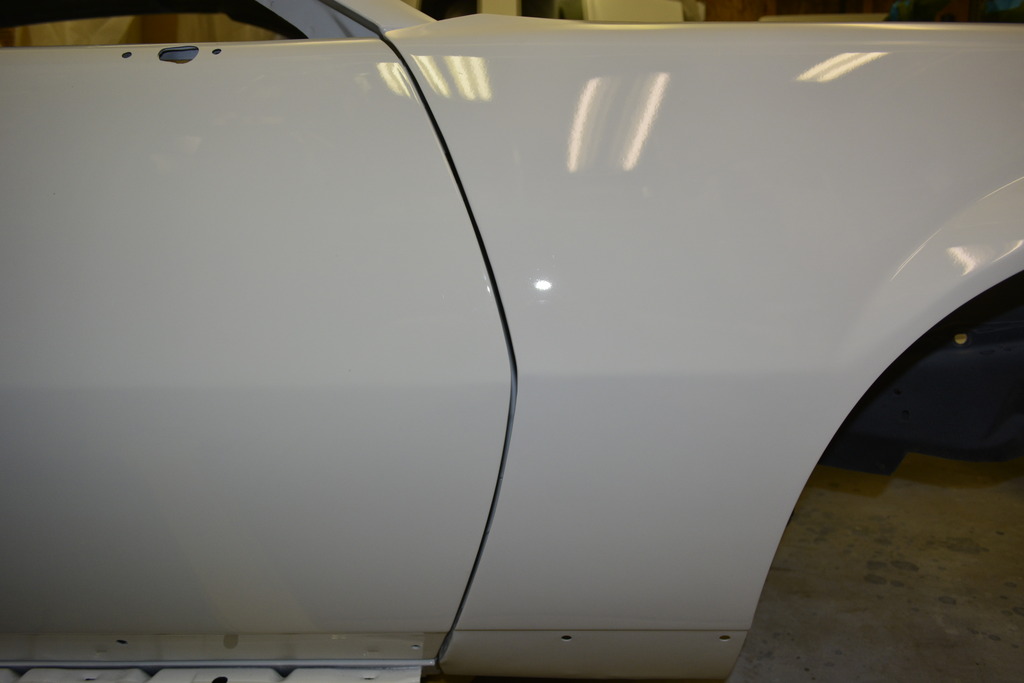
Re: Project Procrastination '91Z LS1/T56/currie 9" w/PICS
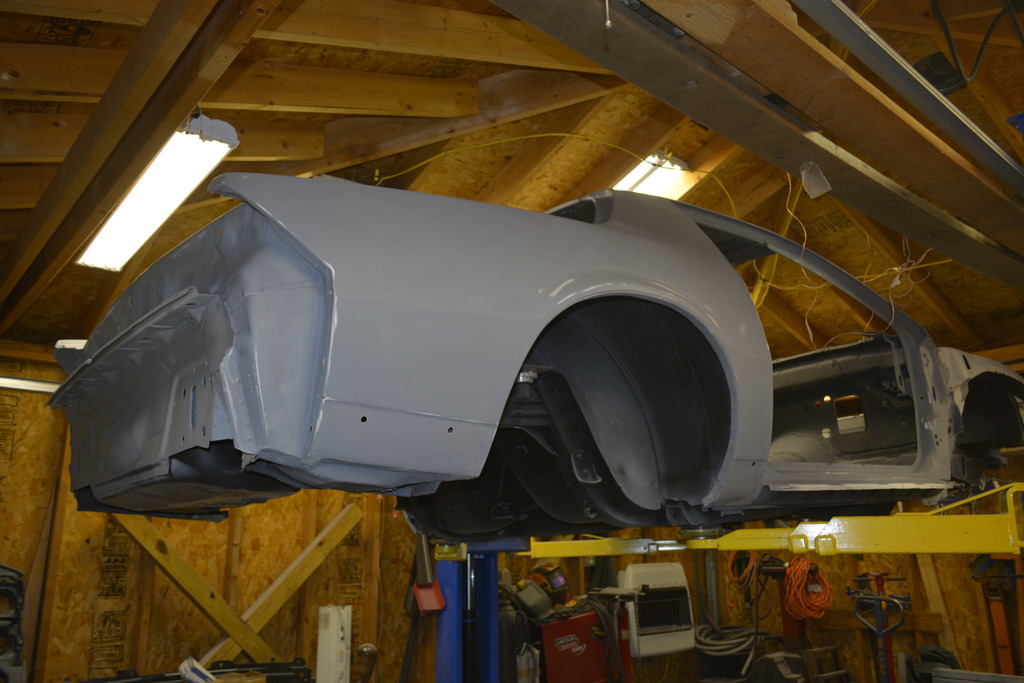
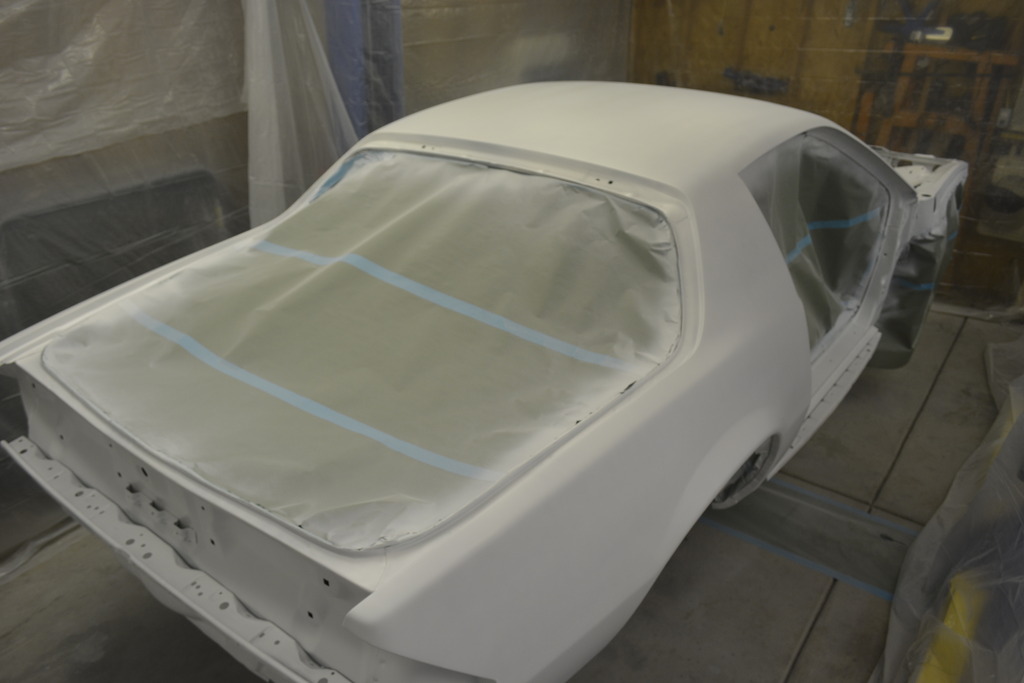
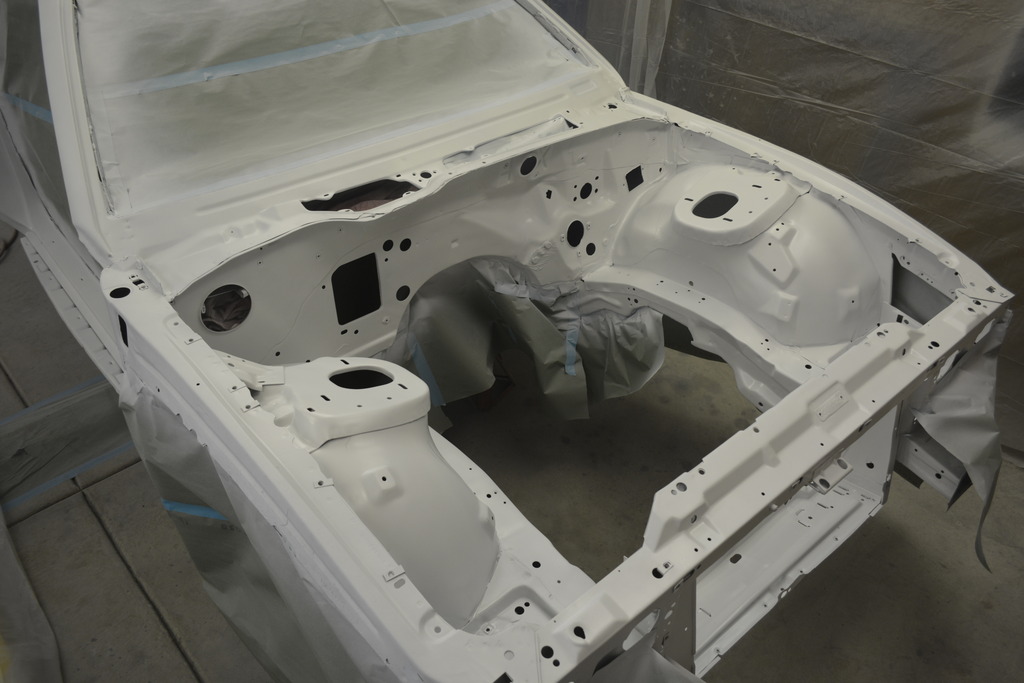
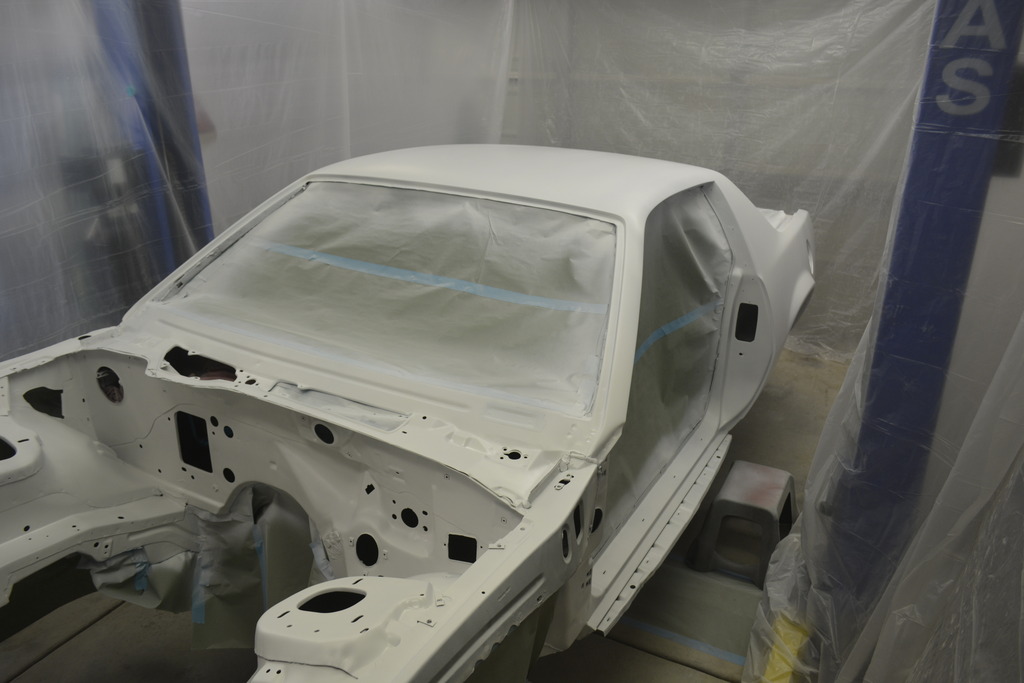
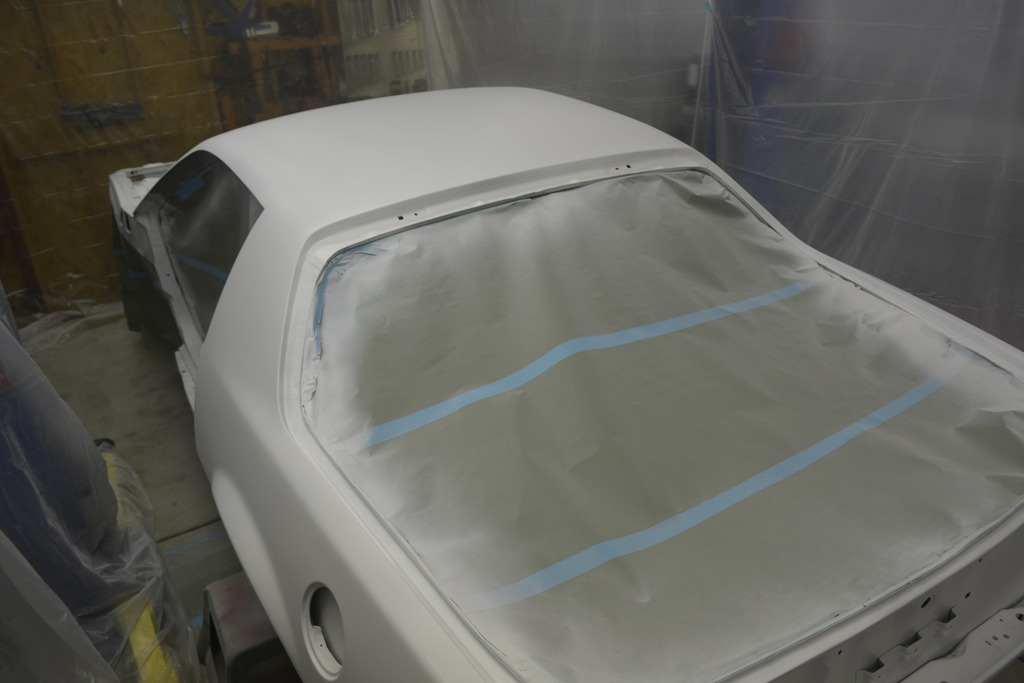
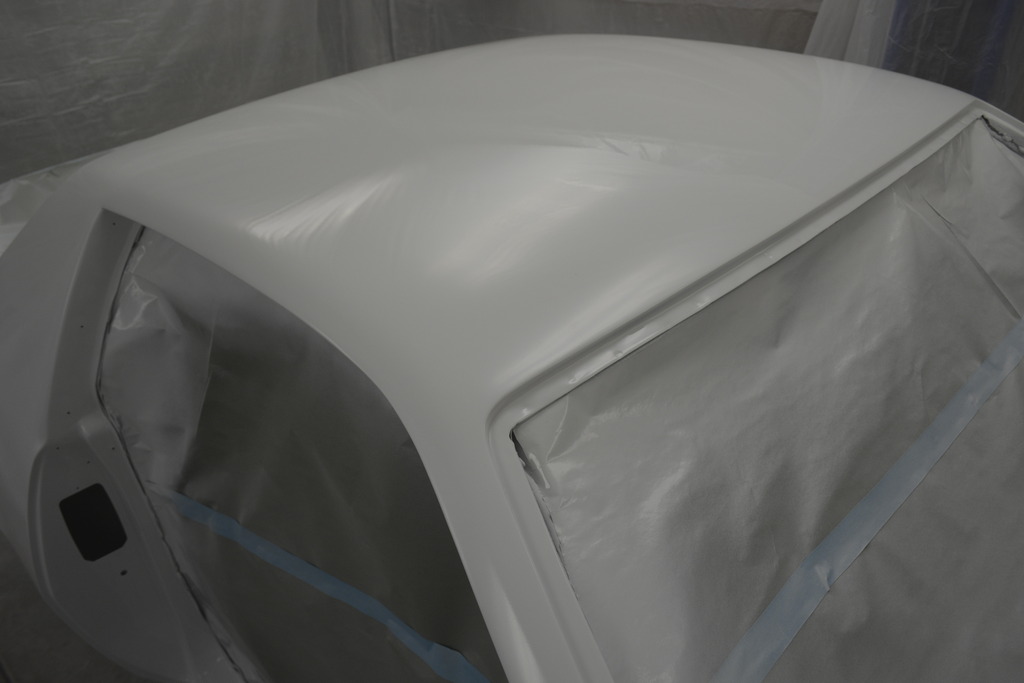
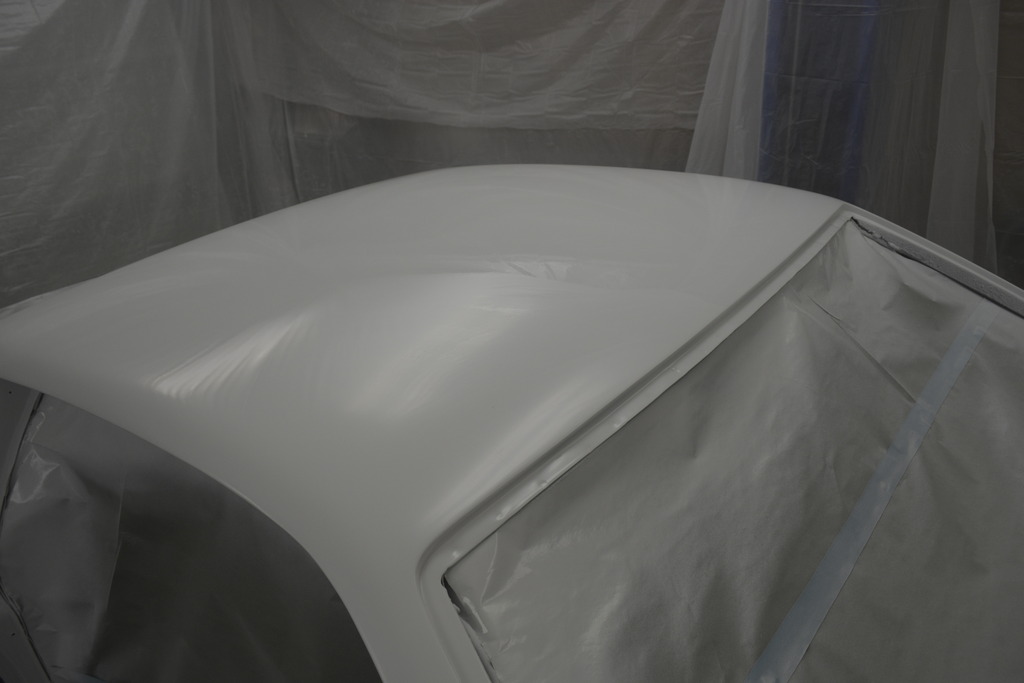
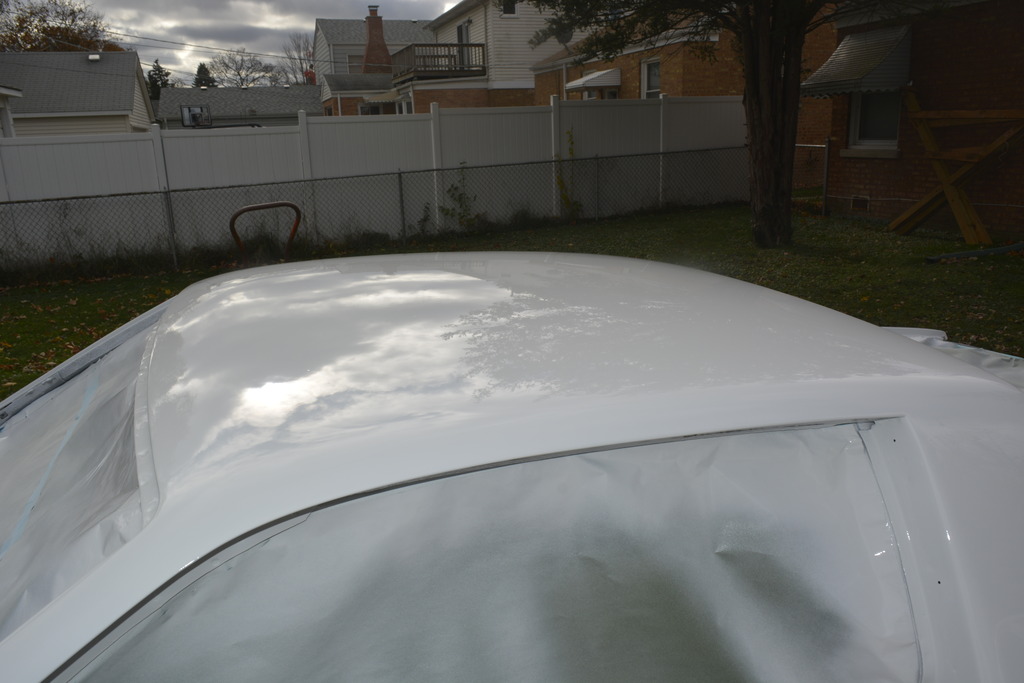
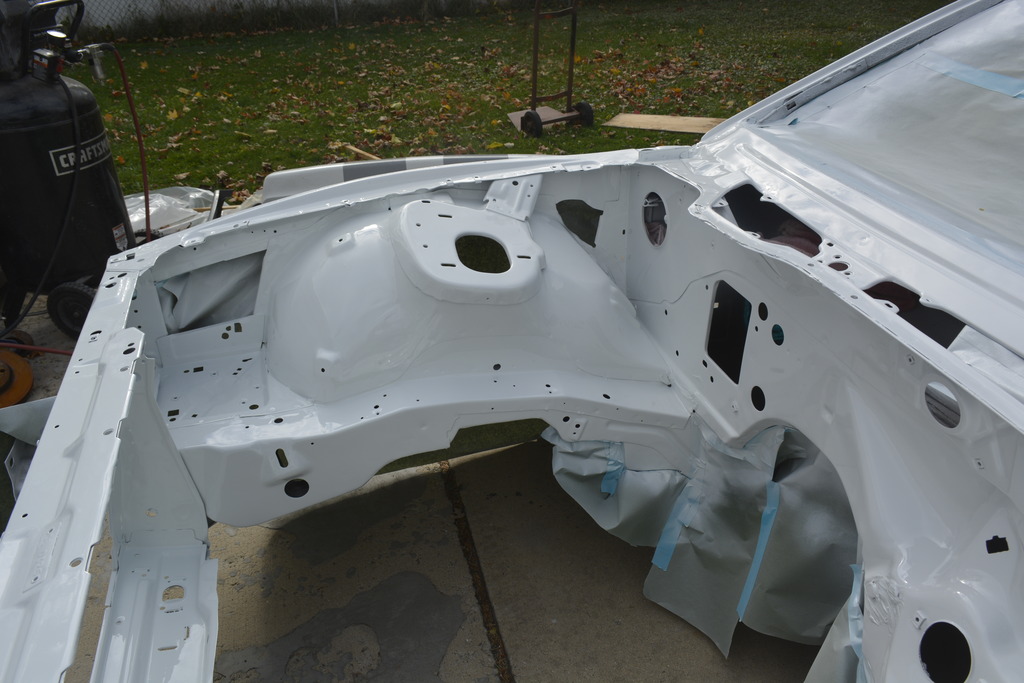
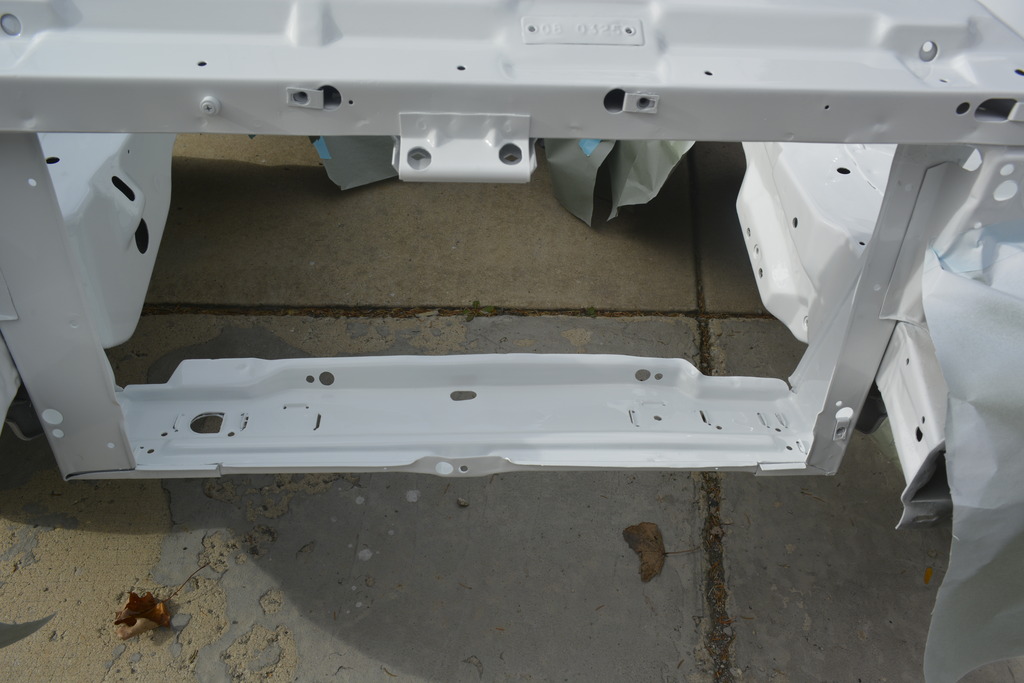
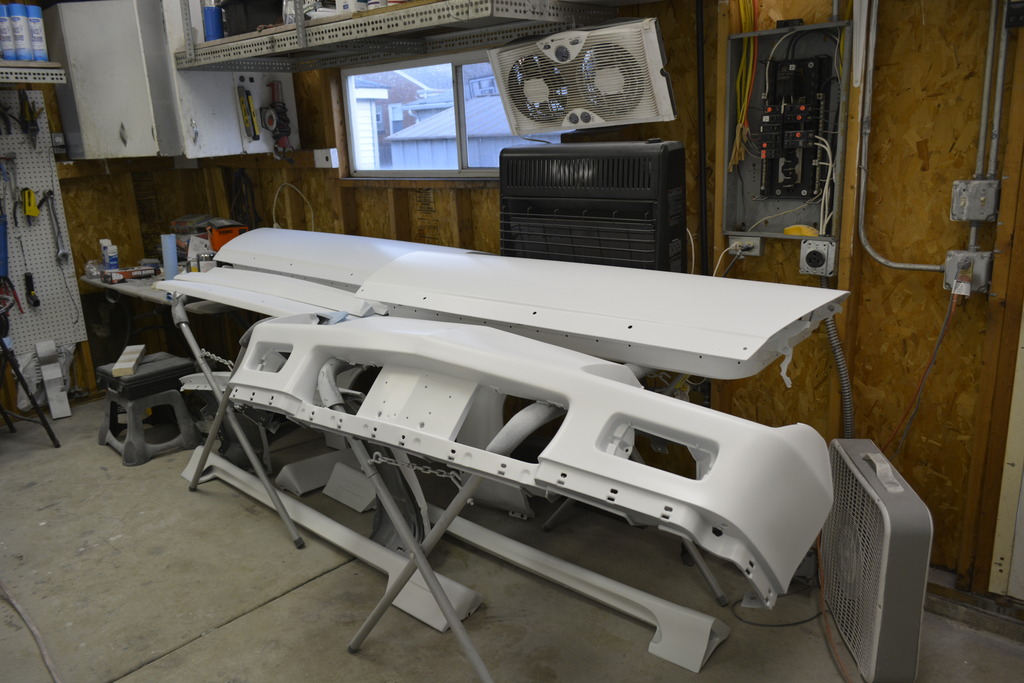
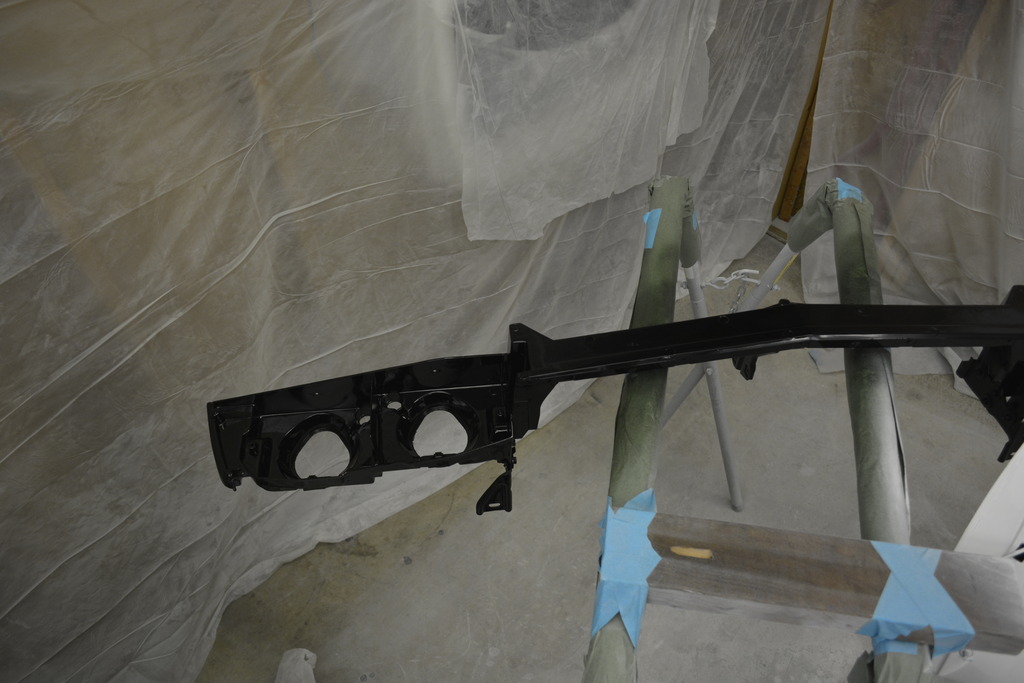
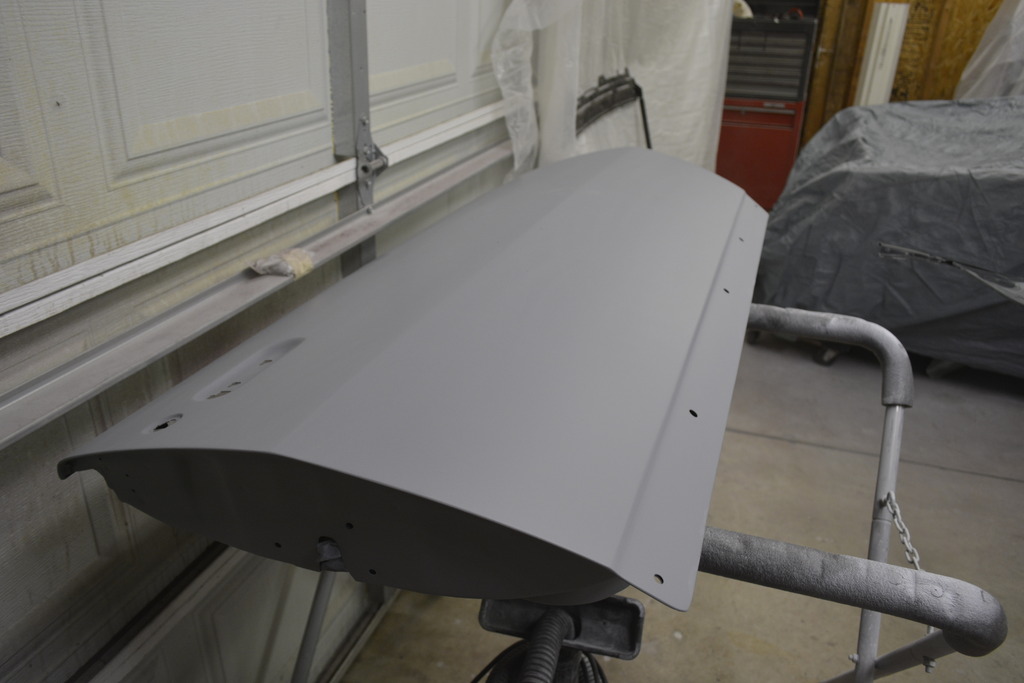
Bid update. Started painting the shell after letting the sealer cure enough to fix a few runs. Also dealt with some fish-eyes while painting:
Then cleared the shell:

Then cleared the shell:
Last edited by robguitargod1; 06-06-2017 at 08:32 AM.
11-21-2016, 08:20 AM
#217
Senior Member
Thread Starter
iTrader: (4)
Join Date: Oct 2008
Location: Niles, IL
Posts: 857
Likes: 0
Received 5 Likes
on
4 Posts
Car: '91 LS6/T56/9"
Engine: LS6
Transmission: T56
Axle/Gears: Currie 9"/4.11, detroit truetrac
Re: Project Procrastination '91Z LS1/T56/currie 9" w/PICS
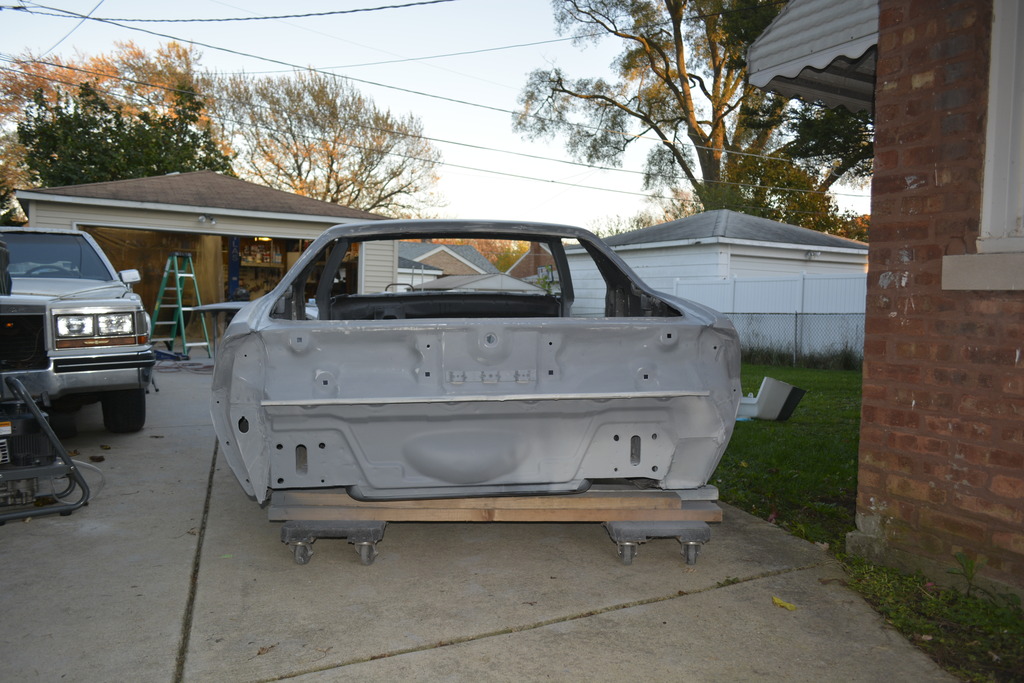
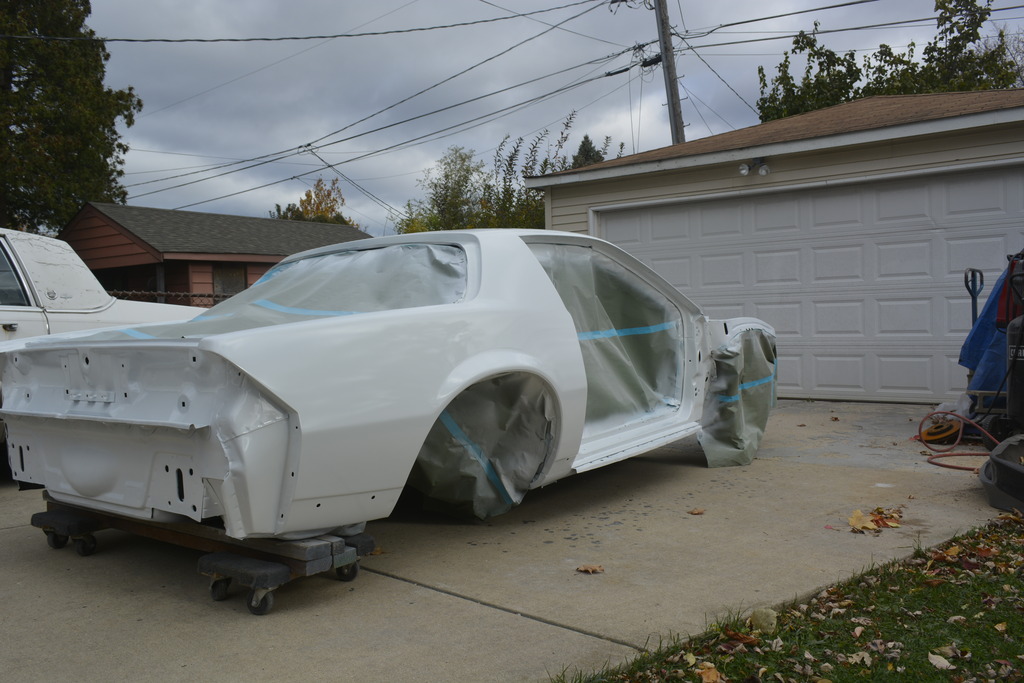
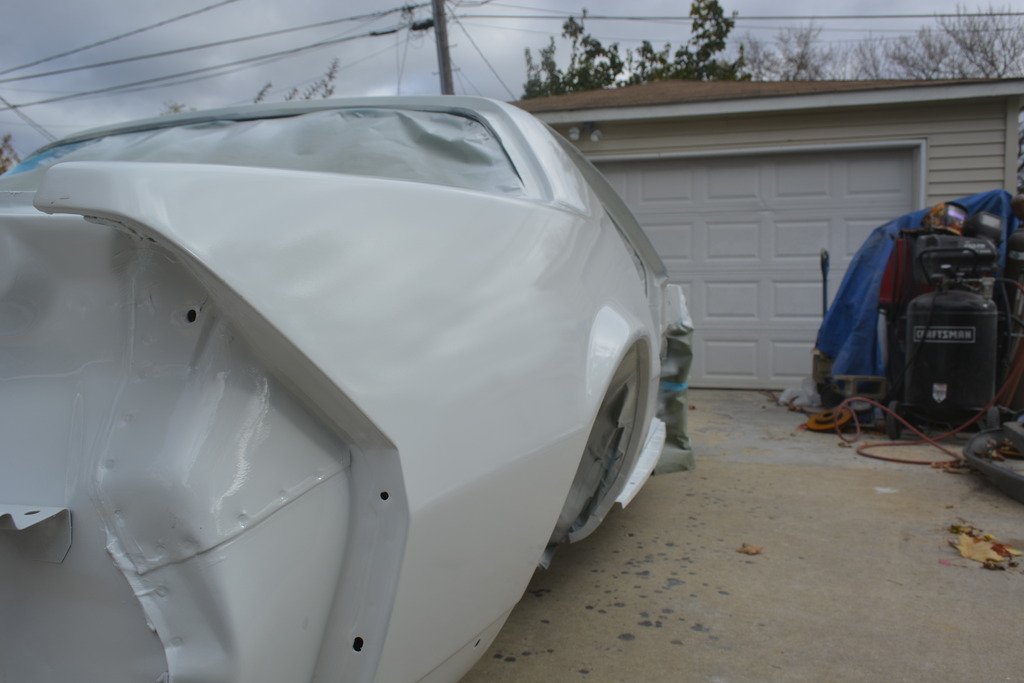
Cured overnight then pushed back into the driveway:

Last edited by robguitargod1; 06-06-2017 at 08:35 AM.
11-21-2016, 08:24 AM
#218
Senior Member
Thread Starter
iTrader: (4)
Join Date: Oct 2008
Location: Niles, IL
Posts: 857
Likes: 0
Received 5 Likes
on
4 Posts
Car: '91 LS6/T56/9"
Engine: LS6
Transmission: T56
Axle/Gears: Currie 9"/4.11, detroit truetrac
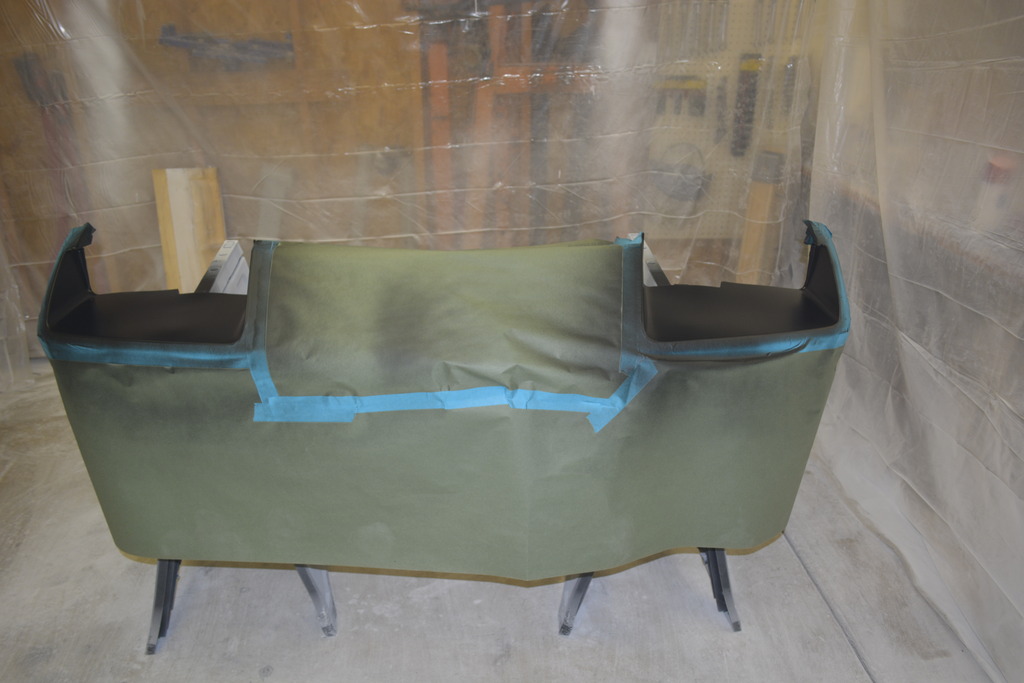
Re: Project Procrastination '91Z LS1/T56/currie 9" w/PICS
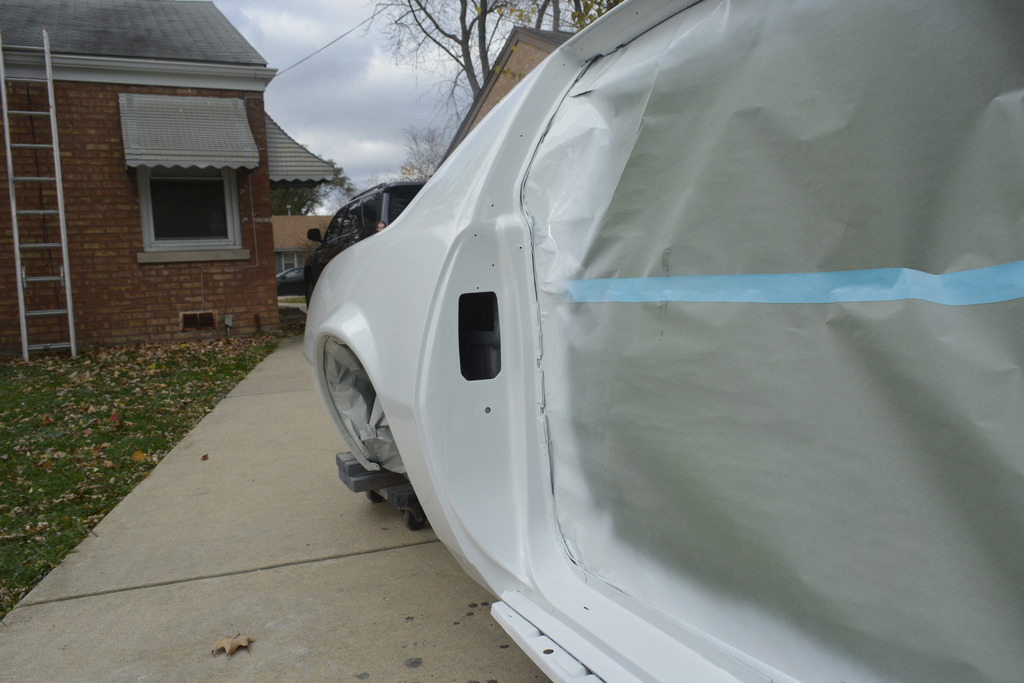
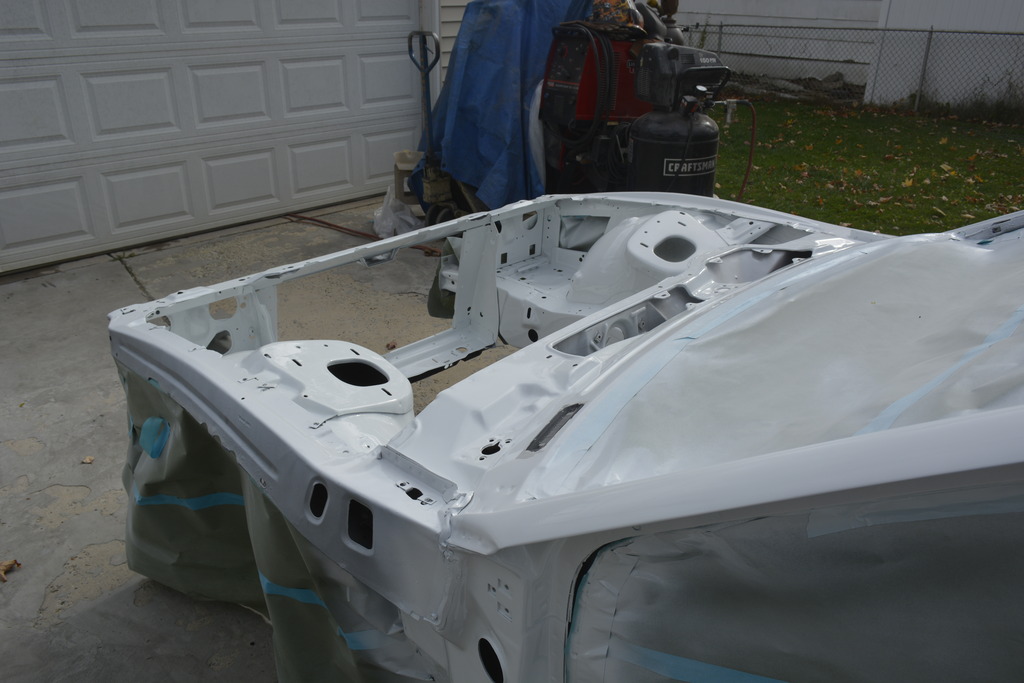
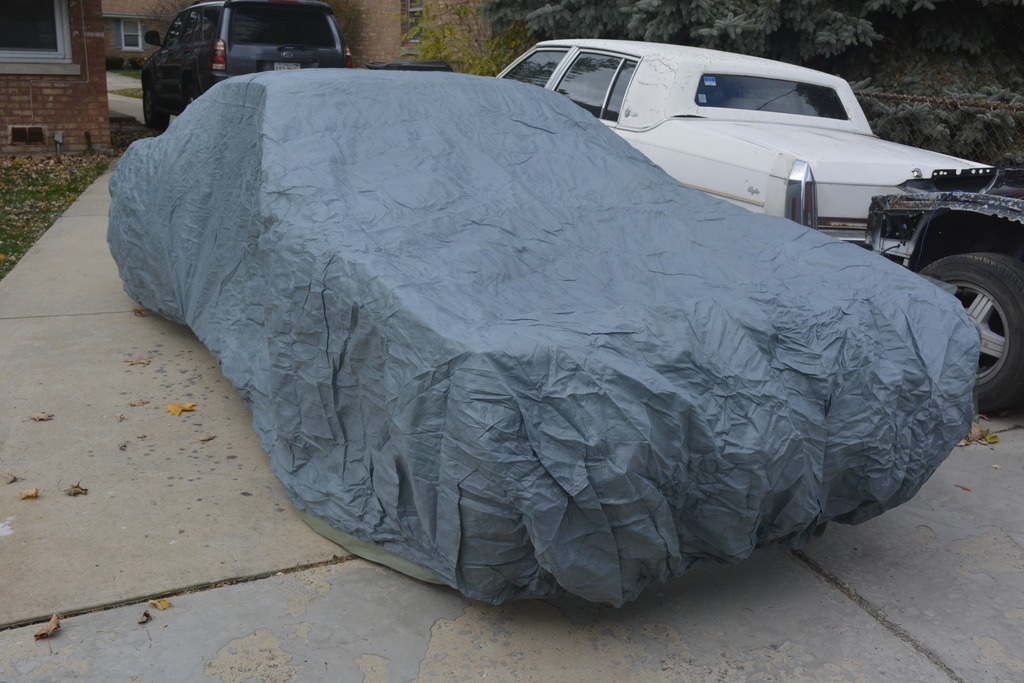
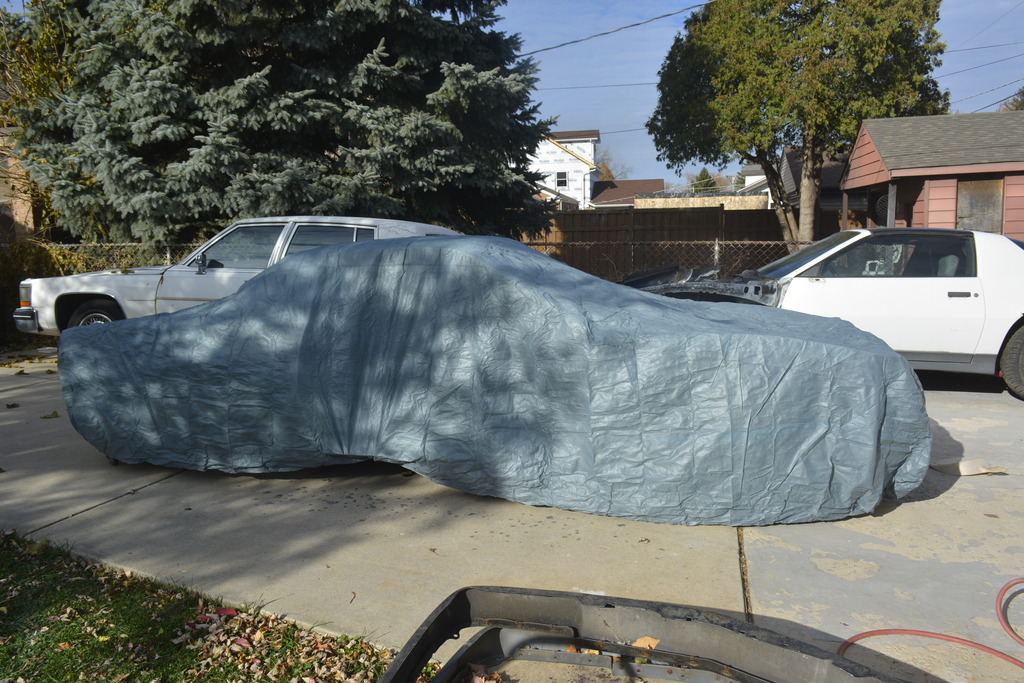
Then I covered it and started working on everything else in the garage.
This is the cover I used. I found it recommended in another thread here and it fits very well! Not a custom cover but more than good enough.
https://www.amazon.com/gp/product/B0...?ie=UTF8&psc=1
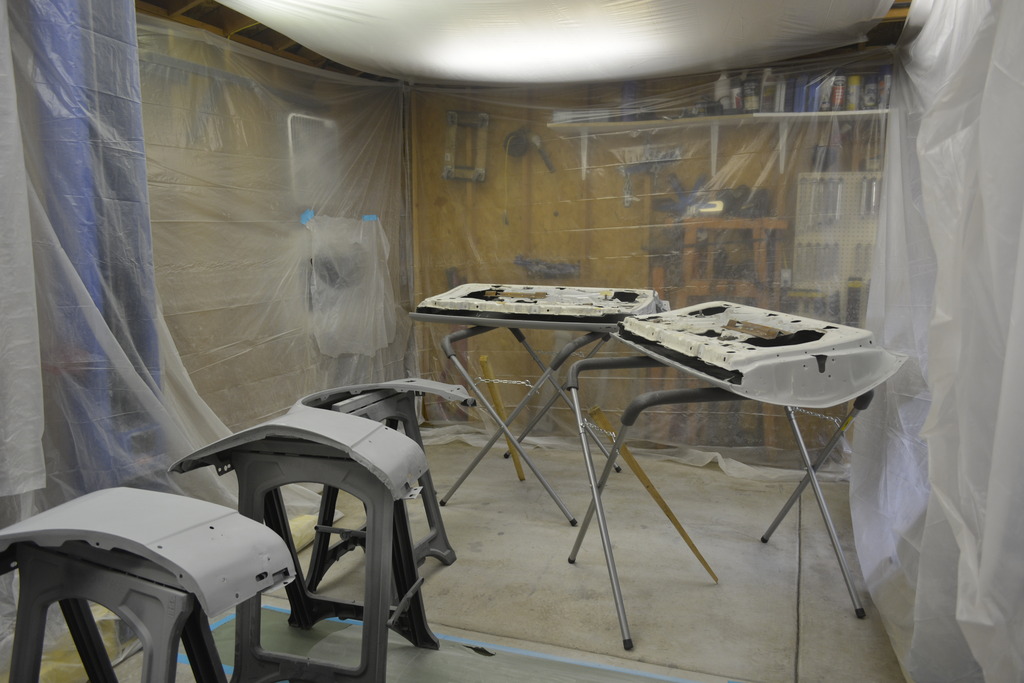
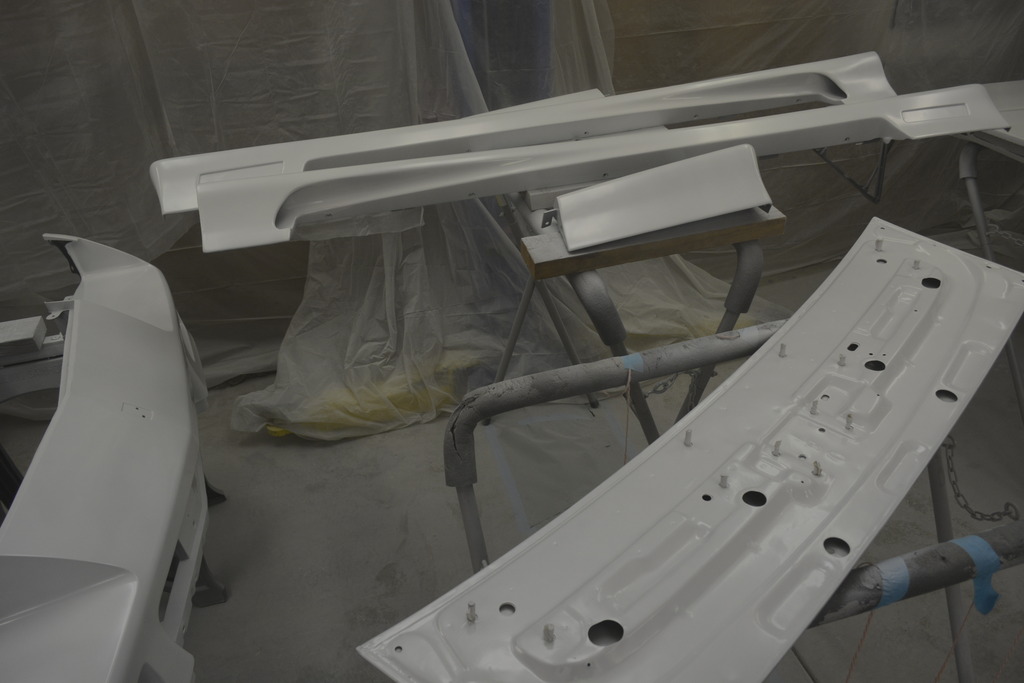
Started with sealer on the other parts:
This is the cover I used. I found it recommended in another thread here and it fits very well! Not a custom cover but more than good enough.
https://www.amazon.com/gp/product/B0...?ie=UTF8&psc=1


Started with sealer on the other parts:


 11-21-2016, 08:29 AM
#219
Senior Member
Thread Starter
iTrader: (4)
Join Date: Oct 2008
Location: Niles, IL
Posts: 857
Likes: 0
Received 5 Likes
on
4 Posts
Car: '91 LS6/T56/9"
Engine: LS6
Transmission: T56
Axle/Gears: Currie 9"/4.11, detroit truetrac
Re: Project Procrastination '91Z LS1/T56/currie 9" w/PICS
I realize I'm probably posting too many pictures especially since the sealer and basecoat are nearly identical. You can't tell if I'm showing a picture of sealer being sprayed or basecoat. Hell I only remember by looking back at these pictures! I've used them 3 times already to remind myself of what still needs to be done.
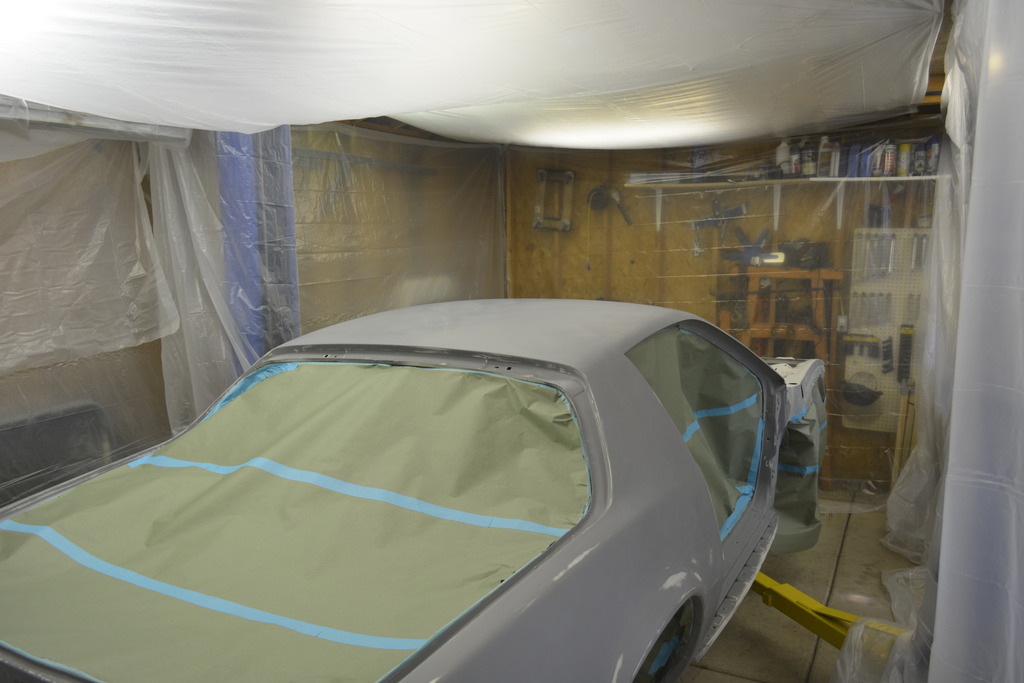
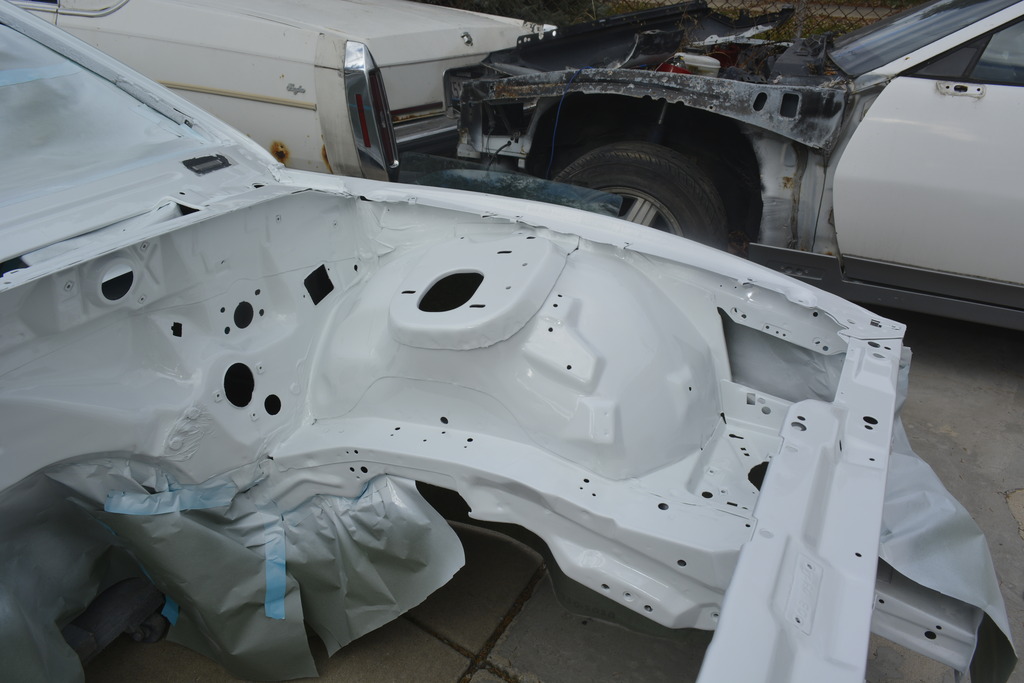
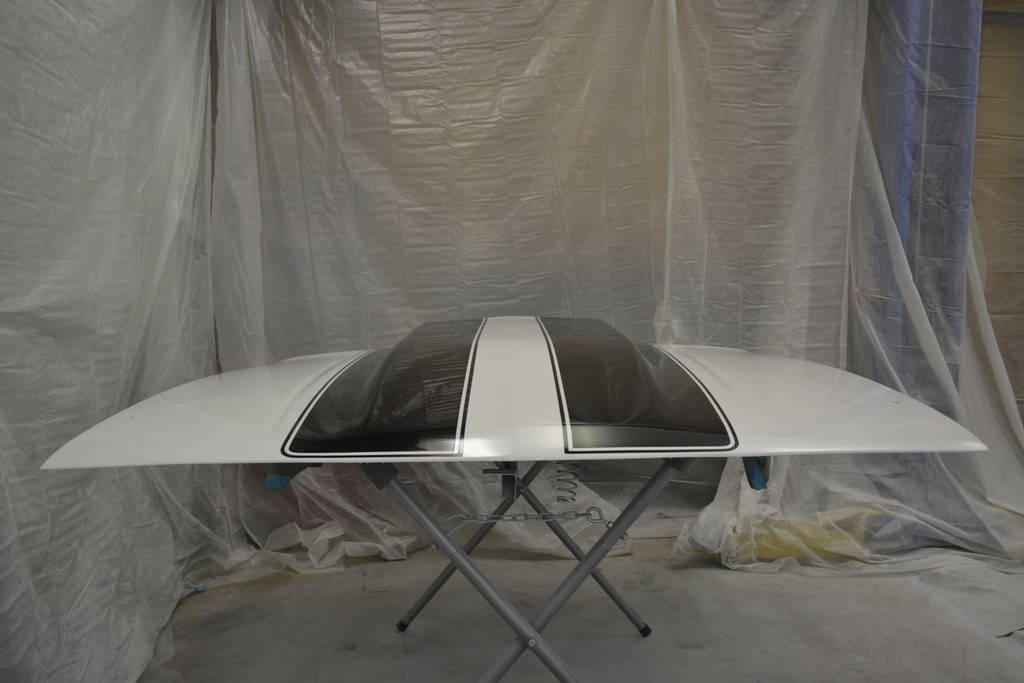
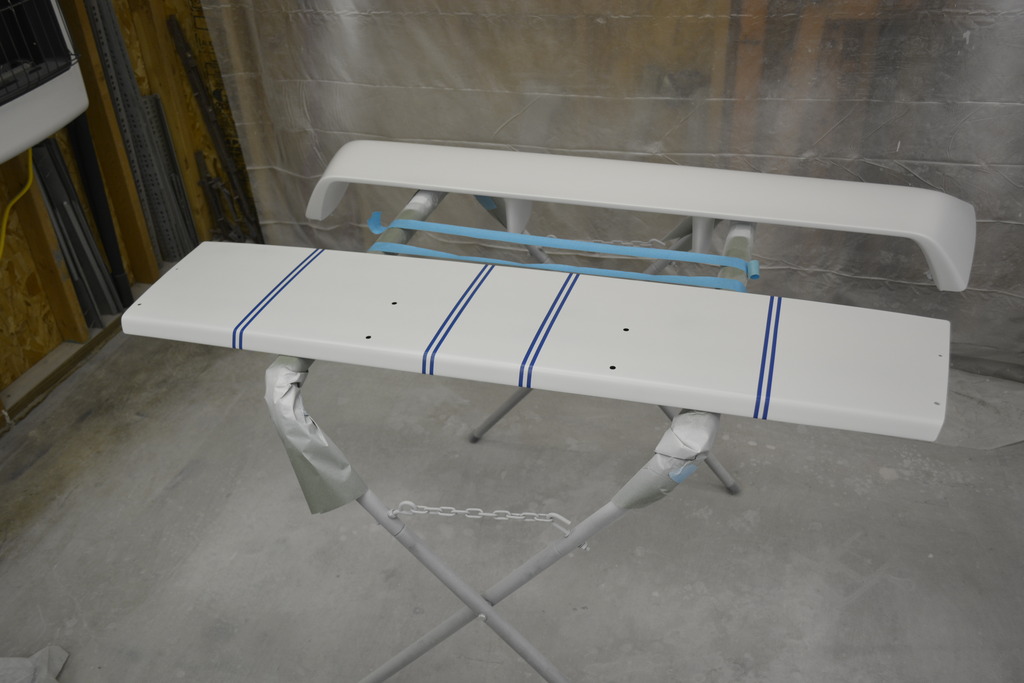
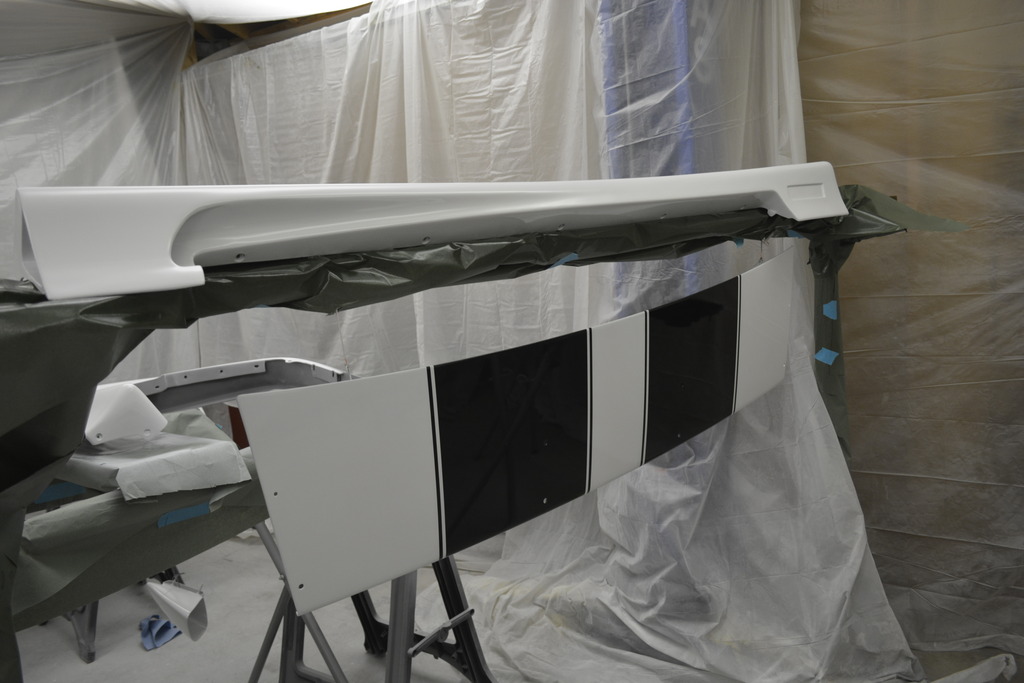
So the front GFX, spoiler, and hatch lid need some sanding before basecaot but everything else is painted:
So the front GFX, spoiler, and hatch lid need some sanding before basecaot but everything else is painted:
Last edited by robguitargod1; 06-06-2017 at 08:37 AM.
11-21-2016, 08:35 AM
#220
Senior Member
Thread Starter
iTrader: (4)
Join Date: Oct 2008
Location: Niles, IL
Posts: 857
Likes: 0
Received 5 Likes
on
4 Posts
Car: '91 LS6/T56/9"
Engine: LS6
Transmission: T56
Axle/Gears: Currie 9"/4.11, detroit truetrac
Re: Project Procrastination '91Z LS1/T56/currie 9" w/PICS
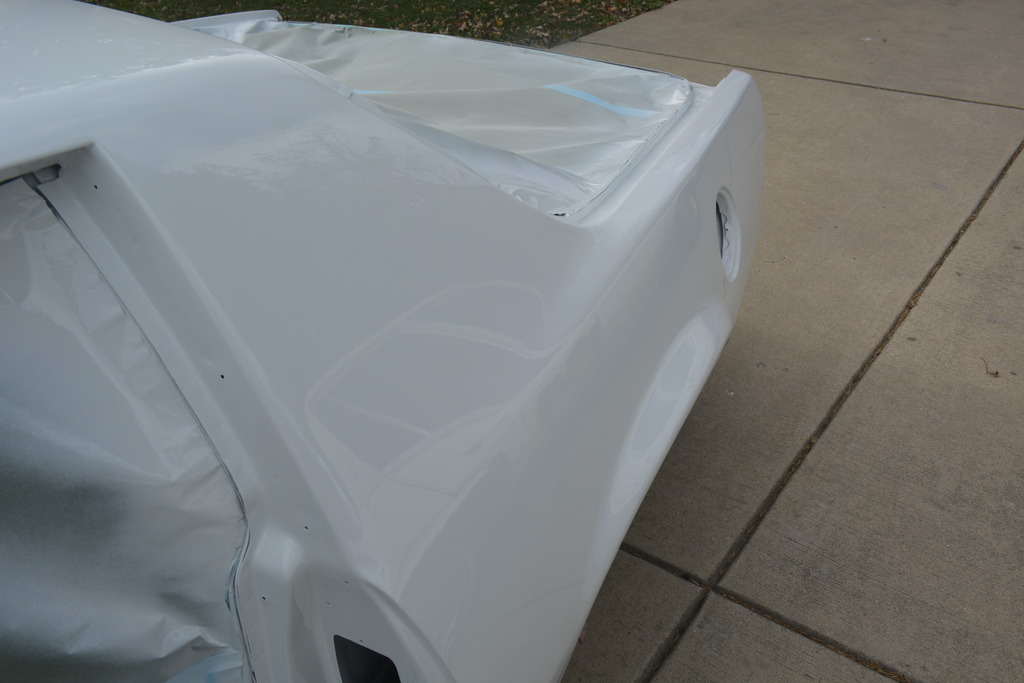
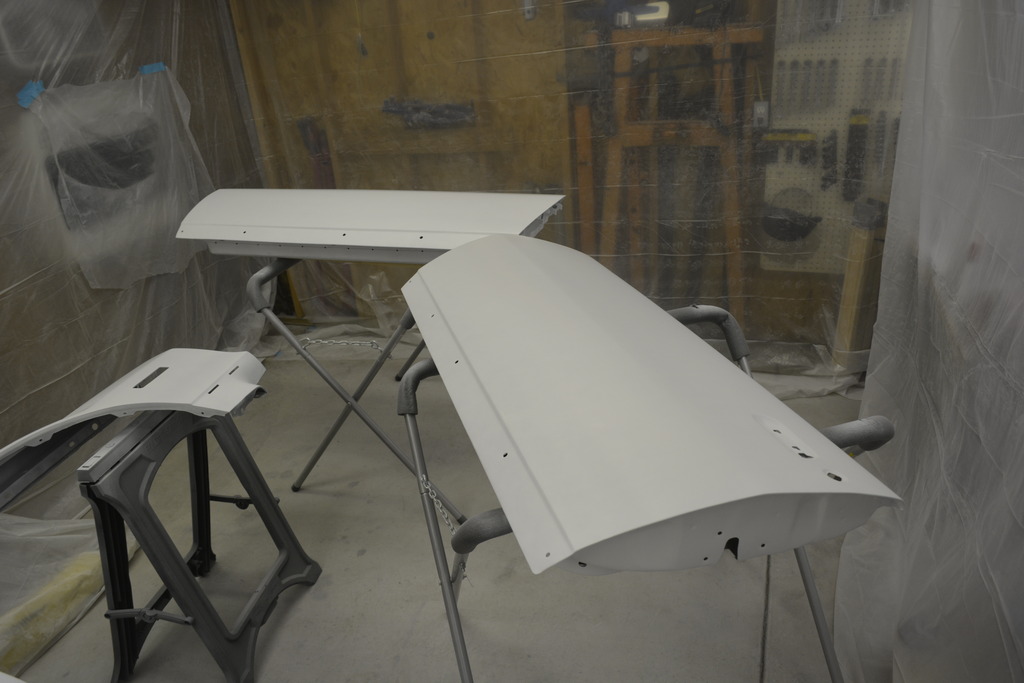
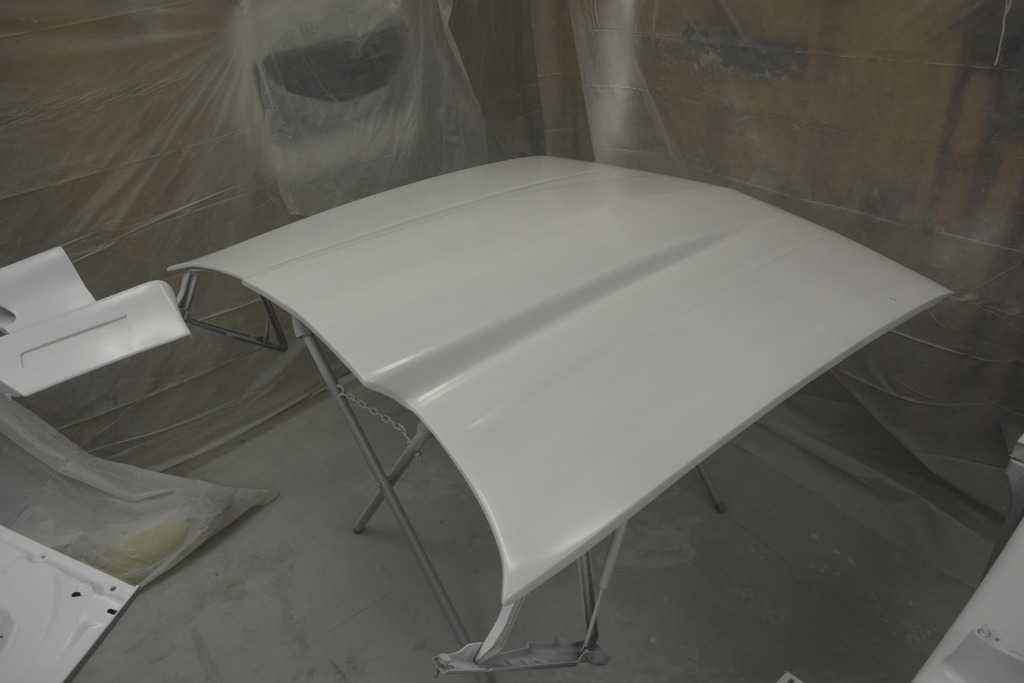
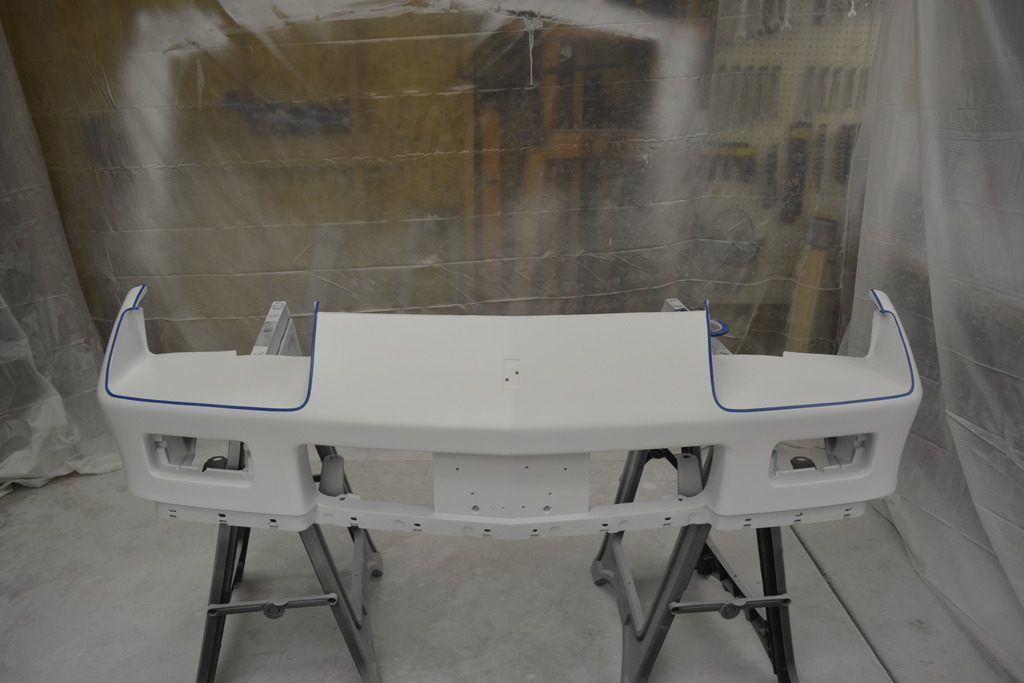
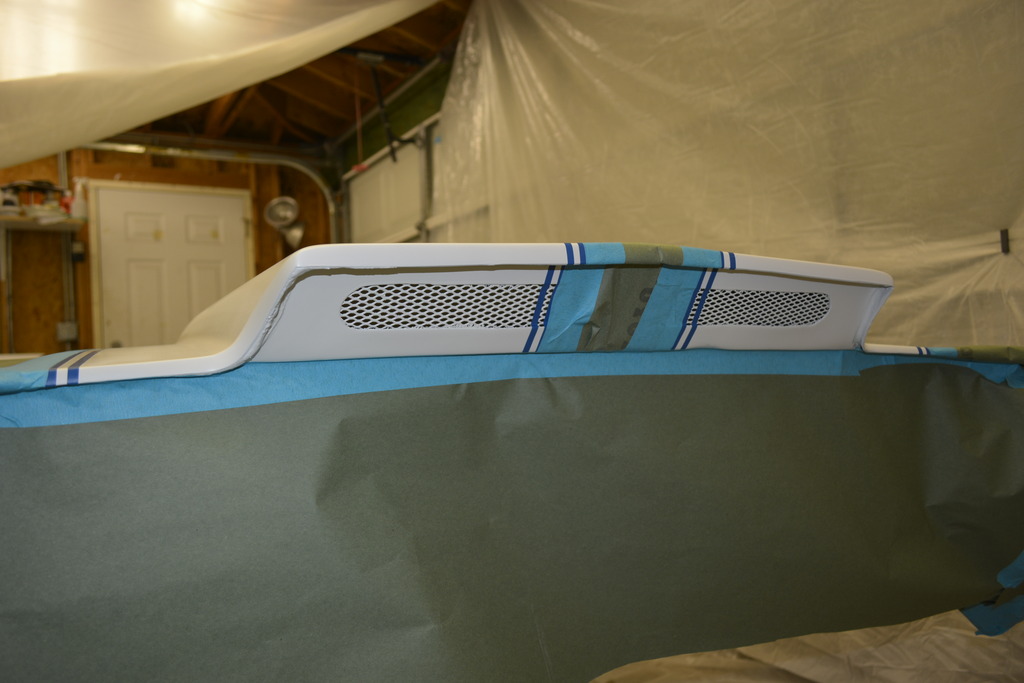
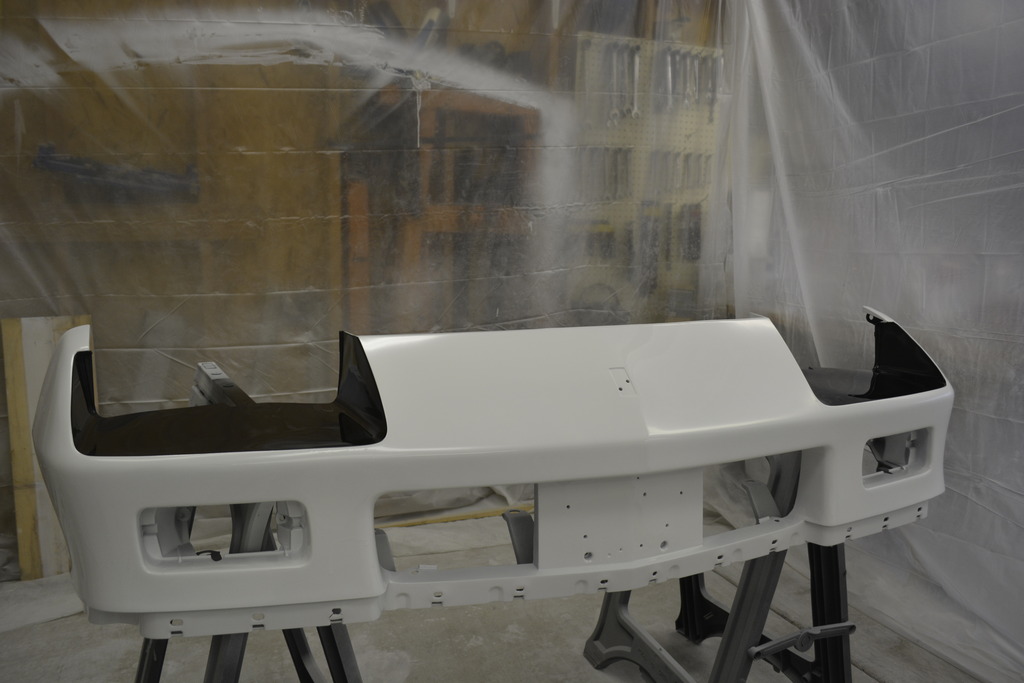
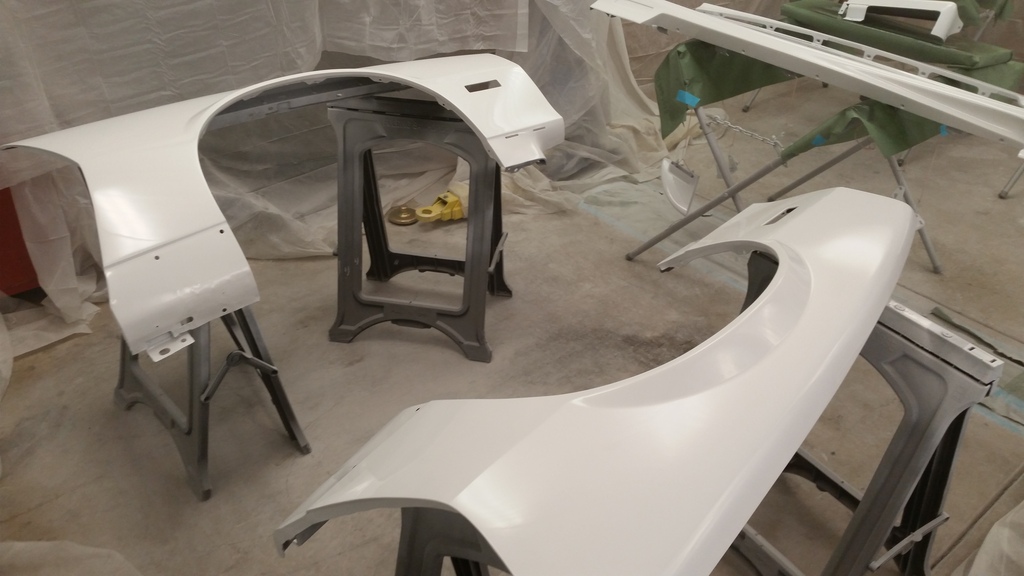
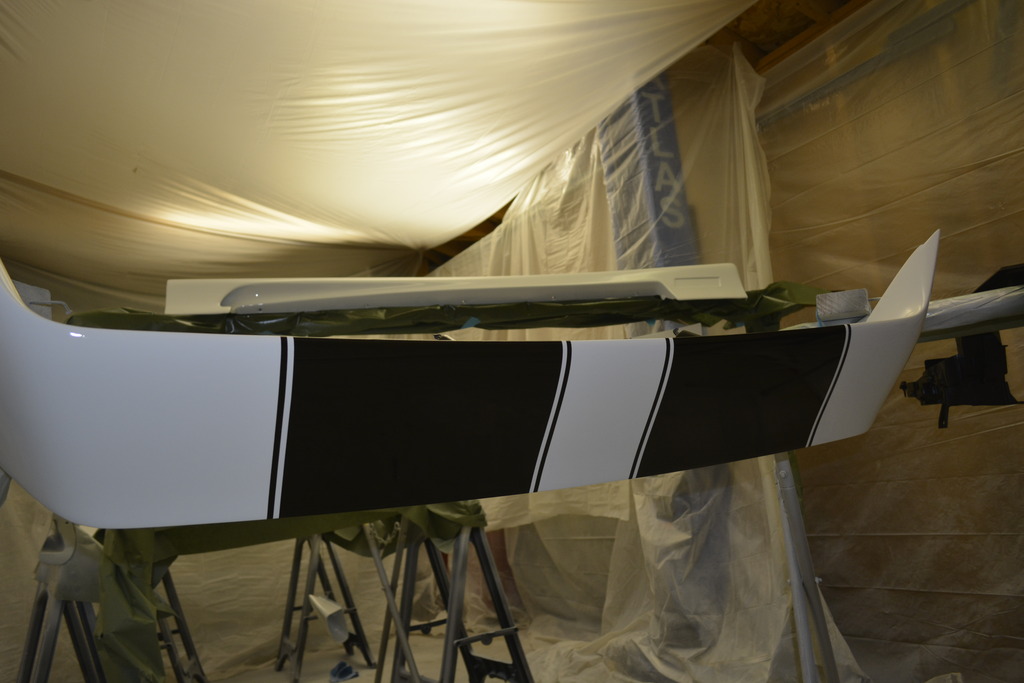
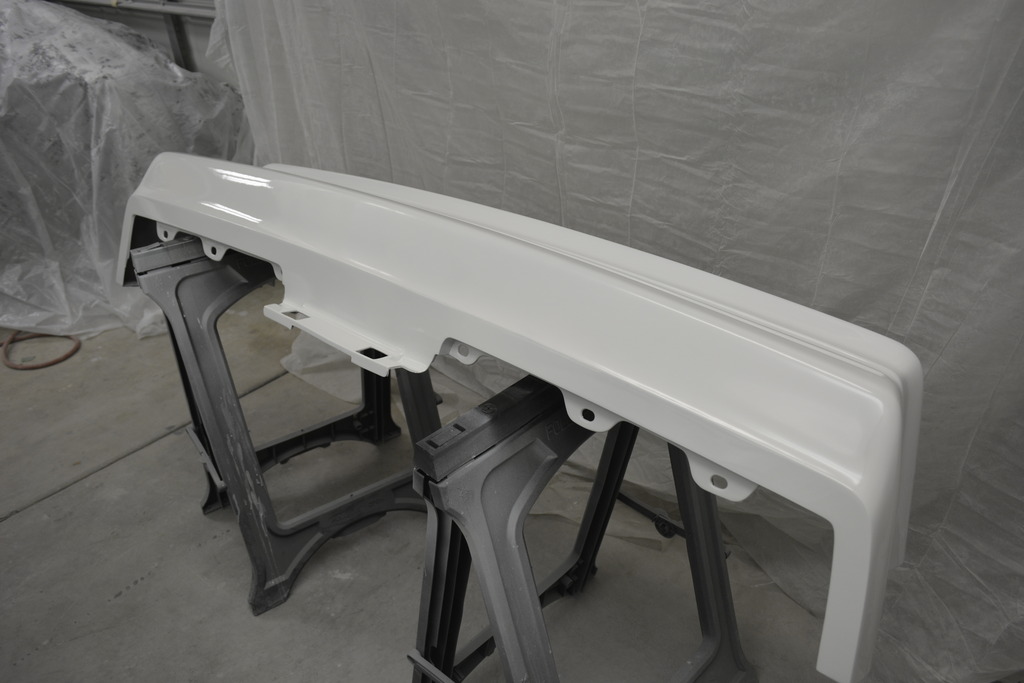
Then I decided to work on the front bumper and hood:
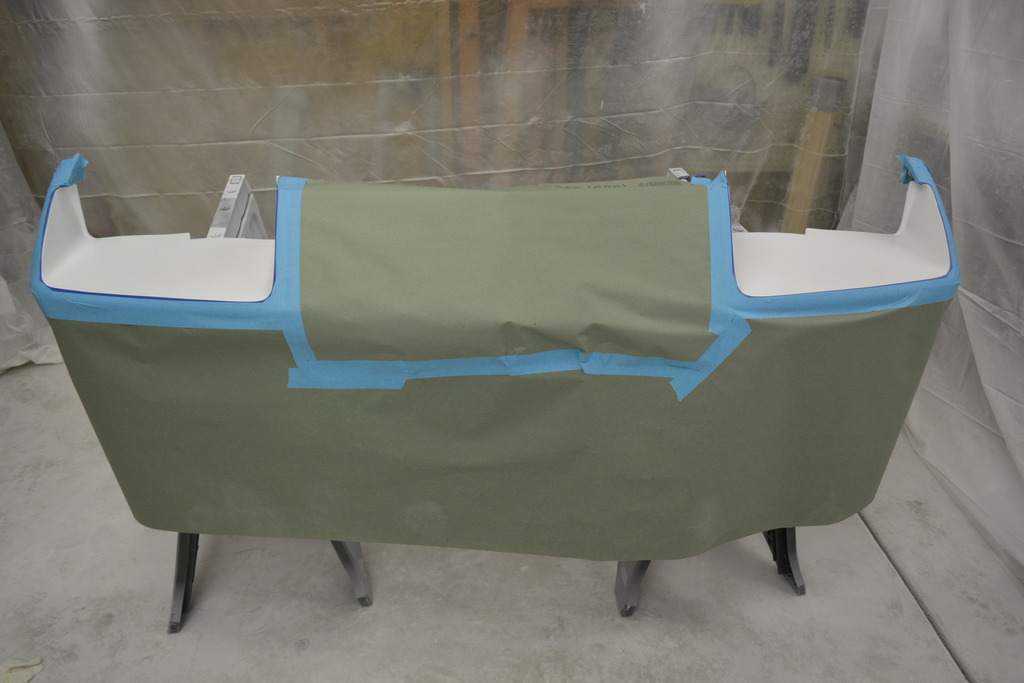
I'd purchased a 70-72 Chevelle stripe kit, but it just wasn't going to work for this car. Very close though but the angle wasn't right.
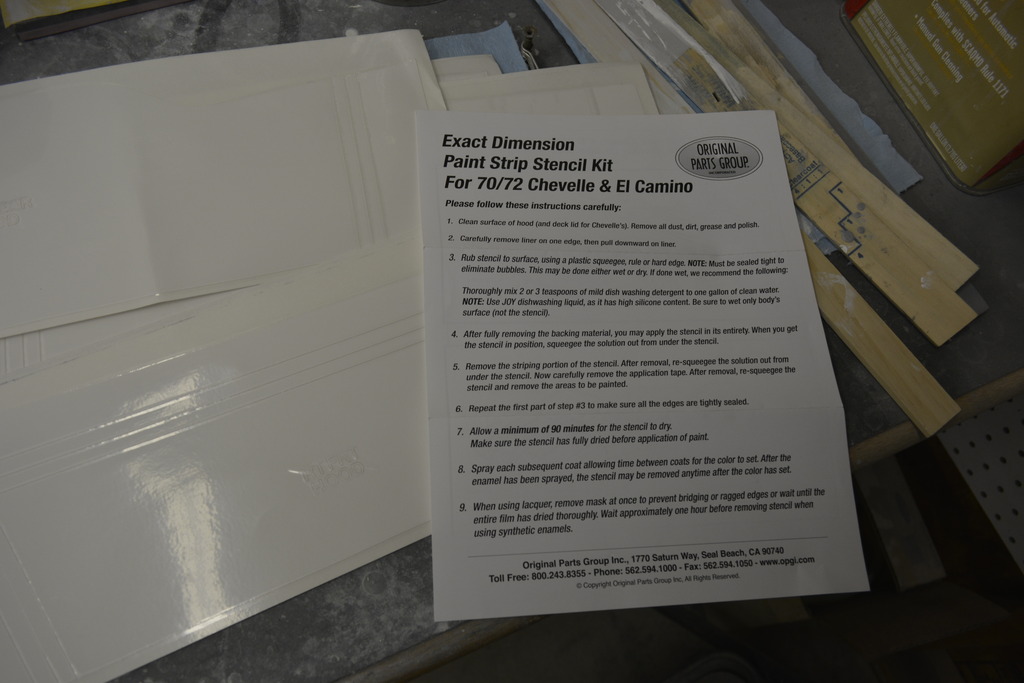
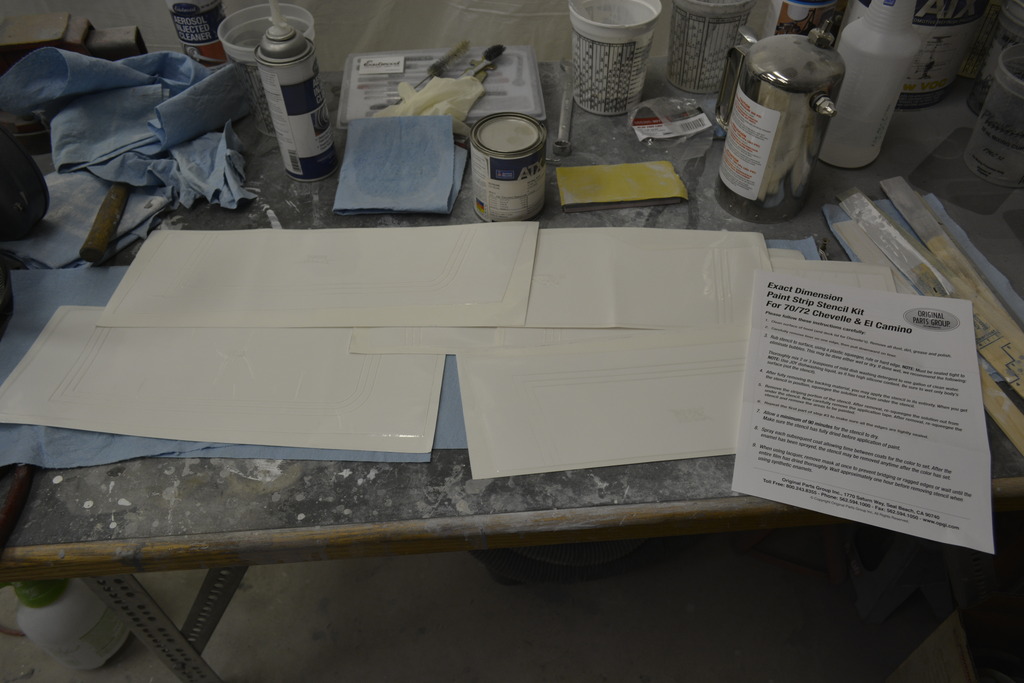


I'd purchased a 70-72 Chevelle stripe kit, but it just wasn't going to work for this car. Very close though but the angle wasn't right.

 11-21-2016, 08:38 AM
#221
Senior Member
Thread Starter
iTrader: (4)
Join Date: Oct 2008
Location: Niles, IL
Posts: 857
Likes: 0
Received 5 Likes
on
4 Posts
Car: '91 LS6/T56/9"
Engine: LS6
Transmission: T56
Axle/Gears: Currie 9"/4.11, detroit truetrac
Re: Project Procrastination '91Z LS1/T56/currie 9" w/PICS
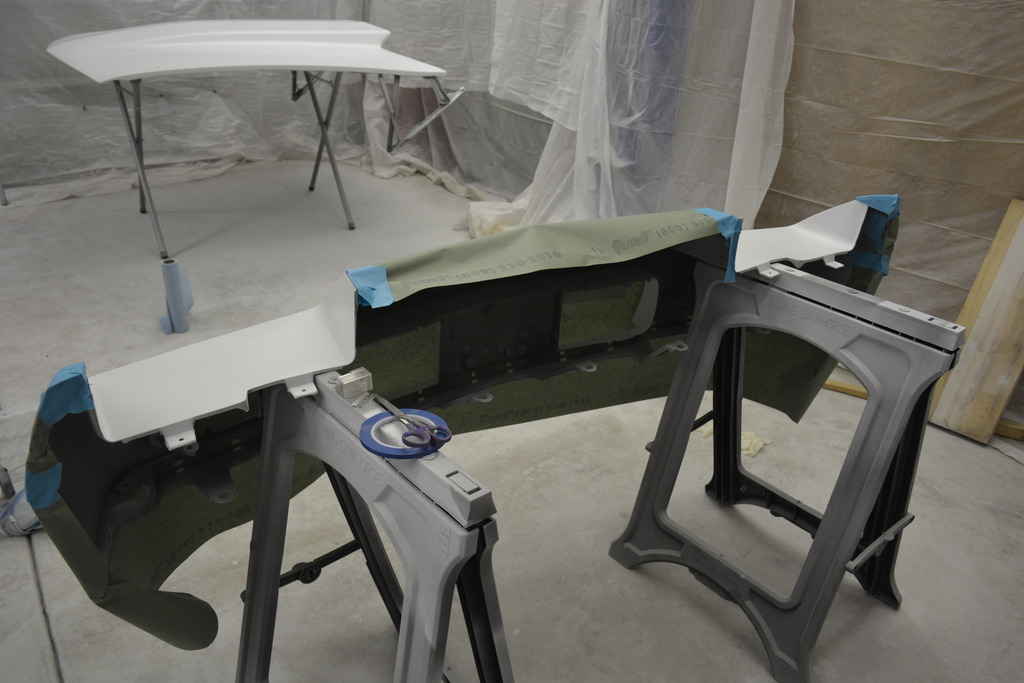
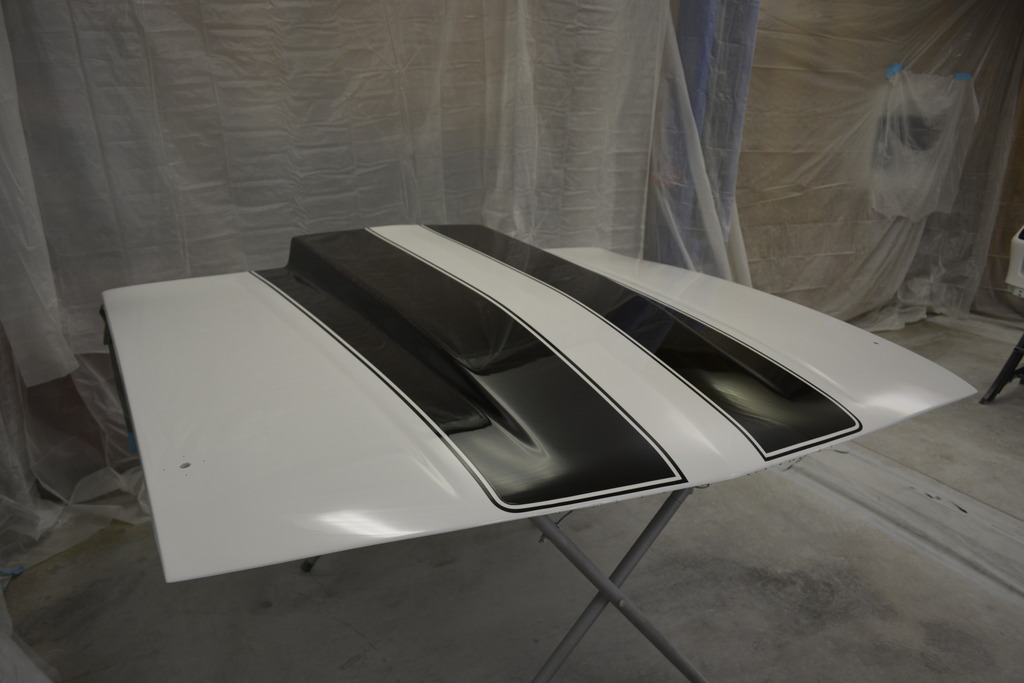
I'd never done this before so I just went for it. Started with one stripe freehand, then measured it to make the second:
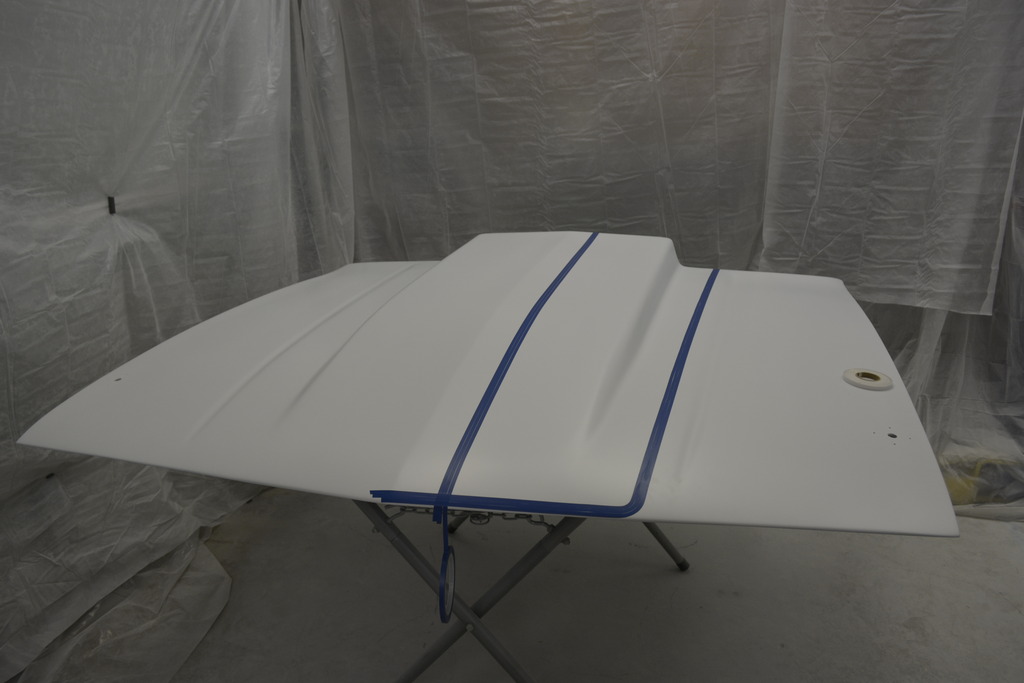
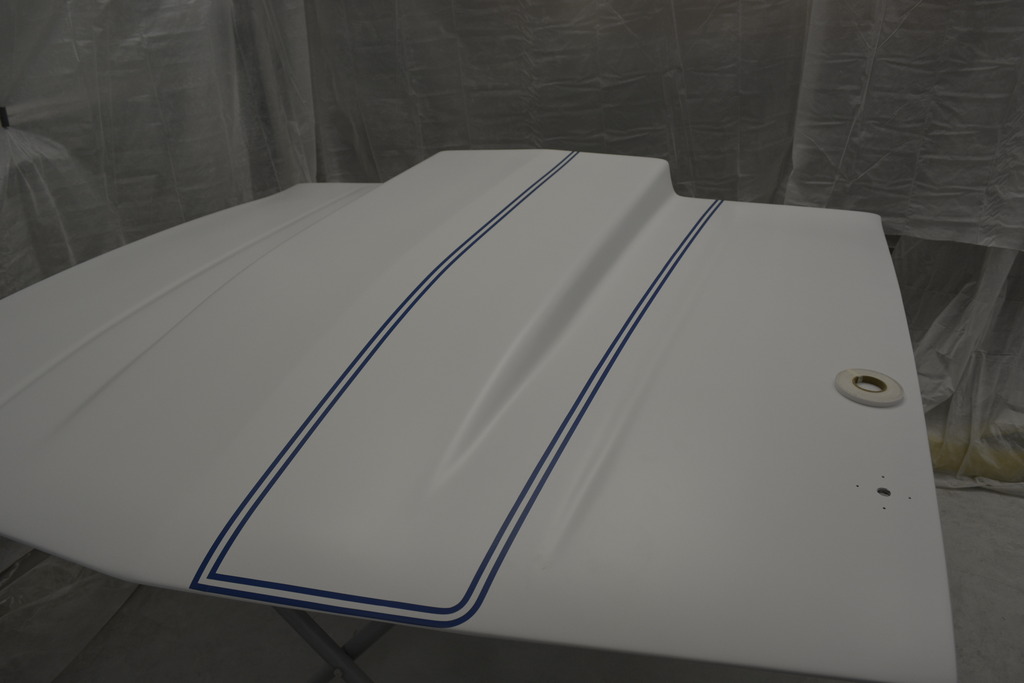
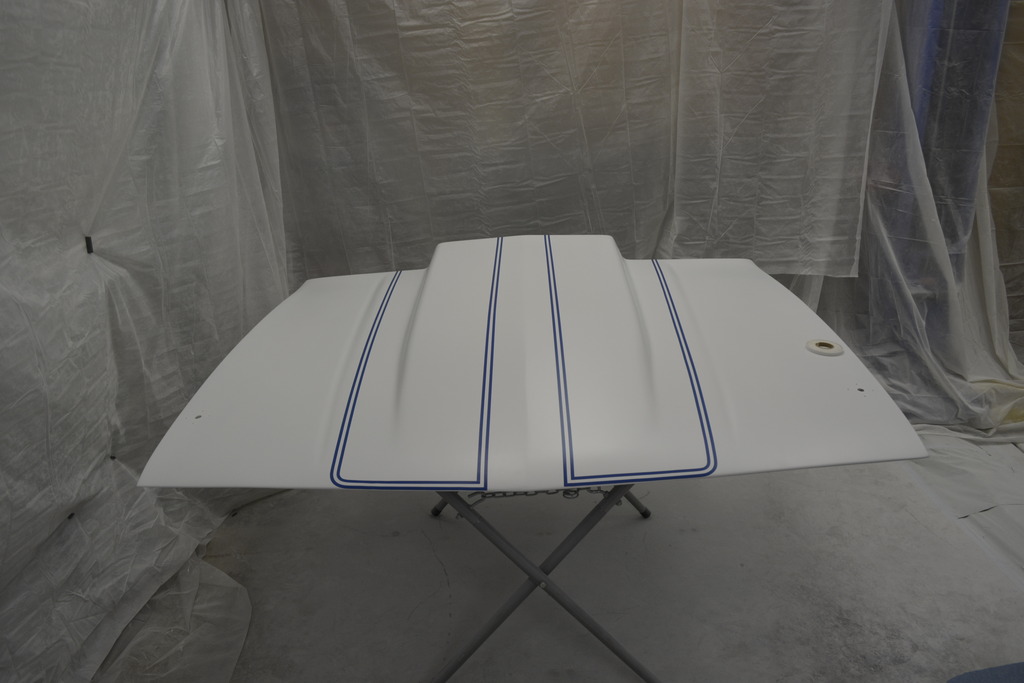
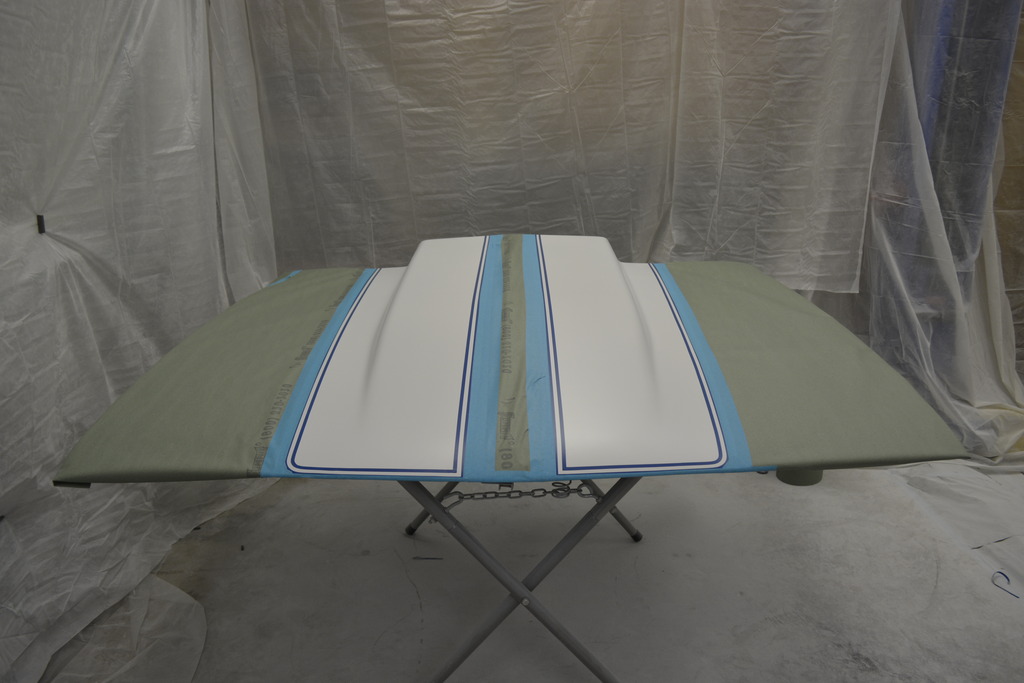
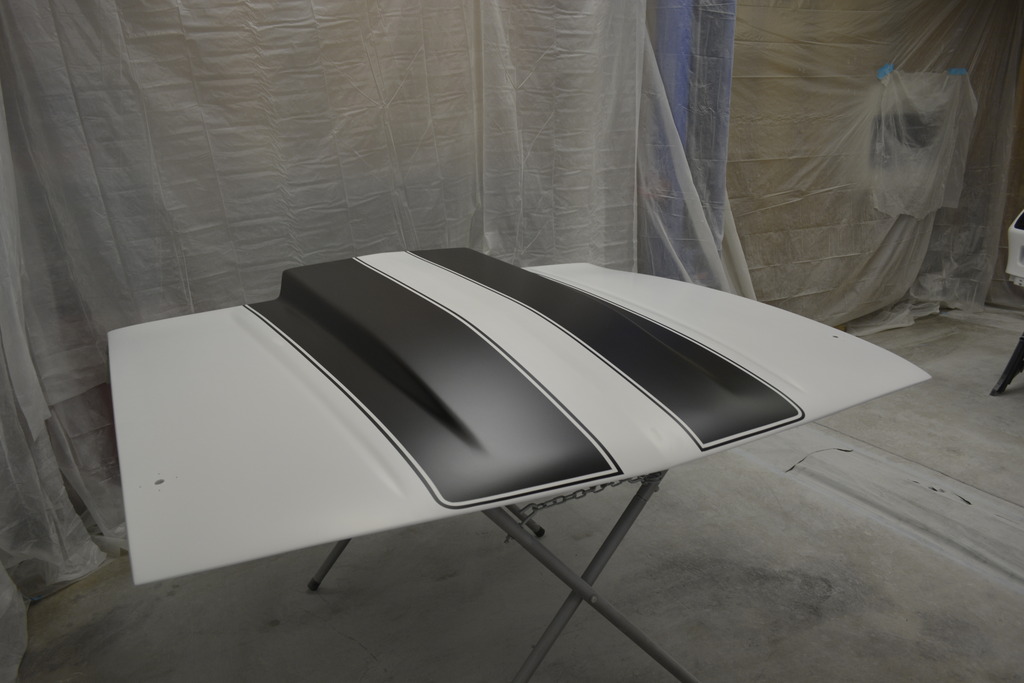
Then cleared both:


Then cleared both:


Last edited by robguitargod1; 06-06-2017 at 08:40 AM.
11-21-2016, 06:38 PM
#222
Re: Project Procrastination '91Z LS1/T56/currie 9" w/PICS
Looks great. I would have butchered those stripes.
Off topic, another garage question. We've started moving in and I've already cleared out the garage and moved some stuff in, including my car. Looks like I've got just enough room to work in there, but it's damn cold at night due to no heat and no insulation. From what I can tell, yours is uninsulated as well. Does it actually stay warm when you turn the heat on?
Off topic, another garage question. We've started moving in and I've already cleared out the garage and moved some stuff in, including my car. Looks like I've got just enough room to work in there, but it's damn cold at night due to no heat and no insulation. From what I can tell, yours is uninsulated as well. Does it actually stay warm when you turn the heat on?
11-21-2016, 10:07 PM
#223
Senior Member
Thread Starter
iTrader: (4)
Join Date: Oct 2008
Location: Niles, IL
Posts: 857
Likes: 0
Received 5 Likes
on
4 Posts
Car: '91 LS6/T56/9"
Engine: LS6
Transmission: T56
Axle/Gears: Currie 9"/4.11, detroit truetrac
Re: Project Procrastination '91Z LS1/T56/currie 9" w/PICS
It stays plenty warm in the garage. I turn both heaters on for about an hour, then just keep one on a low setting. That keeps it around 70 unless it's in the teens, then I keep one heater on high. My gas bill will be significantly higher than usual, but it'll be worth it!
Getting heat to the garage was not easy. I dug a 70' trench by hand, but it's been well worth the effort.
Getting heat to the garage was not easy. I dug a 70' trench by hand, but it's been well worth the effort.
11-21-2016, 10:08 PM
#224
Senior Member
Thread Starter
iTrader: (4)
Join Date: Oct 2008
Location: Niles, IL
Posts: 857
Likes: 0
Received 5 Likes
on
4 Posts
Car: '91 LS6/T56/9"
Engine: LS6
Transmission: T56
Axle/Gears: Currie 9"/4.11, detroit truetrac
Re: Project Procrastination '91Z LS1/T56/currie 9" w/PICS
I bet you could do the stripes too! I've never done this before, just used some common sense and went for it.
11-22-2016, 07:13 AM
#225
Re: Project Procrastination '91Z LS1/T56/currie 9" w/PICS
It stays plenty warm in the garage. I turn both heaters on for about an hour, then just keep one on a low setting. That keeps it around 70 unless it's in the teens, then I keep one heater on high. My gas bill will be significantly higher than usual, but it'll be worth it!
Getting heat to the garage was not easy. I dug a 70' trench by hand, but it's been well worth the effort.
Getting heat to the garage was not easy. I dug a 70' trench by hand, but it's been well worth the effort.
Did you already have a gas in your house? Mine is all electric. I'm considering buying a good indoor propane heater for now until I can figure something out.
Well it turned out great, I'd like to try some but my 3rd gen won't be getting any. I like stripes, but not so much on the iroc/z28 louvered hoods which is what I'll be running.
11-22-2016, 10:48 AM
#226
Senior Member
Thread Starter
iTrader: (4)
Join Date: Oct 2008
Location: Niles, IL
Posts: 857
Likes: 0
Received 5 Likes
on
4 Posts
Car: '91 LS6/T56/9"
Engine: LS6
Transmission: T56
Axle/Gears: Currie 9"/4.11, detroit truetrac
Re: Project Procrastination '91Z LS1/T56/currie 9" w/PICS
Digging that trench alone by hand in the middle of summer was brutal. I buried a 1" gas line at 2' and 4 4ga (I think) conductors at 1' for the 100A sub-panel.
But hard work pays off because I wouldn't be able to work in there for half of the year.
<center>
<a href="http://s816.photobucket.com/user/robguitargod12/media/trenching/DSCF7119.jpg.html" target="_blank"><img src="http://i816.photobucket.com/albums/zz85/robguitargod12/trenching/DSCF7119.jpg" border="0" alt=" photo DSCF7119.jpg"/></a>
</center>
You have no natural gas service? Propane will work of course, but it's expensive compared to natural gas.
I like the SS style stripes like I did on the hood. The outer edges are rounded, and the inner edges are square.
11-22-2016, 11:12 AM
#227
Re: Project Procrastination '91Z LS1/T56/currie 9" w/PICS
No there's no natural gas at the new house. I don't know if I can get it in the area or not but there's no plumbing for it.
I think my little garage is around 350 sq ft, the mr heater big buddy claims it will heat 400 sq ft and the reviews are good. I've already got 2 15lb tanks. I'll probably pick one up before this weekend and see how it does. This won't be my permanent solution but maybe it will get me by until i come up with something. I am an absolute wuss when it comes to the cold.
As for the stripes, yours def looks as good as any. I'm not really a fan of the stripes that run down the front bumper. The style you used and the 25th anniversary look great on 3rd gens.
Edit: Just checked to be sure, no gas meter on the property.
Last edited by Billgluckman; 11-22-2016 at 11:23 AM.
11-23-2016, 09:29 AM
#228
Senior Member
Thread Starter
iTrader: (4)
Join Date: Oct 2008
Location: Niles, IL
Posts: 857
Likes: 0
Received 5 Likes
on
4 Posts
Car: '91 LS6/T56/9"
Engine: LS6
Transmission: T56
Axle/Gears: Currie 9"/4.11, detroit truetrac
Re: Project Procrastination '91Z LS1/T56/currie 9" w/PICS
Propane it is! They sell big tanks so pick one up so you won't have to keep refilling. Some electric heaters are good too.
11-23-2016, 09:41 AM
#229
Senior Member
Thread Starter
iTrader: (4)
Join Date: Oct 2008
Location: Niles, IL
Posts: 857
Likes: 0
Received 5 Likes
on
4 Posts
Car: '91 LS6/T56/9"
Engine: LS6
Transmission: T56
Axle/Gears: Currie 9"/4.11, detroit truetrac
Re: Project Procrastination '91Z LS1/T56/currie 9" w/PICS
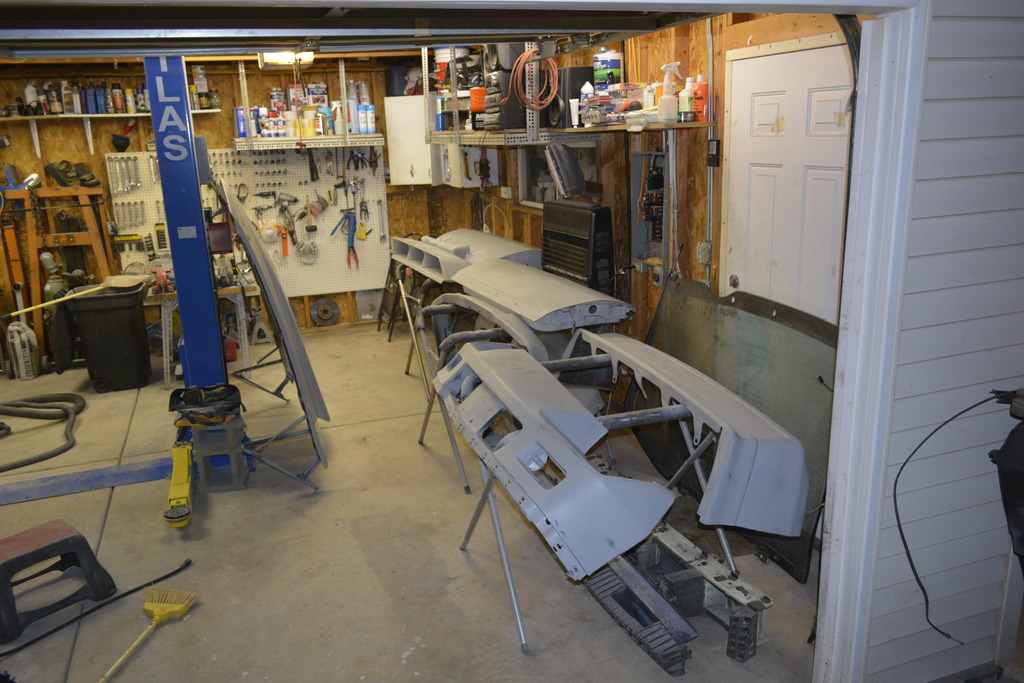
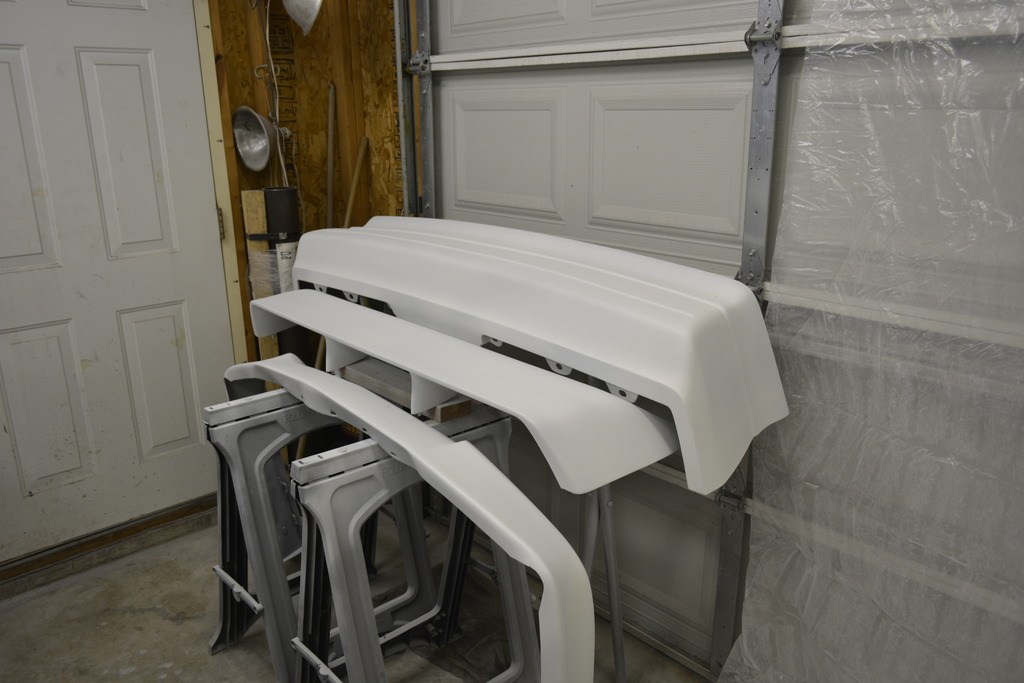
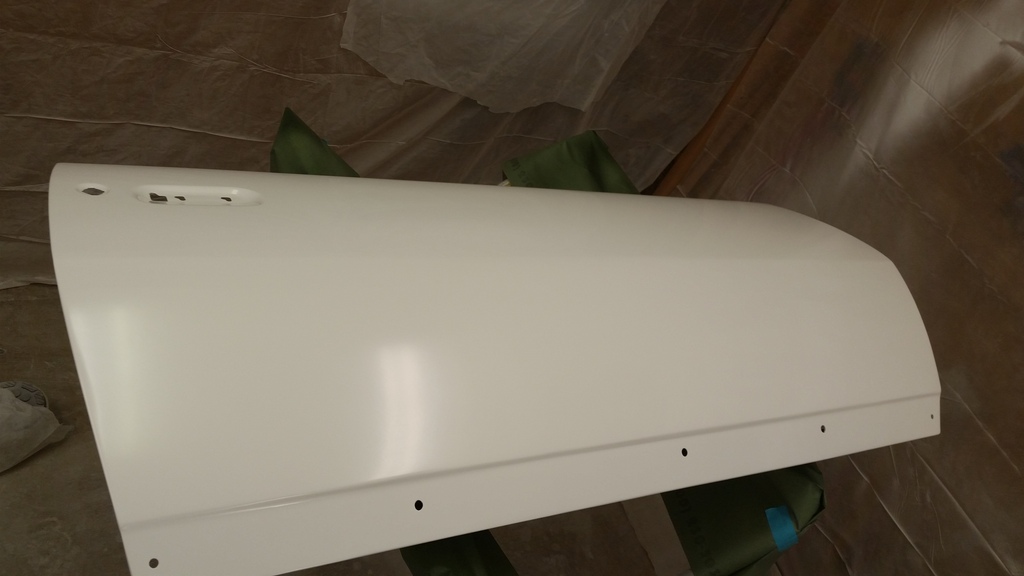
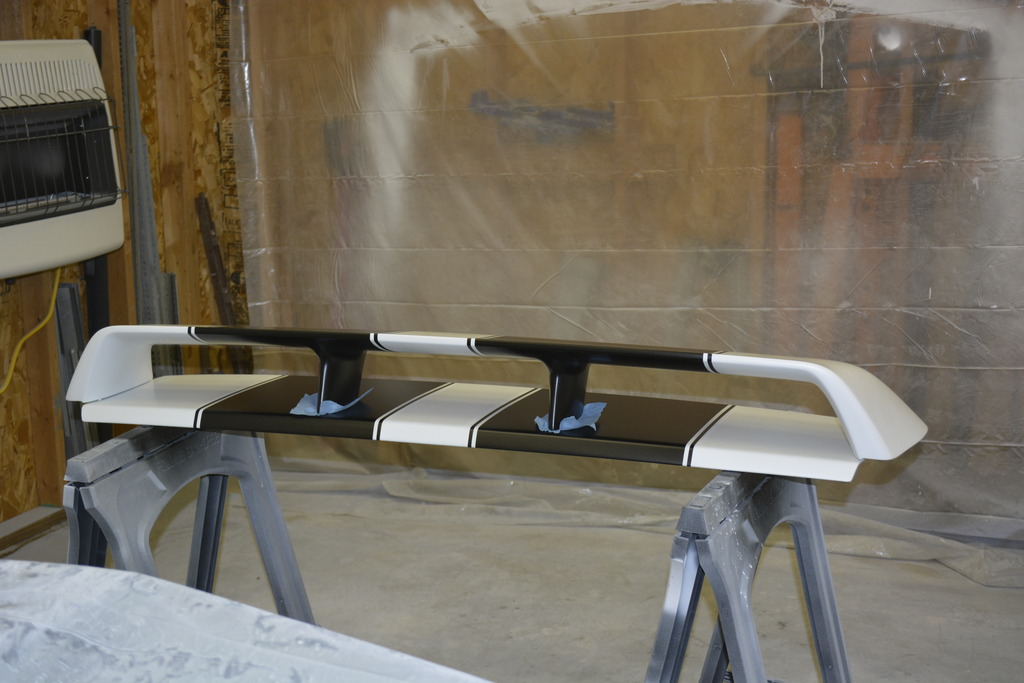
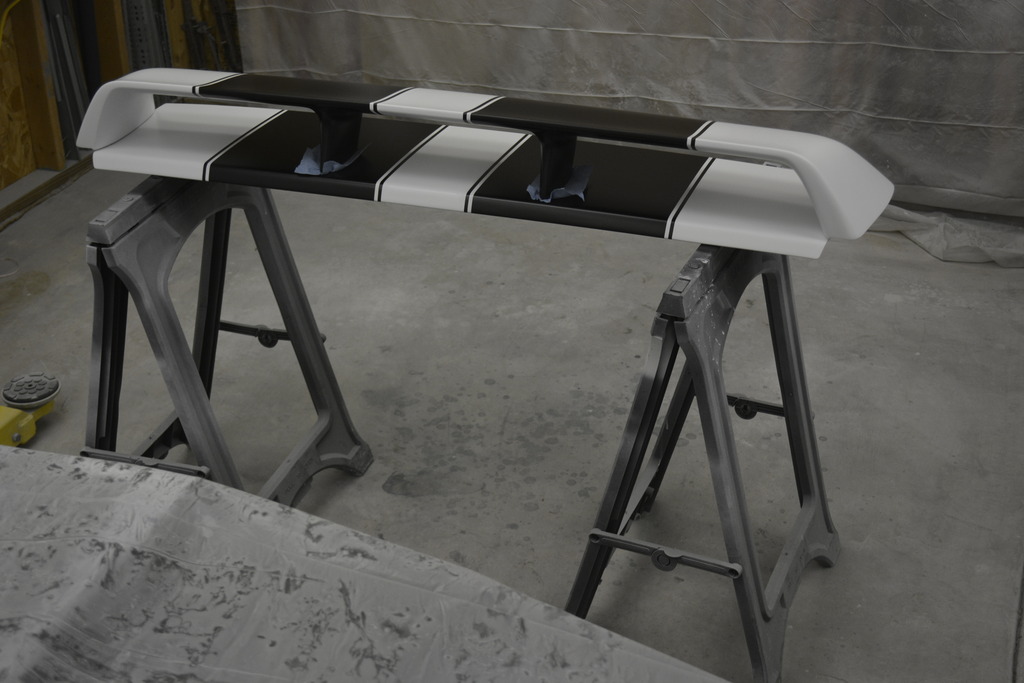
Cleared the doors, fenders, 1 mirror, door hinges, 1 quarter GFX, and 1 body GFX.
Now what's left to sand (sags in sealers), paint, then clear are the other quarter and body GFX, rear bumper, hatch and spoiler.
Lots of color sanding and buffing but not compared to the amount of sanding that it took to get here! also, not 100% sure when the clear will be cured enough to sand on it.
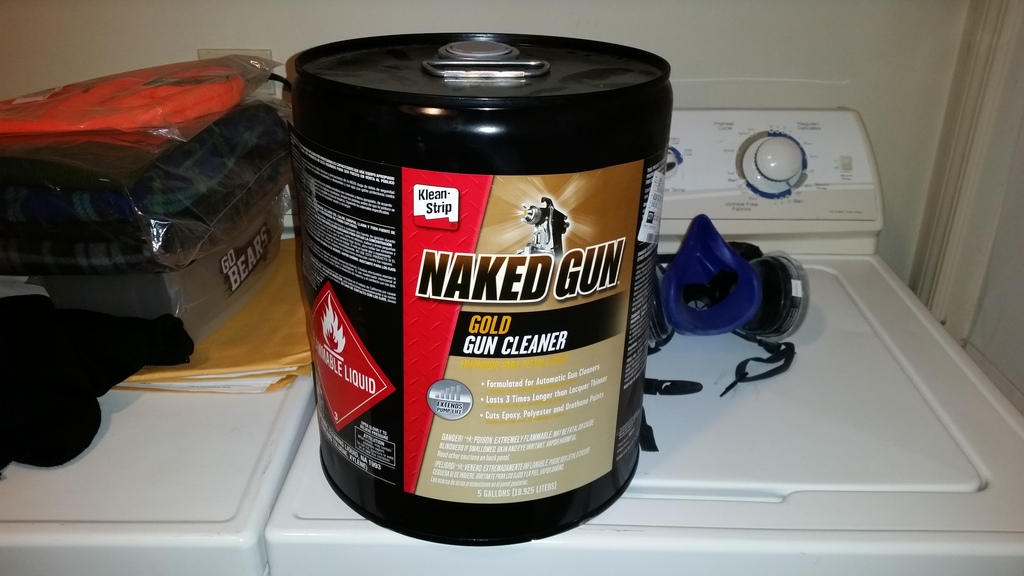
I also found a great deal on the Naked Gun paint gun cleaner. A gallon is around $35, but I found the 5 gallon pail for $57 at Oriley.
Now what's left to sand (sags in sealers), paint, then clear are the other quarter and body GFX, rear bumper, hatch and spoiler.
Lots of color sanding and buffing but not compared to the amount of sanding that it took to get here! also, not 100% sure when the clear will be cured enough to sand on it.
I also found a great deal on the Naked Gun paint gun cleaner. A gallon is around $35, but I found the 5 gallon pail for $57 at Oriley.
Last edited by robguitargod1; 06-06-2017 at 08:55 AM.
11-23-2016, 01:47 PM
#230
Member

Join Date: Aug 2007
Location: Long Island, NY
Posts: 201
Likes: 0
Received 2 Likes
on
2 Posts
Car: 1992 z28
Engine: LS1
Transmission: T-56
Re: Project Procrastination '91Z LS1/T56/currie 9" w/PICS
Wow! I am blown away by those pictures...you are doing an awesome job! Particularly impressed by the stripes and the overall quality of the paint. Really great job. I have been following this one since the beginning and it is great to see all your hard work in the prep pay off. This is going to be one pretty car when you are all done. Consider me jealous.
11-25-2016, 01:03 PM
#232
Re: Project Procrastination '91Z LS1/T56/currie 9" w/PICS
It looks great. The straight stripes along with the cowl give it a 69 camaro look for sure. What color white and black are you using? I went against the norm and used a gloss black color for the buckets. Try to put the headlight bar/frame on as soon as you can. My bumper cover lost shape and I waited too long to reattach the headlight frame and I got a crack. fun.
Last edited by Tibo; 11-25-2016 at 01:08 PM.
11-27-2016, 08:03 PM
#233
Senior Member
Thread Starter
iTrader: (4)
Join Date: Oct 2008
Location: Niles, IL
Posts: 857
Likes: 0
Received 5 Likes
on
4 Posts
Car: '91 LS6/T56/9"
Engine: LS6
Transmission: T56
Axle/Gears: Currie 9"/4.11, detroit truetrac
Re: Project Procrastination '91Z LS1/T56/currie 9" w/PICS
Wow! I am blown away by those pictures...you are doing an awesome job! Particularly impressed by the stripes and the overall quality of the paint. Really great job. I have been following this one since the beginning and it is great to see all your hard work in the prep pay off. This is going to be one pretty car when you are all done. Consider me jealous.
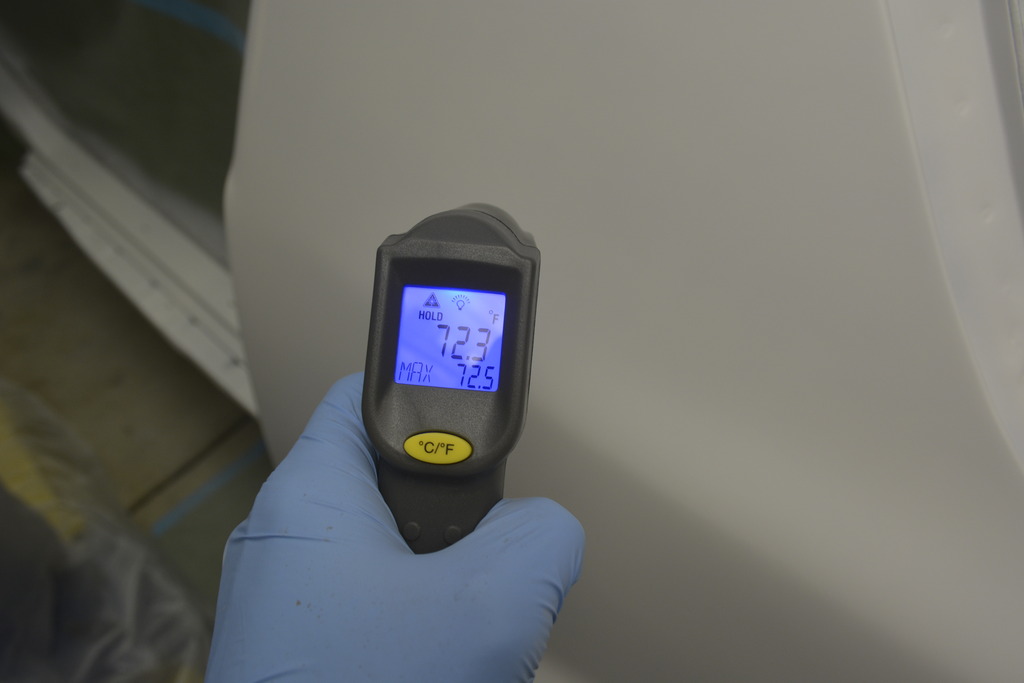
The last clear I sprayed came out very well with only 1 run to fix. I used a light 1st coat, let it flash, then did 2 moderately heavy coats.
11-27-2016, 08:10 PM
#234
Senior Member
Thread Starter
iTrader: (4)
Join Date: Oct 2008
Location: Niles, IL
Posts: 857
Likes: 0
Received 5 Likes
on
4 Posts
Car: '91 LS6/T56/9"
Engine: LS6
Transmission: T56
Axle/Gears: Currie 9"/4.11, detroit truetrac
Re: Project Procrastination '91Z LS1/T56/currie 9" w/PICS
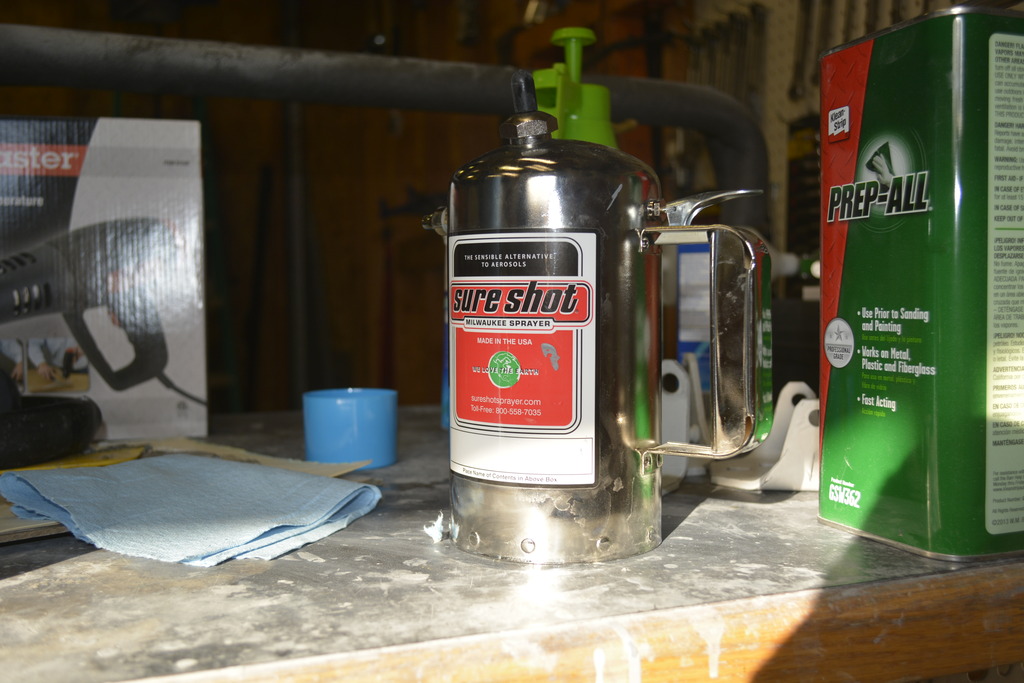
I bought a pressurized sprayer:

I fill it with the naked gun 5 gallon bucket that I bought for $57 and it will probably last me a lifetime!
That's the equivalent of 58 cans of cleaner at $10 each = $580
Or the 5 gallons of Naked gun and the pressurized sprayer = $74
11-27-2016, 08:57 PM
#235
Senior Member
Thread Starter
iTrader: (4)
Join Date: Oct 2008
Location: Niles, IL
Posts: 857
Likes: 0
Received 5 Likes
on
4 Posts
Car: '91 LS6/T56/9"
Engine: LS6
Transmission: T56
Axle/Gears: Currie 9"/4.11, detroit truetrac
Re: Project Procrastination '91Z LS1/T56/currie 9" w/PICS
It looks great. The straight stripes along with the cowl give it a 69 camaro look for sure. What color white and black are you using? I went against the norm and used a gloss black color for the buckets. Try to put the headlight bar/frame on as soon as you can. My bumper cover lost shape and I waited too long to reattach the headlight frame and I got a crack. fun.
I saw that crack and it made me cringe!! Show how you repair it.
11-27-2016, 08:59 PM
#236
Senior Member
Thread Starter
iTrader: (4)
Join Date: Oct 2008
Location: Niles, IL
Posts: 857
Likes: 0
Received 5 Likes
on
4 Posts
Car: '91 LS6/T56/9"
Engine: LS6
Transmission: T56
Axle/Gears: Currie 9"/4.11, detroit truetrac
Re: Project Procrastination '91Z LS1/T56/currie 9" w/PICS
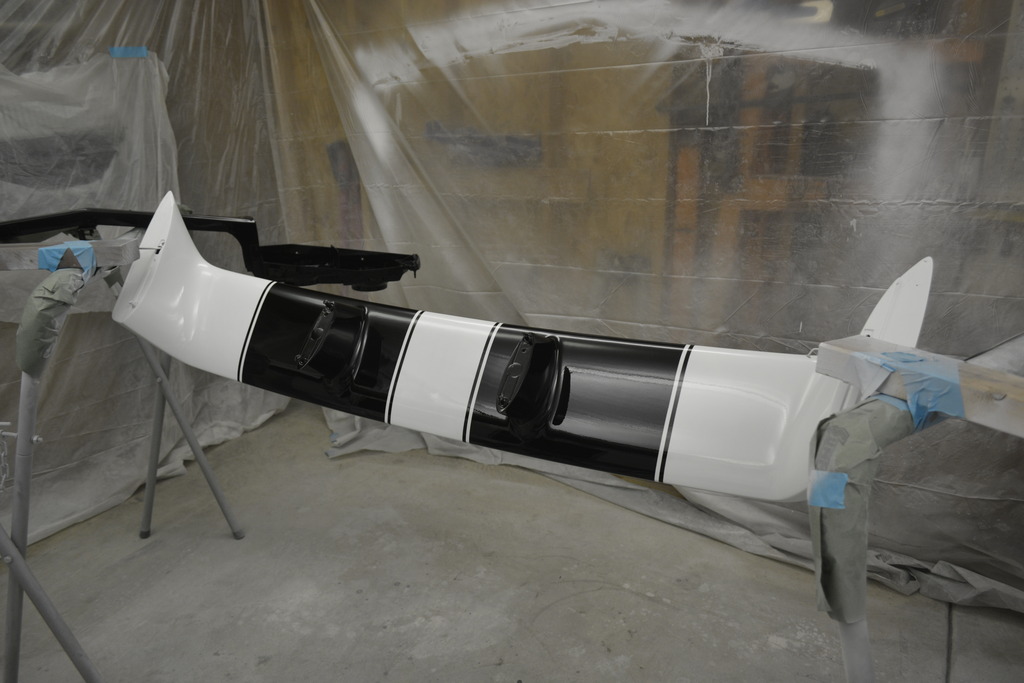
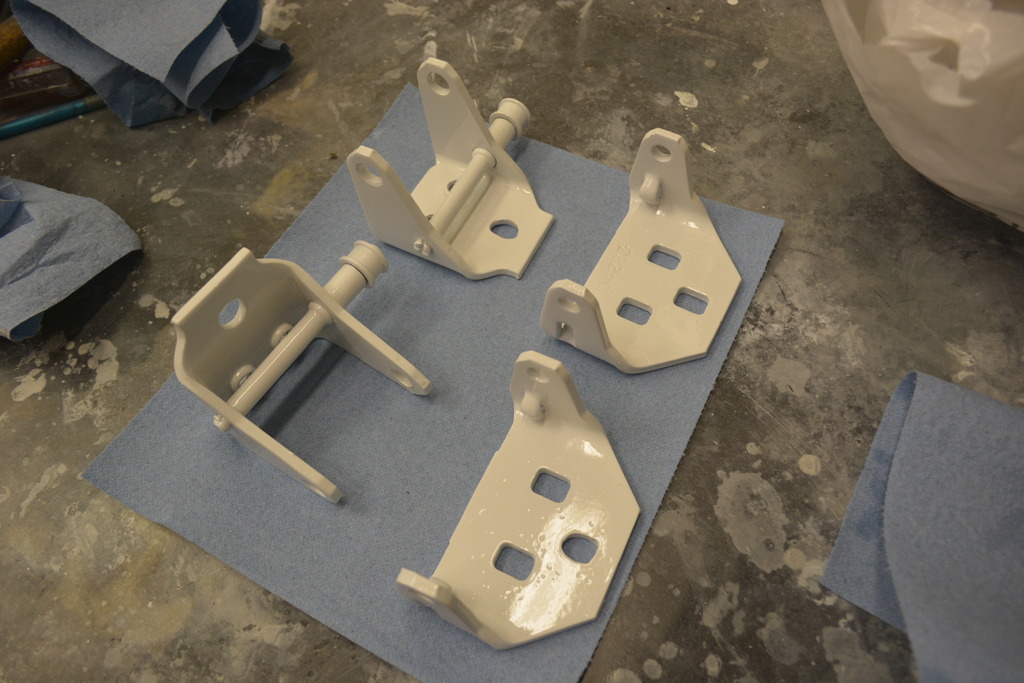
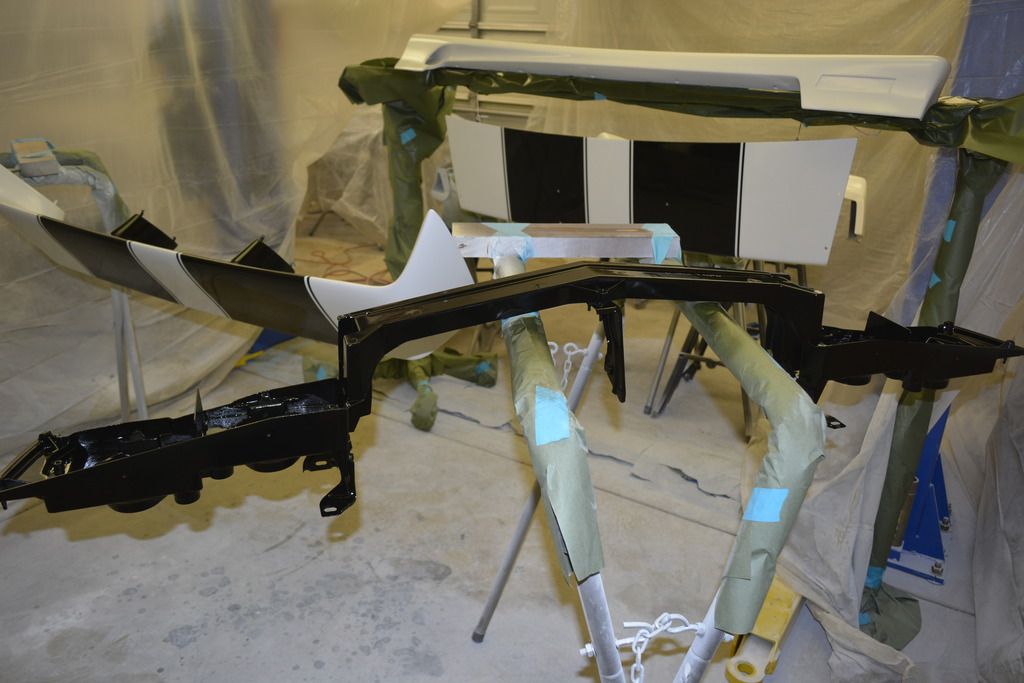
Painted everything that was left today:
Last edited by robguitargod1; 06-07-2017 at 07:11 AM.
11-27-2016, 09:00 PM
#237
Senior Member
Thread Starter
iTrader: (4)
Join Date: Oct 2008
Location: Niles, IL
Posts: 857
Likes: 0
Received 5 Likes
on
4 Posts
Car: '91 LS6/T56/9"
Engine: LS6
Transmission: T56
Axle/Gears: Currie 9"/4.11, detroit truetrac
Re: Project Procrastination '91Z LS1/T56/currie 9" w/PICS
Everything cleared:
Last edited by robguitargod1; 06-07-2017 at 07:13 AM.
11-27-2016, 09:04 PM
#238
Senior Member
Thread Starter
iTrader: (4)
Join Date: Oct 2008
Location: Niles, IL
Posts: 857
Likes: 0
Received 5 Likes
on
4 Posts
Car: '91 LS6/T56/9"
Engine: LS6
Transmission: T56
Axle/Gears: Currie 9"/4.11, detroit truetrac
Re: Project Procrastination '91Z LS1/T56/currie 9" w/PICS
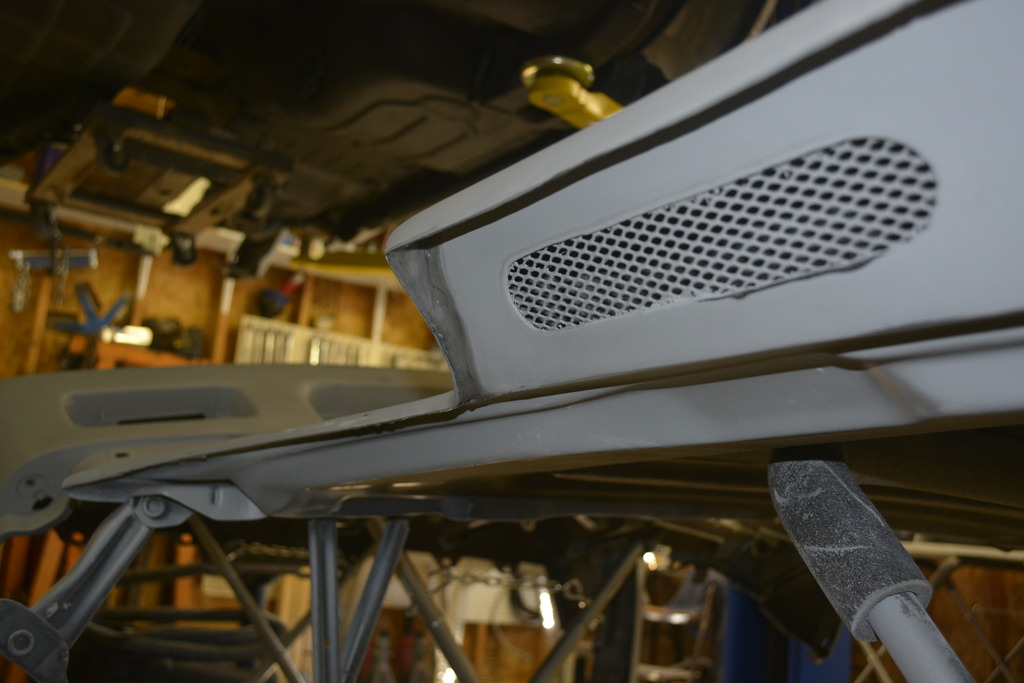
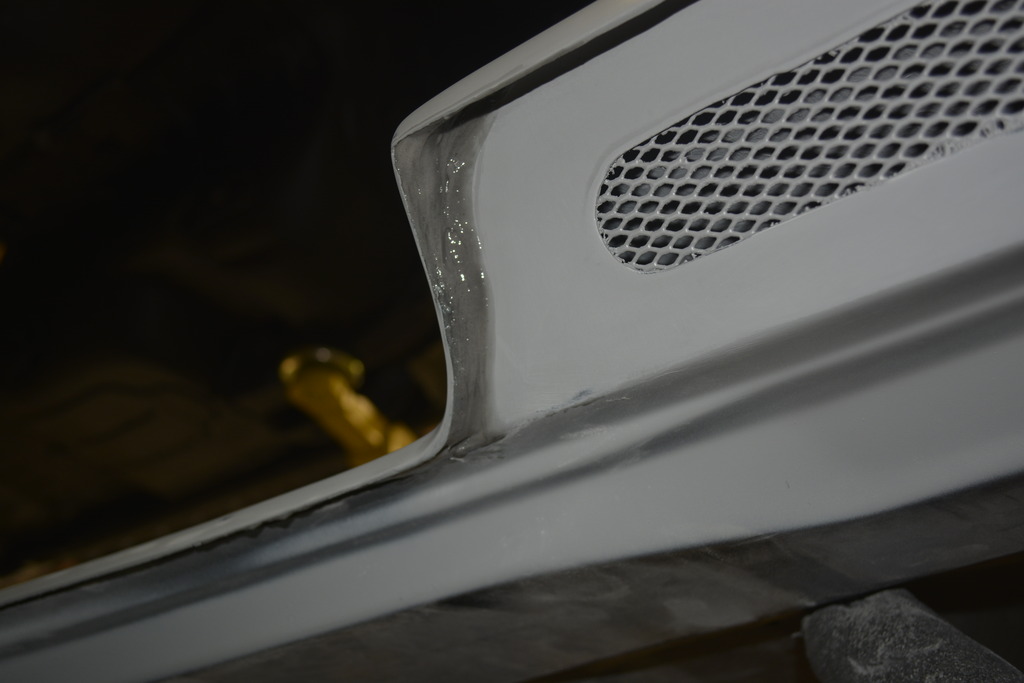
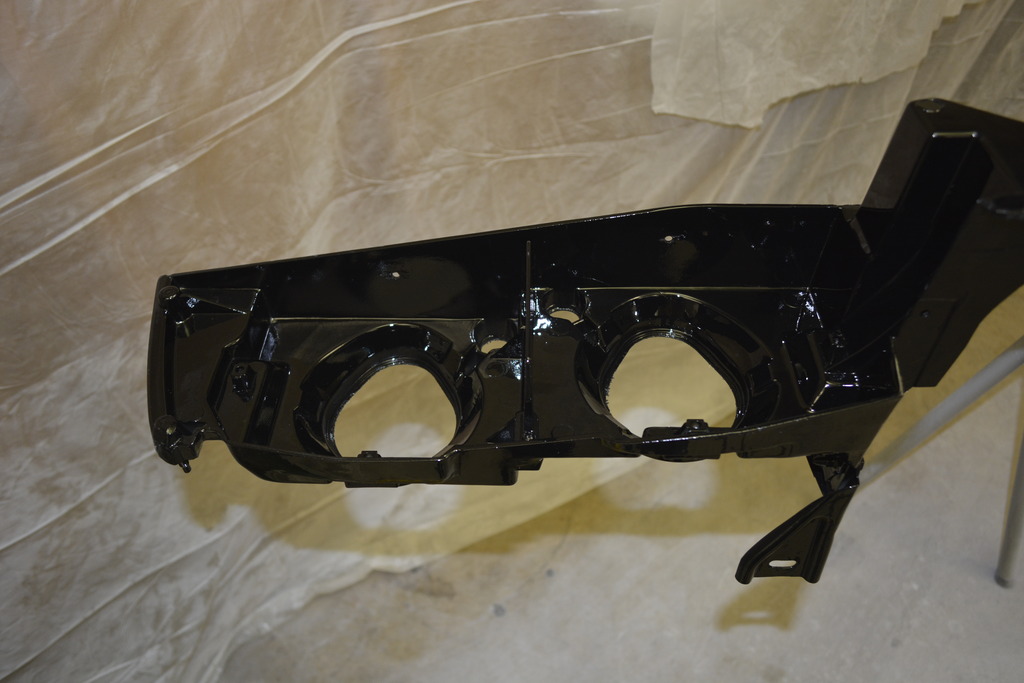
I also decided to paint the fiberglass headlight holder. I used the same black and clear that I used on everything else.
Last edited by robguitargod1; 06-07-2017 at 07:14 AM.
11-27-2016, 09:07 PM
#239
Senior Member
Thread Starter
iTrader: (4)
Join Date: Oct 2008
Location: Niles, IL
Posts: 857
Likes: 0
Received 5 Likes
on
4 Posts
Car: '91 LS6/T56/9"
Engine: LS6
Transmission: T56
Axle/Gears: Currie 9"/4.11, detroit truetrac
Re: Project Procrastination '91Z LS1/T56/currie 9" w/PICS
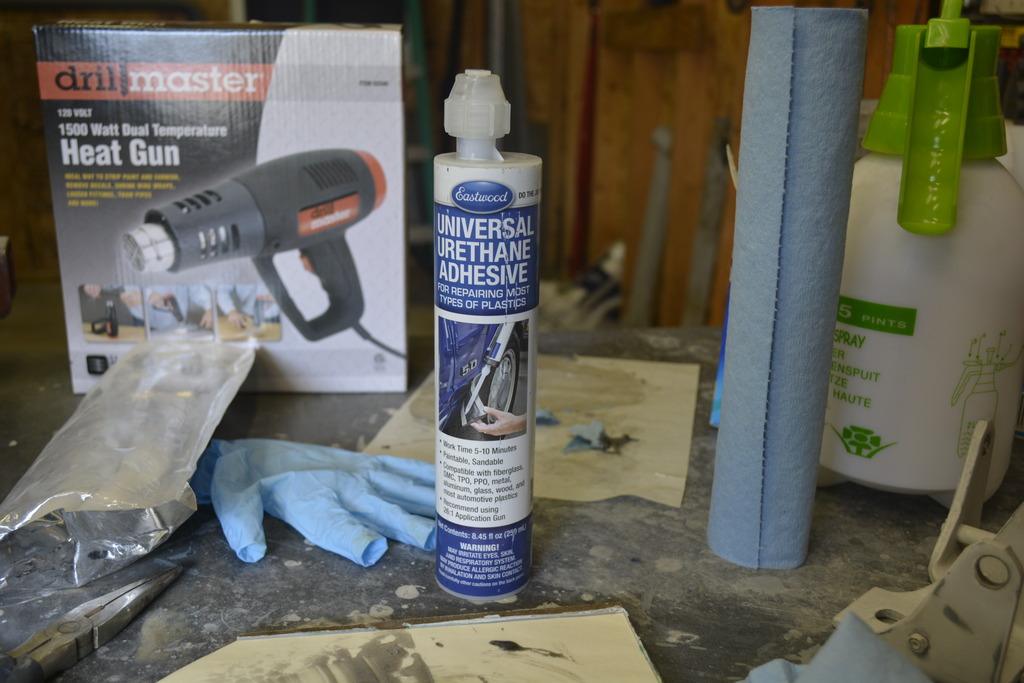
Annnnd that's it for painting!
A couple minor things to still paint, but the major parts are done. Couple questions:
What color should I paint the hood hinges? I'm leaning toward black since the hood shocks are already black.
What adhesive should I use to re-attach the hatch to the glass? Just regular windshield adhesive?
A couple minor things to still paint, but the major parts are done. Couple questions:
What color should I paint the hood hinges? I'm leaning toward black since the hood shocks are already black.
What adhesive should I use to re-attach the hatch to the glass? Just regular windshield adhesive?
11-27-2016, 09:13 PM
#240
Re: Project Procrastination '91Z LS1/T56/currie 9" w/PICS
No paint code necessary, I used arctic white too. I think the black that I used was just some BMW jet black color. To repair the crack on the bumper I'm just going to sand it down and hope it wasn't all the way to the Urethane so I don't have to re-prime. If I knew you were doing stripes I would have passed along the tip to spray the bejesus out of the clear at the line between the stripe and the base color. You really don't want to wet sand through that area. You saw the pain in the butt that I dealt with when I had to re-spray my stripes!
I wish I had bought a media blaster so I could have done a better job on the door's door jamb areas and the trunk's weatherstrip area like you did.
I wish I had bought a media blaster so I could have done a better job on the door's door jamb areas and the trunk's weatherstrip area like you did.
11-27-2016, 09:21 PM
#241
Senior Member
Thread Starter
iTrader: (4)
Join Date: Oct 2008
Location: Niles, IL
Posts: 857
Likes: 0
Received 5 Likes
on
4 Posts
Car: '91 LS6/T56/9"
Engine: LS6
Transmission: T56
Axle/Gears: Currie 9"/4.11, detroit truetrac
Re: Project Procrastination '91Z LS1/T56/currie 9" w/PICS
I don't plan on burning through and will probably steer clear of that area!
11-27-2016, 09:22 PM
#242
Senior Member
Thread Starter
iTrader: (4)
Join Date: Oct 2008
Location: Niles, IL
Posts: 857
Likes: 0
Received 5 Likes
on
4 Posts
Car: '91 LS6/T56/9"
Engine: LS6
Transmission: T56
Axle/Gears: Currie 9"/4.11, detroit truetrac
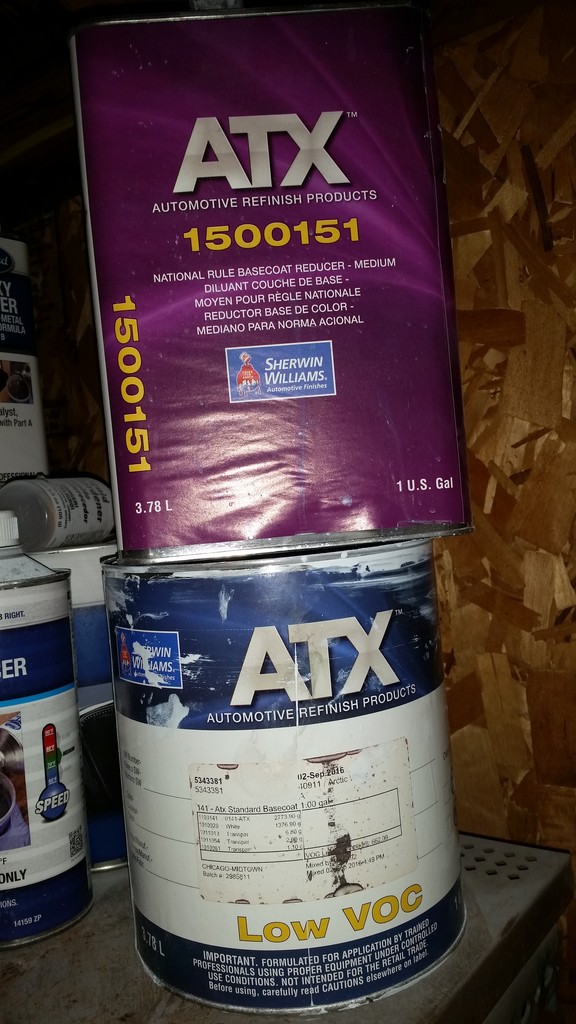
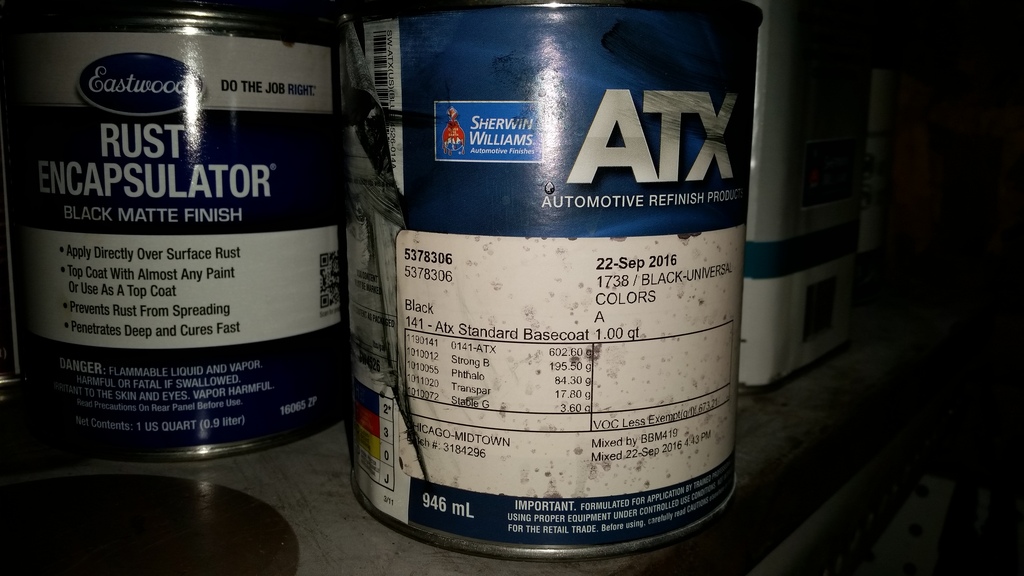
Re: Project Procrastination '91Z LS1/T56/currie 9" w/PICS
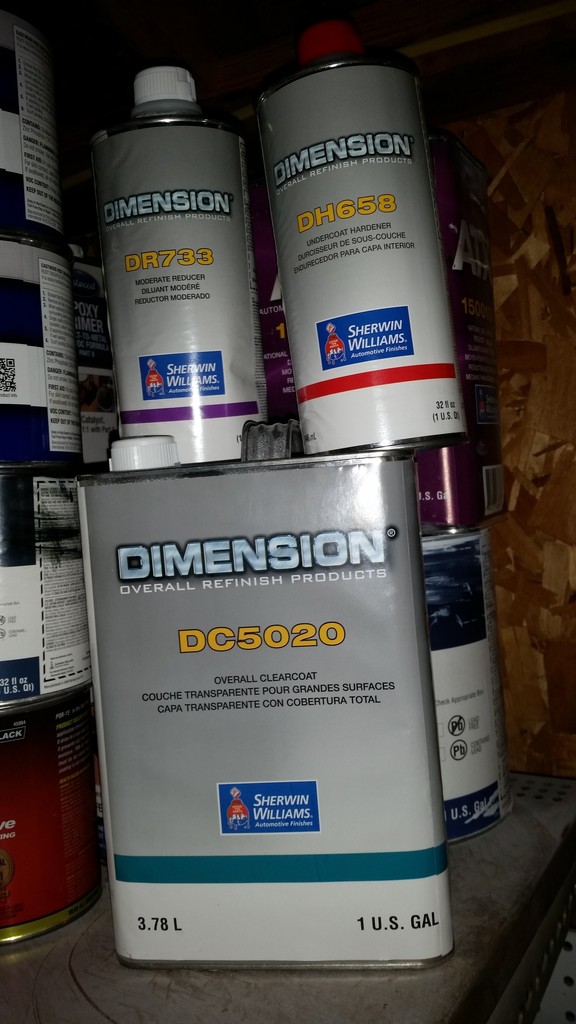
Here's the Sherwin Williams paint I used just for the hell of it:

Last edited by robguitargod1; 06-07-2017 at 07:15 AM.
11-28-2016, 01:14 PM
#243
Senior Member
Thread Starter
iTrader: (4)
Join Date: Oct 2008
Location: Niles, IL
Posts: 857
Likes: 0
Received 5 Likes
on
4 Posts
Car: '91 LS6/T56/9"
Engine: LS6
Transmission: T56
Axle/Gears: Currie 9"/4.11, detroit truetrac
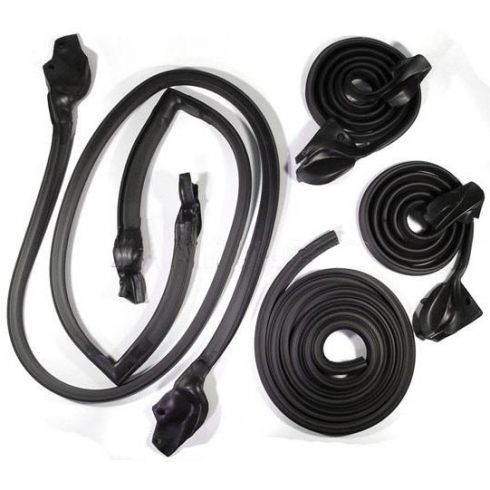
Re: Project Procrastination '91Z LS1/T56/currie 9" w/PICS
Just ordered The weatherstripping kit from 1A Auto:
https://www.1aauto.com/1982-92-chevy...=255902&y=1992
Also ordered 2 tubes of 3M 8008 weatherstrip adhesive:
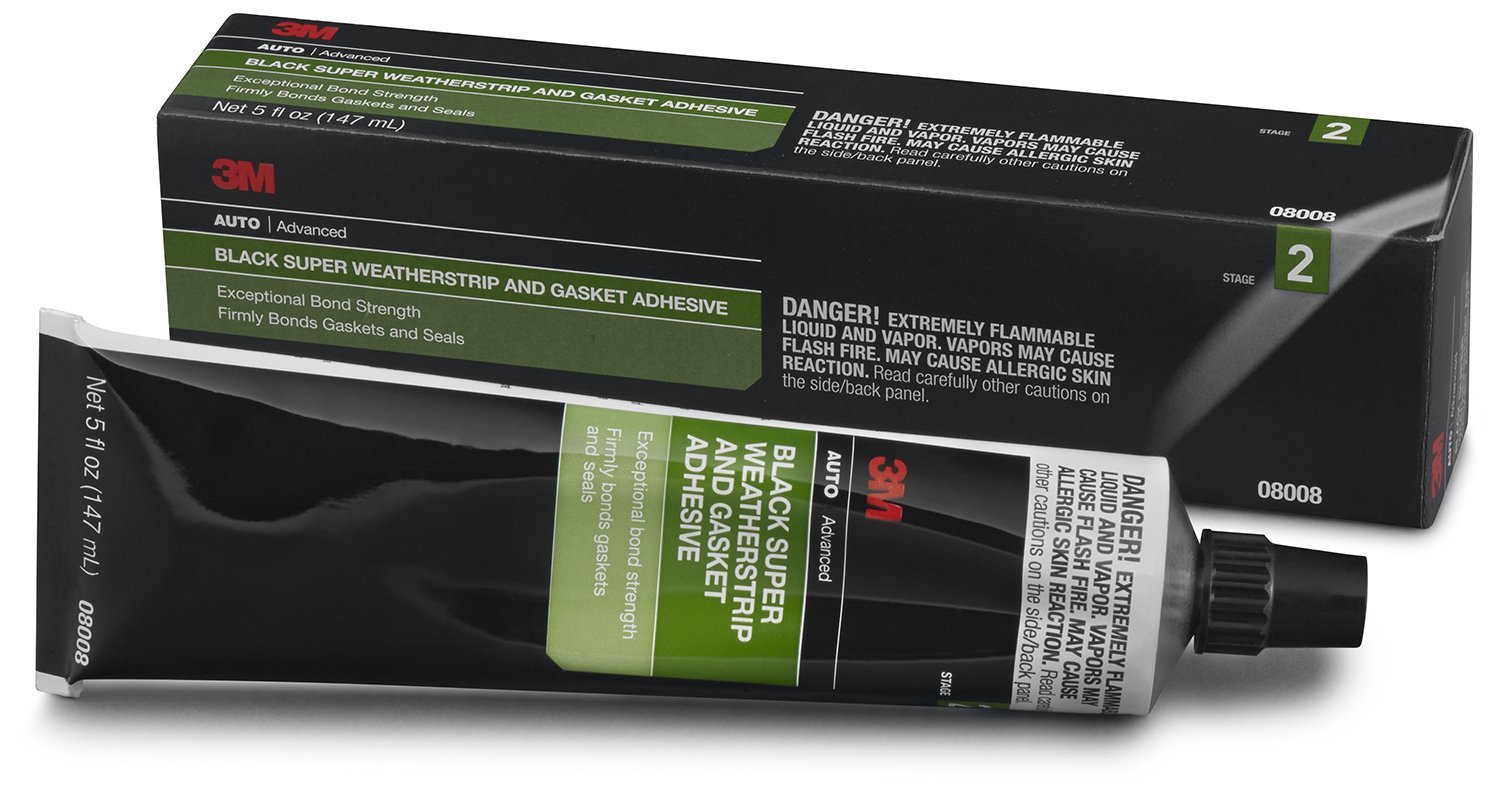
https://www.1aauto.com/1982-92-chevy...=255902&y=1992
Also ordered 2 tubes of 3M 8008 weatherstrip adhesive:
11-28-2016, 03:57 PM
#245
Senior Member
Thread Starter
iTrader: (4)
Join Date: Oct 2008
Location: Niles, IL
Posts: 857
Likes: 0
Received 5 Likes
on
4 Posts
Car: '91 LS6/T56/9"
Engine: LS6
Transmission: T56
Axle/Gears: Currie 9"/4.11, detroit truetrac
Re: Project Procrastination '91Z LS1/T56/currie 9" w/PICS
I plan on driving this car in ALL weather conditions. I built it to not be scared of driving in poor conditions.
Even if it never sees rain the weatherstrip rails that mount to the top of the window channel need a sealant behind them. That's where I plan to use the 3M stuff.
Even if it never sees rain the weatherstrip rails that mount to the top of the window channel need a sealant behind them. That's where I plan to use the 3M stuff.
11-29-2016, 10:57 AM
#247
Senior Member
Thread Starter
iTrader: (4)
Join Date: Oct 2008
Location: Niles, IL
Posts: 857
Likes: 0
Received 5 Likes
on
4 Posts
Car: '91 LS6/T56/9"
Engine: LS6
Transmission: T56
Axle/Gears: Currie 9"/4.11, detroit truetrac
Re: Project Procrastination '91Z LS1/T56/currie 9" w/PICS
01-03-2017, 04:30 PM
#248
Senior Member
Thread Starter
iTrader: (4)
Join Date: Oct 2008
Location: Niles, IL
Posts: 857
Likes: 0
Received 5 Likes
on
4 Posts
Car: '91 LS6/T56/9"
Engine: LS6
Transmission: T56
Axle/Gears: Currie 9"/4.11, detroit truetrac
Re: Project Procrastination '91Z LS1/T56/currie 9" w/PICS
Been a few weeks so it's time for an update.
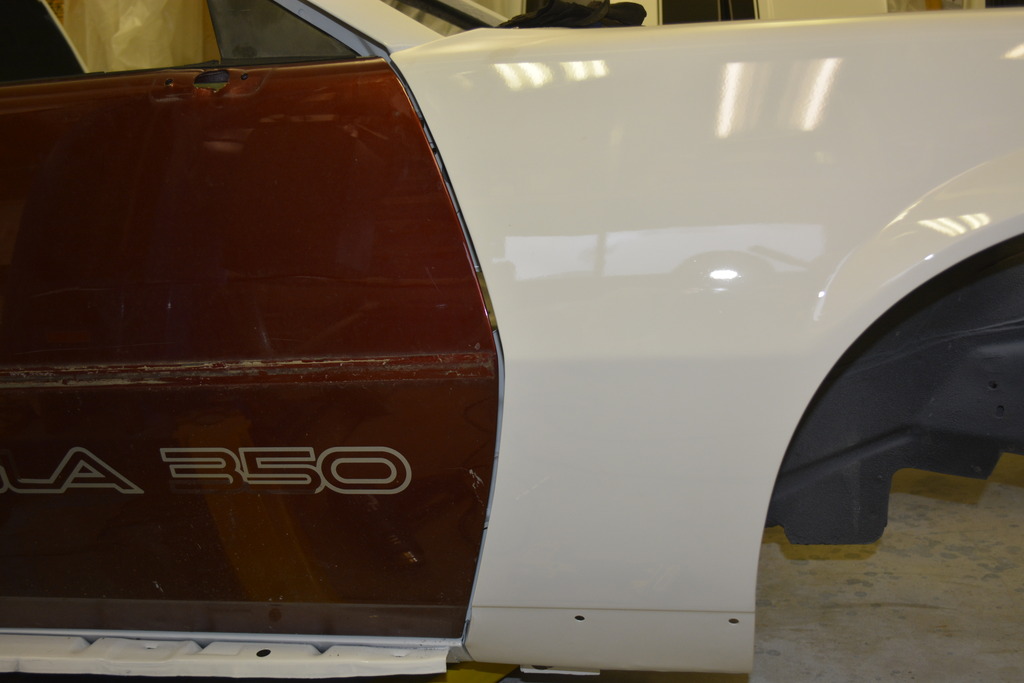
Bad news, the passenger door and fender do not line up. NOTHING CHANGED but this is the BEST I could get it. Meaning the door is as high as it can go, and the fender is as low as it can go:

I felt like pushing this thing into Lake Michigan......
I even looked at pics I took during bodywork and EVERYTHING lined up. Now it doesn't......
So I pulled the door from my parts car, threw it on, and it fit:
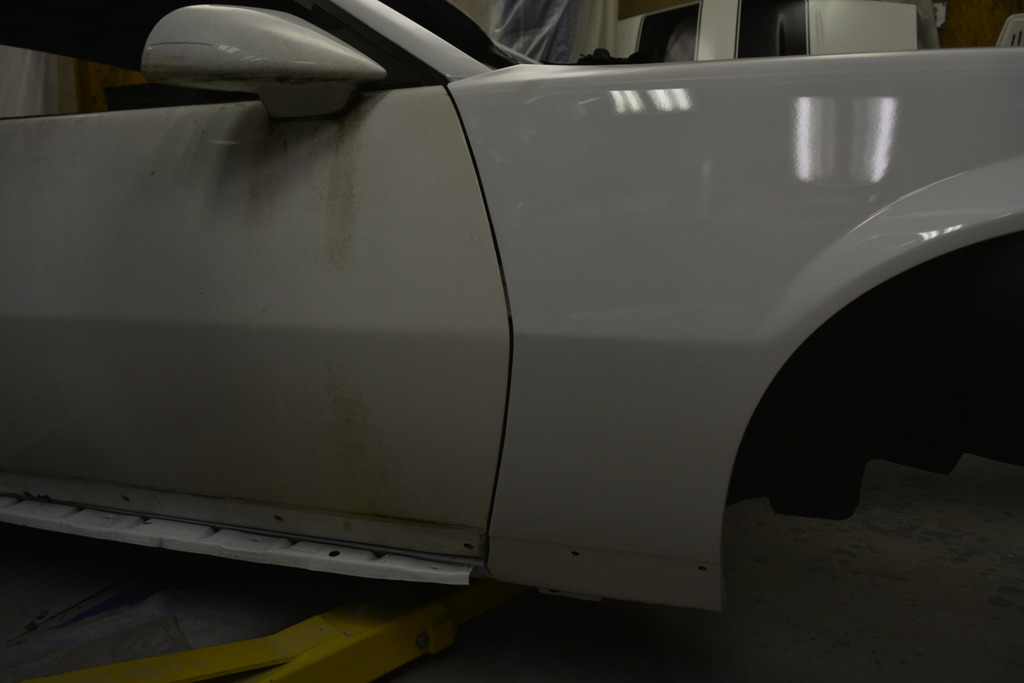
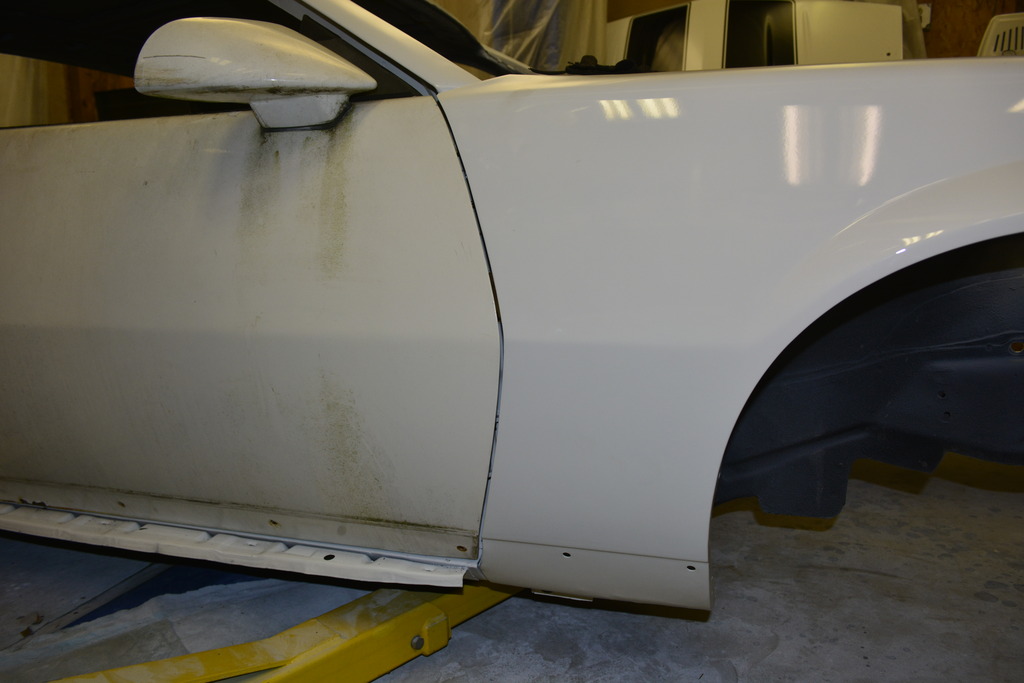
I knew I was in for more body work....... so I found a new door and quit crying about it:
Bad news, the passenger door and fender do not line up. NOTHING CHANGED but this is the BEST I could get it. Meaning the door is as high as it can go, and the fender is as low as it can go:


I felt like pushing this thing into Lake Michigan......
I even looked at pics I took during bodywork and EVERYTHING lined up. Now it doesn't......
So I pulled the door from my parts car, threw it on, and it fit:


I knew I was in for more body work....... so I found a new door and quit crying about it:


Last edited by robguitargod1; 01-03-2017 at 04:33 PM.
01-03-2017, 04:42 PM
#249
Senior Member
Thread Starter
iTrader: (4)
Join Date: Oct 2008
Location: Niles, IL
Posts: 857
Likes: 0
Received 5 Likes
on
4 Posts
Car: '91 LS6/T56/9"
Engine: LS6
Transmission: T56
Axle/Gears: Currie 9"/4.11, detroit truetrac
Re: Project Procrastination '91Z LS1/T56/currie 9" w/PICS
First I went with stripper which did a very good job:

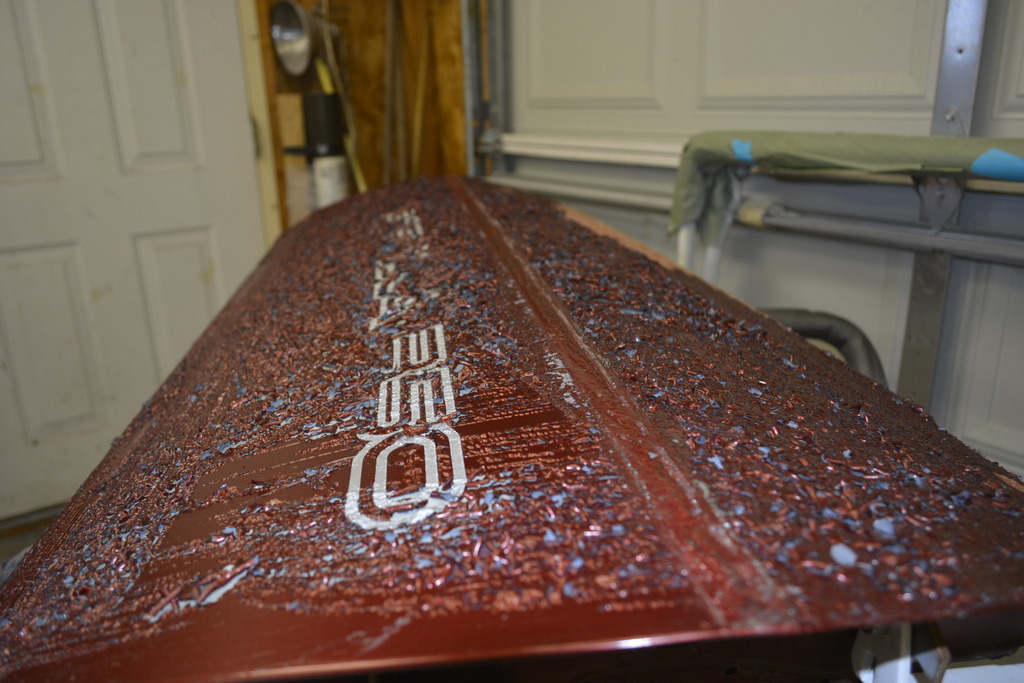
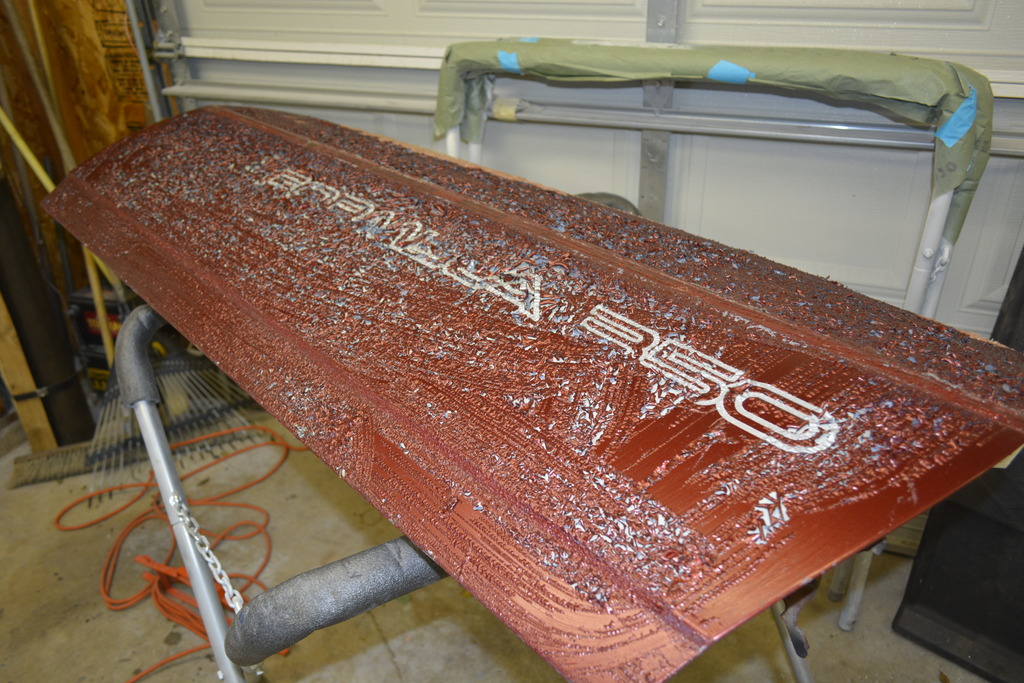
There were 2 layers on paint on the door so after 2 hours of 40 grit on a DA and one more layer of stripper, the door was finally bare:
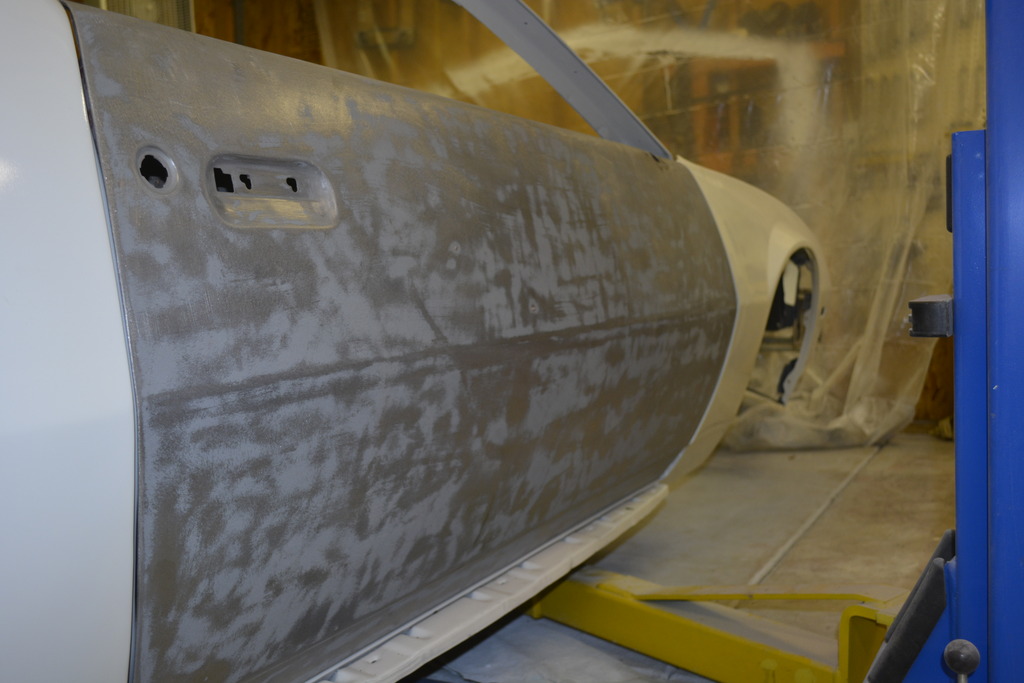
Then it was onto more of the usual:
Filler and blocking where needed:


There were 2 layers on paint on the door so after 2 hours of 40 grit on a DA and one more layer of stripper, the door was finally bare:


Then it was onto more of the usual:
Filler and blocking where needed:

 01-03-2017, 04:45 PM
#250
Senior Member
Thread Starter
iTrader: (4)
Join Date: Oct 2008
Location: Niles, IL
Posts: 857
Likes: 0
Received 5 Likes
on
4 Posts
Car: '91 LS6/T56/9"
Engine: LS6
Transmission: T56
Axle/Gears: Currie 9"/4.11, detroit truetrac
Re: Project Procrastination '91Z LS1/T56/currie 9" w/PICS
Poly primer:
Blocked to 2K
Blocked to sealer
And that's where it sits now.
2 coats of base, couple more clear and it'll be done.

Blocked to 2K

Blocked to sealer

And that's where it sits now.
2 coats of base, couple more clear and it'll be done.