When you click on links to various merchants on this site and make a purchase, this can result in this site earning a commission. Affiliate programs and affiliations include, but are not limited to, the eBay Partner Network.
87 GTA/LS1 Swap - Now with (less?) questionable decisions
LTX and LSXPutting LT1s, LS1s, and their variants into Third Gens is becoming more popular. This board is for those who are doing and have done the swaps so they can discuss all of their technical aspects including repairs, swap info, and performance upgrades.
87 GTA/LS1 Swap - Now with (less?) questionable decisions
This will be round 2 of getting my car back on the road with an LS1. This all started back in 2008, when a relatively minor project to fix a parking brake turned into an LS1 swap project. I was living with my folks at that time and enjoyed working on the car with my dad. We managed to get it together (though there were some interesting developments I'll link to this thread later) enough for me to get it inspected and insured. I then started to address some issues with the swap, starting with a brake line that was too close to the oil pan. That turned into a tubular k-member swap (good idea - make more room!), me cutting off (perfectly good) stainless exhaust thinking I'd upgrade to headers (didn't have the budget, but thought I would soon enough), and then finding out that the Spohn control arms had set the front wheels back 1-2 inches and the car wasn't driveable anymore...
Sometime around then, my wife and I had moved and working on the car meant driving over an hour and spending an entire weekend wrenching. My dad, while still encouraging and super helpful at times, couldn't move around as well as he could anymore and so I didn't like asking him to work on it with me. Every other weekend wrenching turned into every other month, then life took over. Another move. Remodeling an old house. First son. Second son. Finally finishing the remodel. Now third son...
Well, it's been 10 years now since the car moved on its own. It's been on jackstands the entire time and just collected dust. I feel like a different person, as well. I'd always planned on getting back to the car, whenever life settled down. With the help of a friend I reconnected with locally (and met on thirdgen before the LS1 swap started. Talk about amazing luck!), we swapped the UMI control arms onto the car last year and confirmed that they fixed the wheel setback issue. Now I'm faced with - what next? I don't even remember some of the decisions I made > 10 years ago on this car and have tried reading old posts of mine to understand better what's in my garage. Out of a desire to hurry and get the car moving, I made some decisions that I now question. I also skipped some things that I'd I'd like to consider now so that the car can be put back on the road for a good long time without a lot of rework or maintenance. With any luck, the car can be back on the road and enjoyed again before Eric, aka ESC, moves again. I'm decent with a wrench, but he's in another class altogether and much more than just a second set of hands.
Here we go again!
Last edited by 3.1EyeCandy; 09-06-2022 at 11:20 PM.
Reason: Update title
Re: Ls1 Swap - Now with (less?) questionable decisions
Current Setup
(I'll add to this as I collect more inventory)
Engine & Transmission
2001 F-body LS1 - all stock to my knowledge with 241 casting heads and an LS6 style intake. Never disassembled the engine or did any "freshening up" before starting it last time. Has a stock tune on the ECM, minus disabling a couple items to prevent check engine lights.
Accessory Brackets - Fourth Gen F-body. Had an aftermarket A/C bracket to use thirdgen AC. Must have lost it.
Power Steering Pump - Aftermarket underdrive unit by TurnOne.
Throttle Body- Ebay unit. New when bought. Slightly oversized. Have a Fourth gen factory core sitting in a box too.
Harmonic Balancer- Ebay unit. New when bought. Bolted it on years ago and it worked. Did nothing special outside of that though (maybe I should have?)
4L60E transmission - provided/built by a shop at a good value. No idea on internals. I likely overfilled it due to the crummy dipstick & tube setup I had at the time
Exhaust
2001 F-body manifolds - Really rusty. All the ports blocked off. Nothing attached to them downstream and no other parts saved.
Fuel
Fuel Lines - Factory supply and return lines to tank, then some fuel line and clamps/fittings.
Fourth Gen Gas Tank
Factory Wiring to Pump/Sender - wondering if this is sufficient
Unknown Aftermarket Pump - worked 10 years ago
Grand Prix Sender Unit (GM Part # 25319676) - unknown if it ever worked - maybe it did?
Frame / Suspension
Cutout for Fuel Pump- Don't remember if I ever fixed this after it was added to the car.
Spohn Tubular K Member - For Gen 1 SBC. Also used their LS1 mounts. I'm not a huge fan of this, but it does work and provides lots of clearance. It has notches for the stearing linkage on either side and sits very low. I question how long it would last for typical road usage.
UMI Control Arms - Not really an LS1 swap item, but another thing that I question keeping. This won't be a drag car and I'm not concerned about weight loss.
Last edited by 3.1EyeCandy; 09-06-2022 at 11:20 PM.
Re: Ls1 Swap - Now with (less?) questionable decisions
New Goals
While I'd like to get this car on the road, I'm not in near the hurry I was 10 years ago. There have also been new parts and lots of lessons learned by the community in that time as well. I'd like to systematically go through all of the parts used on this car, the decisions made, and address them with an eye toward future reliability, cost, and performance. If there's a "right" or better way to do something, that's the route I'm going to prefer to go. I also want to take this slow enough that it's enjoyable, but not slow enough that it gets stalled out.
I'd like to end up with a fairly mild LS1 setup. Free flowing exhaust, mild cam, good airflow + whatever gets replaced as part of freshening things up. No forced induction. This will see mainly enjoyable cruises on nice weather days. Will likely stick with the 4L60E due to cost of sourcing a T56, though I'd prefer the T56 for the fun factor.
First Steps
Last go round, I put the engine in as quickly and cheaply as possible and just trusted that things would work out. They did, for the most part. Having sat for 10 years, I'd like to do whatever inspection is warranted on the drivetrain components and ensure that they're appropriately "freshened up." I'm still researching what to inspect (and how far to go in this before taking it to a machine shop, which I'd like to avoid if possible as I have no existing contacts at ones I trust I'm hunting for a good machine shop now) and what is good to replace. So far, I've ordered:
LS2 Timing Chain (GM Part #12646386) - supposed to be the GM replacement for the LS1 unit and better engineered
LS1 Front Timing Cover (GM Part #12561243) - is a kit with the seal already in it.
Crank Pulley Damper Bolt (GM Part #12557840) - need to replace this if removing the crank pulley
Improved Racing LS Engine Billet Rear Galley Plug "Barbell" - seems folks recommend replacing the factory unit to prevent oil bypassing the filter
2004-2005 LS1 LS6 Engine Valley Cover Swap Kit - I broke a small rubber boot from the factory LS1 PCV setup and it's cheaper to replace the whole PCV setup with the newer LS6 style valley cover which has the PCV integrated into it.
I have also questioned replacing the oil pump. This engine should have the newer "LS6 style" unit that isn't prone to failure like the earlier units. I wasn't seeing oil pressure issues before. Is it worth swapping it now? What else should be on the priority list to go ahead and plan on replacing without inspecting first? What else should we be closely inspecting on a decent mileage LS1? All thoughts welcome on this.
I have also questioned the long-term reliability of the Spohn K-member that I have for general road use and would like to go back to a stock K-member and control arms. In support of that, I sourced a factory setup and have started the process of removing all rust from it. In order to prevent having to notch it, I've ordered:
LS3 Dipstick and Tube (GM Part #12669528 and 12625031) - required for use with the Holley 302-2
Figure these are more than enough parts to get started while I sort out getting the drivetrain ready to reinstall and figure out what I want to do about exhaust, transmission, and everything else. Progress will be slow, but I'm seeing this in a much more positive light than I have in a long time. All thoughts and recommendations welcome.
Last edited by 3.1EyeCandy; 05-31-2020 at 07:32 PM.
Re: 87 GTA/LS1 Swap - Now with (less?) questionable decisions
Awesome man! In a similar boat myself right now where the project was put away for a long time and I am getting a second go at it. Very excited to see some pictures and get some progress photos...welcome back!
Re: 87 GTA/LS1 Swap - Now with (less?) questionable decisions
I would definitely keep the k-member you have already installed. It usually provides much more room for the swap, in so many areas.
I would replace the lifters, weather you do the cam swap, or not.
Definately want to see some pictures. I am swapping a lq4 6.0 into my '89 GTA. I too, have been doing lots of research. Sometimes it can be a little overwhelming, caught between my desire to do it right, and my budget. I believe the UMI K-member is going to be the budget friendly way for me to proceed. I am also considering speed engineering long tube headers. Have not seen any reviews for the headers, and how well they fit.
DR.K.
Re: 87 GTA/LS1 Swap - Now with (less?) questionable decisions
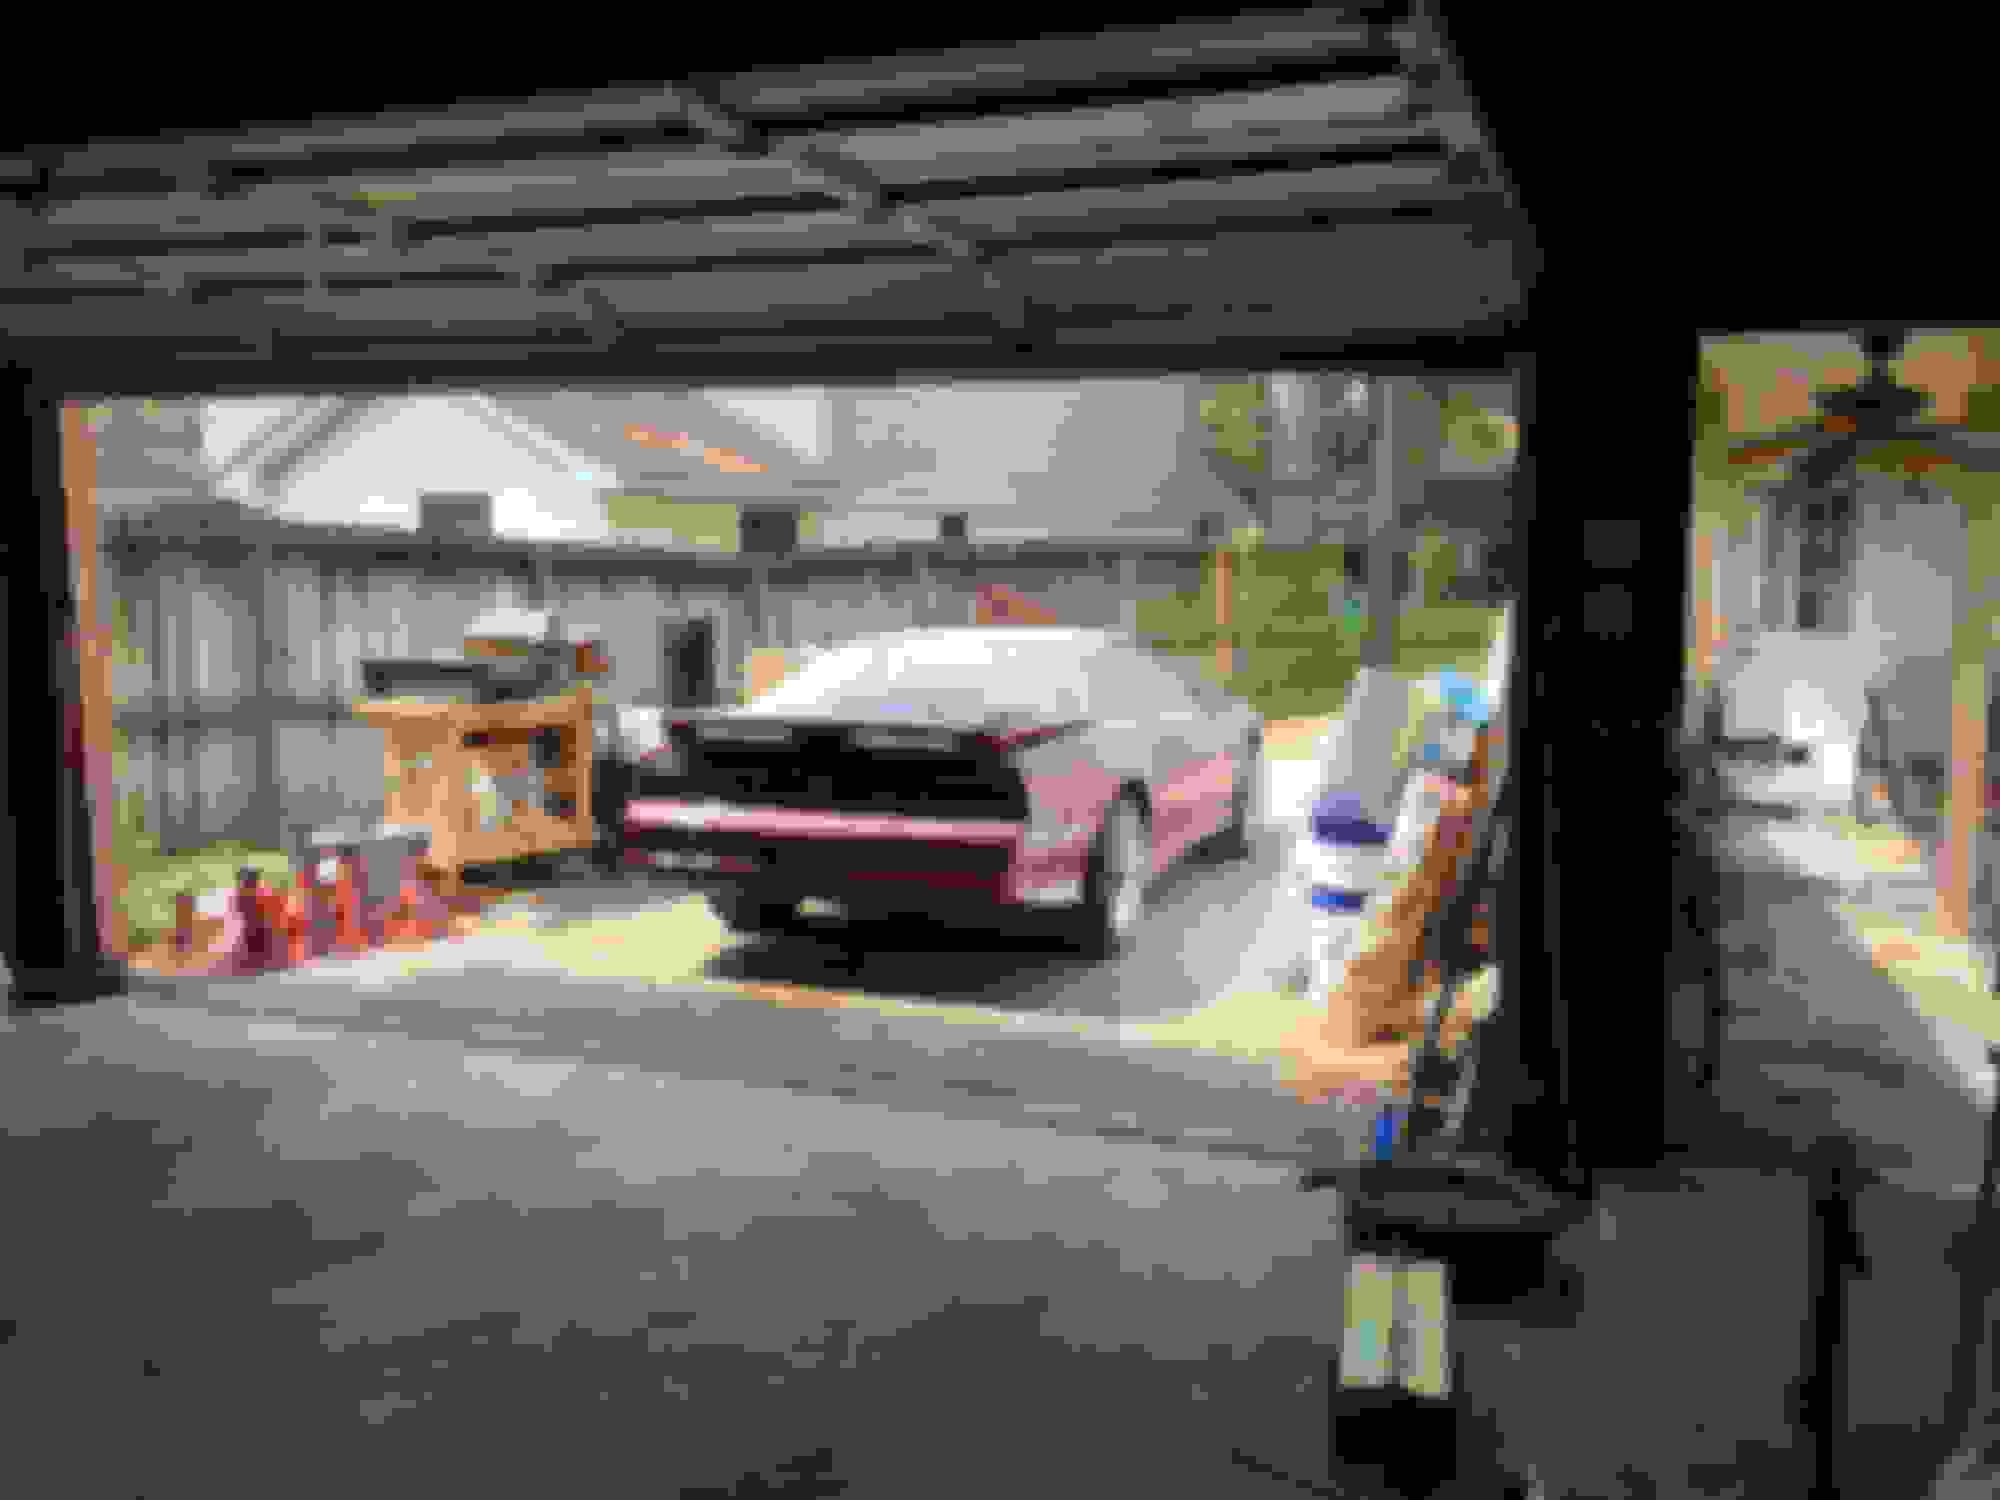
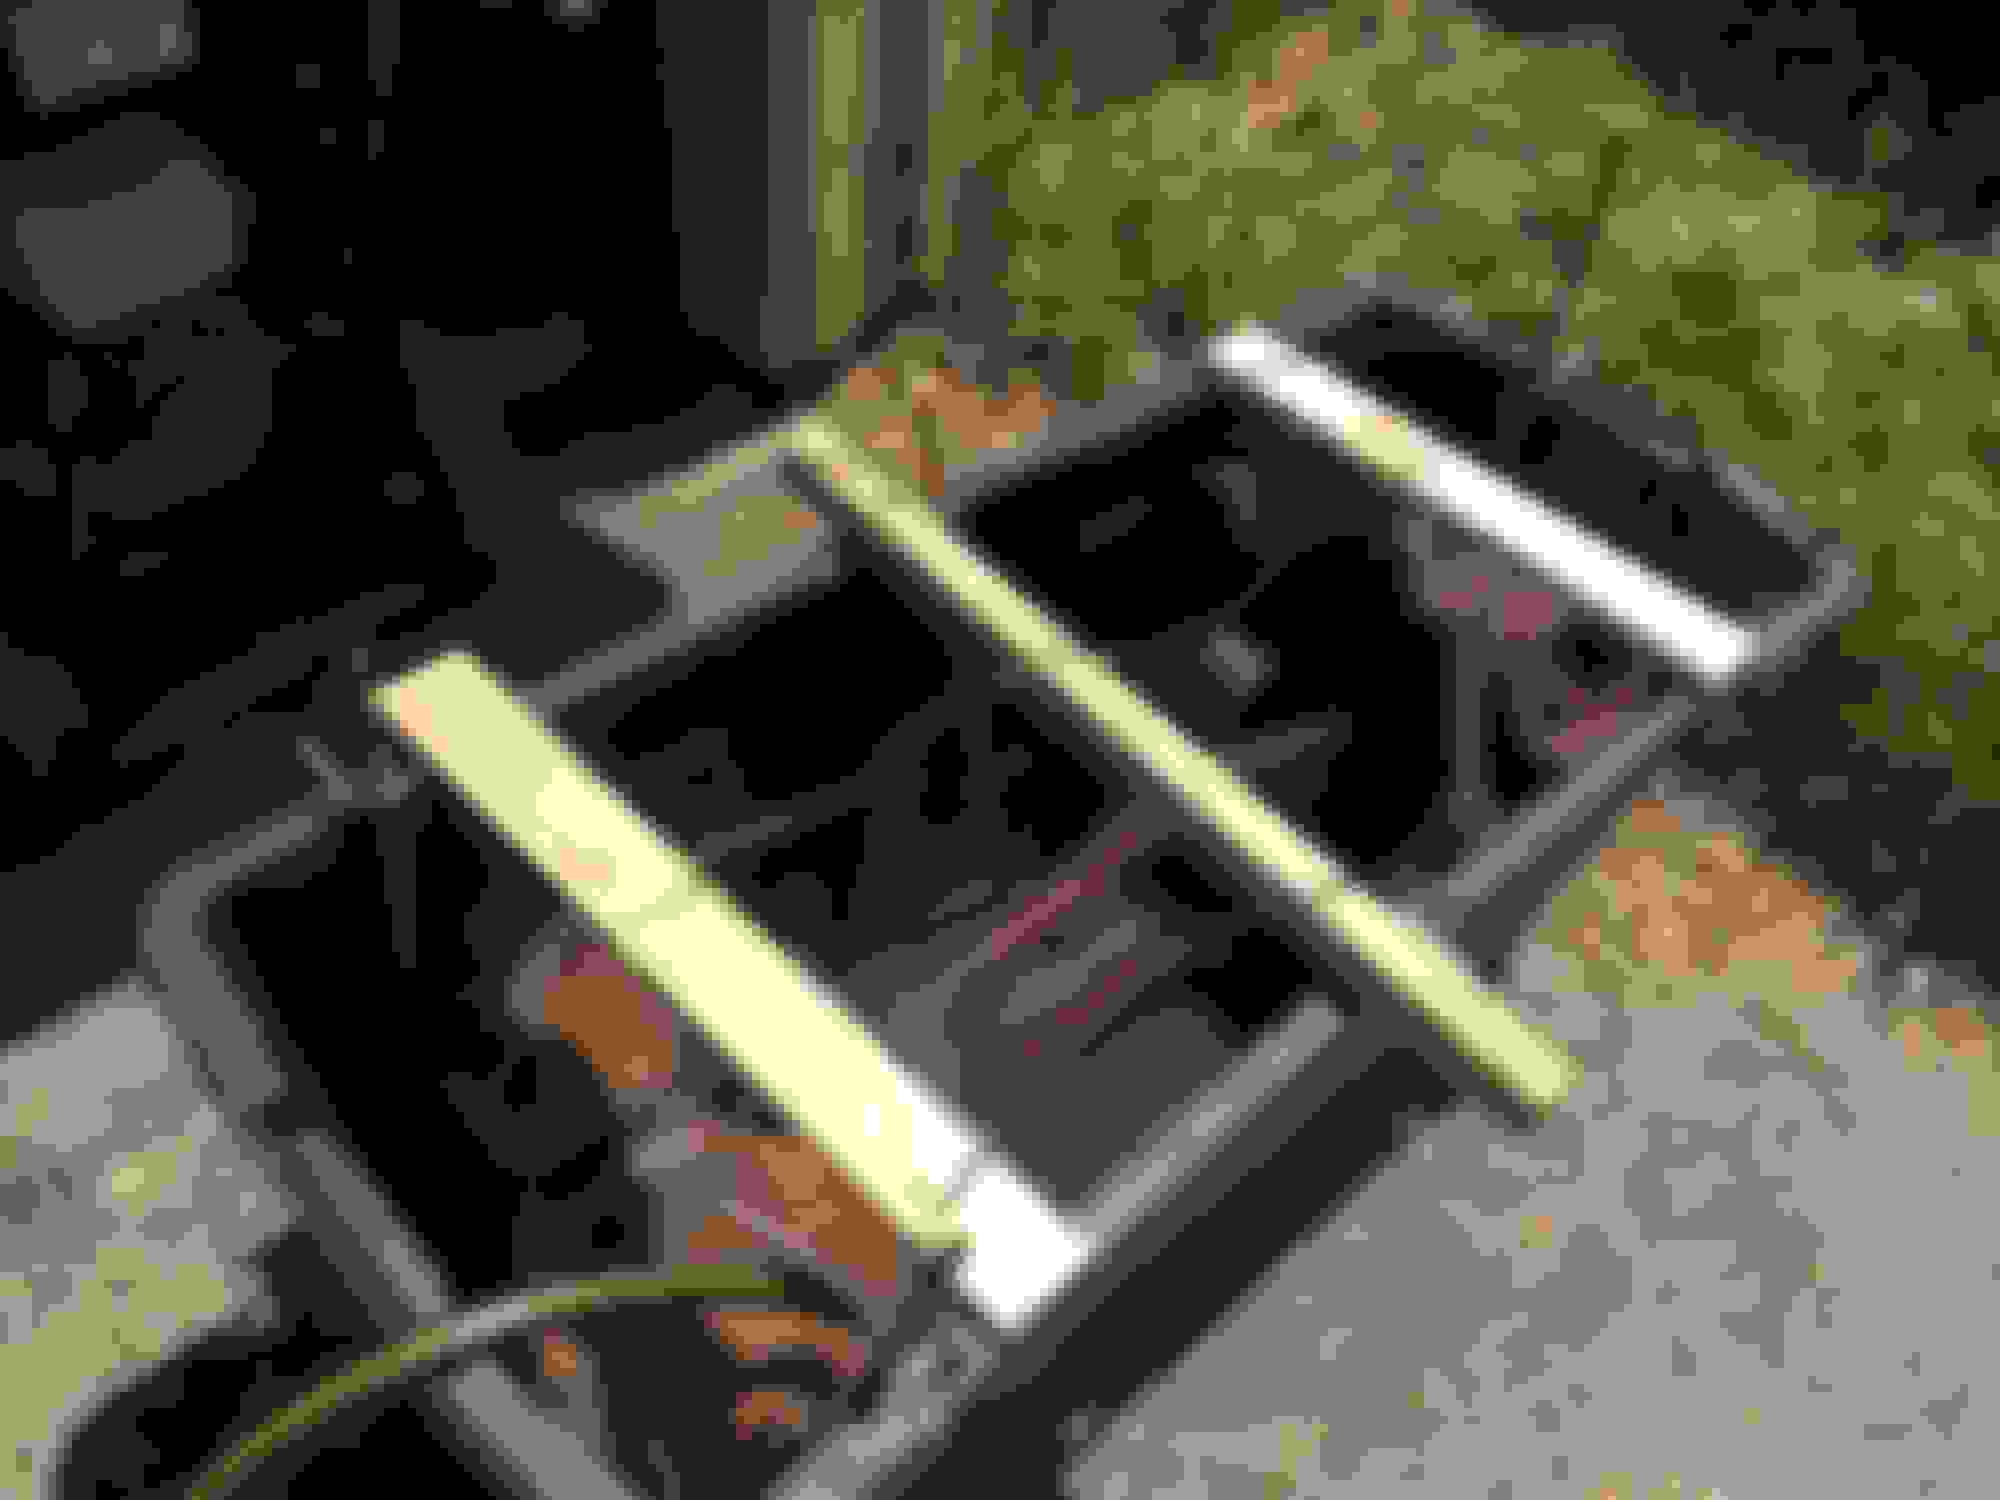
Here's where she sits these days. Been this way for quite a while... I started in on removing items attached to the engine while starting to work on the k-member.
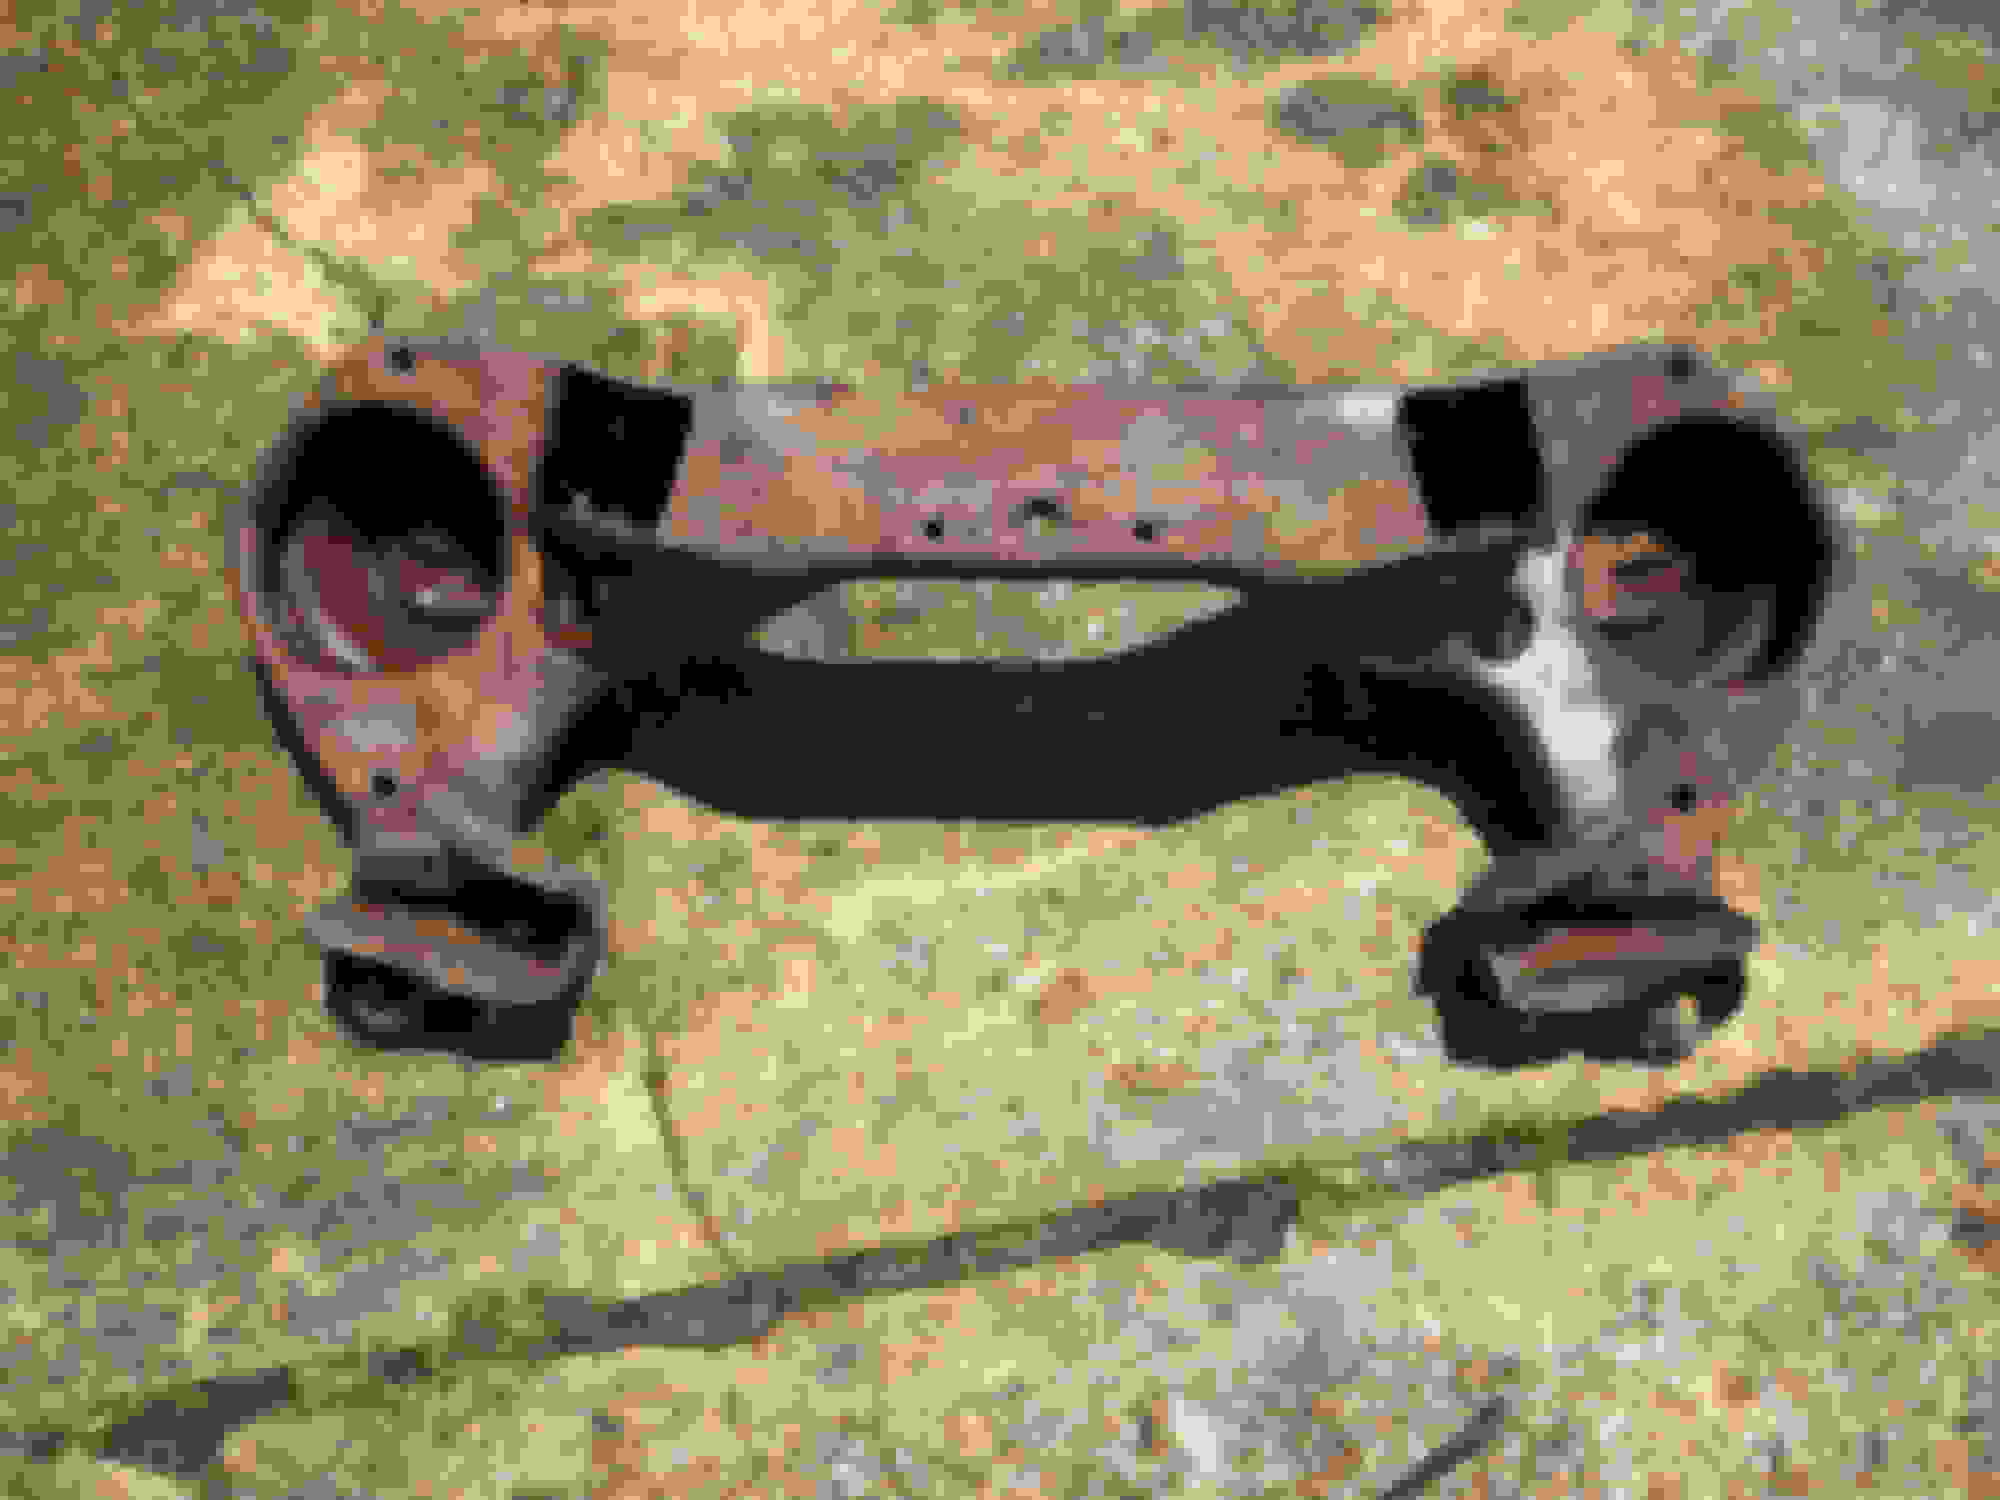
Here's what the K-member looked like when I started. This is just after using a pressure washer on it to knock anything loose off.
I made an electrolysis tank out of a tote from Lowe's and some material from the garage. Add water, some baking soda, and a car charge on trickle charge and you have...
A good bit of the rust removed after 24 hours. Had to brace the tank to keep it from bulging too far.
This next shot is taken in the garage under lights after most of the rust (which had turned into a black sludge) was scrubbed off with some acetone. I've got a few more spots to treat with naval jelly and then will scrub it down again before treating it for paint. Definitely a big improvement though.
Re: 87 GTA/LS1 Swap - Now with (less?) questionable decisions
I don�t have experience with the tubular k-members. I think you�re doing the right thing by addressing the k-member and engine mounts first. You have a family now, so be careful with the springs. A coworker of mine noticed that I was researching spring removal. He said �normally I don�t get into people�s business, but that�s dangerous. Pay a shop to do it.�. I paid a mobile mechanic, and I�m glad I did. He apparently got a lot of business fixing hot rod problems. He had seen a few broken aftermarket k-members. If you don�t feel comfortable with your aftermarket k-member, going back to stock seems prudent.
I bought a Hedman engine and tranny mount kit, and I bought hedman longtube headers. They were designed to work well together, but I did lose ground clearance. Speed bumps are a huge pain now. If I had to do it over again, I may have just used the 4th gen stock headers.
I too bought a 4th gen fuel tank. I bought a herko aftermarket Grand Prix fuel sensor and a herko 4th gen fuel bucket/pump. I had to switch the fuel sensor electronics to a stock 4th gen plastic bracket, but that wasn�t to hard. https://www.thirdgen.org/forums/ltx-lsx/748097-fuel-pump-woes.html
Re: 87 GTA/LS1 Swap - Now with (less?) questionable decisions
3.1EyeCandy.... Dang, blast from the past! I remember you from the old days almost 20 years ago! Awesome to see you back, and doing an LS swap! An LS swap is what brought me back to the forum too. Fun stuff.
Re: 87 GTA/LS1 Swap - Now with (less?) questionable decisions
Originally Posted by johnw999
I don’t have experience with the tubular k-members. I think you’re doing the right thing by addressing the k-member and engine mounts first. You have a family now, so be careful with the springs. A coworker of mine noticed that I was researching spring removal. He said “normally I don’t get into people’s business, but that’s dangerous. Pay a shop to do it.”. I paid a mobile mechanic, and I’m glad I did. He apparently got a lot of business fixing hot rod problems. He had seen a few broken aftermarket k-members. If you don’t feel comfortable with your aftermarket k-member, going back to stock seems prudent.
I bought a Hedman engine and tranny mount kit, and I bought hedman longtube headers. They were designed to work well together, but I did lose ground clearance. Speed bumps are a huge pain now. If I had to do it over again, I may have just used the 4th gen stock headers.
I too bought a 4th gen fuel tank. I bought a herko aftermarket Grand Prix fuel sensor and a herko 4th gen fuel bucket/pump. I had to switch the fuel sensor electronics to a stock 4th gen plastic bracket, but that wasn’t to hard. https://www.thirdgen.org/forums/ltx-lsx/748097-fuel-pump-woes.html
Totally agree. I've got a type of spring compressor that I've never seen others use. I'm a firm believer that you shouldn't skimp on tools, particularly when safety is involved. Found out about it in the GM service manual and think it's what everyone should be using if they can get ahold of them. Once I dig it out and get ready to use it, I'll take a photo and try to find a part number. Thanks!
Originally Posted by Warnd
Nice progress on that K member....looks good as new.
I got it looking even better. Bought some rough steel wool, some wire brushes, and got to work. Also took care of both control arms. After getting them as cleaned up as I could, I did 2 coats of Rustoleum's "Rust Converter", 2 coats of black engine enamel, and 2 coats of clear enamel. Going to order a set of Global West Del-A-Lum LCA bushings to go in them.
Originally Posted by QwkTrip
3.1EyeCandy.... Dang, blast from the past! I remember you from the old days almost 20 years ago! Awesome to see you back, and doing an LS swap! An LS swap is what brought me back to the forum too. Fun stuff.
LOL. I've seriously enjoyed reading your swap thread QwkTrip. I remember seeing pics of your car years (decades?) ago with the super charger out of the engine compartment... I'm glad to be back and glad to be in good company
Re: 87 GTA/LS1 Swap - Now with (less?) questionable decisions
We got the engine and transmission pulled on Labor Day. In the process of putting on the engine lift plate, I torqued the head off of one of the valley cover bolts. Turns out that you shouldn't trust a torque wrench that's been sitting for a decade tightened all the way up (last thing I used it for was putting the crank pulley on). Fought it a bit myself with a left handed drill bit, but gave up after it dulled out and decided to haul it to a local machine shop. They removed it without issue, for less money that I spent on the left handed drill bit set...
Some pictures because who doesn't like progress pictures, even when it's not very much? Rolled the car into the driveway for the first time in a very long time.
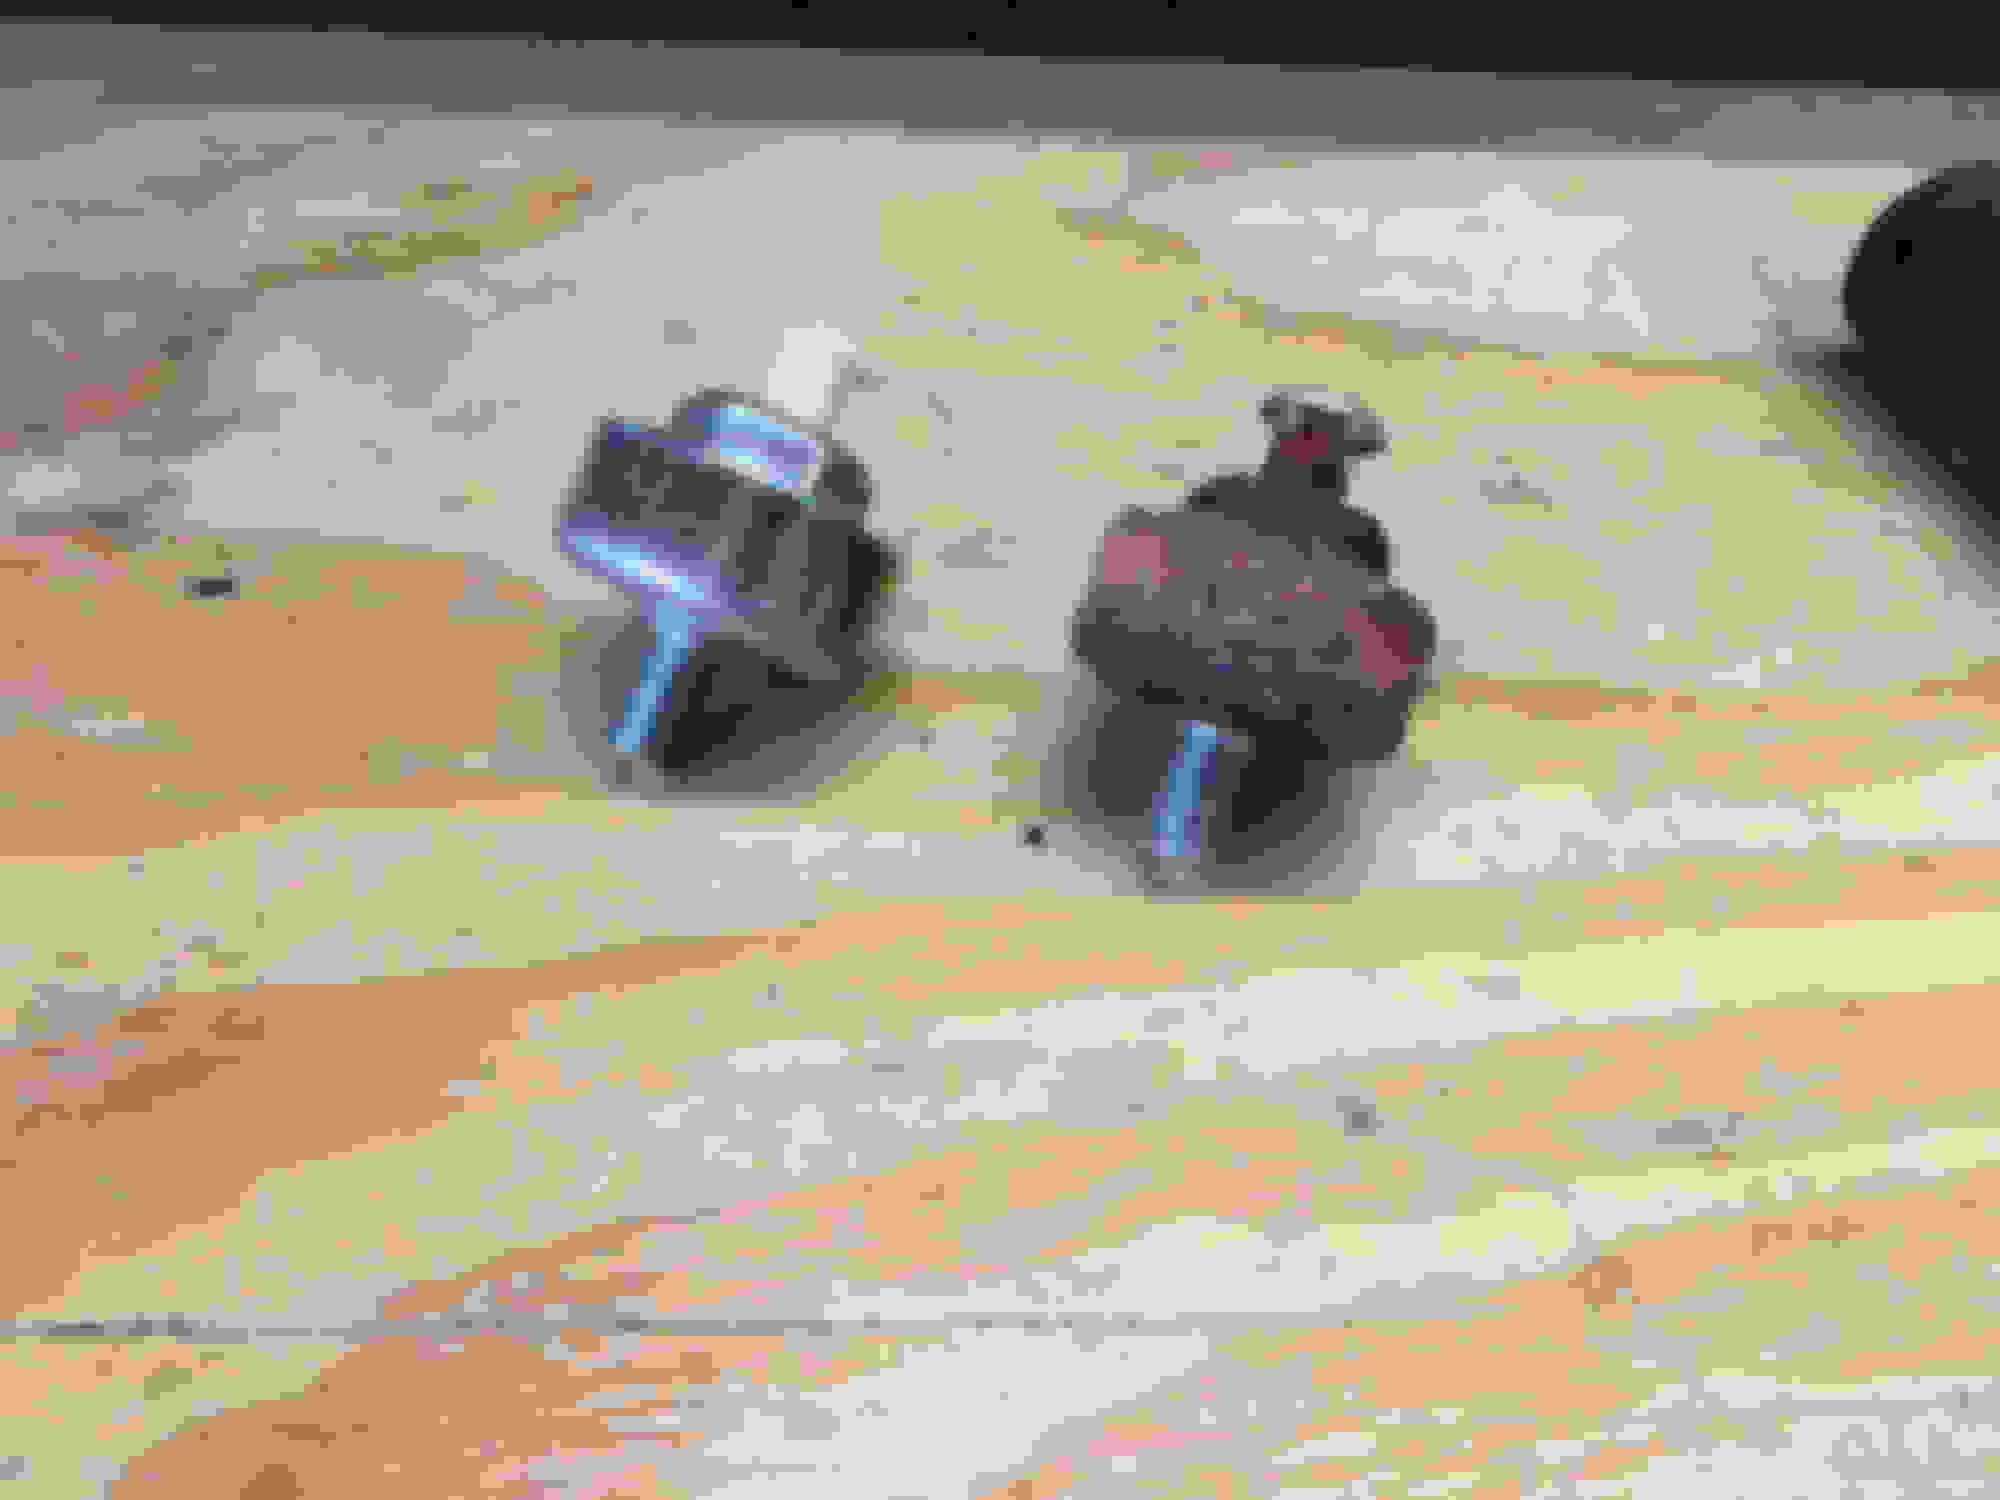
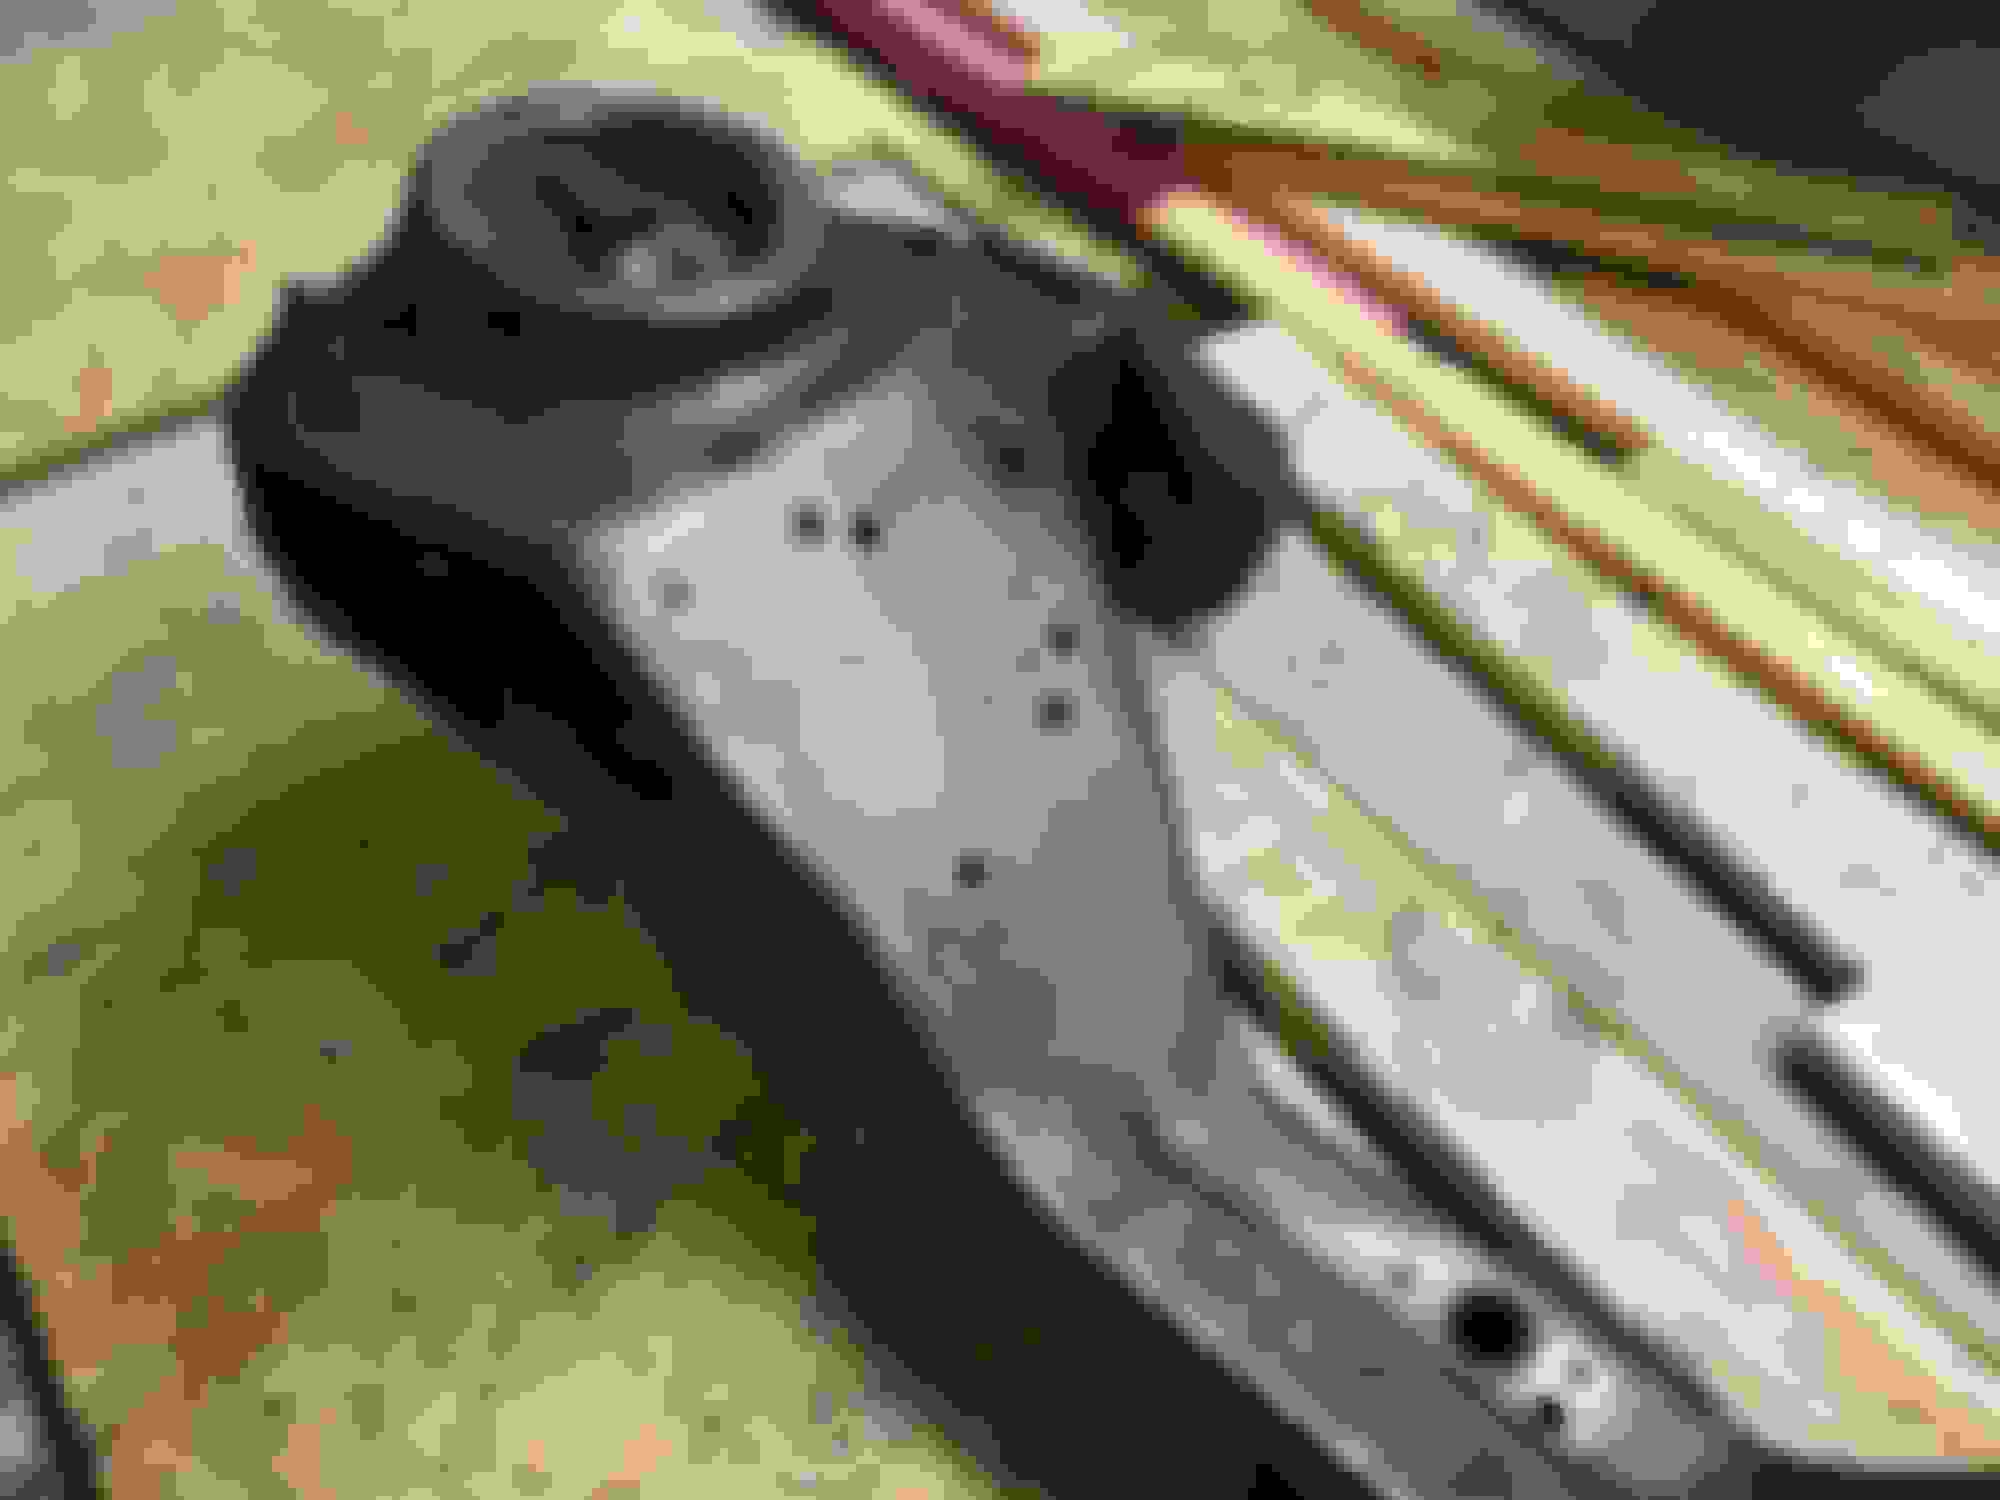
This is one of the knock sensor holes. Very corroded. This is toward the front of the engine an apparently pretty common with LS engines. The other was spotless.
Here you can see the difference in knock sensors. Incredible how gross the front one got, just from some water seeping in under the front of the intake, likely at car washes over the years.
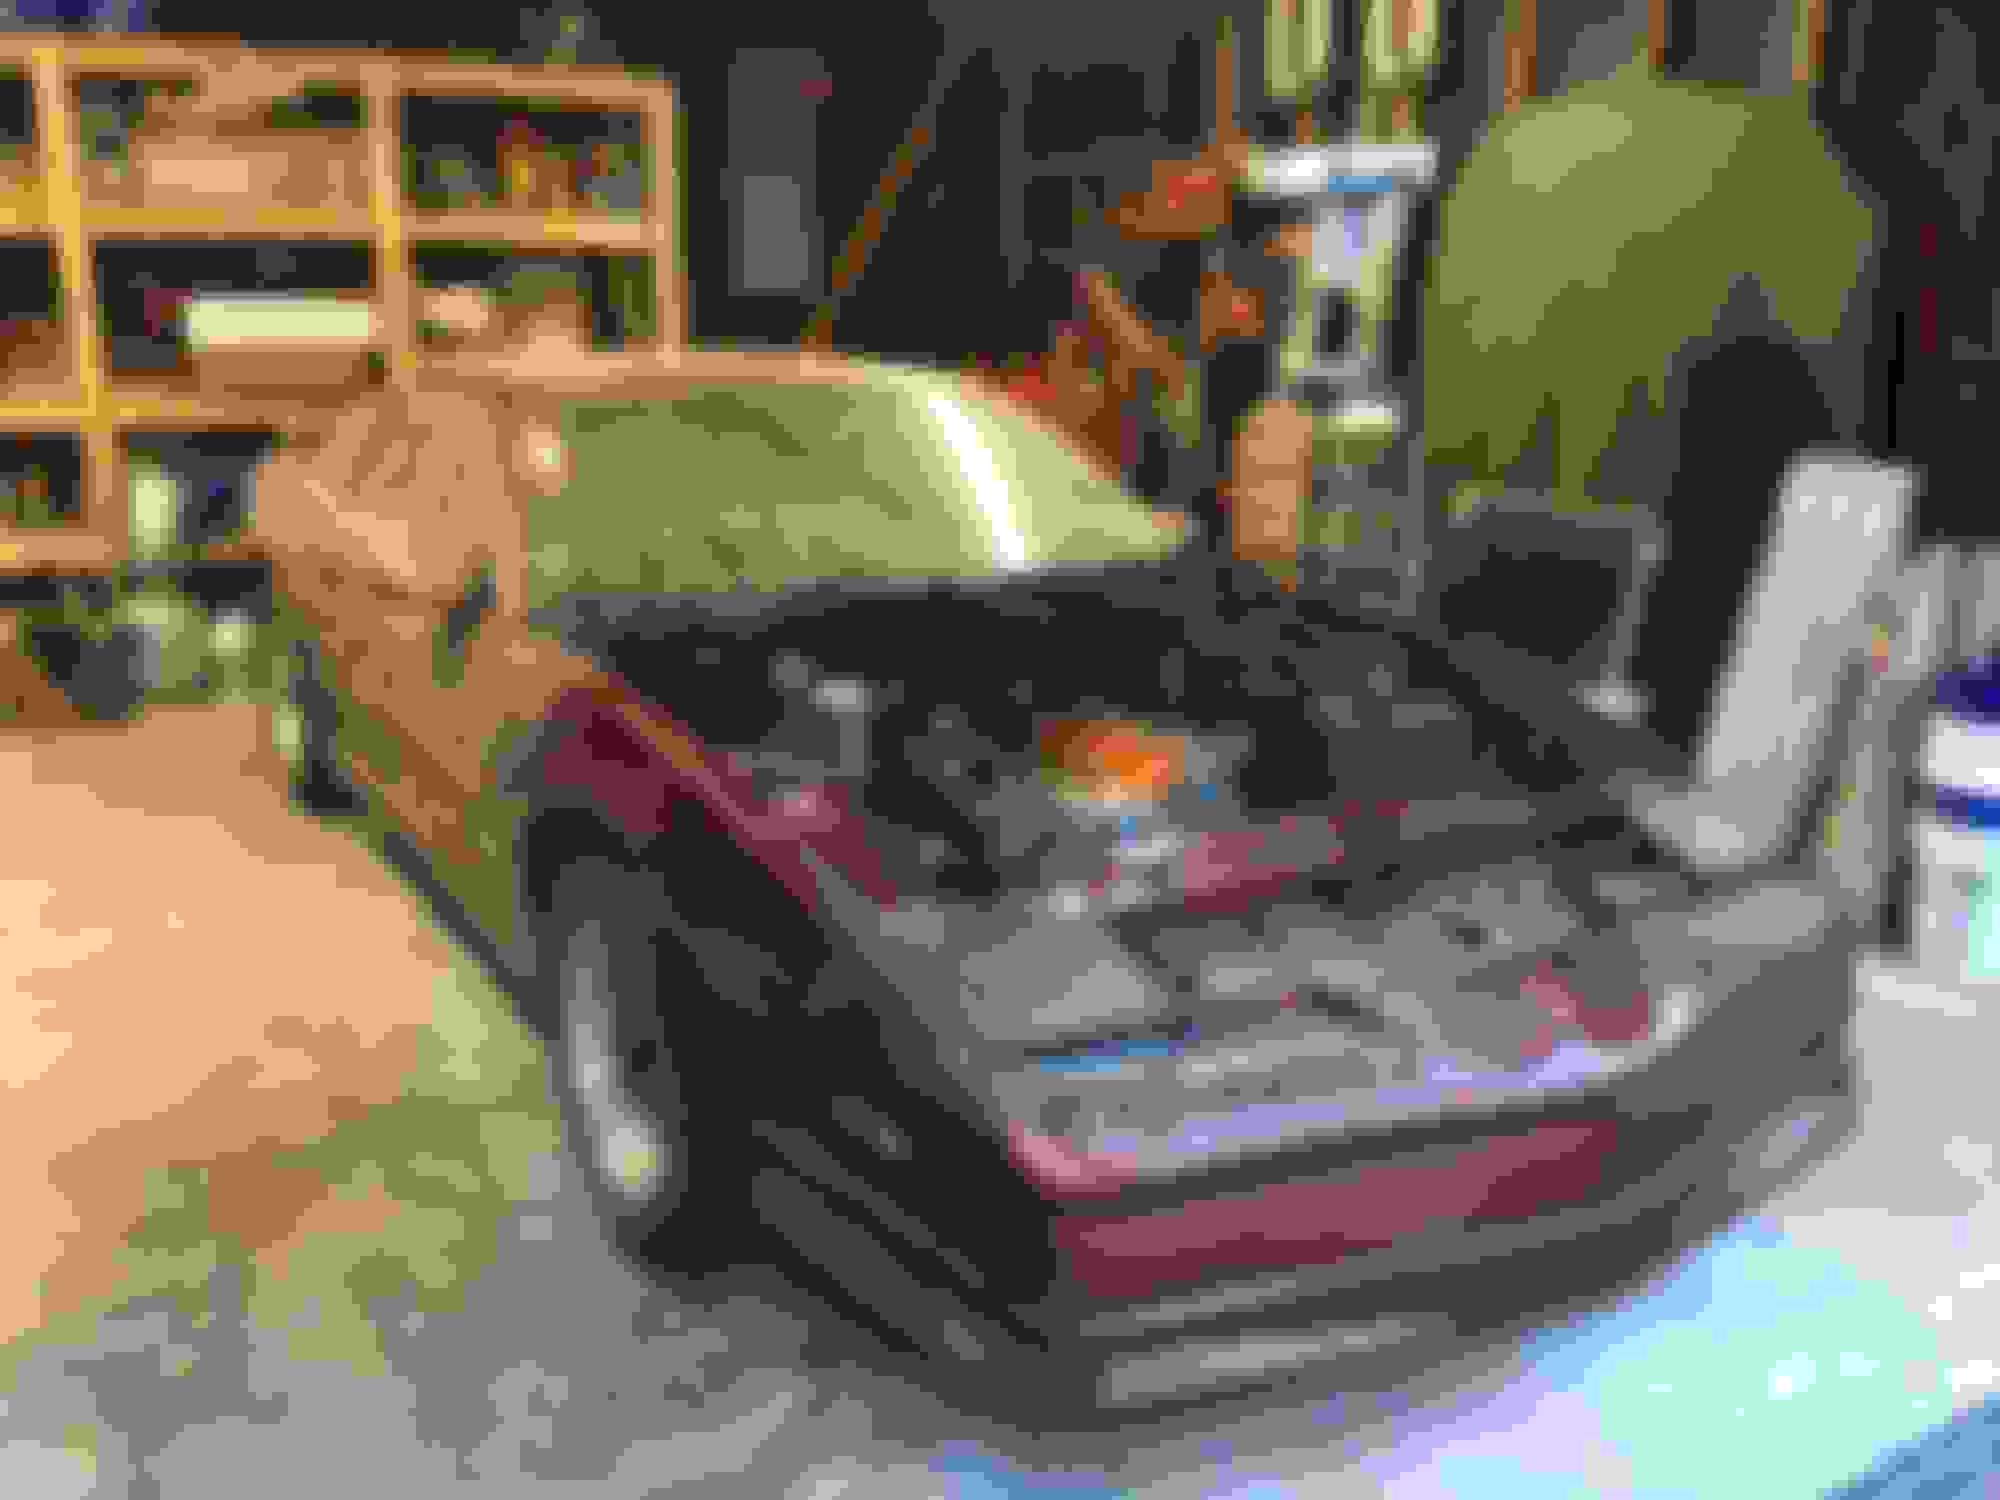
Got the intake off and the lift plate installed. It's a nice piece. Not required for this per se, but it did make it a little easier.
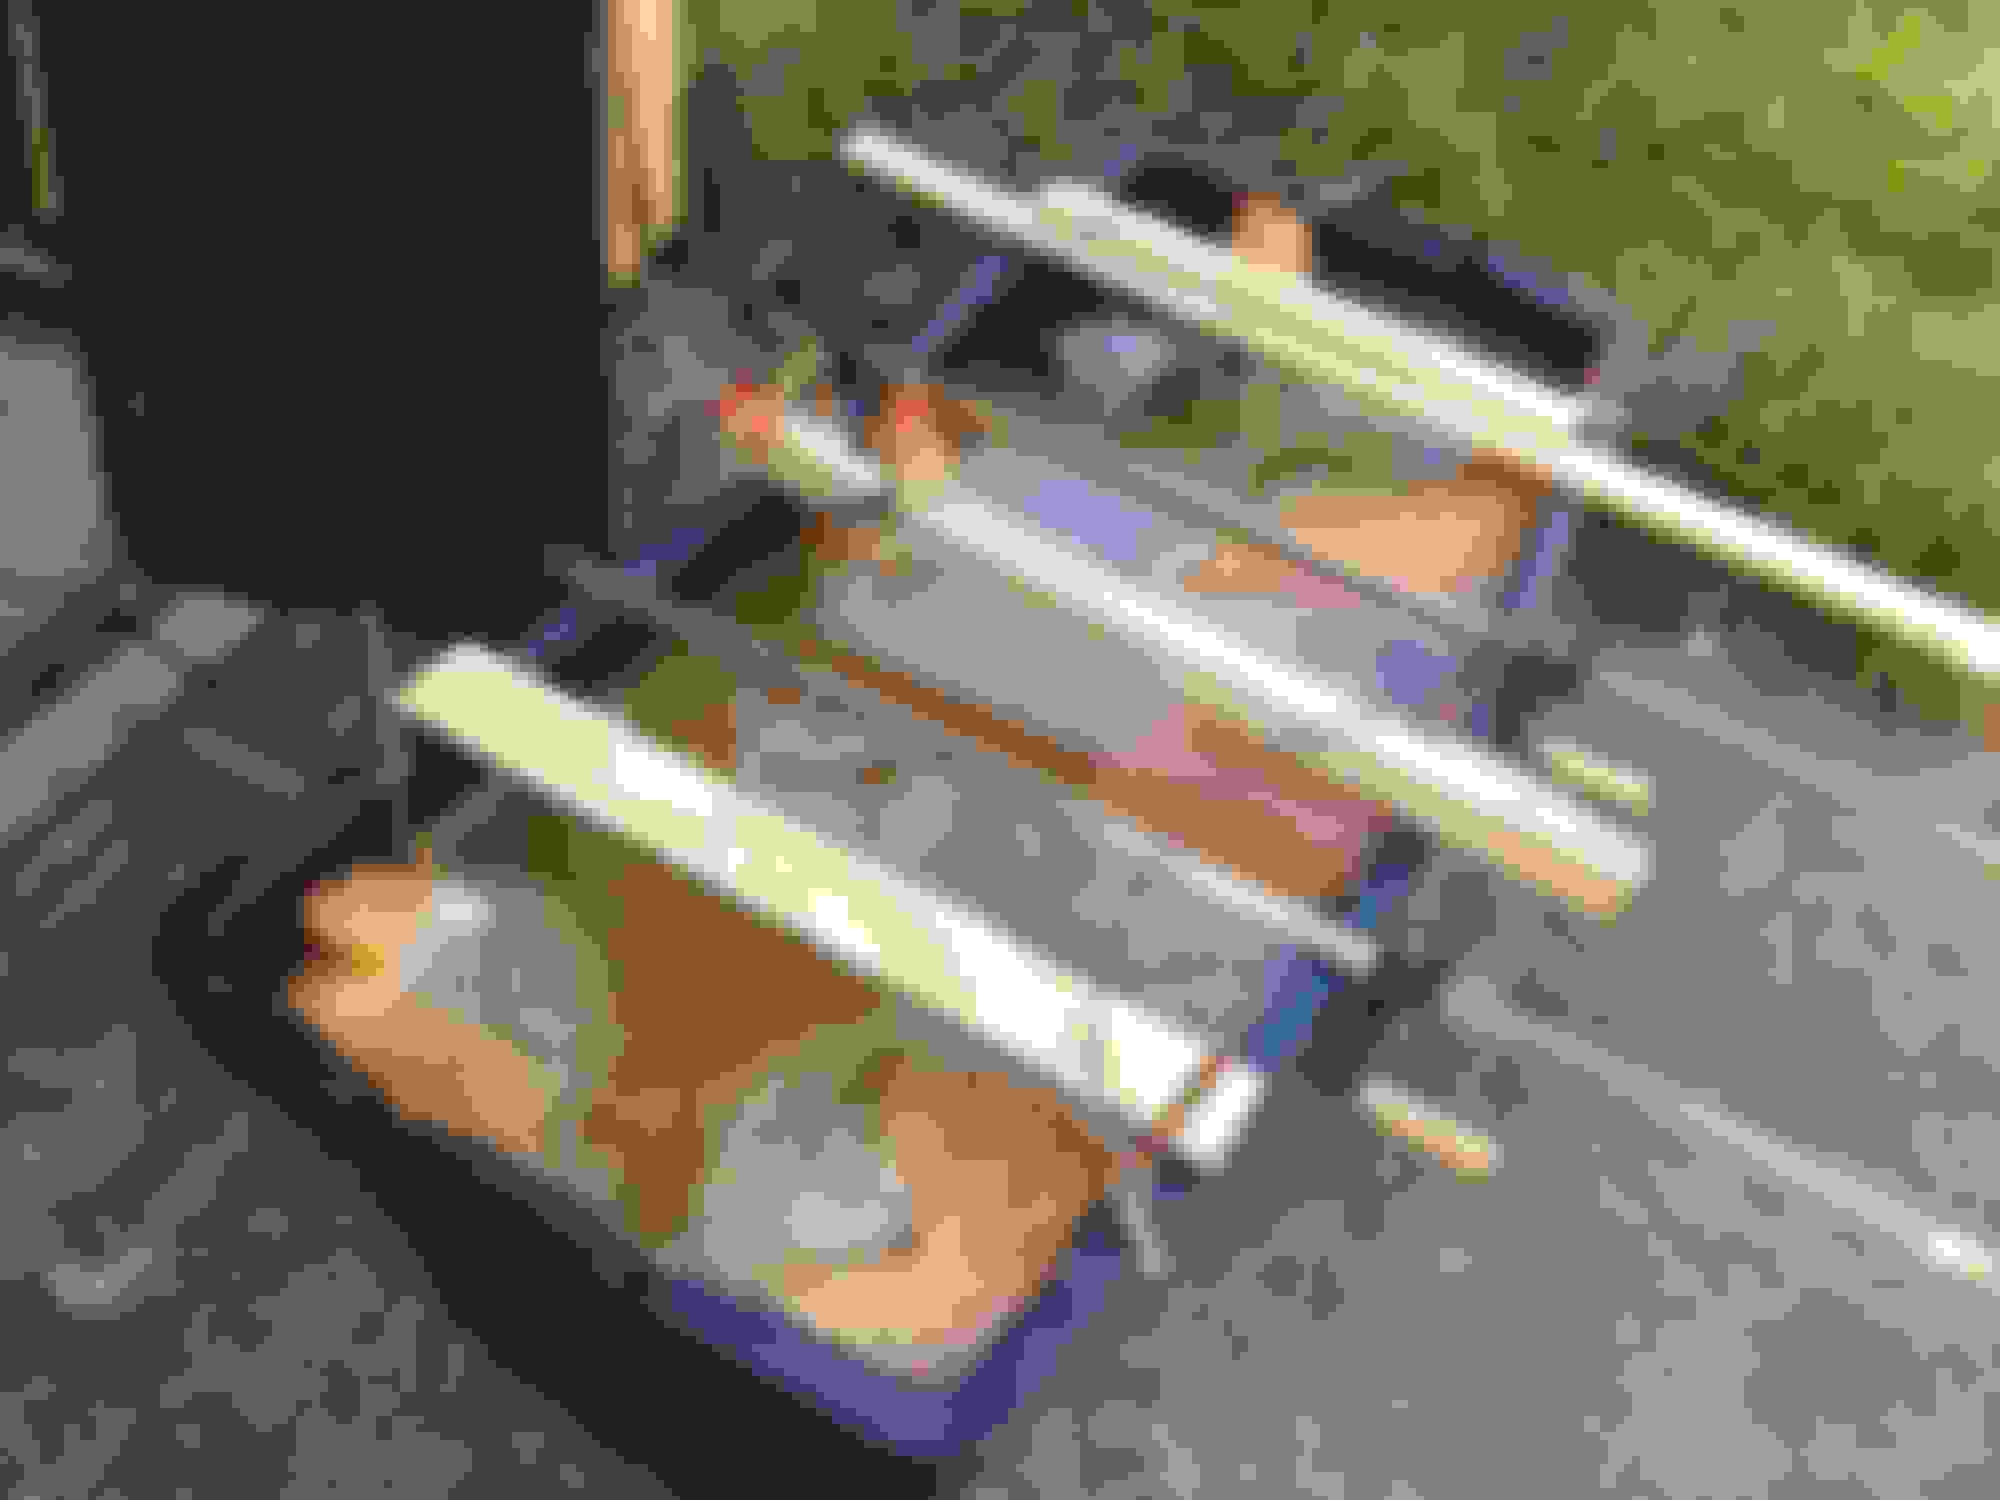
I built some DIY wheel cribs to hold the car up with the suspension compressed. Worked great for angling the car to remove the engine. Was also just enough room to get under the can and unbolt the transmission and remove the driveshaft.
Engine on a stand. The lift plate doubles as a nice temporary valley cover, and came in handy when I had to take the motor the machine shop and had already removed the manifolds.
I've taken off this next week and plan to put some time into working on the motor and car. Need to figure out whether I'm going to change the cam or anything else really soon, will probably be reading up on proven NA LS1 (stock 346) combos that use the LS6 intake and stay nice and reliable while hitting 400 HP. It's just a number, but it sounds nice. I'll also be tearing the LS1 down to inspect for any unusual looking wear or slack and putting on some typical refresher parts. More pics/updates/questions to come as I get into that I'm sure.
Re: 87 GTA/LS1 Swap - Now with (less?) questionable decisions
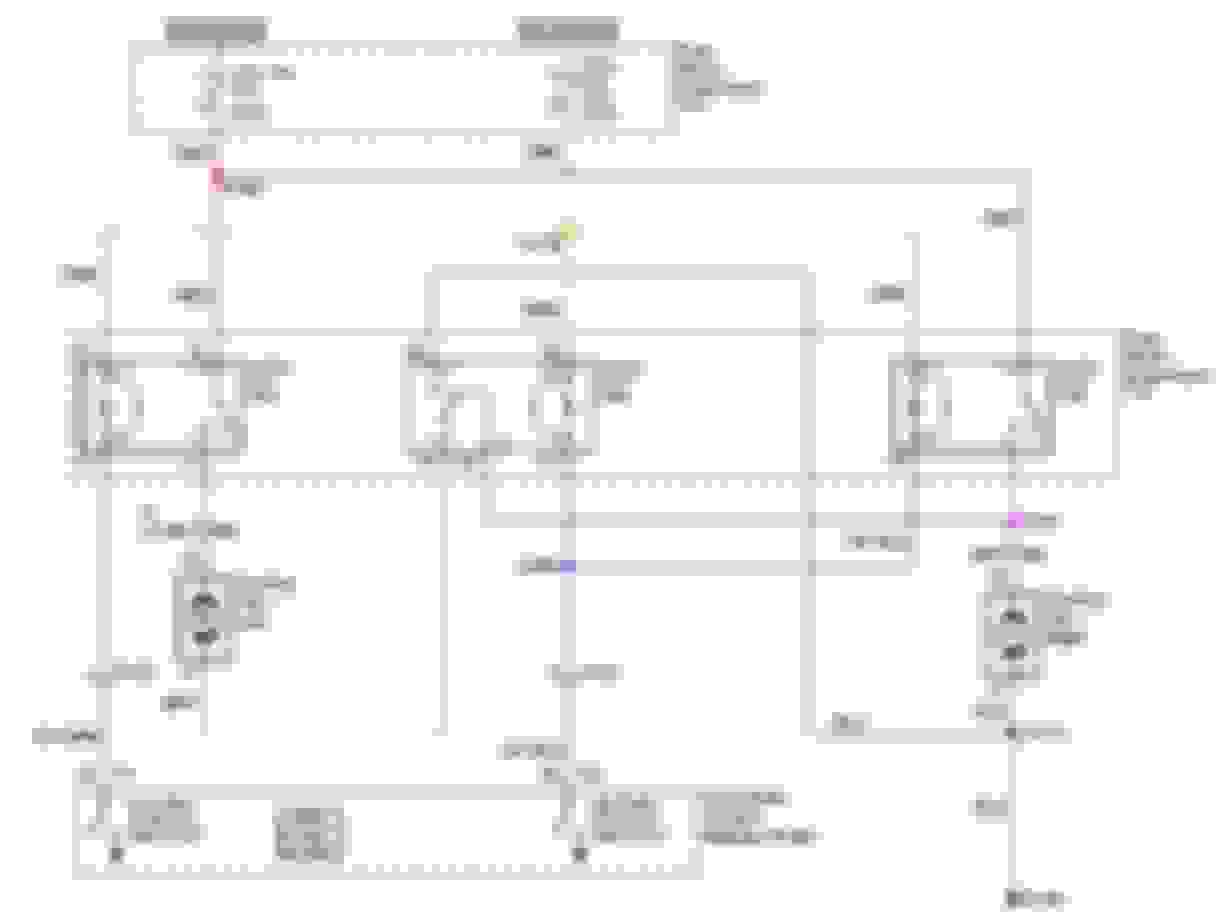
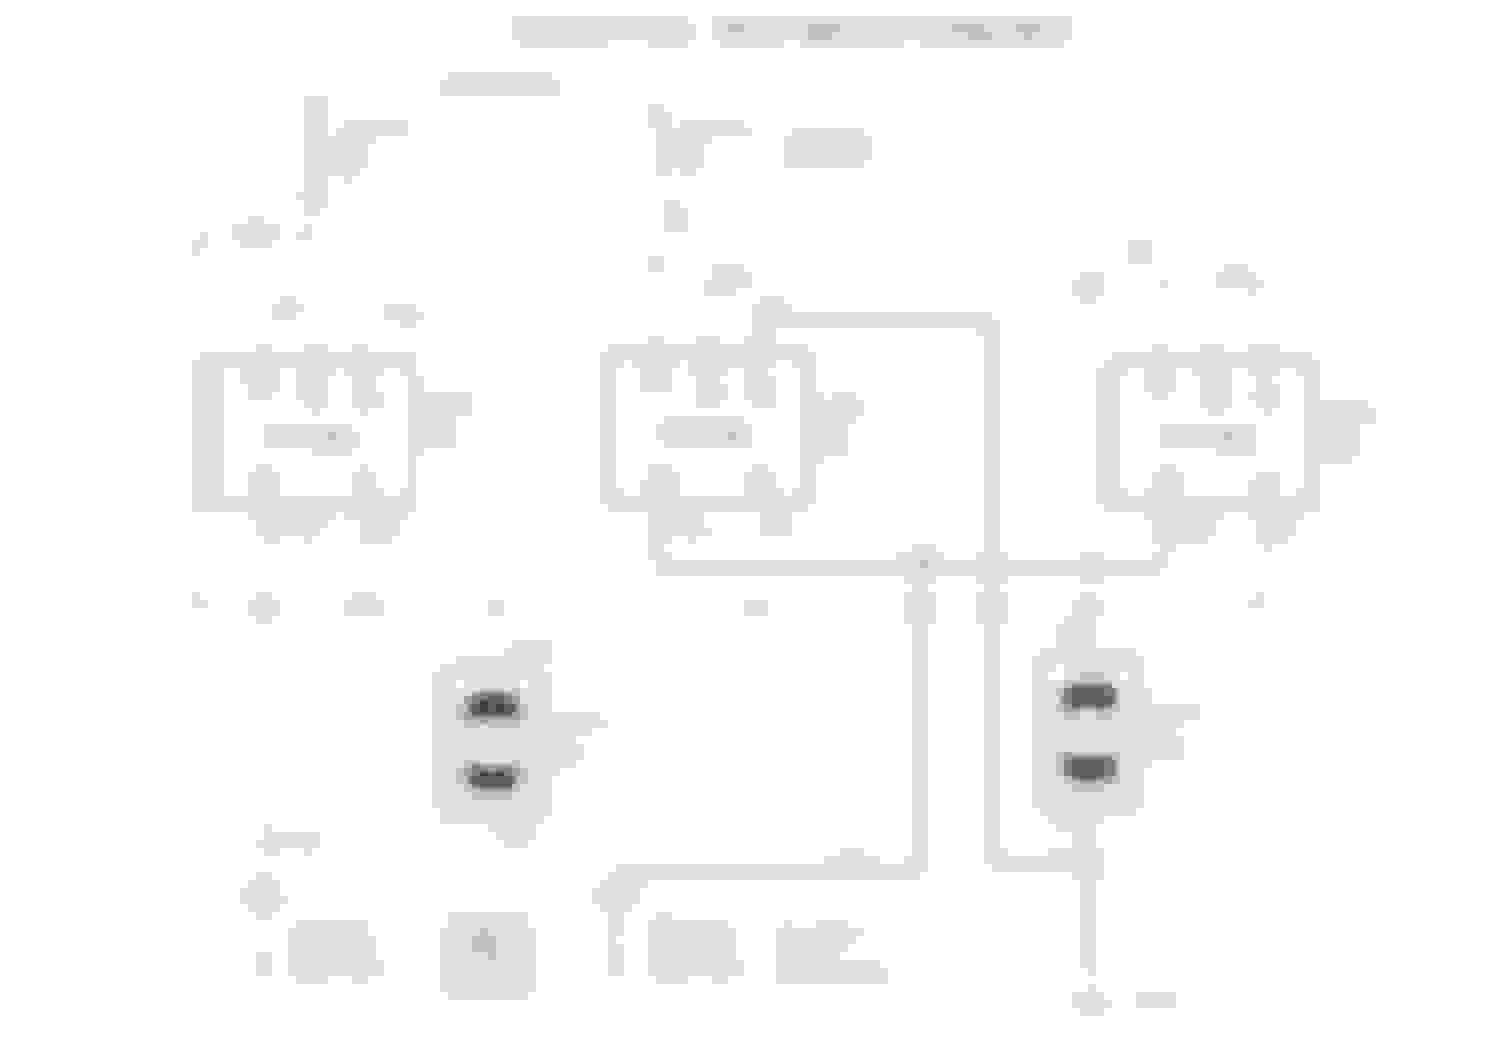
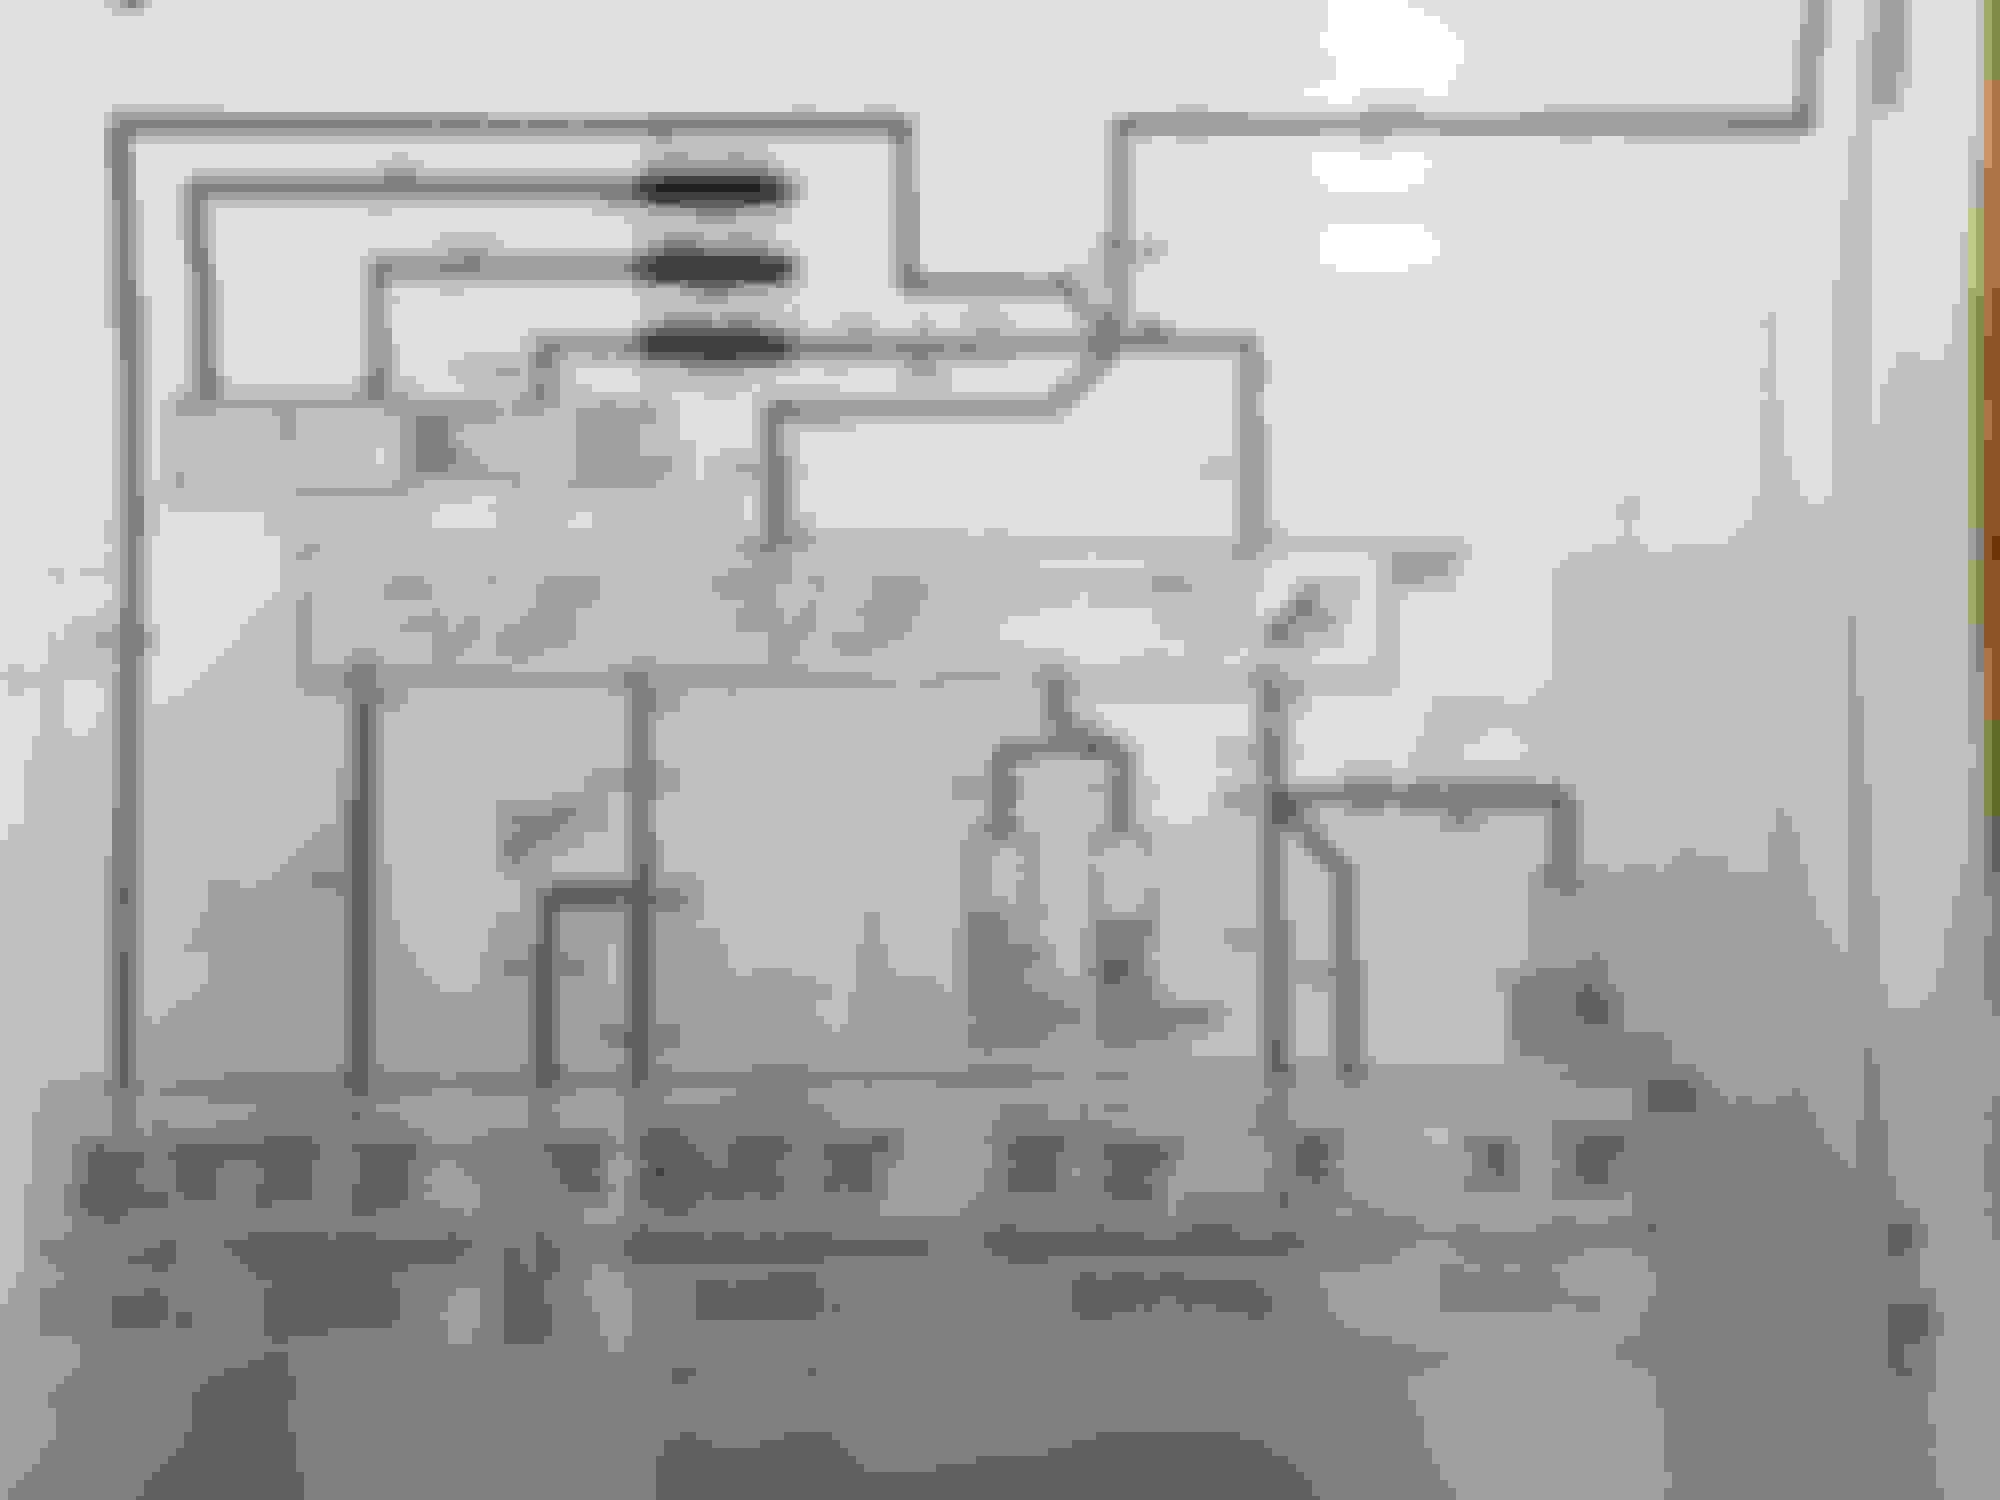
Finished taking the alarm out today. Started looking into the fan relay situation. Ordered some parts and tools to build out the factory LS1 cooling fan setup. Here's the best diagram I found online, with some enlarged relay labels for those wanting to DIY.
The above looks to only be able to support 40A total across 2 fans, as the 10A fuse is used just as a trigger. My assumption is that if you want to run bigger fans which draw more, you'd need bigger wiring, bigger relays, and a bigger fuse to replace the 40A one.
Some questions for the forum:
Who's running this setup and how do you like it?
If you're running this, are you running "normal" size fans or the higher speed ones which draw 40A? What did you do different to accommodate?
Interestingly, RaceTronix sells a harness for this purpose but it doesn't have the same configuration (https://www.racetronix.biz/p/dual-se...rness/fnwh-006). They specifically mention having multiple 30A fuses pre-loaded, which the above obviously doesn't have. Anybody have any insight on a different wiring configuration to allow for the dual fan high/low operation like RaceTronix put together? I could just purchase theirs, but I'm already planning on trying to get all of this to fit in a little relay/fuse holder box.
Re: 87 GTA/LS1 Swap - Now with (less?) questionable decisions
I like the 2 speed fan setup like the factory LS is using. Should pull less current when the two are in series and then there is no spike when they go into high since they are already spinning.
I get the entire harness in one of the Eaton RTMR fuse boxes
Re: 87 GTA/LS1 Swap - Now with (less?) questionable decisions
Originally Posted by scooter
I like the 2 speed fan setup like the factory LS is using. Should pull less current when the two are in series and then there is no spike when they go into high since they are already spinning.
I get the entire harness in one of the Eaton RTMR fuse boxes
Scooter - which Eaton box are you using? I ended up buying something off Amazon because the Eatons I was looking at I wasn't sure how I was going to mount.
I'm working on a second diagram version that might be better for higher amp fans and is patterned off of what I can tell from looking at Racetronix's picture.
Re: 87 GTA/LS1 Swap - Now with (less?) questionable decisions
I use one of these, I can get you the exact part number but I like the one with the common stud for the fuse side of the panel and I use a seperate relay on an ignition source to turn on the whole thing
There are other parts you need to buy to complete it. it comes with the cover for panel mounting, but I buy the legs (and screws separately!) plus all the terminals and seals/plug and mini relays and fuses. It's not the least expensive solution, but I think it is the most finished/factory looking solution
Re: 87 GTA/LS1 Swap - Now with (less?) questionable decisions
Originally Posted by scooter
I use one of these, I can get you the exact part number but I like the one with the common stud for the fuse side of the panel and I use a seperate relay on an ignition source to turn on the whole thing
There are other parts you need to buy to complete it. it comes with the cover for panel mounting, but I buy the legs (and screws separately!) plus all the terminals and seals/plug and mini relays and fuses. It's not the least expensive solution, but I think it is the most finished/factory looking solution
That's what I was looking at too. Believe I was looking at the 2-2-4. Wasn't aware they also sold legs, will have to look into it more. If you've got part numbers, post them or PM them. The part I got from Amazon was relatively cheap, so I'm not sold on it and haven't even received it yet.
Next diagrams may change things. Would like your input.
Re: 87 GTA/LS1 Swap - Now with (less?) questionable decisions
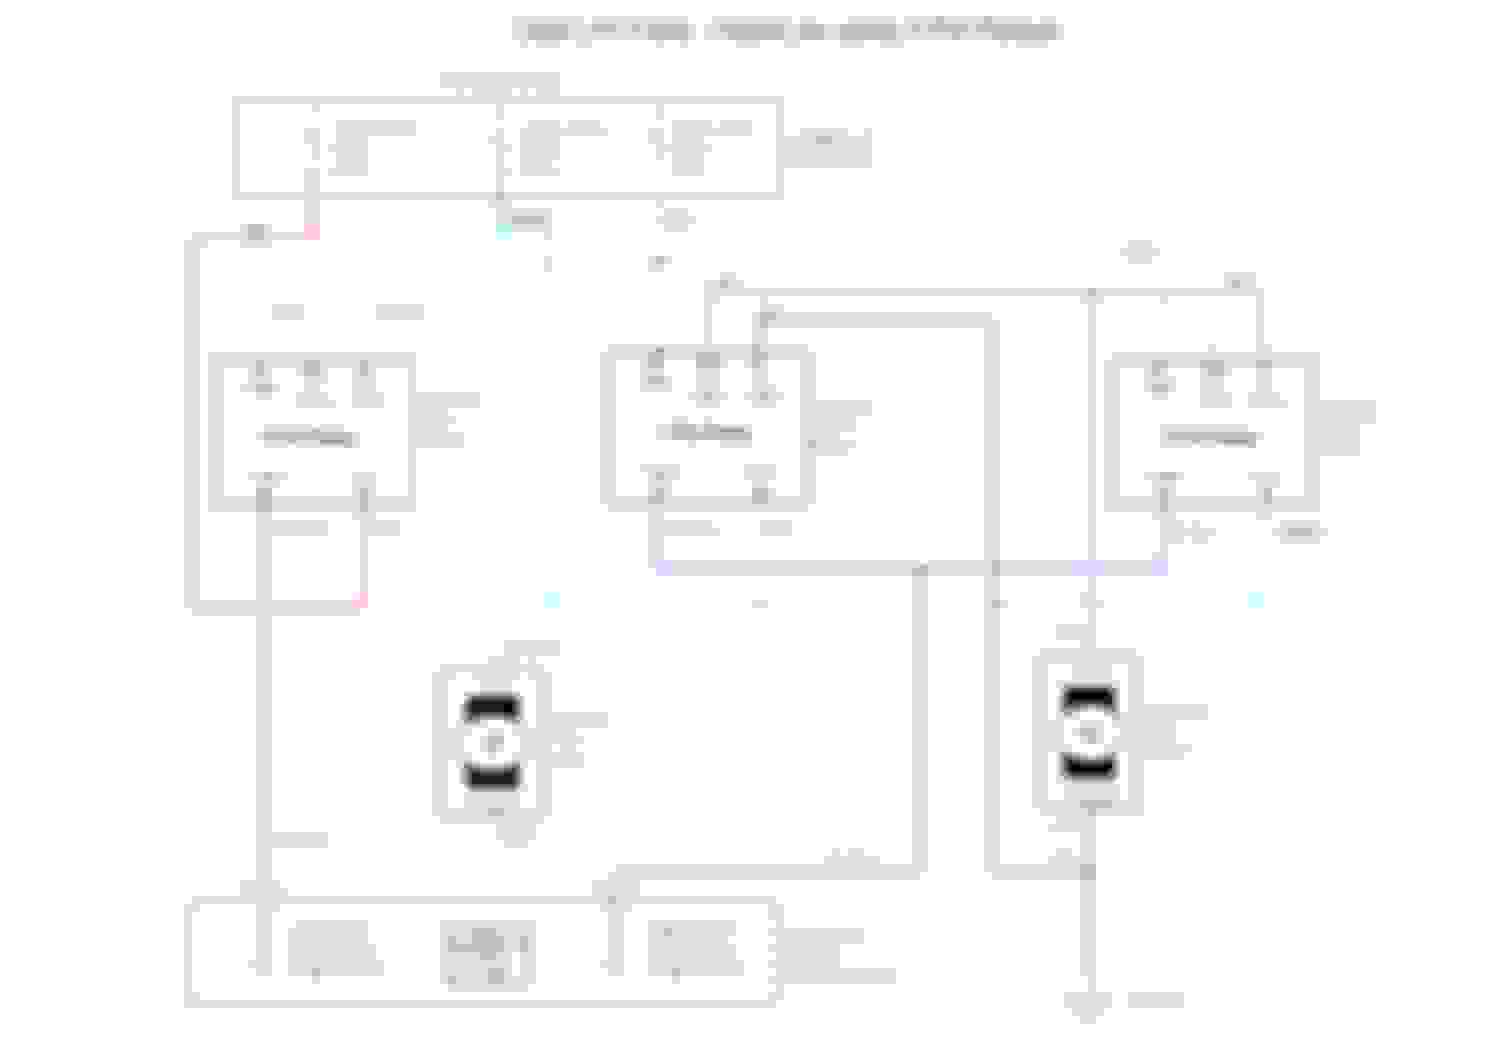
I found various posts online about 4th gen owners upgrading their fan harness using either the Racetronix FNWH-006 or FNWH-007 when running fans which required higher amperage. These look to be some very well made harnesses. Buy one if you're so inclined.
Looking at the descriptions and pictures, it's clear that it's not using the same schematic as the factory fourth gen setup and has a higher awg wire, upgraded pigtails, and a simplified connection to power. I found a great page on electric fan wiring at gtsparkplugs.com which provides an alternate to the fourth gen schematic for high/low operation. So I modified my schematic to have a fuse for each fan when running in parallel.
Dual Cooling Fans - High/Low Operation using 5 Pin Relays
Last edited by 3.1EyeCandy; 09-26-2020 at 02:27 PM.
Reason: Removed 4 pin diagram. Updated 5 pin diagram
Re: 87 GTA/LS1 Swap - Now with (less?) questionable decisions
Originally Posted by scooter
I like the 2 speed fan setup like the factory LS is using. Should pull less current when the two are in series and then there is no spike when they go into high since they are already spinning.
I get the entire harness in one of the Eaton RTMR fuse boxes
I am also using the Eaton box. The LS Camaro's and the GTO's use the same configuration for the high/low dual fans (from my GTO service manual). I happen to be using twin 12" high output Spal fans now and the system works flawlessly. I used 10 ga wire for the fans when I made my harness, so the amp draw is relatively low. Another thing I like about the Eaton box is that they have 5 slots for relays, I have my headlights low/high on my other positions, but you can put anything requiring a relay there.
Re: 87 GTA/LS1 Swap - Now with (less?) questionable decisions
Originally Posted by 3.1EyeCandy
That's what I was looking at too. Believe I was looking at the 2-2-4. Wasn't aware they also sold legs, will have to look into it more. If you've got part numbers, post them or PM them. The part I got from Amazon was relatively cheap, so I'm not sold on it and haven't even received it yet.
Next diagrams may change things. Would like your input.
Legs you need two per RTMR
If you just want the common post for the fuse side I am using this one
It looks like the 2-2-4 has common studs for both the fuse and relay side, which doesn't really work if you have mixed relay triggers, like low side for the fans and high side trigger for the fuel pump.
Re: 87 GTA/LS1 Swap - Now with (less?) questionable decisions
Continuing to address the gaps in my wiring/harness. Had a few questions for the forum.
I'm going to have to re-wrap a good bit of the harness and like the look of mesh loom, particularly the kind with the split. I haven't found a vendor/specific type yet. Recommendations? I've seen a nice picture of one of Scooter's harnesses which used this I believe.
I'd like to pass the fuel pump power wire (10 awg) through the C100 instead of through the passenger fender well. It seems many folks have re-pinned the C100. Are you using the Metripack 280 female/male terminals for this? Also, what are you putting back in the C100 to replace the black tar-like stuff when you're done?
What are you using the pink ignition wire from the C100 for in the engine bay? From what I can tell, you either pass it over and back into the cabin to power the ECM+injectors and/or you use it as one part of the trigger for the relays in the corner. If I route a fresh wire from under the driver's dash to the ECM location under the passenger dash for the ECM+injectors, that just leaves using it to trigger some relays. That's not a whole lot of work for that fat ignition wire. Was just curious.
If you want to pass that much current through the C100 you'll need to use a 10 gauge wire and you'll need a 630 size male and female terminal. The tar stuff is some sort of grease, I wouldn't worry about it, just put some dielectric grease in the connector when you're done.
On my first harness I re-used the coil wire too, but I connected three smaller fuse holders to it so the smaller wires were protected. The coil wire is not protected except from the fusible link at the starter terminal
Re: 87 GTA/LS1 Swap - Now with (less?) questionable decisions
Originally Posted by scooter
On my first harness I re-used the coil wire too, but I connected three smaller fuse holders to it so the smaller wires were protected. The coil wire is not protected except from the fusible link at the starter terminal
The coil? Haven't used that term myself. I'm referring to the "Hot in run" pink wire. We referring to the same thing? You're probably referring to the ignition coils right? I need to dig back through and see how Speartech sourced power for them...
Last edited by 3.1EyeCandy; 09-20-2020 at 01:19 PM.
Re: 87 GTA/LS1 Swap - Now with (less?) questionable decisions
Originally Posted by 3.1EyeCandy
The coil? Haven't used that term myself. I'm referring to the "Hot in run" pink wire. We referring to the same thing? You're probably referring to the ignition coils right? I need to dig back through and see how Speartech sourced power for them...
There are only three wires that are hot in run AND crank. One is the wire for the coil, which is a heavy "unfused" wire, it is only protected by the fusible link at the starter. The second is the gauges power, this generally also powers the emissions stuff under the hood too, it only has a 10 amp fuse. The third is the one for the ECM.
I am not sure what Speartech does, but I would assume they get power from some connection they instruct you to make when you install the harness. I am sure they would not leave you to power and fuse the injectors and coils for the harness.
Re: 87 GTA/LS1 Swap - Now with (less?) questionable decisions
Originally Posted by scooter
There are only three wires that are hot in run AND crank. One is the wire for the coil, which is a heavy "unfused" wire, it is only protected by the fusible link at the starter. The second is the gauges power, this generally also powers the emissions stuff under the hood too, it only has a 10 amp fuse. The third is the one for the ECM.
I am not sure what Speartech does, but I would assume they get power from some connection they instruct you to make when you install the harness. I am sure they would not leave you to power and fuse the injectors and coils for the harness.
I'm sure you're right scooter. Speartech did a bang up job on the harness and the after-sales support. Trouble is, the me of > 10 years ago wasn't as patient and painstaking, though I thought I did a decent job. Add the shop that replaced the 700r4 with a 4L60E, replaced the fuel pump after I'd already replaced it and had to do whatever last bit of work to get the car running (including adding another harness for the 4L60E that Speartech supplied when we figured out we needed to swap transmissions)... I've got a mess under the passenger dash to sort out. I'm taking it a piece at a time and will ask questions as I run into oddities. I really appreciate your help.
Over the next week, I'm planning to diagram out what I've got (as much as I can tell, anyway) and post it up. Once it's understood what needs to be done, I'll pull the Speartech harness, bundle any new wires into the main trunk, and re-wrap and tie things back in.
Re: 87 GTA/LS1 Swap - Now with (less?) questionable decisions
Originally Posted by 3.1EyeCandy
What are you using the pink ignition wire from the C100 for in the engine bay? From what I can tell, you either pass it over and back into the cabin to power the ECM+injectors and/or you use it as one part of the trigger for the relays in the corner. If I route a fresh wire from under the driver's dash to the ECM location under the passenger dash for the ECM+injectors, that just leaves using it to trigger some relays. That's not a whole lot of work for that fat ignition wire. Was just curious.
Thanks guys!
I used that as a trigger wire for a 200 amp solenoid that powers a secondary fuse-box under the hood on my swap.
Re: 87 GTA/LS1 Swap - Now with (less?) questionable decisions
Over 20 years ago now... I wanted to upgrade my 3rd Gen.
I looked at the original power distribution with the Fusible-Links off of the starter motor...
I said: Damn! That all has to go!
These cars really need a proper power distribution system.
DixieBandit's method will work great!
Otherwise a Bussed-Electrical Center needs to be made or swapped from a more modern vehicle.
The Fusible-Links are not meant for adding a lot or Amperage... without burning up!
Ask me how I know... LOL!
Re: 87 GTA/LS1 Swap - Now with (less?) questionable decisions
Made a bit more progress the last few days.
First, we pulled the remaining accessories and heads. Everything looks as good as would be expected of a low mileage motor, so that's good. Started in on removing the graphite head gasket material. Will pick up some aerosol gasket remover and a plastic scraper over the next few days and start back up again. Definitely don't want to scratch or gouge the block. Need to also research what's worth replacing. I've got all seals, lifter trays, oil pump, and a timing chain ready to go.
While the mechanical took a break, started back on figuring out wiring. Diagramed out what I could and then took the Speartech harness out.
This is my in-progress schematic of how the cur was wired before I pulled the Speartech harness out. Looks rough as I had to use a trackpad. I'll expand on it as I figure more out or add circuits. I'd like to add 4th gen computer controlled A/C compressor and cruise control. It's also clearly got an issue (see the "Huh?" label). I'll need to better source battery power. It's only calling for 20A so I'll probably just run a wire from the driver's side dash area.
Started removing the loom and electrical tape from the Speartech harness. Need to remove an unused wire that was cut short when I bought it, and add a few more in. Very tough electrical tape. Need to also decide on 4L60E or T56. Wife thinks a six speed would be fun
Remove some tape, replace with some Velcro wrap (for now). Rinse. Repeat.
That's all she wrote for this week.
Question for scooter (or others) - best place to source 4th gen A/C connectors for the harness? Are they a metripack standard?
Re: 87 GTA/LS1 Swap - Now with (less?) questionable decisions
It would be a better idea to run those fuses from a relay instead of using F4 from the C100. That's the power for the original coil power source and has no fuse but the fusible link at the starter.
I would need to know what connector is on your compressor to tell you what you need for them
Re: 87 GTA/LS1 Swap - Now with (less?) questionable decisions
Kudos for taking time to make wiring diagrams. You'll be glad you did. Slows down the process so you really think things through and less likely to make any errors. And the best part is you'll have documentation for troubleshooting later on.
Re: 87 GTA/LS1 Swap - Now with (less?) questionable decisions
Originally Posted by scooter
It would be a better idea to run those fuses from a relay instead of using F4 from the C100. That's the power for the original coil power source and has no fuse but the fusible link at the starter.
Curious why on this one Scooter. On my Helms diagram, the pink wire exiting F4 on C100 would have originally gone to the Ignition Coil, sure. But with that removed, it's just a convenient ~12 awg wire that's powered in start, bulb test, and run. Do you think it's too small a gauge for the 40A load if it's routed across the engine compartment and back into the cabin? It comes off of a branch that's feeding the fuse block. Attaching the diagram below. If I need to switch to a relay and source power from the battery for these, I'll need to rethink how I'm going to fit things into the Eaton box. So far I'm planning on 3 relays for fans, an A/C compressor clutch relay, and one for the fuel pump. That's all she'll hold. Open to suggestions here, want to do this right and keep things tidy.
Couple ideas - I'm curious about using what looks to be a power distribution setup that's under the driver's side dash. I haven't traced the wires or found the diagram (book is out in the garage and I'm done for the night), but it looked like it had a busbar for orange and a busbar for pink, that everything else fed off of. There's also reusing the INJ1 and INJ2 fuse locations in the existing fuse block to power the new LS1 injectors. I'd have to remove and attach new wires to the fuse block as the TPI used 10A fuses and the LS1 calls for 15A for each bank (which is also odd considering Speartech put in a single 20A fuse that supposedly powers them+more)... I'm just going to need to test the PCM end and the connectors and determine how much they split off and for what.
1987 Firebird TPI Power Distribution showing ignition
Originally Posted by scooter
I would need to know what connector is on your compressor to tell you what you need for them
Planning on stock 4th gen A/C compressor at this point and the wiring to go with it, mounted down low like the 4th gens did. I haven't sourced a compressor yet, just thinking about it. If you ever sell partial wiring harnesses or a bunch of split loom, let me know. It's probably a better deal than buying too much material and having it sit in my garage.
Last edited by 3.1EyeCandy; 09-28-2020 at 09:21 PM.
Re: 87 GTA/LS1 Swap - Now with (less?) questionable decisions
Originally Posted by QwkTrip
Kudos for taking time to make wiring diagrams. You'll be glad you did. Slows down the process so you really think things through and less likely to make any errors. And the best part is you'll have documentation for troubleshooting later on.
Couldn't agree more. I'm glad I found TinyCAD, it's pretty easy.
Re: 87 GTA/LS1 Swap - Now with (less?) questionable decisions
Originally Posted by Neil350
I think I remember this GTA, its a low mile car with red cloth interior right? Think you had some issues with ARD butchering some things on the car?
Blast from the past! Good to hear from you again You remember most of it alright. It's got ~140K on it and I don't think many folks saw it with red cloth interior, but that's what it had for a couple years. ARD definitely made some interesting choices. I'm going to address all of them with this rebuild. All water under the bridge at this point, as I definitely could have done some things better too. Don't think I'd use them again though, given the history. If they're still around, they could be a completely different bunch at this point.
Re: 87 GTA/LS1 Swap - Now with (less?) questionable decisions
Originally Posted by 3.1EyeCandy
Do you think it's too small a gauge for the 40A load if it's routed across the engine compartment and back into the cabin? It comes off of a branch that's feeding the fuse block. Attaching the diagram below. If I need to switch to a relay and source power from the battery for these, I'll need to rethink how I'm going to fit things into the Eaton box. So far I'm planning on 3 relays for fans, an A/C compressor clutch relay, and one for the fuel pump. That's all she'll hold. Open to suggestions here, want to do this right and keep things tidy.
.
I Think that 40 amps is too much for a wire and connection THAT OLD. Remember, GM wasn't planning on these cars being on the road 40 years later, they just wanted them to get through the warranty period.
Why do you think newer cars have relays for almost everything?
Because manufacturers found out that they had problems over time.
What I'm doing on my build is using the big pink wire as a trigger for a continuous duty solenoid, which powers an auxiliary fuse/ relay box under the hood.
Re: 87 GTA/LS1 Swap - Now with (less?) questionable decisions
Originally Posted by 3.1EyeCandy
Curious why on this one Scooter. On my Helms diagram, the pink wire exiting F4 on C100 would have originally gone to the Ignition Coil, sure. But with that removed, it's just a convenient ~12 awg wire that's powered in start, bulb test, and run. Do you think it's too small a gauge for the 40A load if it's routed across the engine compartment and back into the cabin? It comes off of a branch that's feeding the fuse block. Attaching the diagram below. If I need to switch to a relay and source power from the battery for these, I'll need to rethink how I'm going to fit things into the Eaton box. So far I'm planning on 3 relays for fans, an A/C compressor clutch relay, and one for the fuel pump. That's all she'll hold. Open to suggestions here, want to do this right and keep things tidy.
You can do what you want with the F4 terminal, but my point is that the circuit protection is the fusible link, so if you have an issue with your new engine and harness setup you're going to burn out the link and you won't necessarily know what caused the problem. If you put in a relay and run to the battery, and protect that wire with a fuse or it's own fusible link, you'll know where the problem is.
If you just need a hot wire in run and crank I would use the other one that comes off the gauges cluster to trigger a relay that way it isn't picking up a substantial load
Eaton also makes a larger block setup that holds 40 fuses and 10 relays, you could consider stepping up to that model instead, or run the fans in discrete on/off instead of high/low to free up one more relay
Re: 87 GTA/LS1 Swap - Now with (less?) questionable decisions
You can use that C100 F4 (PINK) wire for high power devices (within reason), but it is maybe not a good idea. If that wires shorts then it's going to blow a fusible link and disable your whole car. More likely to have a high-current short running a large device than running a teeny tiny relay coil.
Also, it could end up being a flaky power source with lots of voltage drop given the path it takes through the car. It begins at one of the two RED (12 AWG) wires on fusible links, goes thru C100, thru the ignition switch on the steering column, and back out the C100 again. You can provide much more direct/reliable power source with a new underhood power center.
Stock power distribution isn't exactly impressive. Main power wires were undersized and there was a lot of voltage drop. That's the #1 reason why I separated out anything engine related to have its own power center (fuses/relays) in the engine bay. I used C100 F4 to switch on relays with "key on". All the actual power feeds for engine devices comes from wires that I added in the engine bay. And I ditched all the fusible links and replaced with a mix of fast blow and slow blow fuses close to battery. Basically I made it more similar to a modern car.
I kept all my original chassis wiring in tact, including the under dash fuse center. That is all fed by the two original RED (12 AWG) wires that go through C100. But it is solely chassis functions now (dash, lighting, starter motor, hatch, HVAC, radio, etc). All the engine related stuff is separate (engine, ECM, radiator fans, AC compressor, fuel pump). It helps provide a more balanced electrical load on wires, lower voltage drop, and decouples things so sub-systems are easier to troubleshoot if something goes wrong.
No doubt it is more work up front. But can you imagine a fusible link blowing and trying to figure out what did it? That sucks.
Re: 87 GTA/LS1 Swap - Now with (less?) questionable decisions
Originally Posted by 3.1EyeCandy
Blast from the past! Good to hear from you again You remember most of it alright. It's got ~140K on it and I don't think many folks saw it with red cloth interior, but that's what it had for a couple years. ARD definitely made some interesting choices. I'm going to address all of them with this rebuild. All water under the bridge at this point, as I definitely could have done some things better too. Don't think I'd use them again though, given the history. If they're still around, they could be a completely different bunch at this point.
Owen left town after ripping people off, subsequent law suits in civil court and Jay Hamersley started another shop in which he was fired by his business partner after defrauding him. Jay is currently incarcerated in the Harris county jail awaiting trial for murdering and cremating his wife in the back yard with bbq coal, not his ex Trish but a lady he later married.
Any case, I always thought your car was a 20-30k mile GTA because it was so nice. I had a 93 Trans Am then, still do, but picked up an 89 Trans Am GTA a few years ago, also flame red. It still has the original L98/Th700R4 but I've been redoing the brakes, suspension, interior, fuel system while building an LS based motor.
Re: 87 GTA/LS1 Swap - Now with (less?) questionable decisions
Originally Posted by QwkTrip
You can use that C100 F4 (PINK) wire for high power devices (within reason), but it is maybe not a good idea. If that wires shorts then it's going to blow a fusible link and disable your whole car. More likely to have a high-current short running a large device than running a teeny tiny relay coil.
Also, it could end up being a flaky power source with lots of voltage drop given the path it takes through the car. It begins at one of the two RED (12 AWG) wires on fusible links, goes thru C100, thru the ignition switch on the steering column, and back out the C100 again. You can provide much more direct/reliable power source with a new underhood power center.
Stock power distribution isn't exactly impressive. Main power wires were undersized and there was a lot of voltage drop. That's the #1 reason why I separated out anything engine related to have its own power center (fuses/relays) in the engine bay. I used C100 F4 to switch on relays with "key on". All the actual power feeds for engine devices comes from wires that I added in the engine bay. And I ditched all the fusible links and replaced with a mix of fast blow and slow blow fuses close to battery. Basically I made it more similar to a modern car.
I kept all my original chassis wiring in tact, including the under dash fuse center. That is all fed by the two original RED (12 AWG) wires that go through C100. But it is solely chassis functions now (dash, lighting, starter motor, hatch, HVAC, radio, etc). All the engine related stuff is separate (engine, ECM, radiator fans, AC compressor, fuel pump). It helps provide a more balanced electrical load on wires, lower voltage drop, and decouples things so sub-systems are easier to troubleshoot if something goes wrong.
No doubt it is more work up front. But can you imagine a fusible link blowing and trying to figure out what did it? That sucks.
I'd love to have the time/patience/motivation to do something like this! I've owned mine since '02 and there are things starting to fail (common - headlight motor relay, not as common - turn signal switch mechanically worn out/busted), just starting to wonder what's lurking around the corner. Plus there's the part of my brain that just wants to make the car better, as in try and bring the car up to somewhat modern standards.
Originally Posted by Neil350
Owen left town after ripping people off, subsequent law suits in civil court and Jay Hamersley started another shop in which he was fired by his business partner after defrauding him. Jay is currently incarcerated in the Harris county jail awaiting trial for murdering and cremating his wife in the back yard with bbq coal, not his ex Trish but a lady he later married.
Now THAT'S a where are they now update!
On topic, looks like you're doing a great job, carefully going through it and doing to your best to do it right this time.
Re: 87 GTA/LS1 Swap - Now with (less?) questionable decisions
Originally Posted by Neil350
Owen left town after ripping people off, subsequent law suits in civil court and Jay Hamersley started another shop in which he was fired by his business partner after defrauding him. Jay is currently incarcerated in the Harris county jail awaiting trial for murdering and cremating his wife in the back yard with bbq coal, not his ex Trish but a lady he later married.
Any case, I always thought your car was a 20-30k mile GTA because it was so nice. I had a 93 Trans Am then, still do, but picked up an 89 Trans Am GTA a few years ago, also flame red. It still has the original L98/Th700R4 but I've been redoing the brakes, suspension, interior, fuel system while building an LS based motor.
indeed... just... wow. Thanks for the update, I never knew. Don't want to distract the thread too much, but for those unaware Jay had build an LS-swapped thirdgen camaro and he and Owen had held events for the Houston thirdgen crowd at their shop, ARD. Due to this, I ended up having them work to finish up my GTA. Some things went well, others not so well. Jay was on these forums for a time...
Yeah, car's always been real clean. Hopefully will again. I'd love to see yours one of these days. Love the GTAs.
Re: 87 GTA/LS1 Swap - Now with (less?) questionable decisions
Back on topic - it's clear that everyone is saying to not rely on the factory circuits for the new drivetrain. I'm open to that. Will take a while to read up and understand how best to get this in place. I'm not versed in what manufacturers have done since thirdgen times to make power distribution better and don't like building things (now) without a solid understanding that they're right-sized and safe. Expect more diagrams and questions. I'm off to re-read your threads on what you've done, the parts you've chosen, and why. I don't think buying the thickest wire and putting a giant fuse in-line and guessing on the load and wire tolerances will pass muster for me. Good thing this is a "hobby" and it's going to take a while to save up for that T56 Magnum-F.
Re: 87 GTA/LS1 Swap - Now with (less?) questionable decisions
Originally Posted by QwkTrip
You can use that C100 F4 (PINK) wire for high power devices (within reason), but it is maybe not a good idea. If that wires shorts then it's going to blow a fusible link and disable your whole car. More likely to have a high-current short running a large device than running a teeny tiny relay coil.
Also, it could end up being a flaky power source with lots of voltage drop given the path it takes through the car. It begins at one of the two RED (12 AWG) wires on fusible links, goes thru C100, thru the ignition switch on the steering column, and back out the C100 again. You can provide much more direct/reliable power source with a new underhood power center.
Stock power distribution isn't exactly impressive. Main power wires were undersized and there was a lot of voltage drop. That's the #1 reason why I separated out anything engine related to have its own power center (fuses/relays) in the engine bay. I used C100 F4 to switch on relays with "key on". All the actual power feeds for engine devices comes from wires that I added in the engine bay. And I ditched all the fusible links and replaced with a mix of fast blow and slow blow fuses close to battery. Basically I made it more similar to a modern car.
I kept all my original chassis wiring in tact, including the under dash fuse center. That is all fed by the two original RED (12 AWG) wires that go through C100. But it is solely chassis functions now (dash, lighting, starter motor, hatch, HVAC, radio, etc). All the engine related stuff is separate (engine, ECM, radiator fans, AC compressor, fuel pump). It helps provide a more balanced electrical load on wires, lower voltage drop, and decouples things so sub-systems are easier to troubleshoot if something goes wrong.
No doubt it is more work up front. But can you imagine a fusible link blowing and trying to figure out what did it? That sucks.
Super solid advice here. I am using the PINK F4 C100 output to send a 12v signal to a junction which then triggers a bunch of relays for AC, Radio, etc. It is only used as a signal path and not to provide load. As mentioned, you will want to run a new power supply to any relays, especially fans, fuel pump, etc. You can trigger those relays with the OEM F4 12v source. I have a main junction under my dash that is wired directly to the battery via 0/1 gage wire. The relay loads are fed through that with the signal coming from the F4.
 05-31-2020, 09:22 AM


 An LS swap is what brought me back to the forum too. Fun stuff.