When you click on links to various merchants on this site and make a purchase, this can result in this site earning a commission. Affiliate programs and affiliations include, but are not limited to, the eBay Partner Network.
87 GTA/LS1 Swap - Now with (less?) questionable decisions
LTX and LSXPutting LT1s, LS1s, and their variants into Third Gens is becoming more popular. This board is for those who are doing and have done the swaps so they can discuss all of their technical aspects including repairs, swap info, and performance upgrades.
Several interesting bits from that, notably around wire gauge with the charging wire. Not the only resource out there, but seems like something solid with a lot of "why" explanation, which helps.
I'm curious for those who've gone whole hog into addressing the electrical system - the stock LS1 wiring schematics call for quite a bit that's hot all the time, and quite a bit that's only hot in run/start/bulb test. Here are my notes from reviewing the electical diagrams referred to by QwkTrip:
# Load
## Hot at all times (Orange)
60A - Cooling fans (2 30A fuses or do 1 40A Maxi if following stock 4th gen setup)
10A - Cooling fan relays (1 10A fuse)
10A - PCM Battery
20A - Fuel Pump (relay gets voltage from PCM)
## With Ignition (Pink)
15A - A/C and Cruise. Curious if we can/should separate these out.
15A - PCM Ignition
15A - Injectors and Ignition Coils 1
15A - Injectors and Ignition Coils 2
20A - Engine Sensors (goes to O2 sensors and MAF)
15A - EVAP + Automatic Transmission
Looking at that, you've got 100A for orange and 100A for pink if you go by what GM put in place. Obviously these are peak loads and you're not going to see everything draw it at once.
Last edited by 3.1EyeCandy; 09-30-2020 at 10:09 PM.
Definitely another good resource. I read through that one as well today at lunch.
Scooter - are you saying you're powering the cooling fans and fuel pump in run/start/bulb test (pink)? I suppose the PCM could just never trigger the fans and fuel pump unless it's in that position, but why did GM have them sourced off orange (hot all the time)? That must also be a big relay... I was thinking of using a big continuous duty solenoid like Dixie is using for this purpose.
Last edited by 3.1EyeCandy; 09-30-2020 at 10:08 PM.
Re: 87 GTA/LS1 Swap - Now with (less?) questionable decisions
GM powered the cooling fans all the time so the fans could run after the engine was in the off position. I do them on ignition power for simplicity, it would be more work to wire them to constant power with the RTMR I am using.
I am only using a 40 amp relay to power everything. It's not ideal, but it's what is available for that RTMR. The harnesses from other companies aren't even going to the point of putting fuses on for each circuit individually.
Re: 87 GTA/LS1 Swap - Now with (less?) questionable decisions
Originally Posted by scooter
The harnesses from other companies aren't even going to the point of putting fuses on for each circuit individually.
All I can figure is someone actually measured the amperage draw at each of the consumers and determined that it was okay. Definitely feels odd comparing to factory schematics though. In my Speartech harness (and new ones, based on the info on their website), nearly all devices which require power on ignition (pink) are fed from a single fuse (mine is 20A). They separate out the O2 heaters into a second 20A fuse. Fans and fuel pump aren't a part of the power distribution of the harness.
On mine, this includes:
PCM
LED for check engine light purpose
Fuel injectors
Ignition Coils
MAF
I've never seen a single complaint about this online, in fact most people seem very content with the minimum amount of fuses and connections. I'm at a point where I could change it to individually fused and am debating whether to do so. Leaning toward doing it for a couple reasons:
Power feeds into the cabin for the PCM would be limited to only what the PCM is using
All devices would be fused at the underhood fuse block and could be independently checked if there are any issues.
I'm assuming that custom harness makers limit the number of fuses to ease installation and lower cost. Thoughts?
Last edited by 3.1EyeCandy; 10-04-2020 at 06:08 PM.
Re: 87 GTA/LS1 Swap - Now with (less?) questionable decisions
Originally Posted by 3.1EyeCandy
I've never seen a single complaint about this online, in fact most people seem very content with the minimum amount of fuses and connections.
I am sure they are content, until they have an issue and it is very difficult to troubleshoot the issue since so many circuits are all connected to the same fuse location
Originally Posted by 3.1EyeCandy
I'm assuming that custom harness makers limit the number of fuses to ease installation and lower cost. Thoughts?
It's DEFINITELY due to cost. It takes more time and money to put everything to it's own fuse. PSI does it to keep the cost AS F'ing low as possible, Speartech is doing it to keep cost margins high. I have worked with one PSI harness and it really is junk IMO. I understand why people use them, but I would never.
It takes me a "long time" to do all that work to get separate power feeds for each circuit, plus the cost of the fuse block, all the additional terminals and seals, the price of the fuses
For what I do I should be charging more than Speartech, but I charge less and I don't really make much profit on a harness in the end. I am not a professional doing this full time but I wanted to produce the best produce that I could with the time and materials I have available, while still hitting a price point most people can afford. I got into this because I wanted to help pay for my harness after I invested thousands to make one for myself.
Re: 87 GTA/LS1 Swap - Now with (less?) questionable decisions
Today's very small update - worked on the block, trying to remove what's left of the graphite? gasket material from the head gaskets. Used the Permatex Gasket Remover (with foaming action!) along with some plastic razor blades. One bottle of the stuff was enough for 4 coats. Waiting 20 minutes between scraping sessions for it to soak, I got off a good bit but it's far from clean and shiny. Mechanic neighbor said to get it as clean as possible and then use a rubber finger wheel on a drill or die grinder. Not sure what I'll actually do next, but at least the method I've got (though agonizingly slow) isn't digging into the metal at all. I'm contemplating grabbing some green scotchbright pads and just being gentle with it, not sure.
Also got the heater/ac box in the engine bay removed and set aside. Going to need to repair the lower half as we gouged it taking the LS1 out. Contemplating going the GhettoCruiser route and trying to fab up something for the top half to fit the 4th gen stuff.
Did I mention how much I abhor baked on gasket residue?
Re: 87 GTA/LS1 Swap - Now with (less?) questionable decisions
Need some folks to go and look at their firewalls and report back, please.
My car was totalled in 2003 and "fixed" for what I could afford at the time. In gutting the engine bay down to nothing this time around, I've found that the hole where the cruise control wires ran through is now quite wavy. It doesn't look like it's supposed to be that way and I'm tempted to bang it out from the inside of the car. I'll either have the hole welded up afterward, or run a grommet for the 4th gen cruise wires, haven't decided yet.
Here are the pics of mine. Go check yours and report back - is the hole on a flat plane, or is there curvature to it and the grommet makes up for it? Thanks!
Re: 87 GTA/LS1 Swap - Now with (less?) questionable decisions
Dropped the car off at a trusted family body shop today. Initial inspection of the engine bay wasn't promising. Some of the damage in the front clip from 2003 was pulled out with heat, weakening the metal. There's also likely quite a bit of body filler in areas that are designed to crumple in collisions. Not sure if we're going to be able to keep the car or not... Owner went ahead and let us drop it off, on the condition that the estimate was from what he could see at this point. He offered for me to come by and put in some labor to help lower the cost and speed it along (he's pretty much a one man shop at this point and we've been using him for ~30 years). First thing we'll be doing is removing the fenders and nose cone to see the extent of the damage underneath the filler. He recommended looking into what aftermarket parts are available to help strengthen the frame on these cars from mid-body forward. I'm not aware of any, but haven't looked much either.
Not sure what to think at this point. I don't want to cover things up and just drive this thing on backroads and feeders at low speed, hoping to never have a collision. I've got a family to think about. At the same time, I'm really looking forward to getting this thing going again. I guess this is a decision that can wait until we can see more. Fun times.
Re: 87 GTA/LS1 Swap - Now with (less?) questionable decisions
So, I knew some one in a similar predicament with a very low mile TTA, what they ended up doing was buying an entire GTA and cut the front end structure off, using it to fix the TTA. Similar as to what you posted, only difference was the GTA they used as a donor was a fairly nice car.
Where did you source the stock K member from? I need one for my build, would like to have it notched for a 4th gen AC
Re: 87 GTA/LS1 Swap - Now with (less?) questionable decisions
Originally Posted by Neil350
So, I knew some one in a similar predicament with a very low mile TTA, what they ended up doing was buying an entire GTA and cut the front end structure off, using it to fix the TTA. Similar as to what you posted, only difference was the GTA they used as a donor was a fairly nice car.
While it's doable, it's definitely out of my comfort zone and possibly out of my budget. Add to that sourcing and disposing of another firebird in decent shape, I'm holding out a little hope that mine isn't toast. I hope to talk to my body shop guy (and do some disassembly) in the next couple weeks on what's needed and feasible.
Originally Posted by Neil350
Where did you source the stock K member from? I need one for my build, would like to have it notched for a 4th gen AC
Found it watching the classifieds here. Had to drive a little ways to pick it up, but overall worth it. This is probably one of the few parts that's going to be undamaged in nearly every thirdgen and nobody will really need another one. Should be some in the junkyards if you get pressed for one. Depending upon how my fun experiment ends up going and your timeline, I may have one for sale early next year.
Re: 87 GTA/LS1 Swap - Now with (less?) questionable decisions
Things are looking up
A few weeks back I went by the shop and took the nose cone, fenders, and bumper off. We got to look everything over pretty well. Conclusion? Previous shop used some rusty parts and had a few spots of not-great work, but nothing to throw a car away over. I think it's safe enough to drive. I finished the day by started to scuff the paint and removing what I could from the engine bay. Next time would be removing the K-member.
Inspection time
Got a call today. "What's the paint code? It's usually in the center console." Luckily I saved that in a folder here inside the house, as car parts are everywhere in the garage right now. Asked if he wanted any help today and he said sure. Made it down and got to see this wonderful sight! He'd already nearly finished prepping the engine bay, pulled the dent in the firewall, and smoothed out a few of the rougher spots.
Next up - removing the tubular K-Member and A-Arms (and the rest of the front suspension). Having a mobile lift really helps!
Got it down and on a roller, disassembled the front suspension, and pushed the car back under another project. There's some more prep to do, but not too much. I'm really liking how this is turning out. Next up - need to source an original Trans Am hood (no longer care as much for the ASCD Ram Air 1), a front end bolt kit, and make sure my OEM K-Member is all set and ready to go back under the car. Here's a few more pics of where she sits now.
Re: 87 GTA/LS1 Swap - Now with (less?) questionable decisions
It's actually the same old frontend. Wasn't as bad as it appeared initially. That and body work does wonders. It's structurally sound, and will look nice when done. Good enough for me
Re: 87 GTA/LS1 Swap - Now with (less?) questionable decisions
Got the car back in the garage. Engine bay looks mint.
Questions for the forum:
I'd like to avoid notching the factory K member (it's back in the car - tubular unit in picture is for sale in thirdgen classifieds local) by using a high mount A/C along with the 4th-gen alternator and P/S pump. Thinking of using the one from Holley (Holley 20-141 LS A/C Accessory Drive Kit - Includes SD508 A/C Compressor, Tensioner, & Pulleys). Anybody else run this with success? Anything I should watch out for? Others I should consider?
Is the ATI Super Damper worth it on a stockish engine? This will have a TSP 224R cam (112 LSA) and headers. Not planning to go to the track much, maybe once a year. Will see street duty more than anything else. I've got a replacement factory damper in a box from GM, but have wondered if it's worth stepping up to the ATI unit at this point.
I've had enough of trying to get the remains of the graphite head gasket off of the block. No amount of scraping with a plastic razor blade and using the expensive gasket remover stuff has worked. Some light work with a scotch bright pad "works" but starts to leave tiny scratches, so I quit that as soon as I saw it. Going to be trying to find a reputable machine shop that works on LS engines to get this thing taken care of. If you know of any in the Houston/Conroe TX area let me know.
Re: 87 GTA/LS1 Swap - Now with (less?) questionable decisions
Not sure if there is a correct answer on the ati balancer if you was doing a lot of racing then might be worth it. I just have seen to many high powered cars on a stock balancer to say yes you need it.
Re: 87 GTA/LS1 Swap - Now with (less?) questionable decisions
I think a stock GM damper will work but will need to be replaced more often. If you don't have a good GM piece then you might go straight to the higher end aftermarket because it seems the stock-style aftermarket replacements suck. They suck so bad that I was able to sell my lightly used GM F-body damper for a whole lot of moolah. Same thing happened when I sold my LS7 damper.
Re: 87 GTA/LS1 Swap - Now with (less?) questionable decisions
Just about any machine shop in our area will work on LS motors, West Side is in Spring Branch, G&G is out in Tomball, Nickens is in Conroe and in reality you can look at some one like Texon motor center because this falls in to more of a general machine shop stuff.
People have used those brackets before, just make sure it's off set for a Fbody belt line. There was an AC shop off 249/BW8 that did a lot of really nice custom AC lines.
Re: 87 GTA/LS1 Swap - Now with (less?) questionable decisions
Originally Posted by 3.1EyeCandy
Got the car back in the garage. Engine bay looks mint.
Questions for the forum:
I'd like to avoid notching the factory K member (it's back in the car - tubular unit in picture is for sale in thirdgen classifieds local) by using a high mount A/C along with the 4th-gen alternator and P/S pump. Thinking of using the one from Holley (Holley 20-141 LS A/C Accessory Drive Kit - Includes SD508 A/C Compressor, Tensioner, & Pulleys). Anybody else run this with success? Anything I should watch out for? Others I should consider?
I am running the Holley mid mount set-up which is similar, puts the AC up high, and possibly the same as 20-141 bracket. My only beef is that it is a pain to run the AC lines from the top of the compressor. There isn't much room between the compressor and the strut tower. You might be able to use the KWIK mini compressor mount. I have one you could try out, as it didn;t work with my UMI K-member.
As for the balancer, I echo what QWK says. If you don't want to drop big coin on ATI I think Summit and Jegs make a version that is easier on the wallet. I wouldn't be surprised if ATI or Fluidyne didn't make it for them.
Re: 87 GTA/LS1 Swap - Now with (less?) questionable decisions
Originally Posted by obeymybird
Not sure if there is a correct answer on the ati balancer if you was doing a lot of racing then might be worth it. I just have seen to many high powered cars on a stock balancer to say yes you need it.
Originally Posted by QwkTrip
I think a stock GM damper will work but will need to be replaced more often. If you don't have a good GM piece then you might go straight to the higher end aftermarket because it seems the stock-style aftermarket replacements suck. They suck so bad that I was able to sell my lightly used GM F-body damper for a whole lot of moolah. Same thing happened when I sold my LS7 damper.
Originally Posted by ShiftyCapone
As for the balancer, I echo what QWK says. If you don't want to drop big coin on ATI I think Summit and Jegs make a version that is easier on the wallet. I wouldn't be surprised if ATI or Fluidyne didn't make it for them.
Thanks guys. I've got GM 12553118 in a box, which is supposed to fit the 98-02 LS1. I'll compare it physically to the ebay special that's on the motor now here in a few days. I'll just plan to run it for now. QWK - strange you mention resale value. This thing is like ~$100 online. Surprised there's a high resale for them.
Re: 87 GTA/LS1 Swap - Now with (less?) questionable decisions
Originally Posted by Neil350
Just about any machine shop in our area will work on LS motors, West Side is in Spring Branch, G&G is out in Tomball, Nickens is in Conroe and in reality you can look at some one like Texon motor center because this falls in to more of a general machine shop stuff.
Thanks Neil! This is a great list. I called and talked to Nickens in Conroe Monday morning (it's just across town! can't beat that) and they want me to bring the motor by on Friday so they can look it over and talk about next steps. I had found the another local member mentioned them on LS1tech. If it works out and the price is right, I'll just leave it there for them to take care of.
I've been using another general machine shop in town that has done well on smaller things so far, and thought of using them. I'm a bit hesitant on it. An aluminum block LS motor isn't your run of the mill takeout from a passenger car or truck and will see more spirited driving as well. I wanted somebody that is going to nail it on the first try. Hopefully my pocketbook can accommodate, as choosing to use a shop that builds race engines when I'm definitely not building a race car is a bit of a mismatch. Am I misjudging the need to talk to a specialty shop? Guess I just don't want to mess with the motor again for a good long while and it makes me anxious.
Re: 87 GTA/LS1 Swap - Now with (less?) questionable decisions
Originally Posted by ShiftyCapone
I am running the Holley mid mount set-up which is similar, puts the AC up high, and possibly the same as 20-141 bracket. My only beef is that it is a pain to run the AC lines from the top of the compressor. There isn't much room between the compressor and the strut tower. You might be able to use the KWIK mini compressor mount. I have one you could try out, as it didn;t work with my UMI K-member.
That's some good feedback. Are you talking about the KWIK Low mount mini-AC bracket (see LS1 LSx Sanden Air Conditioner Compressor Bracket (kwikperf.com) part number K10420? Or the high mount K10471? I'm assuming you mean the K10420 as it's the "mini". I'm wondering how that compares to the 4th gen positioning and compressor. These Holley motor mounts are supposed to set the engine forward a bit, but I'm not sure it will be enough to accommodate an A/C compressor in that position. Looks like you'd pair it with the SD7B20 Mini A/C Compressor, which is 7" in length + fittings on the back. Give me some more details Shifty. I'm willing to try it out if we think it has a chance of working. I'll also pull up your build thread again for pictures of your working setup...
Found your thread and your pic and description. I'll be running the braces as well. How badly did the low mount mini mount interfere with the braces? What about clearance to the motor mount if those weren't in play? Toddoky mentioned on ls1tech that the mounts move the trans/engine mating plane forward about 5/8". It would definitely be really tight, but maybe it could work? Curious why you didn't run the KWIK top mount setup instead of the Holley? It looks like it may tuck a little tighter in. Shifty's AC mount in question
Another ls1tech member's picture of that area using Holley mounts:
It might work with a mini compressor. If you've got both and are willing to let me trial 'em, drop me a PM. We can work something out.
Last edited by 3.1EyeCandy; 01-26-2021 at 09:03 PM.
Re: 87 GTA/LS1 Swap - Now with (less?) questionable decisions
Got out and enjoyed the nice weather this afternoon. Not a lot done, but had fun.
Finished torqueing the K-member to body bolts, as well as those for the control arms using a new torque wrench (the last one helped me sheer off a bolt in the block). Really like the new wrench, it's from Precision Instruments and a split-beam type. First time I've ever used one of that type, but I really like it thus far.
Attached the front stabilizer bar end links. These are probably ~20 years old. In the process, found that the bolts and nuts were different sizes between left and right. One side probably got replaced and not the other when the wreck happened in 03. Maybe it's worth just buying a new set. Recommendations for a pretty-day joy-ride car?
Also started attaching the Hooker Blackheart motor mounts. The control arms are already on the car and I remembered how much of a pain doing this was before. Luckily, I remembered what worked for me last time. I've found success by using a wrench with the end wrapped with electrical tape, allowing the nut to be angled and held in place. You end up contorting yourself a bit to get it positioned right, but it works really well. It made me curious what method(s) others have used.
Miracle tool!
Last edited by 3.1EyeCandy; 02-07-2021 at 08:35 AM.
Re: 87 GTA/LS1 Swap - Now with (less?) questionable decisions
Well, time for another of those questionable decisions...
While trying to attach the K-Member triangle braces to the car, I found that I didn't have the bolts. Found a forum thread with the thread sizes, bought a set, and then tried them out. The triangle-brace to body bolts would bottom out quickly, but the thread seemed to be right. Looking up in the hole, it looked like some rust or corrosion, so I bought a thread chaser from ARP (I've got some for the LS1, so why not right?). Finally got around to using it last weekend and it was helping, but still bottoming out.
Took the T-handle off, put the socket wrench on, and quickly sheared it despite the slow back and forth. I knew better. Lesson learned, never take the T-handle off of a tap (or thread chaser).
Struggled for a bit trying to get it out, tried calling a mobile welding service to attempt the welded nut method, but gave up for the day without a good solution. Ordered a set of tap extractors, then had an idea and went back outside.
Worked it out with a punch, some penetrating fluid, and a hammer. Whew! Quickly canceled the order for the tap extractors.
While it was stuck, I looked down the frame rail and could see it had started to widen the hole. I didn't see much corrosion from that angle, just plenty of metal clearly not wide enough to let a bolt through. At this point, I thought "how did this attach before? I know I had these at some point..." So I made questionable decision #2 and got out the 10.9 grade bolt and the impact wrench. I had only been using a socket wrench by hand before. Made sure it was started clean, then let the impact work it. Wouldn't you know, it worked fine. Powered through the end of the hole (which was clearly too narrow). Backed it out and the threads looked fine.
The bolts I bought are too long (40 mm), so I'm going to get shorter ones (20 mm). But for those that end up in the same boat without bolts, but do have the threaded holes, you'll need:
4 M10x1.5 (K-member to triangle brace)
2 M12x1.75 (triangle brace to body)
Re: 87 GTA/LS1 Swap - Now with (less?) questionable decisions
Motor's been rebuilt and is sitting on the stand. Starting to make small progress with the weather turning nice. I tend to work in circles, and thought this week I'd be getting the fuel system ready. Ended up cleaning, painting, and attaching the crash bar and doing some harness investigation/cleanup. Started putting the C100 harness back into the car, and using some Power Braid loom and really like it thus far.
Re: 87 GTA/LS1 Swap - Now with (less?) questionable decisions
Looks good! The timing is funny because I'm doing the exact same cleanup to my crash bar at this moment.
How are your fog lights? I noticed a small crack in the glass on one of mine, and then the entire thing broke in halves in my hands.
Re: 87 GTA/LS1 Swap - Now with (less?) questionable decisions
Originally Posted by 1989karr
3.1 eye candy..I remember you! weren;t you in the v6 forums a lot? then you got the GTA, right?
I got the GTA in 2001 and only made a handful of posts in the v6 forum before that. Had a nice 92 v6 firebird though originally. Wouldn't say I was on the v6 forums all that much... it's actually really weird to go back and read what you wrote as a teenager. Glad I didn't post more than I did
Re: 87 GTA/LS1 Swap - Now with (less?) questionable decisions
After the crash bar, I worked over the bottom of the bumper fill panel to remove the surface rust, then painted it with black enamel. y son and I worked and got the headlights installed, bumper mounted up and the new hood latch and cable installed. After removing rust and slag, painted with black enamel. Headlights and bumpter mounted up
Re: 87 GTA/LS1 Swap - Now with (less?) questionable decisions
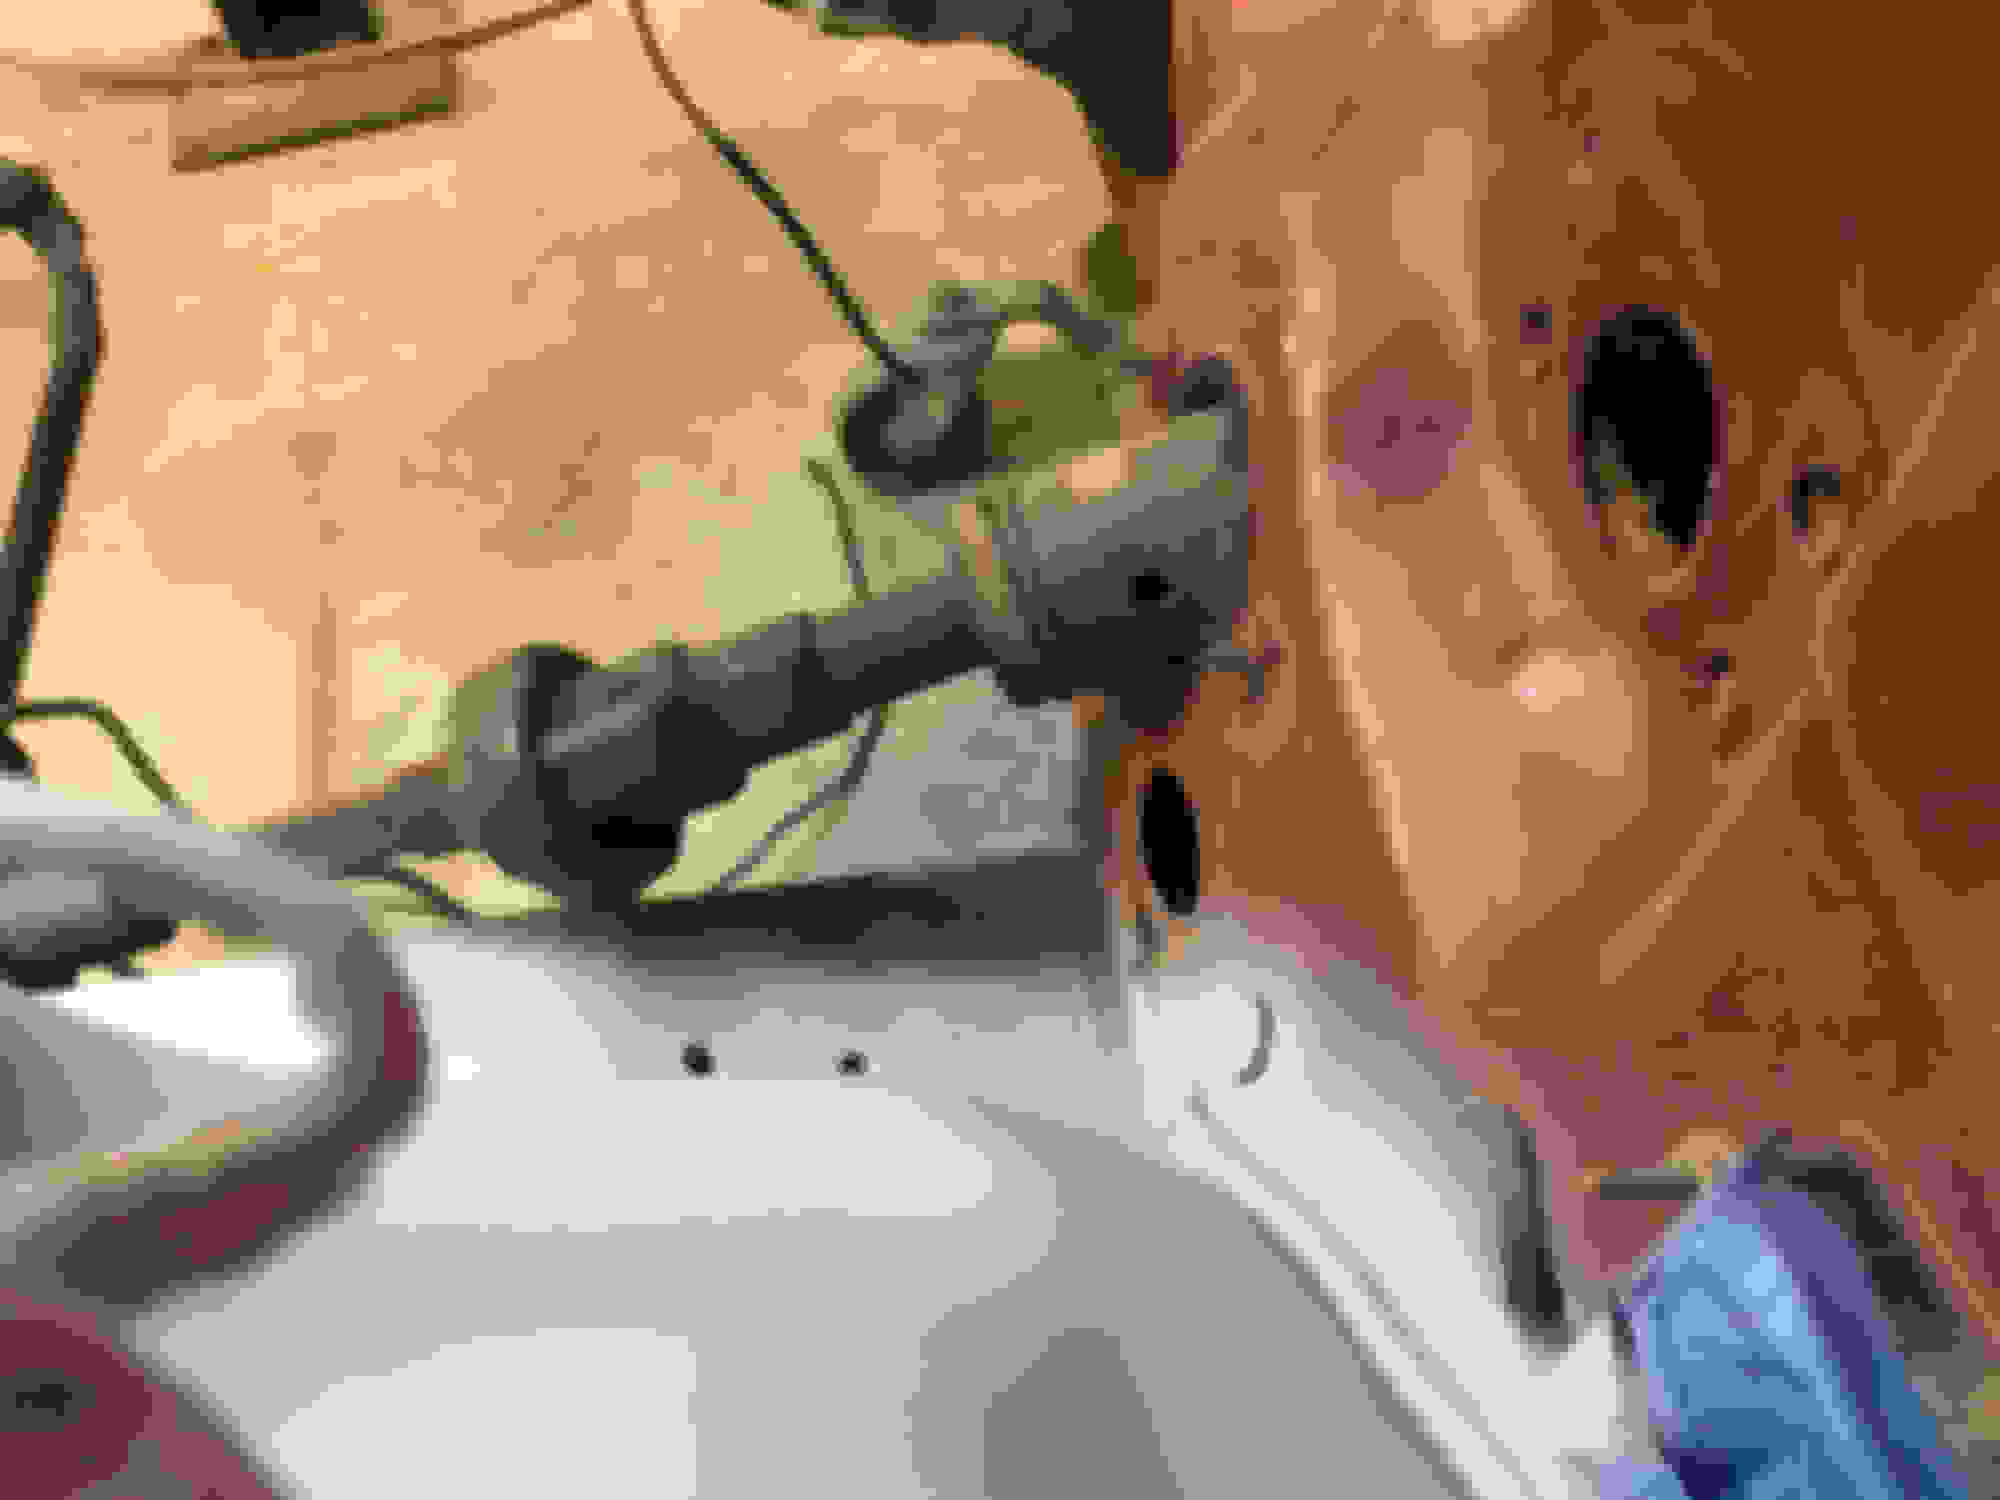
Finished off that particular weekend by crawling under the car and holding up the Hooker transmission crossmember. Turns out - this does NOT fit with the Alston subframe connectors.
Passenger side interference between Hooker transmission crossmember and Alston subframe connector. Drivers side interference between Hooker transmission crossmember and Alston subframe connector.
I checked this a long time ago when I first got the box of Hooker parts, so knew this was coming. I just didn't take pictures at the time, and wasn't ready to deal with it yet.
Fast forward a couple weekends... time to cut the Alston subframe connectors off. I started out thinking I'd be able to cut just the welds and save the connectors for somebody else. That plan didn't last long. Ended up under the car around 10 hours (across 3 days) working with an angle grinder with diamond-coated cutting wheel, another angle grinder with a standard grinding wheel, and a dremel with a bunch of little cutting discs. This wasn't fun, wasn't something I felt qualified doing when I started, and wasn't something I'd be able to find anybody else to do for me... time to learn, take all the safety precautions, and hope for the best!
I'm relatively unharmed, and the connectors are off. The car needs a little welding here and there to fill a couple spots where the cutting wheel, or the dremel, dug too deep. But overall very pleased with the result. Don't ever want to do it again.
The Dremel was the star of the show, as it allowed very precision cuts in cramped spaces when just trying to separate the car from the connector. Had to let it rest A LOT though in front of a fan, and went through ~8 discs. Most of the work got done using the diamond-coated cutting wheel on one angle grinder, and the last angle grinder with the standard grinding wheel I used to smooth things out after the bulk was cut off with the other tools.
I've been looking at subframe connectors and will probably go with the UMIs. I'll wait until the car is moving under its own power again though so the suspension is fully loaded.
Last edited by 3.1EyeCandy; 10-05-2021 at 09:03 PM.
Re: 87 GTA/LS1 Swap - Now with (less?) questionable decisions
Originally Posted by fuchs
Looks good! The timing is funny because I'm doing the exact same cleanup to my crash bar at this moment.
How are your fog lights? I noticed a small crack in the glass on one of mine, and then the entire thing broke in halves in my hands.
They actually look pretty good @fuchs . In the early 2000s, I replaced the lenses with the cheap light set lenses from AutoZone. Not sure if they're around anymore, but the lenses were nearly a direct fit for the stock fog light housings and were clear instead of hazy.
Re: 87 GTA/LS1 Swap - Now with (less?) questionable decisions
Originally Posted by 3.1EyeCandy
This wasn't fun, wasn't something I felt qualified doing when I started,
You're qualified now!
My friend lives in Montgomery? He lives in The Woodlands. I was just out in Conroe a few weeks ago, had I known that is where I was going I would have looked you up.
Re: 87 GTA/LS1 Swap - Now with (less?) questionable decisions
Originally Posted by scooter
You're qualified now!
My friend lives in Montgomery? He lives in The Woodlands. I was just out in Conroe a few weeks ago, had I known that is where I was going I would have looked you up.
Yep. You drove right past me most likely! Next time you're down, send me a PM
Re: 87 GTA/LS1 Swap - Now with (less?) questionable decisions
Prepping to put the motor and transmission in the car and trying to get the torque converter seated to the 4L60E (code shows it's from a 2002 v8 F-body). This is the same torque converter and transmission which was pulled and working years ago. Torque Converter sticker says TMAX 2420 (which there is some evidence online is a stock converter for a 4L60E).
I've found online that the only way to tell if the torque converter is fully seated is to measure the distance between the bellhousing mating surface and the TC pads. This should be 1.125 (1 1/8) inch for the 700r4 and 4L60E. This measurement should be done after sliding the TC on, rotating it while pressing inward, and likely hearing 3 clicks as it engages.
I've now mounted it a few times, hearing 3 clicks, and each time measure at only one inch. I've ruled out measurement error by using calipers after the measuring tape, and it's definitely 1.0 inch.
Any hints or advice?
Beyond continuing to try to get that last 1/8" (online forums mention rocking the TC gently and moving the gear selector?), the only other thing I've read is to attempt to mate the transmission to the engine and check the clearance between the mounting pads and the flexplate (I've got a nice one from TCI) and there are some clearances there to check. However, even this isn't telling you if the pump has been engaged in the transmission, which is that last "click"...
Last edited by 3.1EyeCandy; 10-16-2021 at 09:03 PM.
Re: 87 GTA/LS1 Swap - Now with (less?) questionable decisions
The TC should not be pushed all the way in to the Transmission Pump at final installation.
When installing, pull the TC out 1/16" to 3/16" with 1/8" being ideal.
When first installing the TC, let it go all the way into the Pump...
Measure the gap between the Flex-Plate and TC bolt Pads.
Subtract 1/8" from the distance...
This will be how thick the washers or spacers need to be for each TC Bolt.
Now the TC should be out of the Pump 1/8".
Re: 87 GTA/LS1 Swap - Now with (less?) questionable decisions
Originally Posted by vorteciroc
The TC should not be pushed all the way in to the Transmission Pump at final installation.
When installing, pull the TC out 1/16" to 3/16" with 1/8" being ideal.
When first installing the TC, let it go all the way into the Pump...
Measure the gap between the Flex-Plate and TC bolt Pads.
Subtract 1/8" from the distance...
This will be how thick the washers or spacers need to be for each TC Bolt.
Now the TC should be out of the Pump 1/8".
Thanks, I'll use this when it's time.
At this point I'm trying to determine if the TC is all the way into the pump (3 clicks) even though the measurement from the bellhousing mating surface to the TC bolt pads is only 1" (vs. the 1 1/8" I've found referenced online). There are a couple threads in forums where this seemed to work out fine and the measurements between the flywheel and TC bolt pads were within the desired range as well. Another that referenced the "second click" depth would be about 1/2 to 3/4" - meaning I'm likely fully seated and perhaps the TC is just a bit tall? I'll likely give mating the engine to the transmission tomorrow a try and measure the clearance.
Last edited by 3.1EyeCandy; 10-16-2021 at 09:06 PM.
Re: 87 GTA/LS1 Swap - Now with (less?) questionable decisions
Bolted the flexplate to the motor and lined up the motor and transmission. Using drill bits to measure, there is 13/64 between the flexplate mounting pads and the torque converter mounting pads. This is enough that we'd need 5/64 shims to achieve the 1/8 pull out of the TC from being fully seated.
All of that with the original measurement of 1.0 " between the TC mounting pads and the mounting surface of the transmission...
Time to find some shims. My friend also insists that I ought to have a mild stall and not stick with the stock TC, so there's that to think on as well.
Interested in thoughts on the measurements seen, and what mild stall would be appropriate for a 224 cam, lightly worked heads, and fairly mild driving most of the time.
Re: 87 GTA/LS1 Swap - Now with (less?) questionable decisions
Originally Posted by 3.1EyeCandy
Bolted the flexplate to the motor and lined up the motor and transmission. Using drill bits to measure, there is 13/64 between the flexplate mounting pads and the torque converter mounting pads. This is enough that we'd need 5/64 shims to achieve the 1/8 pull out of the TC from being fully seated.
All of that with the original measurement of 1.0 " between the TC mounting pads and the mounting surface of the transmission...
Time to find some shims. My friend also insists that I ought to have a mild stall and not stick with the stock TC, so there's that to think on as well.
Interested in thoughts on the measurements seen, and what mild stall would be appropriate for a 224 cam, lightly worked heads, and fairly mild driving most of the time.
Post both duration numbers at 0.050"...
The LSA, and where you installed the Camshaft relative to ICL.
Re: 87 GTA/LS1 Swap - Now with (less?) questionable decisions
Originally Posted by vorteciroc
Post both duration numbers at 0.050"...
The LSA, and where you installed the Camshaft relative to ICL.
You'll have to excuse me, as I had the cam installed by the (well respected racing engine) shop that rebuilt the motor and didn't pay attention to the specifics of how it was installed relative to ICL. It's the Texas Speed 224R (224/224 .600"/.600" 112 LSA) (25-TSP224R6 Texas Speed 224R Camshaft (texas-speed.com)). I supplied it in the box, which came with the below specs. Only thing to really add is that the rockers now also have PAC 1219 single beehive springs (recommended for cams under 230 duration by Texas Speed), new seals, and the CHE trunnion kit. Added the LS7 lifters at the same time.
Being inexperienced, I researched the best I could and found what others described as a fairly mild cam that still had some lope, made some power, and wouldn't require extensive tuning to get good results out of. Then I took the car to a well respected local shop to take care of the things I couldn't do well myself... and didn't even think about the specifics of the cam installation.
Is it a good assumption that they did nothing special regarding the degree of the cam relative to ICL? Will it matter that much in choosing a torque converter? I'm not planning on racing this car but maybe once a year with a few trips down the dragstrip, so was thinking of a 3000-3200 stall converter from Circle D, as it's a good increase over stock but not as expensive as some that get up to 3400-3500. Not that the internet is always the best source of information, but 3400-3500 seems to get batted around as a good range for the LS1 in fairly stock trim.
I drove my friend's 5-600? horse 82 Camaro (can't remember) with a 4000 stall and he's fairly convinced that I'd be best served with a higher stall... so much so that I stopped the engine/tranny install to go drive his car and hear him out. After 10 years of not driving a sportscar at all, it was wonderful. It also wasn't undriveable at all. A little tamer at lower RPM than you'd expect if just thinking it was a loud powerful thirdgen, but really exciting as you got on it. Very easy to drive.
Last edited by 3.1EyeCandy; 10-20-2021 at 08:05 PM.
Re: 87 GTA/LS1 Swap - Now with (less?) questionable decisions
I am going to have to cut the Alstons out of my car as well, I plan to have it done while its still running with the TPI, I have alston inners and spohn outers.
Torque converter selection has a lot of factors, power adder, vehicle weight, cam, etc. With that mild of a cam, you should be perfectly fine with a 3200 stall, that's still pretty tight and will drive well. I ran a 3200 Vigi in my 93 when it was bolt ons, I also ran the same stall behind a Heads and cam set up, 230/244/112 cam and it was ok, though it could have benefitted from better tuning. Later converted the car to a six speed and LS based PCM. I had the next cam up in a manual C6, TSP 228R on a 114 but it drove great. The 224R is a really mild cam, so you should be fine.
Re: 87 GTA/LS1 Swap - Now with (less?) questionable decisions
Howdy Neil
Cutting them out definitely wasn't any fun. Having the transmission out of the car helped a bit though. They're fairly close to fuel & brake lines in the front.
I asked Circle D Specialties (they're in Houston and have been around a long time making solid toque converters) about it and they recommended their LS 4L60 Pro Series Single Disk 245mm 2C ~32-3400 Stall for my setup, so you're right on the money. They said it would take a few weeks to be ready before I can pick it up, then the only other major thing left for me parts wise is an A/C compressor. The rest will be nickel and dimes.
Re: 87 GTA/LS1 Swap - Now with (less?) questionable decisions
Originally Posted by Neil350
I am going to have to cut the Alstons out of my car as well, I plan to have it done while its still running with the TPI, I have alston inners and spohn outers.
Those inner subframe connectors are awesome though. I'd leave them in and make a custom trans crossmember instead. I welded mounting tabs to the subframe connectors and use a double hump bridge that the trans lays on. Here's a few pictures for ideas and you can probably do even better, Post #789 https://www.thirdgen.org/forums/ltx-...ml#post6149848
Re: 87 GTA/LS1 Swap - Now with (less?) questionable decisions
Those In-Board Sub-Frame Connectors are the most important, center Tie-In Point for each side of the Car...
From there, further Chassis Tubing Reinforcement will "Spider-Web" outward towards the Body Pinch-Point Sub-Frame Connectors.
Also Roll-Cages will also go through the Floor and directly Connect/ Tie-In to the Tubular Structures created under the Car.
I will not Post Images of the Design that I created for ThirdGens (Sorry)...
But this Image of a FourthGen shows a very simplified version of what I create:
The Alston Style Sub-Frame Connectors play a very important role.
So much, that they are the starting-point of where my Chassis and Roll-Cage designs are built upon.
Re: 87 GTA/LS1 Swap - Now with (less?) questionable decisions
Originally Posted by vorteciroc
The Alston Style Sub-Frame Connectors play a very important role.
So much, that they are the starting-point of where my Chassis and Roll-Cage designs are built upon.
Can't be said enough.
One thing I did is put a welded bar that ties the LH and RH side Alston's together at the trans tunnel. That is a fantastic little mod for our cars.
Re: 87 GTA/LS1 Swap - Now with (less?) questionable decisions
Originally Posted by QwkTrip
Those inner subframe connectors are awesome though. I'd leave them in and make a custom trans crossmember instead. I welded mounting tabs to the subframe connectors and use a double hump bridge that the trans lays on. Here's a few pictures for ideas and you can probably do even better, Post #789 https://www.thirdgen.org/forums/ltx-...ml#post6149848
I bought and had the Alston's put on originally for all the same reasons you guys state. They're nice pieces and do the best job in the right place on the car. Welding is not a skill I possess, and I don't personally know any welders in this area (or specialty shops willing to work on old cars)..., so call it another questionable decision I suppose.
In retrospect from the start of this thread, I'd have been better served to have left the motor alone, all the existing parts on the car, and just get it running and moving again. At the time, I really liked the attention to detail and "everything works together" aspect of the Hooker system, so decided to switch over to it and let this be a hobby more than a death march. Finding new subframe connectors is on the list, but not until this thing moves under its own power again.
When it came right down to it, I figured out of all the thirdgens that have had non-Alstons installed and reaped enough benefit to prevent frame flexing under typical driving conditions, mine could be among them and be fine.
Last edited by 3.1EyeCandy; 01-15-2022 at 08:17 PM.
Re: 87 GTA/LS1 Swap - Now with (less?) questionable decisions
It is true that the Alston's don't play well with bolt-on parts. I had to make custom trans crossmember and a custom torque arm. You know I didn't start out with those and it was an evolution of learning to get there. Seeing the paint crack on the roof was my deciding moment.
I still need to do something about the floppy front end. The car bends like crazy at the firewall.
Re: 87 GTA/LS1 Swap - Now with (less?) questionable decisions
I should mentioned...
Many years ago, I used the actual "Alston's" Sub-Frame Connectors.
Fitment was okay, but as QwkTrip just said... there can be interference issues.
I do not know if the fitment or Design of the Alston's Sub-Frame Connectors has changed or improved, after all these years.
But it was very easy for me to just produce my own Version of Sub-Frame Connectors.
Also it is nice to be able to alter the Sub-Frame Connectors to my needs depending on what else has been done to the Car.
I almost never just install a set of Inboard Sub-Frame Connectors...
Most of the time, I have a lot more going on, under these Cars.
Especially with the Torque-Arm being relocated, Outboard Sub-Frame Connectors, and Roll-Cage Tie-Ins.
But I would purchase a new set of actual Alston's Sub-Frame Connectors (just to see if anything has changed)...
If I have a Car that only needs Inboard Sub-Frame Connectors.
 09-30-2020, 08:50 PM