Watch a Rookie Learn How To Swap a LS1 and T56 into a 1992 Z28
 02-26-2017, 01:43 PM
#251
COTM Editor

iTrader: (22)
Join Date: Mar 2001
Posts: 9,934
Likes: 0
Received 1,861 Likes
on
1,275 Posts
Car: '89 Firebird
Engine: 7.0L
Transmission: T56
Re: Watch a Rookie Learn How To Swap a LS1 and T56 into a 1992 Z28
https://www.thirdgen.org/forums/ltx-...ml#post5963351
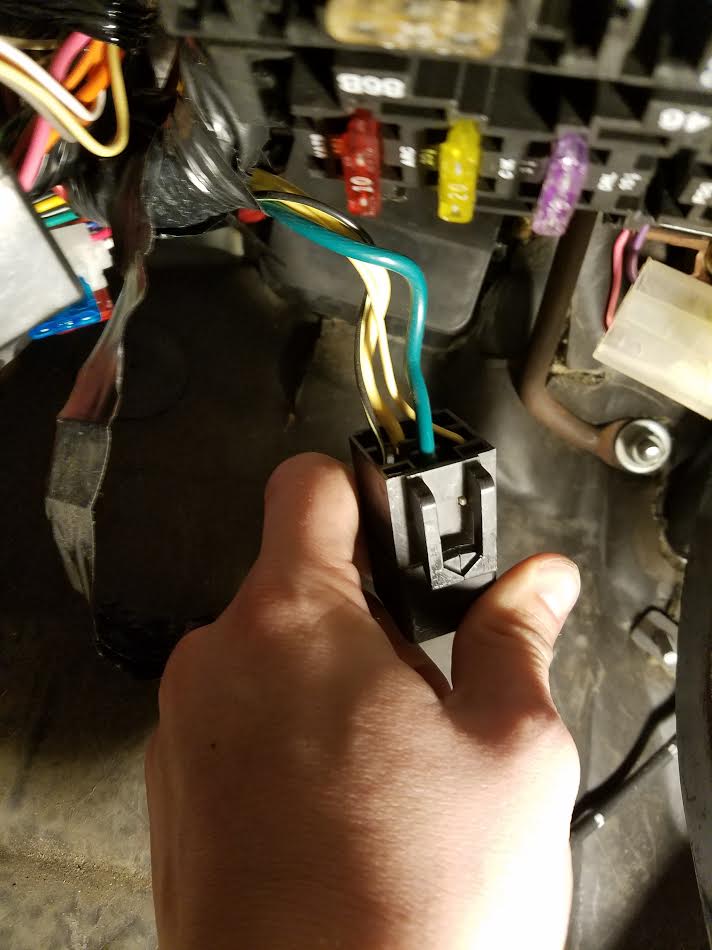
As usual, there is more than one way to do things so if you don't want to disassemble the dash then you could bypass the start relay altogether by jumping the larger (12 gauge) YEL and DRK GRN/WHT wires at the start relay. The start relay is located behind the driver side kick panel. The start relay only existed in order to give the VATS (the PASSkey module) control of the start relay so you don't really need it any more.
 02-26-2017, 01:52 PM
#252
COTM Editor
iTrader: (22)
Join Date: Mar 2001
Posts: 9,934
Likes: 0
Received 1,861 Likes
on
1,275 Posts
Car: '89 Firebird
Engine: 7.0L
Transmission: T56
Re: Watch a Rookie Learn How To Swap a LS1 and T56 into a 1992 Z28
Honestly though, I am not a good mechanic. You'll get better help on this from other people.
02-26-2017, 02:20 PM
#253
COTM Editor
iTrader: (22)
Join Date: Mar 2001
Posts: 9,934
Likes: 0
Received 1,861 Likes
on
1,275 Posts
Car: '89 Firebird
Engine: 7.0L
Transmission: T56
Re: Watch a Rookie Learn How To Swap a LS1 and T56 into a 1992 Z28
By the way, I'm not sure if these same VATS tricks work on the '92. I have a foggy memory there was a change of the design somewhere around that time, or maybe the change was with the 4th gen car. Might be worthwhile to compare notes with another '92 owner before tearing apart your dash, if you're thinking of that route.
02-26-2017, 02:22 PM
#254
Member
Thread Starter

Join Date: Aug 2007
Location: Long Island, NY
Posts: 201
Likes: 0
Received 2 Likes
on
2 Posts
Car: 1992 z28
Engine: LS1
Transmission: T-56
Re: Watch a Rookie Learn How To Swap a LS1 and T56 into a 1992 Z28
The more I think about it, the more I am thinking that it might not be a PASSkey issue. The car is cranking and even getting enough juice to start for a second or 2, so im not sure that bypassing that starter relay would fix my problem because the starter is already cranking as it is.
I paid someone to tune the VATS out of the ls1 PCM, but I am beginning to wonder if that never actually happened because this issue seems to be a very common problem when VATS isnt taken out of the PCM. However I guess it could be any number of different things at this point.
I have not tried to pull any codes yet QwK...I should probably go buy a code reader lol. Im half tempted to pull the trigger and buy HPtuners as well.
Anyone have any good ideas on how to trouble shoot this?
Also, anyone know how to embed youtube videos in forum posts?
02-26-2017, 02:30 PM
#255
COTM Editor
iTrader: (22)
Join Date: Mar 2001
Posts: 9,934
Likes: 0
Received 1,861 Likes
on
1,275 Posts
Car: '89 Firebird
Engine: 7.0L
Transmission: T56
Re: Watch a Rookie Learn How To Swap a LS1 and T56 into a 1992 Z28
It is real quick and easy to test whether or not bypassing the start relay helps. Just take a piece of 12 gauge wire and crimp spades on both ends. Then unplug the connector at the start relay and shove your homemade jumper into the correct terminals. Crank and see what happens....
That will help narrow the field of possibilities a bit.
That will help narrow the field of possibilities a bit.
02-26-2017, 08:11 PM
#256
Member
Thread Starter
Join Date: Aug 2007
Location: Long Island, NY
Posts: 201
Likes: 0
Received 2 Likes
on
2 Posts
Car: 1992 z28
Engine: LS1
Transmission: T-56
Re: Watch a Rookie Learn How To Swap a LS1 and T56 into a 1992 Z28
It is real quick and easy to test whether or not bypassing the start relay helps. Just take a piece of 12 gauge wire and crimp spades on both ends. Then unplug the connector at the start relay and shove your homemade jumper into the correct terminals. Crank and see what happens....
That will help narrow the field of possibilities a bit.
That will help narrow the field of possibilities a bit.

On an unrelated note, I am considering buying HPTuners to confirm that VATS is turned off in the LS1 PCM. It would also be nice to have since I do not have anything to pull codes with. Good idea or money I could spend elsewhere?
02-26-2017, 10:07 PM
#257
COTM Editor
iTrader: (22)
Join Date: Mar 2001
Posts: 9,934
Likes: 0
Received 1,861 Likes
on
1,275 Posts
Car: '89 Firebird
Engine: 7.0L
Transmission: T56
Re: Watch a Rookie Learn How To Swap a LS1 and T56 into a 1992 Z28
Yes, judging by the wire colors that looks like the start relay. Just pull the box off the bottom (the relay). If the engine does not crank then you know you found it. 
Your relay is more modern than mine and in a different location. They must have been updating the cars in the last year in prep for LT1 4th gen.
Your relay is more modern than mine and in a different location. They must have been updating the cars in the last year in prep for LT1 4th gen.
02-27-2017, 04:40 PM
#258
Member
Thread Starter
Join Date: Aug 2007
Location: Long Island, NY
Posts: 201
Likes: 0
Received 2 Likes
on
2 Posts
Car: 1992 z28
Engine: LS1
Transmission: T-56
Re: Watch a Rookie Learn How To Swap a LS1 and T56 into a 1992 Z28
Yes, judging by the wire colors that looks like the start relay. Just pull the box off the bottom (the relay). If the engine does not crank then you know you found it.
Your relay is more modern than mine and in a different location. They must have been updating the cars in the last year in prep for LT1 4th gen.
Your relay is more modern than mine and in a different location. They must have been updating the cars in the last year in prep for LT1 4th gen.
I am thinking it might be fuel related, but I am not sure. Going to start going through some tests of the fuel system I guess. Should I check pressure at the rails where it comes in from the tank?
Also, I am trying to start this with just headers and no o2 sensors as of yet, but it should at least be able to run for more than a second regardless right? Definitely pulling the trigger on HP Tuners. Probably way over my head, but over time I will figure it out and be much better off in the long run.
02-27-2017, 06:06 PM
#259
COTM Editor
iTrader: (22)
Join Date: Mar 2001
Posts: 9,934
Likes: 0
Received 1,861 Likes
on
1,275 Posts
Car: '89 Firebird
Engine: 7.0L
Transmission: T56
Re: Watch a Rookie Learn How To Swap a LS1 and T56 into a 1992 Z28
I wouldn't be chasing problems until you get all the sensors hooked up and installed right.
02-27-2017, 08:24 PM
#260
Member
Thread Starter
Join Date: Aug 2007
Location: Long Island, NY
Posts: 201
Likes: 0
Received 2 Likes
on
2 Posts
Car: 1992 z28
Engine: LS1
Transmission: T-56
Re: Watch a Rookie Learn How To Swap a LS1 and T56 into a 1992 Z28
The o2 sensors are the only things not hooked up right now because I need to take the car to an exhaust shop to get everything finished up. I guess I will be towing it there

Oh well stay tuned...I will keep trying to push forward with this...thanks for all the help so far!
03-30-2017, 07:19 PM
#261
Member
Thread Starter
Join Date: Aug 2007
Location: Long Island, NY
Posts: 201
Likes: 0
Received 2 Likes
on
2 Posts
Car: 1992 z28
Engine: LS1
Transmission: T-56
Re: Watch a Rookie Learn How To Swap a LS1 and T56 into a 1992 Z28
Finally got this thing started!!! I cant even begin to tell you guys how happy it makes me to hear this thing run lol.
Ended up being a really stupid mistake on my part (no surprise here). I had the wiring for my starter confused. I was using both lugs on the starter and assumed both we are good 12v source (idk I figured they were connected?)...ended up putting all of the wires (battery, fuse block power, and power dist to the c100) on the same lug of the starter and she fired right up!
Time to start buttoning everything up so I can take it for a test drive. Here are the things I left to do before I can drive it (in no particular order):
-Button up PCM and wiring in interior (hide pcm and tuck wires)
-Fix steam vent tube with the fitting I purchased from jagsthatrun
-Bleed front and rear brakes
-Install exhaust from the headers back (install o2 sensors)
-Finalize CAI
-Find some front seats...do I have any good options besides stock thirdgen seats? I always loved the GTO seats.
-Triple check the suspension and make sure everything is tight and good to go.
Im sure there are other things on the list that dont come to mind right now but other than that I am going to be looking at buying some new wheels and tires too. I am thinking 18x9.5 on all four corners....thoughts?
Last edited by Warnd; 03-30-2017 at 07:27 PM.
03-31-2017, 06:59 AM
#263
Member
Thread Starter
Join Date: Aug 2007
Location: Long Island, NY
Posts: 201
Likes: 0
Received 2 Likes
on
2 Posts
Car: 1992 z28
Engine: LS1
Transmission: T-56
Re: Watch a Rookie Learn How To Swap a LS1 and T56 into a 1992 Z28
It is a big motivator though to hear the engine run...definitely going to kick my *** into gear...especially with the summer right around the corner.
04-04-2017, 05:41 AM
#264
Re: Watch a Rookie Learn How To Swap a LS1 and T56 into a 1992 Z28
I'm looking to do a swap on my 92 as well but can't make up my mind on the LS1 or LS3 and pros' sand con's to this.
04-05-2017, 09:09 AM
#265
Member
Thread Starter
Join Date: Aug 2007
Location: Long Island, NY
Posts: 201
Likes: 0
Received 2 Likes
on
2 Posts
Car: 1992 z28
Engine: LS1
Transmission: T-56
Re: Watch a Rookie Learn How To Swap a LS1 and T56 into a 1992 Z28
If you have the money to do so, I would probably start out with an LS3. As far as the logistics of the swap, both are probably very very similar except for the LS3 being drive by wire as opposed to drive by cable (I think)
05-29-2017, 07:07 PM
#266
Member
Thread Starter
Join Date: Aug 2007
Location: Long Island, NY
Posts: 201
Likes: 0
Received 2 Likes
on
2 Posts
Car: 1992 z28
Engine: LS1
Transmission: T-56
Re: Watch a Rookie Learn How To Swap a LS1 and T56 into a 1992 Z28
Ok, so no update on here in a while, but I have been working on the car since the last post. Trying to button up all of the loose ends before I take it to get inspected. Over the past few weeks I was fighting with the stupid Rear hatch pulldown motor, but that is a story for a totally different thread and time. Long story short, BIG shout out to Lon at Top Down Solutions for helping me fix the problem. Now that the hatch is out of the way, I was turning my attention back to the engine bay to neaten up some things and ran across some wires/vacuum lines that I had not accounted for in the past. As usual, I come to you guys, the experts, looking for some advice.
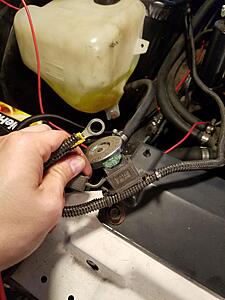
The first is a wire in question that runs from the passenger fender. It is a black wire with a ring terminal on the end and its own built in 30 amp fuse. I have a feeling this is something that was required for the old harness and is not needed now, but any help identifying this?

Lastly, I was rerouting some wires behind the engine block today, and ran across two vacuum lines that are not plugged into anything. I have no idea where these are supposed to go. While I stumbled upon these vacuum lines, I also realized that the MAP sensor on the back of the intake has two ports that have nothing going to them. I am assuming that one of these vacuum lines will go to the small port on the MAP sensor, but what about the large port? I found online that it says something from the master brake cylinder is supposed to go there? I am really not sure what to do with these two MAP sensor ports.

Any help with this would be greatly appreciated. I am so close to driving this stupid thing out of the garage. Interior is all back together and buttoned up. Just need to finish buttoning up the engine bay and bleed the brakes. I will post some interior shots tomorrow.
Sorry if this is rambling. I can clarify anything if need be.
The first is a wire in question that runs from the passenger fender. It is a black wire with a ring terminal on the end and its own built in 30 amp fuse. I have a feeling this is something that was required for the old harness and is not needed now, but any help identifying this?


Lastly, I was rerouting some wires behind the engine block today, and ran across two vacuum lines that are not plugged into anything. I have no idea where these are supposed to go. While I stumbled upon these vacuum lines, I also realized that the MAP sensor on the back of the intake has two ports that have nothing going to them. I am assuming that one of these vacuum lines will go to the small port on the MAP sensor, but what about the large port? I found online that it says something from the master brake cylinder is supposed to go there? I am really not sure what to do with these two MAP sensor ports.

Any help with this would be greatly appreciated. I am so close to driving this stupid thing out of the garage. Interior is all back together and buttoned up. Just need to finish buttoning up the engine bay and bleed the brakes. I will post some interior shots tomorrow.
Sorry if this is rambling. I can clarify anything if need be.
05-29-2017, 07:31 PM
#267
Re: Watch a Rookie Learn How To Swap a LS1 and T56 into a 1992 Z28
The only thing that used a fuse anything like that is the fuel pump but the one you have there dont look factory so could be something else. I cant help any with the vacuum lines.
05-29-2017, 08:18 PM
#269
Member
Thread Starter
Join Date: Aug 2007
Location: Long Island, NY
Posts: 201
Likes: 0
Received 2 Likes
on
2 Posts
Car: 1992 z28
Engine: LS1
Transmission: T-56
Re: Watch a Rookie Learn How To Swap a LS1 and T56 into a 1992 Z28
Abubaca,
I think those are the vacuum lines for the hvac controls, but I am not sure where to hook them up to. They come from the passenger side of the engine bay closer to the trans tunnel with the rest of the hvac wiring. I am not running AC anymore, so Im not sure where to put these.
Also looking for more info on the two ports by the MAP sensor.
05-29-2017, 09:18 PM
#270
COTM Editor
iTrader: (22)
Join Date: Mar 2001
Posts: 9,934
Likes: 0
Received 1,861 Likes
on
1,275 Posts
Car: '89 Firebird
Engine: 7.0L
Transmission: T56
Re: Watch a Rookie Learn How To Swap a LS1 and T56 into a 1992 Z28
That does not look like a factory ring terminal. Somebody either repaired that wire at some point in time, or added it for some other reason. I suggest you trace the wire back to it's source so you can figure out what it is for.
Those two plastic tubes are vacuum lines for the HVAC system.
* The shorter one with the bend in it is the vacuum source for the HVAC head unit in the dash. It connects to the check valve tee that was behind your engine originally. Just need to dig up that tee and you're back in business. My guess is that the tee is still connected to the line from the vacuum ball, or you removed it. You need it back because it is more than just a tee, it is a check valve.
* The longer tube went to the heater core bypass valve. I don't know if you kept the bypass valve or not? If not, then just cap off the line so you don't end up with a vacuum leak, otherwise hook it back up.
The only ports you need on the back of the manifold are the larger port for brake vacuum assist, and a small port for the HVAC controls.
Last edited by QwkTrip; 05-29-2017 at 09:23 PM.
05-29-2017, 09:46 PM
#271
Senior Member
Re: Watch a Rookie Learn How To Swap a LS1 and T56 into a 1992 Z28
That does not look like a factory ring terminal. Somebody either repaired that wire at some point in time, or added it for some other reason. I suggest you trace the wire back to it's source so you can figure out what it is for.
Those two plastic tubes are vacuum lines for the HVAC system.
* The shorter one with the bend in it is the vacuum source for the HVAC head unit in the dash. It connects to the check valve tee that was behind your engine originally. Just need to dig up that tee and you're back in business. My guess is that the tee is still connected to the line from the vacuum ball, or you removed it. You need it back because it is more than just a tee, it is a check valve.
* The longer tube went to the heater core bypass valve. I don't know if you kept the bypass valve or not? If not, then just cap off the line so you don't end up with a vacuum leak, otherwise hook it back up.
The only ports you need on the back of the manifold are the larger port for brake vacuum assist, and a small port for the HVAC controls.
Those two plastic tubes are vacuum lines for the HVAC system.
* The shorter one with the bend in it is the vacuum source for the HVAC head unit in the dash. It connects to the check valve tee that was behind your engine originally. Just need to dig up that tee and you're back in business. My guess is that the tee is still connected to the line from the vacuum ball, or you removed it. You need it back because it is more than just a tee, it is a check valve.
* The longer tube went to the heater core bypass valve. I don't know if you kept the bypass valve or not? If not, then just cap off the line so you don't end up with a vacuum leak, otherwise hook it back up.
The only ports you need on the back of the manifold are the larger port for brake vacuum assist, and a small port for the HVAC controls.
True, that is the way my '92 Z vacuum lines are set up. Nothing about that wire looks factory. The factory fuse terminal in that area has a different weatherpak socket and weatherpak cover with a 20A fuse for ECM power. Could have been a repair to replace a fusible link.
05-30-2017, 07:01 AM
#272
Member
Thread Starter
Join Date: Aug 2007
Location: Long Island, NY
Posts: 201
Likes: 0
Received 2 Likes
on
2 Posts
Car: 1992 z28
Engine: LS1
Transmission: T-56
Re: Watch a Rookie Learn How To Swap a LS1 and T56 into a 1992 Z28
That does not look like a factory ring terminal. Somebody either repaired that wire at some point in time, or added it for some other reason. I suggest you trace the wire back to it's source so you can figure out what it is for.
Those two plastic tubes are vacuum lines for the HVAC system.
* The shorter one with the bend in it is the vacuum source for the HVAC head unit in the dash. It connects to the check valve tee that was behind your engine originally. Just need to dig up that tee and you're back in business. My guess is that the tee is still connected to the line from the vacuum ball, or you removed it. You need it back because it is more than just a tee, it is a check valve.
* The longer tube went to the heater core bypass valve. I don't know if you kept the bypass valve or not? If not, then just cap off the line so you don't end up with a vacuum leak, otherwise hook it back up.
The only ports you need on the back of the manifold are the larger port for brake vacuum assist, and a small port for the HVAC controls.
Those two plastic tubes are vacuum lines for the HVAC system.
* The shorter one with the bend in it is the vacuum source for the HVAC head unit in the dash. It connects to the check valve tee that was behind your engine originally. Just need to dig up that tee and you're back in business. My guess is that the tee is still connected to the line from the vacuum ball, or you removed it. You need it back because it is more than just a tee, it is a check valve.
* The longer tube went to the heater core bypass valve. I don't know if you kept the bypass valve or not? If not, then just cap off the line so you don't end up with a vacuum leak, otherwise hook it back up.
The only ports you need on the back of the manifold are the larger port for brake vacuum assist, and a small port for the HVAC controls.
So, I guess I have to find that T/check valve piece. There is nothing like that in my engine bay, so the original owner must have taken it out when he was removing the engine. I guess I will have to look with the vacuum ball to see if it is still attached to that. Is it a part that I can buy from the store if I cant find it? Are there any other pieces that need to connect to this T or is it just this one vacuum line and then to the back of the intake?
I also don't have that bypass valve anymore. I think part of what is screwing me up is that I removed the AC and all of its components, so im trying to reconnect everything to make it work without the AC. I am assuming the locations you gave me to hook up the vacuum lines will work this way without AC?
Thanks for the info about the wire, I will have to trace it and see where it goes. It definitely did not look factory when I was looking at it, but I know it was left over from the old engine setup so hopefully it isnt important. I wonder if it has anything to do with my radio not getting any power LOL
Thanks for the help guys!
05-30-2017, 07:18 AM
#273
COTM Editor
iTrader: (22)
Join Date: Mar 2001
Posts: 9,934
Likes: 0
Received 1,861 Likes
on
1,275 Posts
Car: '89 Firebird
Engine: 7.0L
Transmission: T56
Re: Watch a Rookie Learn How To Swap a LS1 and T56 into a 1992 Z28
The tee would have been attached to one of the vacuum hoses behind the engine. One side gets manifold vacuum, the other side is attached to the vacuum ball, and the third side goes to the HVAC controls in the cab. I figured out which way to install it by blowing in it to see which way the check valve is oriented. Whichever side blocks off air flow when you blow in it is the side that goes to manifold.
As an interim solution you could run manifold vacuum directly to the HVAC tube. The air flappers in the HVAC might flop to different position when you stab the throttle but it will work at light load.
05-30-2017, 07:48 AM
#274
Member
Thread Starter
Join Date: Aug 2007
Location: Long Island, NY
Posts: 201
Likes: 0
Received 2 Likes
on
2 Posts
Car: 1992 z28
Engine: LS1
Transmission: T-56
Re: Watch a Rookie Learn How To Swap a LS1 and T56 into a 1992 Z28
No worries, somebody had to explain it to me when I got to that point too. Just passing on the favor and I know you'll do the same after you're done.
The tee would have been attached to one of the vacuum hoses behind the engine. One side gets manifold vacuum, the other side is attached to the vacuum ball, and the third side goes to the HVAC controls in the cab. I figured out which way to install it by blowing in it to see which way the check valve is oriented. Whichever side blocks off air flow when you blow in it is the side that goes to manifold.
As an interim solution you could run manifold vacuum directly to the HVAC tube. The air flappers in the HVAC might flop to different position when you stab the throttle but it will work at light load.
05-12-2020, 01:50 AM
#275
Member
Thread Starter
Join Date: Aug 2007
Location: Long Island, NY
Posts: 201
Likes: 0
Received 2 Likes
on
2 Posts
Car: 1992 z28
Engine: LS1
Transmission: T-56
Re: Watch a Rookie Learn How To Swap a LS1 and T56 into a 1992 Z28
Well, it has been quite some time since updating this. Last I left you guys, I had fired up the engine and got it running......
Until I found out that the engine was a complete POS...ran solid for a few seconds...then coolant in the oil...absurd amounts. Drain the nasty milky stuff from the pan...big chunks of metal.
Needless to say at this point I was pretty crushed. Something that I had invested tons of time and energy into was a failure. I got burned bad on the engine....similar to wayyyy earlier in the thread when I got burned on the first used t56 LOL....you live and you learn I guess. I should have never taken the guys word that the motor was good. I should have gone through it before I went through all the trouble of installing it, but its easy for me to sit here and play Monday morning quarter back. Mistakes were made...I had to walk away from the project for a while. I was simply flat out of money to spend on it. The car has taken the back seat to life for the past few years, but I am ready to get back to work. I debated for a long time which route I was going to take as far as getting the car back together again. The ls1 in there is definitely junk and I have no interest in rebuilding it right now. I looked into re-manufactured engines but was not impressed with some of the reviews. Not impressed enough to drop 3k. That brings me to the route that I have chosen.
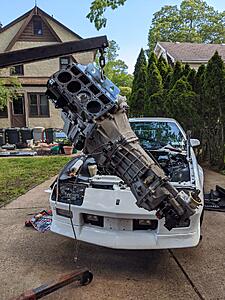
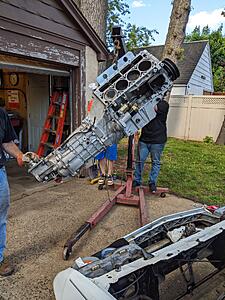
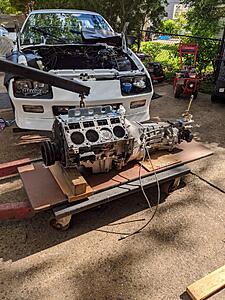
I picked up a lq4 block a long time ago for free basically and have been holding onto it for the future. Never intended it to be for this car, but now that is the plan. Here are some pictures of the block and crank:
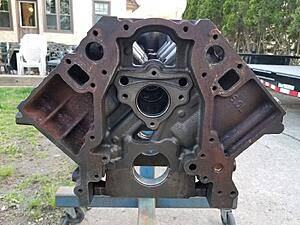

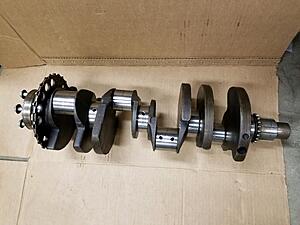
Over the weekend I dropped the block and crank off at a very reputable machine shop that has a lot of experience with LS engines. They are going to check everything out and we are going to come up with a game plan for the best way to go about building up this block. My intentions are to keep the car a driver. Everything will be gone through and no corners cut, but this will not be a high HP crazy build. Most likely a mild cam and some light machine work to clean up the block, but I am still waiting to hear what the machine shop says as far as the condition of the block. There is no lip on the cylinder walls and they seem to be in pretty good shape. Excited to hear what he thinks after they hot tank the block and get a better look at it. Plan is to shoot for somewhere in the area of 400-450 NA. Should be pretty doable I think.
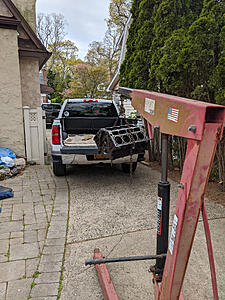
Here are some pics getting the engine loaded and off to the machine shop:
Have 317 heads to go along with this block that were also sent to the shop to be hot tanked and gone through. Any recommendations on the engine build as far as parts or general advice would be greatly appreciated as always. Should have some pics of taking the LS1 back out of the car within the next week. Really want to tear that down and see what the hell went wrong. Stay tuned!
Until I found out that the engine was a complete POS...ran solid for a few seconds...then coolant in the oil...absurd amounts. Drain the nasty milky stuff from the pan...big chunks of metal.
Needless to say at this point I was pretty crushed. Something that I had invested tons of time and energy into was a failure. I got burned bad on the engine....similar to wayyyy earlier in the thread when I got burned on the first used t56 LOL....you live and you learn I guess. I should have never taken the guys word that the motor was good. I should have gone through it before I went through all the trouble of installing it, but its easy for me to sit here and play Monday morning quarter back. Mistakes were made...I had to walk away from the project for a while. I was simply flat out of money to spend on it. The car has taken the back seat to life for the past few years, but I am ready to get back to work. I debated for a long time which route I was going to take as far as getting the car back together again. The ls1 in there is definitely junk and I have no interest in rebuilding it right now. I looked into re-manufactured engines but was not impressed with some of the reviews. Not impressed enough to drop 3k. That brings me to the route that I have chosen.
I picked up a lq4 block a long time ago for free basically and have been holding onto it for the future. Never intended it to be for this car, but now that is the plan. Here are some pictures of the block and crank:

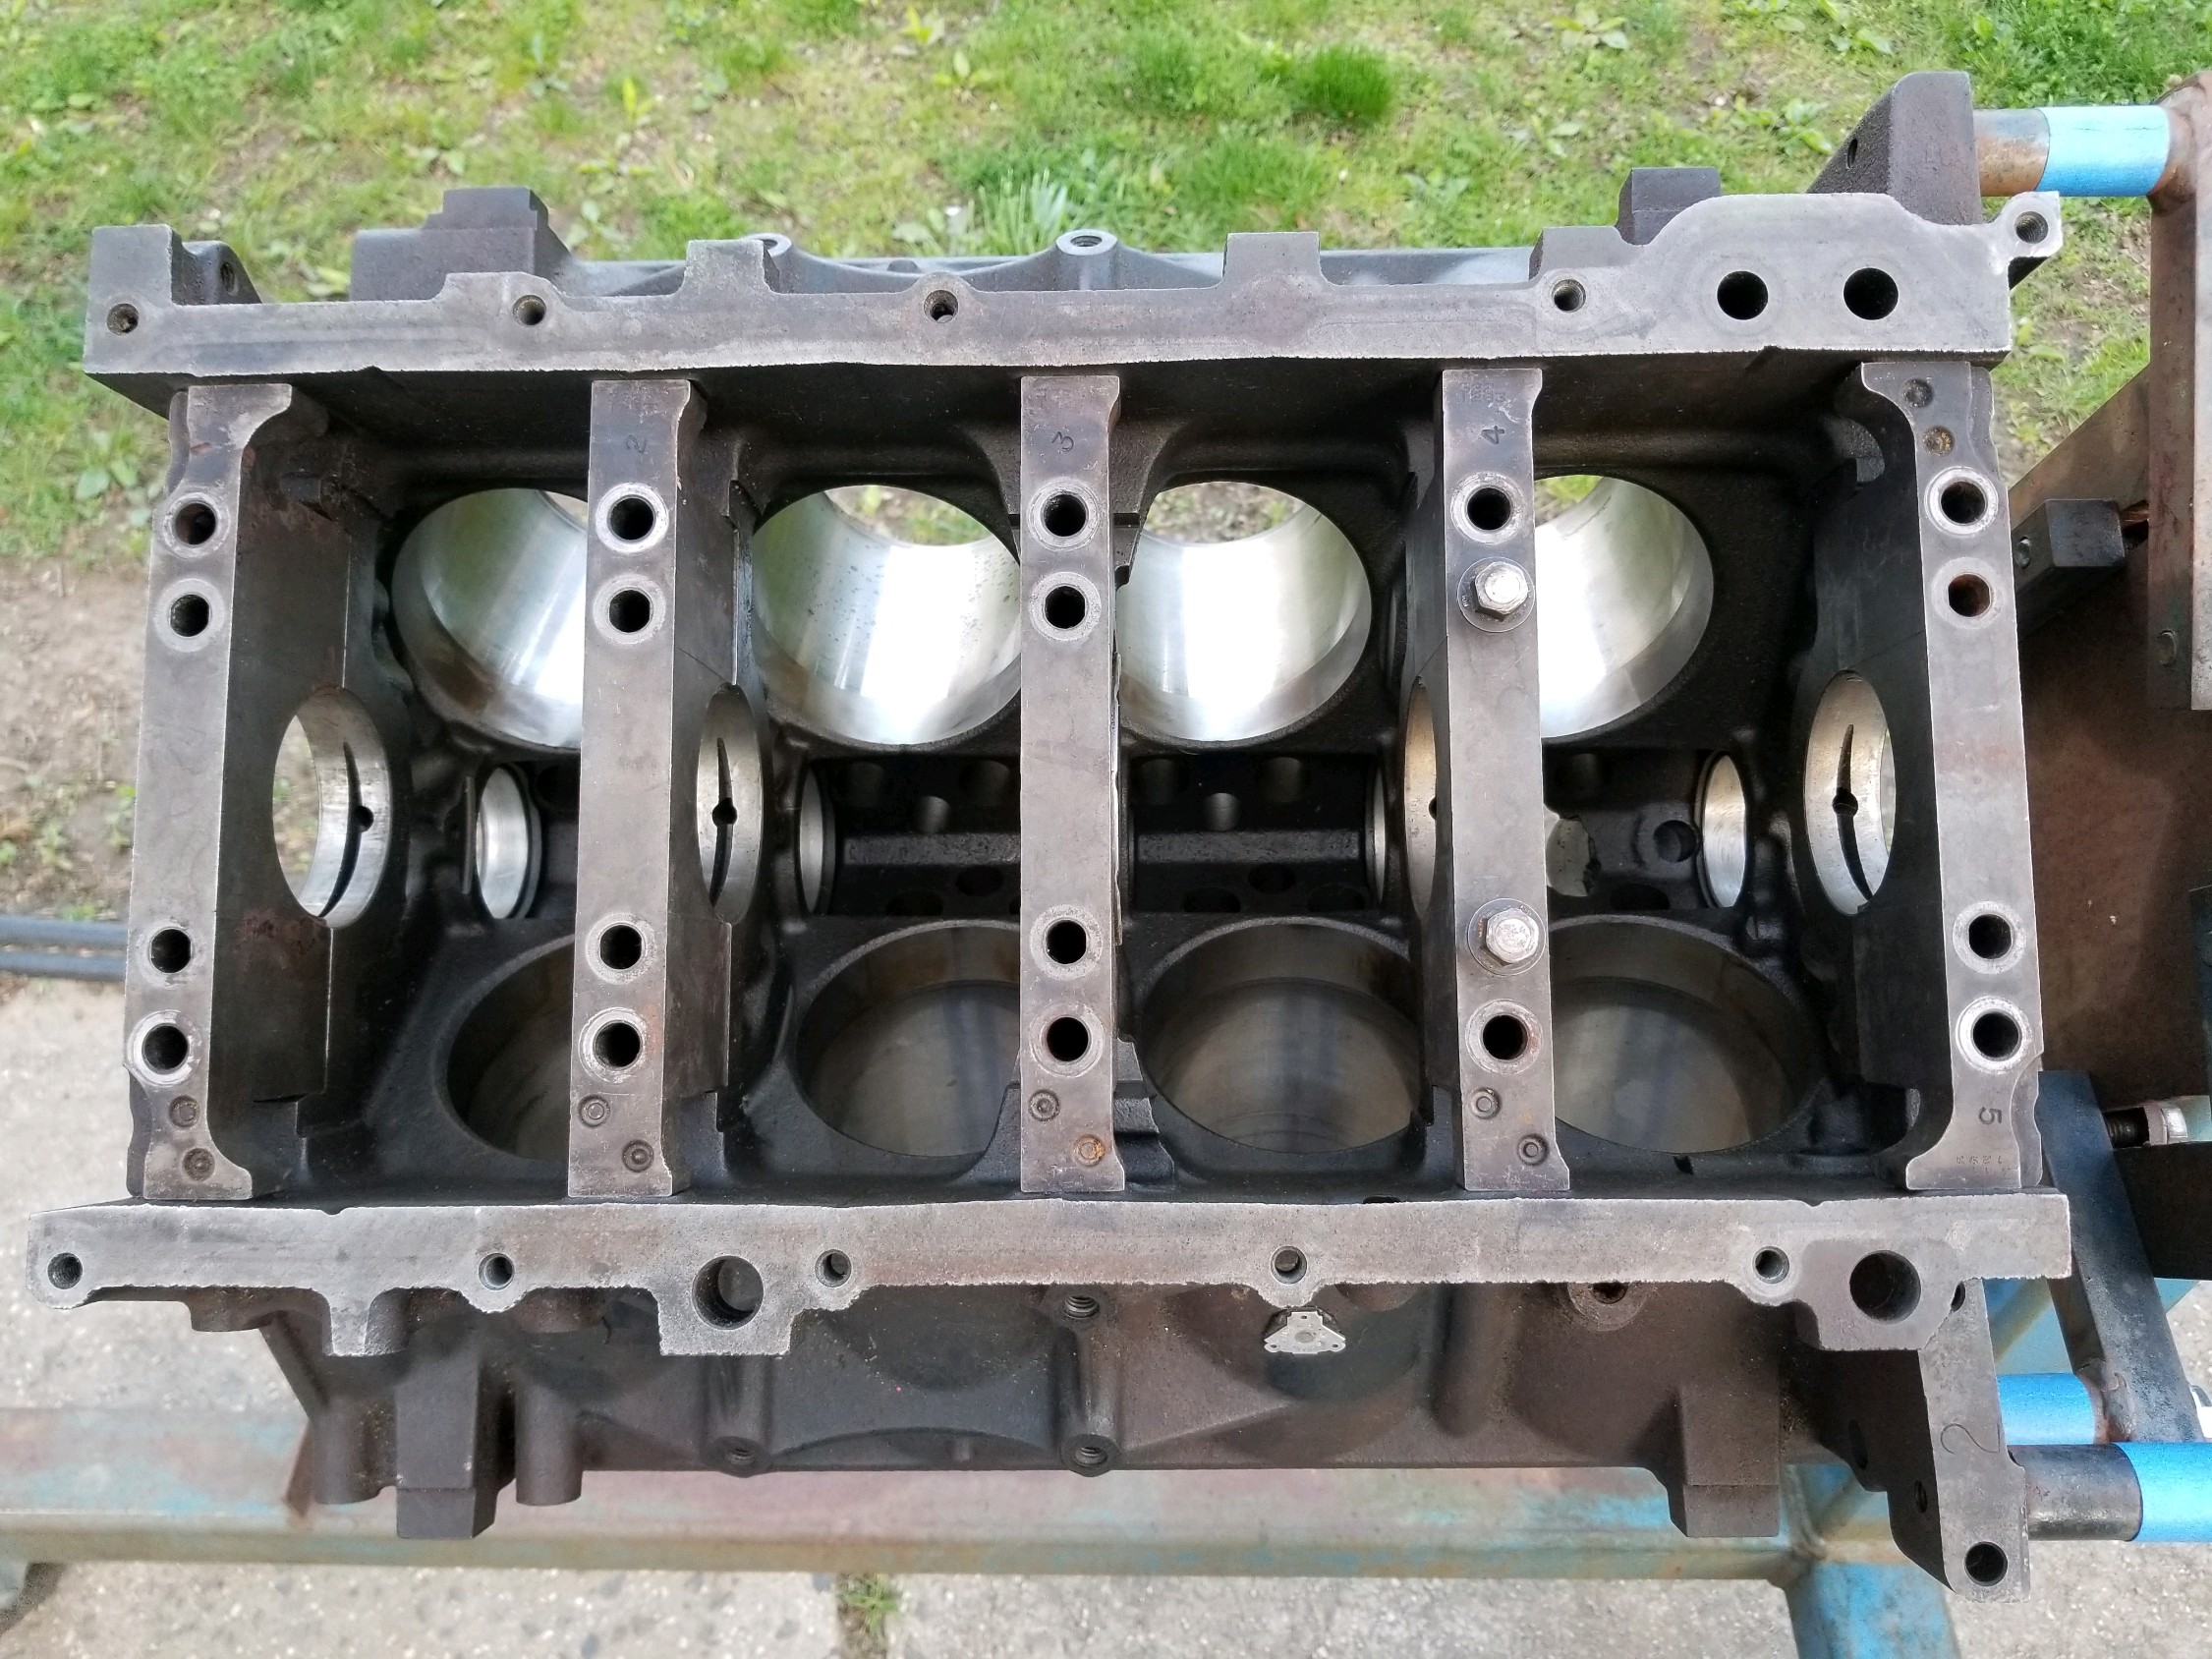


Over the weekend I dropped the block and crank off at a very reputable machine shop that has a lot of experience with LS engines. They are going to check everything out and we are going to come up with a game plan for the best way to go about building up this block. My intentions are to keep the car a driver. Everything will be gone through and no corners cut, but this will not be a high HP crazy build. Most likely a mild cam and some light machine work to clean up the block, but I am still waiting to hear what the machine shop says as far as the condition of the block. There is no lip on the cylinder walls and they seem to be in pretty good shape. Excited to hear what he thinks after they hot tank the block and get a better look at it. Plan is to shoot for somewhere in the area of 400-450 NA. Should be pretty doable I think.
Here are some pics getting the engine loaded and off to the machine shop:


Have 317 heads to go along with this block that were also sent to the shop to be hot tanked and gone through. Any recommendations on the engine build as far as parts or general advice would be greatly appreciated as always. Should have some pics of taking the LS1 back out of the car within the next week. Really want to tear that down and see what the hell went wrong. Stay tuned!
The following users liked this post:
BigDogBob (05-12-2020)
 05-12-2020, 12:23 PM
#277
Moderator
iTrader: (14)
Join Date: Mar 2000
Location: Littleton, CO USA
Posts: 43,169
Likes: 0
Received 35 Likes
on
34 Posts
Car: 82 Berlinetta/57 Bel Air
Engine: LS1/LQ4
Transmission: 4L60E/4L80E
Axle/Gears: 12B-3.73/9"-3.89
Re: Watch a Rookie Learn How To Swap a LS1 and T56 into a 1992 Z28
Are you planning on new pistons, or reusing what you have?
In my opinion ARP rod bolts are always a good idea.
Plan on replacing all the bearings.
Texas Speed and Performance is a good resource for parts and information on the LS platform. Sending your 317 heads to them for their magic is a good start. Your expected level of performance will dictate how far you go (i.e., how much you spend).
05-13-2020, 09:49 AM
#278
Member
Thread Starter
Join Date: Aug 2007
Location: Long Island, NY
Posts: 201
Likes: 0
Received 2 Likes
on
2 Posts
Car: 1992 z28
Engine: LS1
Transmission: T-56
Re: Watch a Rookie Learn How To Swap a LS1 and T56 into a 1992 Z28
Are you planning on new pistons, or reusing what you have?
In my opinion ARP rod bolts are always a good idea.
Plan on replacing all the bearings.
Texas Speed and Performance is a good resource for parts and information on the LS platform. Sending your 317 heads to them for their magic is a good start. Your expected level of performance will dictate how far you go (i.e., how much you spend).
In my opinion ARP rod bolts are always a good idea.
Plan on replacing all the bearings.
Texas Speed and Performance is a good resource for parts and information on the LS platform. Sending your 317 heads to them for their magic is a good start. Your expected level of performance will dictate how far you go (i.e., how much you spend).
Any opinion on reusing the stock rods? Not a good idea? Machine shop was going to check their spec and let me know if they were ok.
Definitely doing all new bearings and gaskets for sure. Machine shop is going to replace the cam bearings for me. I have been looking at Texas Speed for a long time...they seem to be the gold standard. Not sure I want to deal with sending my heads out and waiting for them to come back though. Quite a long ways away from Texas. As for now the machine shop as the heads and they are going to boil them out and check the valves.
05-13-2020, 07:37 PM
#279
Member
Re: Watch a Rookie Learn How To Swap a LS1 and T56 into a 1992 Z28
I'd say don't bother with the 317 heads; upgrade to 243/ 799 heads with the smaller chambers.
If you aren't doing so already, get some flat-top pistons.
This will put you in 11:1+ range, and that will be perfect for 93 octane.
Edit: There are SH*T TONS more 243/799 heads out there than 317s, so you don't have a good reason to NOT do this.
If you aren't doing so already, get some flat-top pistons.
This will put you in 11:1+ range, and that will be perfect for 93 octane.
Edit: There are SH*T TONS more 243/799 heads out there than 317s, so you don't have a good reason to NOT do this.
05-13-2020, 08:26 PM
#280
Supporter/Moderator
iTrader: (7)
Join Date: Feb 2001
Location: Cincinnati, OH
Posts: 13,249
Likes: 0
Received 393 Likes
on
299 Posts
Car: '90 RS
Engine: 377 LSX
Transmission: Magnum T56
Re: Watch a Rookie Learn How To Swap a LS1 and T56 into a 1992 Z28
Agreed on the 243 heads, although your power goals can be achieved with the 317's. Flat tops and 243 heads might not play well together with piston to valve clearance, so make sure you talk to the shop about that. You might have to run new pistons with valve reliefs. As for rods, I would look at a set of Gen 4 rods. They are better than the early LS rods and have more piston selections to go with. Make sure that crank is stored by supporting the journals. Don't let it just sit like you have in the picture. It can warp.
05-18-2020, 12:41 AM
#281
Member
Thread Starter
Join Date: Aug 2007
Location: Long Island, NY
Posts: 201
Likes: 0
Received 2 Likes
on
2 Posts
Car: 1992 z28
Engine: LS1
Transmission: T-56
Re: Watch a Rookie Learn How To Swap a LS1 and T56 into a 1992 Z28
I'd say don't bother with the 317 heads; upgrade to 243/ 799 heads with the smaller chambers.
If you aren't doing so already, get some flat-top pistons.
This will put you in 11:1+ range, and that will be perfect for 93 octane.
Edit: There are SH*T TONS more 243/799 heads out there than 317s, so you don't have a good reason to NOT do this.
If you aren't doing so already, get some flat-top pistons.
This will put you in 11:1+ range, and that will be perfect for 93 octane.
Edit: There are SH*T TONS more 243/799 heads out there than 317s, so you don't have a good reason to NOT do this.
Agreed on the 243 heads, although your power goals can be achieved with the 317's. Flat tops and 243 heads might not play well together with piston to valve clearance, so make sure you talk to the shop about that. You might have to run new pistons with valve reliefs. As for rods, I would look at a set of Gen 4 rods. They are better than the early LS rods and have more piston selections to go with. Make sure that crank is stored by supporting the journals. Don't let it just sit like you have in the picture. It can warp.
05-18-2020, 10:06 AM
#282
Supporter/Moderator
iTrader: (7)
Join Date: Feb 2001
Location: Cincinnati, OH
Posts: 13,249
Likes: 0
Received 393 Likes
on
299 Posts
Car: '90 RS
Engine: 377 LSX
Transmission: Magnum T56
Re: Watch a Rookie Learn How To Swap a LS1 and T56 into a 1992 Z28
Just have the shop check it out and tell them how it's been stored. It might be ok.
06-01-2020, 07:50 PM
#283
Member
Thread Starter
Join Date: Aug 2007
Location: Long Island, NY
Posts: 201
Likes: 0
Received 2 Likes
on
2 Posts
Car: 1992 z28
Engine: LS1
Transmission: T-56
Re: Watch a Rookie Learn How To Swap a LS1 and T56 into a 1992 Z28
Well, unfortunately I still have not heard much progress from the machine shop about the Lq4 block I dropped off. As of the end of last week the block and the heads were going into the hot tank to be cleaned before inspection.
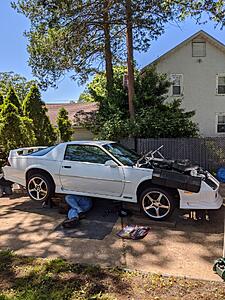
While I am waiting to hear more info from the machine shop, I figured it would be a good time to start pulling the old busted LS1. When I was pulling the LS1 this past weekend, what I found was not surprising, but really aggravating. I decided to break the engine down while it was still in the car because I wanted to try my shot at pulling the engine and tranny from the top without having to blow the whole suspension apart again (more on this later). Lets just say that what I found pretty much confirmed what I knew all along, that this guy scammed me on a completely busted LS1 engine. I will let the pics do the talking as they are pretty hilarious, but before we get there, I would like to take some fault for not ever opening the engine up when I originally bought it. Hindsight is 20/20 and if I had to do it over again I obviously would have. Before buying the engine I pulled the valve covers and spun the engine over with a breaker bar and everything seemed to be good. The heads looked immaculately clean, the engine spun freely and felt decent enough. The most upsetting part about all of this is that it is pretty clear that the original owner went through some great lengths to hide the damage in the engine block. Anyways, onto the pics. Not going to give much of an explanation, just a few pictures from the weekend. 100 percent prefer pulling the engine from the top by the way....I know not everyone has the means to do this, but for me personally it was an absolute breeze.
Last time it is together for a while:
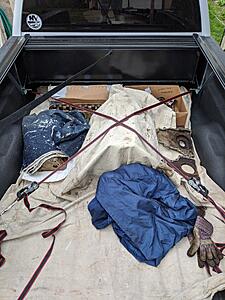
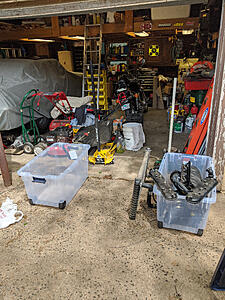
Trying to keep stuff organized and labeled this time around:
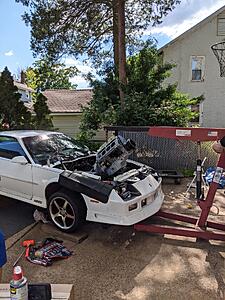
Trying to get the rear end up in the air so that we have enough room to swing the T56 out of the car from the top...ignore my friends underwear lol
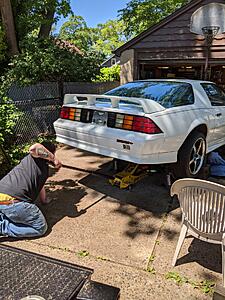
Thatll do
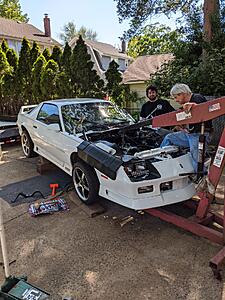
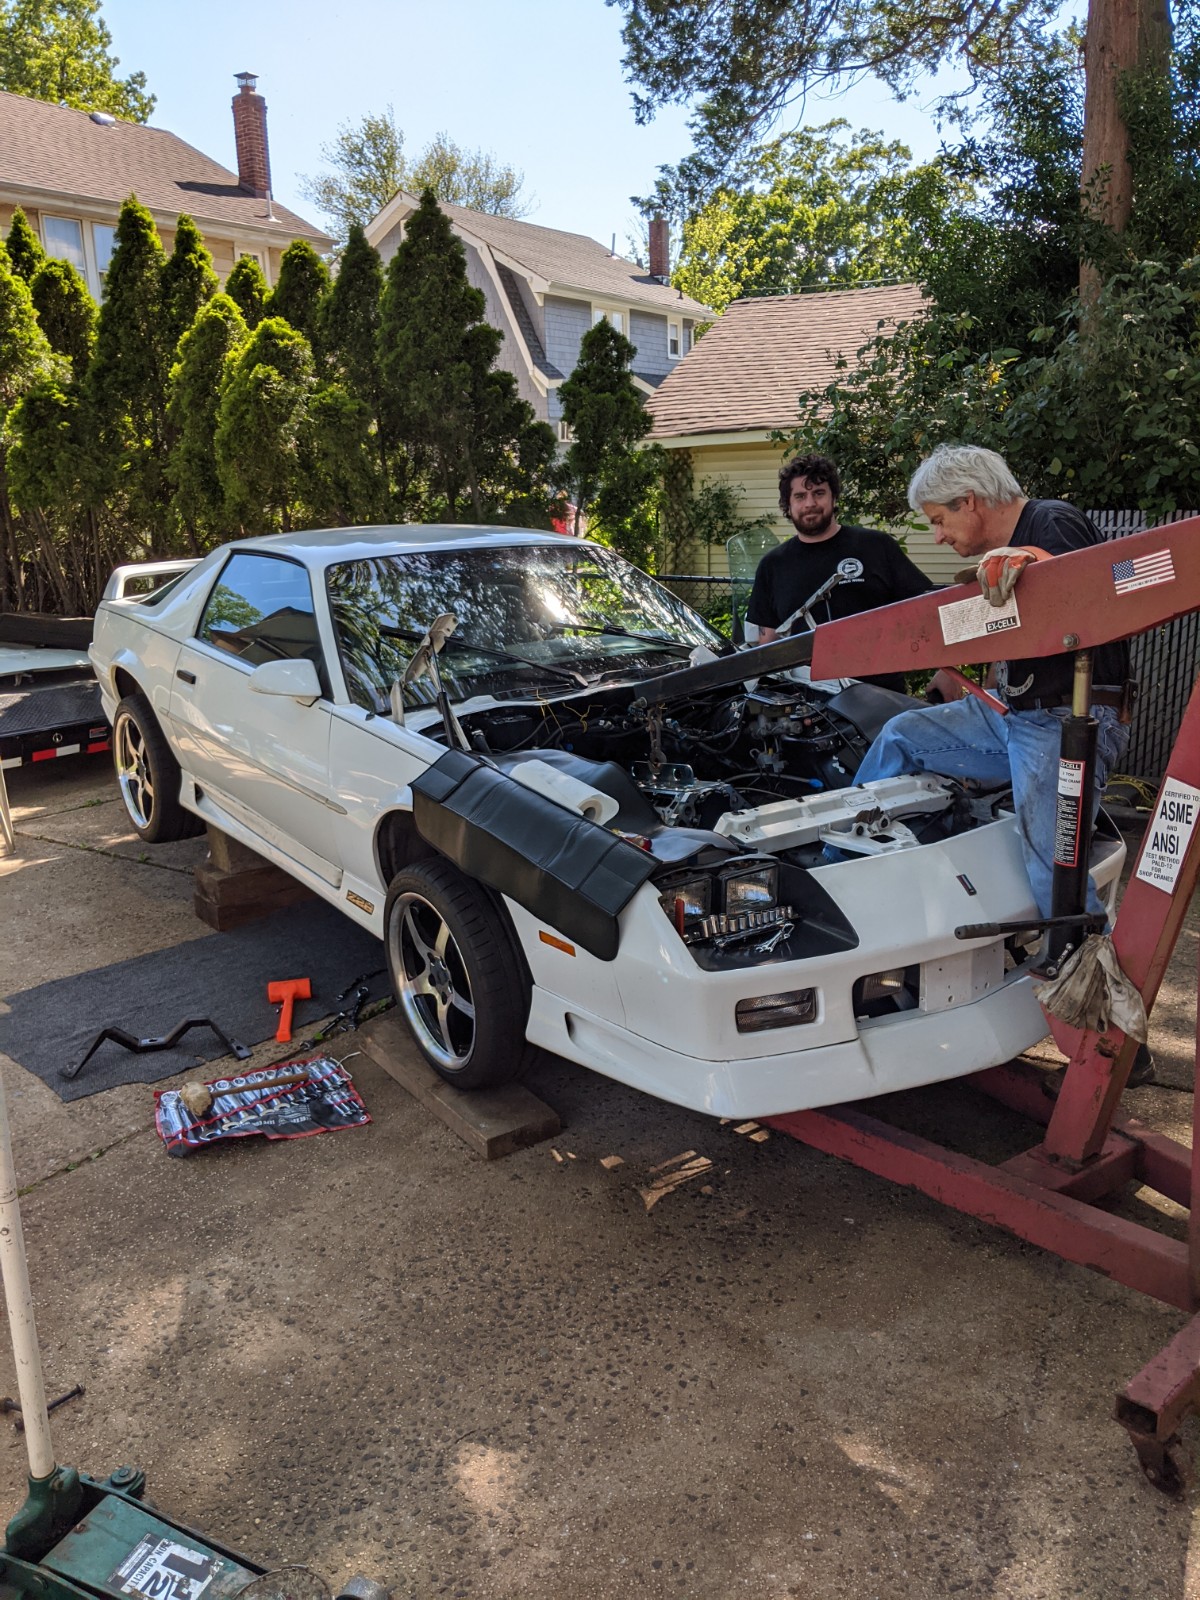
Pulling the engine...awesome to have my friend and pops home to help out...almost worth having the broken engine because it gives me an excuse to spend some quality time with my dad.
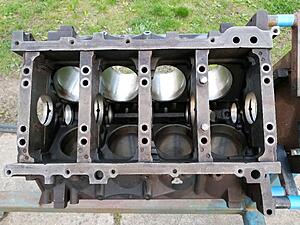
And last but not least...please shield your eyes if you are afraid of engine gore:
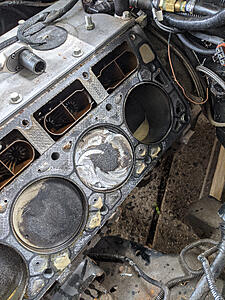
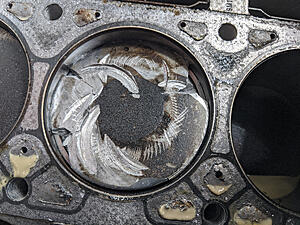
Piston is just a weeeee bit cracked don't you think?? LOL holy hell how many pounds of boost went through this thing....this piston is completely shattered and frozen in the cylinder. Piston is not even connected to the crank anymore (hence engine turning over freely by hand) and the loose metal was removed from the top of the piston and cylinder. I like to believe that most people in the world are good...but this individual who sold me a "Mint 18k pullout" is a scum bag. Again, I take responsibility for not tearing it down before installing it, but this is a bit ridiculous as far as deception goes. Oh well...live and learn. Stay tuned...should have some updates from the engine shop coming soon.
While I am waiting to hear more info from the machine shop, I figured it would be a good time to start pulling the old busted LS1. When I was pulling the LS1 this past weekend, what I found was not surprising, but really aggravating. I decided to break the engine down while it was still in the car because I wanted to try my shot at pulling the engine and tranny from the top without having to blow the whole suspension apart again (more on this later). Lets just say that what I found pretty much confirmed what I knew all along, that this guy scammed me on a completely busted LS1 engine. I will let the pics do the talking as they are pretty hilarious, but before we get there, I would like to take some fault for not ever opening the engine up when I originally bought it. Hindsight is 20/20 and if I had to do it over again I obviously would have. Before buying the engine I pulled the valve covers and spun the engine over with a breaker bar and everything seemed to be good. The heads looked immaculately clean, the engine spun freely and felt decent enough. The most upsetting part about all of this is that it is pretty clear that the original owner went through some great lengths to hide the damage in the engine block. Anyways, onto the pics. Not going to give much of an explanation, just a few pictures from the weekend. 100 percent prefer pulling the engine from the top by the way....I know not everyone has the means to do this, but for me personally it was an absolute breeze.
Last time it is together for a while:


Trying to keep stuff organized and labeled this time around:

Trying to get the rear end up in the air so that we have enough room to swing the T56 out of the car from the top...ignore my friends underwear lol

Thatll do

Pulling the engine...awesome to have my friend and pops home to help out...almost worth having the broken engine because it gives me an excuse to spend some quality time with my dad.


And last but not least...please shield your eyes if you are afraid of engine gore:


Piston is just a weeeee bit cracked don't you think?? LOL holy hell how many pounds of boost went through this thing....this piston is completely shattered and frozen in the cylinder. Piston is not even connected to the crank anymore (hence engine turning over freely by hand) and the loose metal was removed from the top of the piston and cylinder. I like to believe that most people in the world are good...but this individual who sold me a "Mint 18k pullout" is a scum bag. Again, I take responsibility for not tearing it down before installing it, but this is a bit ridiculous as far as deception goes. Oh well...live and learn. Stay tuned...should have some updates from the engine shop coming soon.
06-03-2020, 12:56 AM
#284
COTM Editor
iTrader: (22)
Join Date: Mar 2001
Posts: 9,934
Likes: 0
Received 1,861 Likes
on
1,275 Posts
Car: '89 Firebird
Engine: 7.0L
Transmission: T56
Re: Watch a Rookie Learn How To Swap a LS1 and T56 into a 1992 Z28
I wouldn't blame yourself for anything. This is 100% on the scumbag that sold you the engine. They're out there. Happened to me once too. That's when I said I'll never buy another used engine again.
Coincidentally, I've got a used engine for sale if you're interested. LOL!
Coincidentally, I've got a used engine for sale if you're interested. LOL!
06-04-2020, 08:04 AM
#285
Member
Thread Starter
Join Date: Aug 2007
Location: Long Island, NY
Posts: 201
Likes: 0
Received 2 Likes
on
2 Posts
Car: 1992 z28
Engine: LS1
Transmission: T-56
Re: Watch a Rookie Learn How To Swap a LS1 and T56 into a 1992 Z28
Hahaha, honestly I looked long and hard at your engine for sale, and your reputation gives me enough faith in the engine, but we decided since I have no experience building engines and my dad has been doing it for decades that it would be another good opportunity for him to pass on some more knowledge.
I will honestly never buy another used car part. Ten years ago when this whole thing started I was a kid with little to no money....now that I am an adult with little to no money things are different But seriously it will be nice to have some more spending money this time around for the build. Excited to see it back together.
I will honestly never buy another used car part. Ten years ago when this whole thing started I was a kid with little to no money....now that I am an adult with little to no money things are different
But seriously it will be nice to have some more spending money this time around for the build. Excited to see it back together.  06-05-2020, 10:28 AM
#287
Member
Thread Starter
Join Date: Aug 2007
Location: Long Island, NY
Posts: 201
Likes: 0
Received 2 Likes
on
2 Posts
Car: 1992 z28
Engine: LS1
Transmission: T-56
Re: Watch a Rookie Learn How To Swap a LS1 and T56 into a 1992 Z28
Lol yeah it was definitely a very defeating moment for me t/adreams. Even worse that I thought it was maybe something that I did wrong. I spent a year defeated, thinking of all the possible ways I could have screwed up. Good to know a year later when I finally had the heart to look at it again that it wasn't my fault. I agree with you, once I have this new engine assembled, I can have the car running in a weekend. Very excited for that day! Will be calling the machine shop later today to see if they have an update about the block!
07-27-2020, 03:46 PM
#288
Senior Member
iTrader: (9)
Join Date: Jul 2003
Location: DFW
Posts: 582
Received 200 Likes
on
142 Posts
Car: 90 Formula 350
Engine: 350
Transmission: 700r4
Axle/Gears: Dana 44 3.54
Re: Watch a Rookie Learn How To Swap a LS1 and T56 into a 1992 Z28
Warnd tough luck twice? that sucks! nice build otherwise, best looking of third gen Camaros 
you will get there
you will get there

Thread
Thread Starter
Forum
Replies
Last Post
Buggy Disaster
Transmissions and Drivetrain
11
02-19-2017 04:09 PM