When you click on links to various merchants on this site and make a purchase, this can result in this site earning a commission. Affiliate programs and affiliations include, but are not limited to, the eBay Partner Network.
History / OriginalityGot a question about 1982-1992 Camaro or Firebird history? Have a question about original parts, options, RPO codes, when something was available, or how to document your car? Those questions, answers, and much more!
It's time to finally start putting my 1983 Trans Am back together
I have a 83 TA L69 I bought in 2007 with the intention of restoring. It was in rough shape but it was a California car, rust free and complete. I completely disassembled it and started the rebuild. Then life got in the way. It has been sitting in pieces for the last 15 years and 2 moves.
At the time I bought a lot of NOS parts and I’m glad I did. For example, I know the heater core leaked. So, at the time, I bought a new copper core. Fast forward to a month ago. I can’t find a new heater core I bought back in the day and I started looking for a new one. Turns out they don’t make copper core anymore, only aluminum ones which everyone says is not so good. I looked into having my original one rebuilt, however the way they are constructed it's not really possible. After going through my parts and organizing them, I found the new copper heater core I bought back then. That was exciting!
My goal for this car is to restore it to period correct condition. However, there are a few options I plan on adding. This car was ordered without power door locks but it does have power windows. I plan on adding power door locks, power hatch release, cruise control and power mirrors. I’ll be using period correct parts and I’ll be able to returned the car back to stock if needed. Originality is important to me.
This is the car when i bought it in 2007
When I did the disassembly, I took a lot of picture and labeled the hardware. Last month I went through and organized what I had. However, after 15 years some stuff has gone missing. Most notably the gas tank. I have not idea what happened to it. I was able to find a really nice OE used gas tank so I can retain my original gas cap. I was hoping to reuse the hardware (screws and bolts) but I think I’ll end up replacing most of it.
For those of you who like boring details this post is for you.
To help guide me through the process I�m be using:
� 1983 Pontiac service manual
� 1982-1984 Parts and illustrations Catalog. I also have a 1982-1992 Parts and illustrations Catalog for more up to date part numbers.
� 1984 Pontiac Firebird Assembly manual
� Haynes repair manual
� Wiring diagram printout from the Haynes
I took the assembly manual, service manual and illustration catalog and had them spiral bound. It makes them much easier to use. The Haynes manual is good to looking up quick common information without having to navigate the full service manual.
The assembly manual is great for identify which bolts/screws go where.
Spent some time cleaning up the under hood controls. These are the spark controller module, electric fan controller relay, fast idle relay and manifold differential sensor. They all seem to be working but i have not way to test until I start the car.. which will be awhile
For awhile i was storing this car outside. it was dry but still outside and that meant mice. I left the dash insulation pad in place and the mice got to it. They are replacement pads but they use a different material . After checking a few wrecking yards i realized a few things. I wasn't going to find anything used. Anything in wrecked cars would not be good and I probably was not going to find an NOS pad. I also noticed in 84 they started putting a rubber or plastic face on the pad whereas in 82 and 83 it was just exposed jute padding.
Initially i ordered a new replacement pad but it wasn't the same type of material. it would work fine but it was not the original type. Finding a source for original jute padding was more difficult then i was expecting. I couldn't find anything locally but i did finally find a source online from detroitmuscletechnologies.com. it was a good match. I used the other new one as a temple and created a new pad.
This is the insulation pad after the mice got to. the bottom of it is pretty much gone.
the old one out of the car.
This is the repo pad. it will work but the material is not right for what I'm trying to do with the car.
Here is the pad i made from the correct jute padding. its a little grayer then wait was in the car before but the texture is right.
The Heater core and A/C box are done and installed. They were completely disassembled, cleaned and reassembled. I had a problem with the screws that hold the upper and lower evap case together. They have been discontinued by GM and are no longer made… that I could find anyway. I ended up sourcing some used ones from a wrecking yard, cleaning and redoing the black oxide. They turned out nice.
The heater core also was a bit of work. There is foam on the air blend doors that has completely disintegrated and at some point there was a heater core leak. This meant rust. Fortunately, it was only a light coat and a little rust remove took care of it.
I also have started sorting out the wiring. One of the things I did way back when I disassembled the car may years ago was to rebuild the wiring harness. It’s just a matter of reinstall. I made that sound much easier than it is. Since I’m adding a few options. I’m working through figuring out what goes where and if you have ever looked under the dash of a thirdgen, it can be daunting.
A/C and blower fan installed.
Heater box
Adding power hatch release, fortunately this is a manual car so the wiring is easier then the auto. The auto routes the wiring the shifter and starter relay. Manual cars only check that the parking brake is engaged.
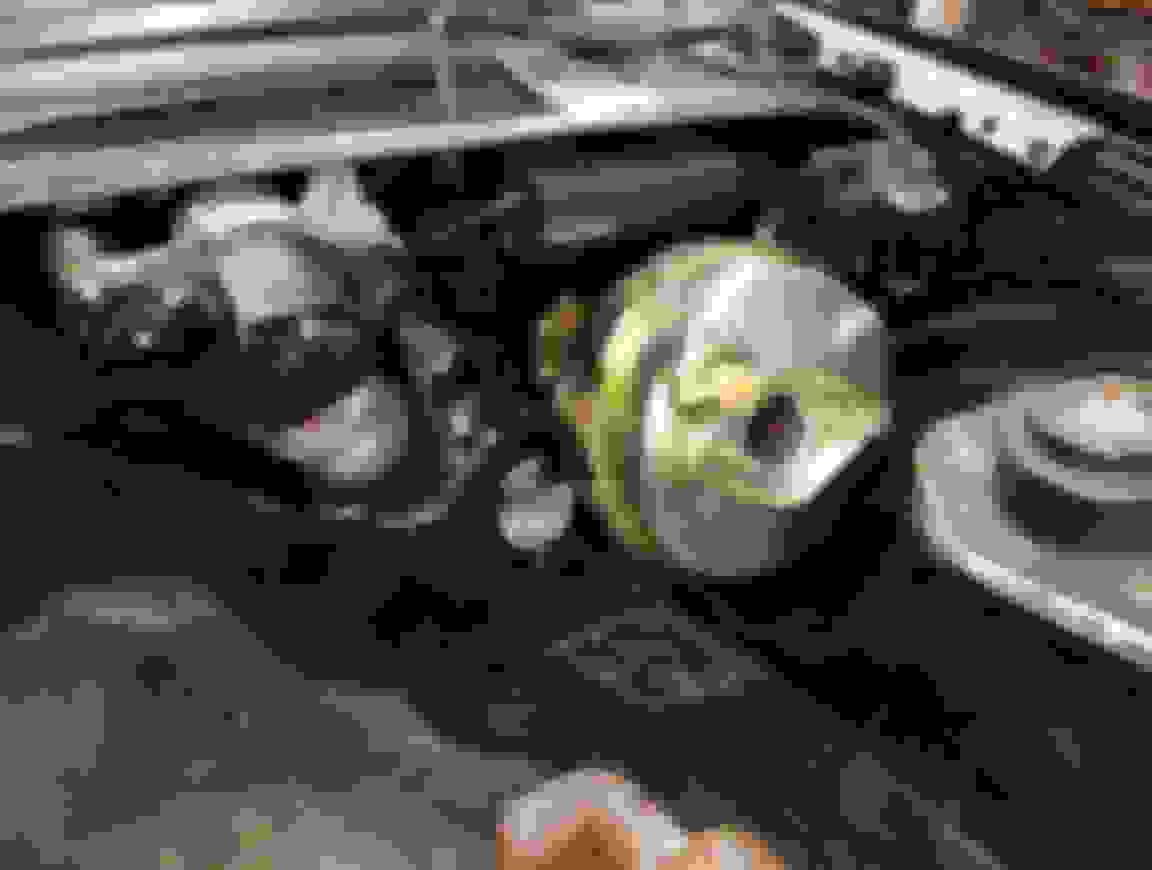
I have completed the pedal assembly and mounted the brake booster. I had the booster restored back in 2007. It has been sitting in a box since then and I was a little concerned about seals drying out or it not working but it seems to be fine. Guess I’ll know when I get to the point where I can start the car.
I don’t care for the new clutch pedal pads. It just doesn’t look right. I ordered a 1981 Firebird clutch pad which looks more original but I have no idea if it will fit. I’ll know in a few days when it arrives
I also worked on the wiper motor. My car did not come with pulse wiper originally. Fortunately the wiring is there already. I just had to source the motor, pump and a few other parts.
I was not a fan of the GM clutch pedal. the pattern does not match the brake pedal and it look off to me. It turns out the 81 clutch pedal is the same size and correct pattern. it look much better.
Here is the 81 clutch pedal, it fits perfect, is the same size and matches the brake pedal. maybe the later cars have that other design. I'm not sure.
and on a side note, does anyone know what the pink wire is for?
Making more progress. The master cylinder is rebuilt and installed and the dash and steering column is in. Cruise control components are also installed. There is a bit more dash wiring to do but i have turned my attention to suspension. I have also discovered the best way to find the old parts i need is to buy new ones. I have all my old parts in boxes, categorized and laid out by where they go in the car. if there is something i cant find i just have to buy a new one, then a few days later the old one that i couldn't find will just magically appear!
The steering gear box is in. Never mind the power steering hose hardline. It still needs to be cleaned. i was just setting it in there to test fit and i need to get a new rubber hose. I've also started working on the suspension. Nothing to show yet, just a lot of cleaning and buying parts. I did have a hard time finding a rebuild kit for the rear brake calipers but i found two so that's good.
More progress is being made. But its slow going. The suspension has been removed and I��ve been working on rebuilding is various parts. It took a lot longer than I expected to clean up the front cross member. It was in good shape excpt for the rust and dirt, but I don�t have anything big enough to soak it in. I started with spray on rust dissolver gel but the part is too big and I couldn�t control the gel. It would run or dry to soon because the area was to big. I ended up using Evapo-Rust and a large tub to soak sections a time. It cleaned up nice. I mounted the motor mounts and front brake lines. I�m leaving it natural for the factory look but I did coat it with Rust Prevention Magic.
The front spindles and rear control arms are cleaned up and ready to be installed. Finding the right hardware has been a little challenging. i was able to reuse the bolts but i am replacing the nuts and washers with new OEM parts.
Front brake calipers have been cleaned up and rebuild with new hardware. The rear calipers have also been rebuild too with new hardware. It was challenging to find a rebuild kit for the rear calipers. The GM rebuild kit has been long discontinued but i did find one aftermarket kit from O'Reilly's. No other parts store had any that i could find.
Front A-Arms are also ready to go. New bushings and hardware. I bought new GM ball joints back in 07 but when i took them out to install them they had minor corrosion and the grease had dyed out. I'm not sure if they are good or not. I assume they can be loaded up with new grease and would work just fine. the other issue i had with them is they don't look the same as the old ones. I wanted something aesthetically close to original as i can get. I found Moog ball joints look almost the same so i ended up buying new moog ball joints.
I'm not ready to install the parts yet. I need to get the undercarriage cleaned and a few spots painted. it will probably be a few months be the suspension is ready to be put back together.
The fuel tank is in! and it was a long and unpleasant journey.
Between the time i took the car apart in 2007, moved twice and started the process of restoration last spring, i misplaced the original tank. Bummer but no big deal. So i thought. I bought an OER replacement tank because it was advertised as meets OEM specs. Well that is a very loose term. It would work just fine in that it would go in the car and hold fuel but it uses a different gas cap and that would bug me very time i fill up. i wanted to use the original metal gas cap. That meant finding an original GM tank in good shape. I was able to find a tank in good, rust free, but dirty shape at wrecking yard about 6 hours round trip from me. After cleaning and painting it was ready to be reassembled. I had the original fuel sender/pick up assembly and after a lot more cleaning it was ready too. Then i tested the fuel level sender to make sure it worked... and of course it didn't. its suppose to read between 0-90 ohms but mine was reading all over the place. I couldn't buy a new one because they where disconnected and no one was making reproductions for 83's. So i disassembled it, cleaned the resistance wire, reassembled it and it still didn't work I dissembled again and this time polished the wire with 2000 sand paper reassembled and this time it works!
the tank was reassembled and was ready to go back in the car much happiness is experienced.
Then i try installing the tank in the car. nope. Happiness is gone The tank would fit but the filler neck was off center, towards the back of the car. I did a lot of trying to get it to fit and nothing. I was considering cutting the filler neck to get it to line up. Fortunately, I was finally able to bend part of the seam on the tank and get the tank to line up correctly and then it just fell into place and once again much happiness is experienced. I'm really glad i did not cut the filler neck.
This is the tank after being cleaned and painted. The tank i got was from an 85 T/A and was originally painted, The 82 and 83's tanks where not painted from the factory. They where shiny unpainted metal. I considered not painting it for authenticity but i decided to paint it to help protect it.
The last issue i have is what to do with the aftermarket tank. i bought it from Summitracing and they said i could return it but shipping it back was around $120. its not worth it ship it back. I'll probably try to sell it. I should have bought something big like this from a local parts store.
Installing the front coil springs is the single worst job of working on any car. I bought a cheap coil spring compressor like the kind that is rented from the auto parts store and it was horrible. It did get the springs out but I could not get it to compress the spring. The hooks would not line up right. It was scary unsafe. Since I don�t have the engine in the car, the front end was to light to try to compress the spring with a jack under the A-arm. It would just lift up the front end. I ended up buying a OTC 7045B Front Coil Spring Compressor. What a difference the right tool makes. The process was still unnerving, but I didn�t feel like I could die at any moment so that�s good.
Those coil spring compressors can get you seriously hurt or worse. I had one "let-go" on me and if I hadn't chained the spring to the frame it could have been bad. Knocked my hand numb for a while but thankful it wasn't worse. This is one job where a proper quality tool is a MUST!
Those coil spring compressors can get you seriously hurt or worse. I had one "let-go" on me and if I hadn't chained the spring to the frame it could have been bad. Knocked my hand numb for a while but thankful it wasn't worse. This is one job where a proper quality tool is a MUST!
BTW-Looking good!
glad your ok, that is my fear every time i work on the front springs.
Front brakes are on. It turns out the brake hoses are specific to left and right side. I could get the hose to fit in the bracket on the body, then i figured out the hose was on the wrong side. Once i switched the hoses around it all fell into place.
The rotors are ACDelco gold. I bought them in 2007 when i was buying parts. My goal is to have the car on its wheels by the end of the year. I spent the last few months getting the parts ready and its time to start reassembling.
Good news, I didn’t die. Bad news, I installed the front coil springs upside down. One thing I do is double check my work and after inspecting the front end, I discovered the springs where upside down. I'm not sure how I did that but I did. I spent half a day flipping them over. Fortunately, I didn’t have disassemble everything and I’m really glad I have a good quality spring compressor. I discover the error a few days ago and have been dreading fixing it all week. Did I mention front coil spring is the worst job but it's fixed now. Stuff like this is bound to happen.
The rearend is back in the car. I also took this opportunity to swap out the open diff to a posi.
The internet be all like, �it�s easy to swap the diff and install a posi�. HA. Once I started researching what I needed to do it became clear there is an art to setting up the rearend. I reused the pinion and rear, so I didn�t have to mess with the pinion depth. I did have to buy a few tools to measure backlash and preload. Getting the proper carrier shim setup was a pain.
It took a month to clean up and rebuild the rear axle. Then another month to get everything ready to install it.
This car also has rear disc brake which is a less common option. They have an integrated parking brake and I couldn�t figure out how to orientate parking brake lever but turns out it didn�t matter. Once the calipers were installed they self-adjust with a few pulls of the lever.
Here is a before and after of the rear axle. The before was taken in 2007 as I was disassembling the car. The after was taken just after I installed the axle.
Here it is, the massively powerful L69� well for 1983... ok maybe not.
It�s time to start working on the engine. The car had 67K miles and ran ok when I started disassembly in 2007. I was a little worried about rust on the inside due to being out of the car for so long. It has always been stored in a garage and covered but I stored it with the spark plugs removed. In hindsight, I should have left them in but oh well. On the plus side, the outside has a nice coating of dirt and oil to protect it.
After taking the heads off, It was a relief to see the cylinder wall were in good shape, there is carbon build up but that is expected. The valve train shows little ware and everything came apart easily, nothing was stuck or binding so that�s good.
It has the original timing set which will need to be replaced due to being loose. It also has the �Plastic� teeth which I heard are bad. The balancer also need to be replace.
I�m in the process of inspecting the engine and cylinder #7 had a bent rod. The weird part is the rest of the engine looks great. There is normal were for 70K, the camshaft and crankshaft look good. The pistons look good and the cylinder walls are smooth. No scratching, no rust or other problems. There is even still crosshatching visible. The cylinder heads look good too. Even cylinder #7 looks good. When I dropped the oil pan it was �clean�. The oil was black, no water or sparkles, no sludge. Just dirty black oil.
When I bought the car I only drove it for maybe 30-40 miles then started taking it apart. It ran a little rough, but it was like old car rough not mechanically broken rough. I remember it pulled strong and was a hoot to drive.
Looking online it seem the most common causes for bent rod is hydro lock or over revving the engine. I don�t see any evidence of water in the block. It is a manual so I�m guessing it was over revved at some point.
Happened to a friends tpi car that he bought from another friend. Turns out the firing order was wrong on 4 cyls. 5-7 were swapped and can't remember the other 2.
Tore into it because of a weird knock, turns out the rod was bent just enough for the counterweight to hit the bottom of the piston skirt. New rod and it was good to go.
I’ve been exploring the next steps with the engine. I have two routes but im not sure which way things will work out. I’m looking at having it rebuilt professionally but I have only found one place locally that will do it. However, they are backed up and it will be a few months if they even decide to do the work. The other machine shops in my area that I talked to are not interested in building a stock 305. They only do custom work. The other option is to rebuild it myself. I’ll have a better idea in a few months.
If anyone knows a good machine shop in the Pacific Northwest let me know.
In the meantime, I have started putting the doors back together. I’m most worried about the order of operations. Some things have to go in before other things and its been many years since i took them apart. I do have other Firebirds for reference which is super helpful. My car came with power windows but did not come with power locks and I’m adding power locks so I needed to track down a few parts for that. The other problem I have is that the car is not painted yet. So, I can’t install the door handles and lock or the triangle thing which is needed to support an internal channel that supports the glass. I should be able to get 80% of the door reassemble. That's the goal for now.
Here are the passenger door parts cleaned up and ready to install. I tested the motor and it works good. At least with no load. i do have a new motor if needed but we'll see once the glass is installed.
Got the cluster back in. I restored this back in 07 when I started this project. Luckily it was in good shape, however I�m not able to test it. We�ll see if it works once I power up the car.
The rearend is back in the car. I also took this opportunity to swap out the open diff to a posi.
The internet be all like, �it�s easy to swap the diff and install a posi�. HA. Once I started researching what I needed to do it became clear there is an art to setting up the rearend. I reused the pinion and rear, so I didn�t have to mess with the pinion depth. I did have to buy a few tools to measure backlash and preload. Getting the proper carrier shim setup was a pain.
It took a month to clean up and rebuild the rear axle. Then another month to get everything ready to install it.
This car also has rear disc brake which is a less common option. They have an integrated parking brake and I couldn�t figure out how to orientate parking brake lever but turns out it didn�t matter. Once the calipers were installed they self-adjust with a few pulls of the lever.
Here is a before and after of the rear axle. The before was taken in 2007 as I was disassembling the car. The after was taken just after I installed the axle.
Looks amazing! What product did use use to remove rust and is that bare metal finish or painted?
Looks amazing! What product did use use to remove rust and is that bare metal finish or painted?
They are bare metal. That's the correct finish for this axle. I used used Evapo-Rust to clean the parts then used rust prevention magic to keep it from rusting again.
I�ve been spending time putting the wiring harnesses back in the car. The picture is a little busy, but wires make things a mess. There is a slight reflection of the parking lights, so those work. I did have some initial issues with the key in buzzer, taillights and computer but after much troubleshooting I was able to get those issue resolved. The issue basically came down to some grounds not being connected. Which I guess is expected with the janky setup I had to test. After making sure all the grounds where connected I was able to all that I could and even connect to the ECM and read codes. There are a lot of codes. I�m guessing because there is no engine 😊
I also tested the radio, heater controls and the most important function, the remote hatch release. My first three Firebirds were S/Es and they had remote hatch release. The T/As I have now don�t have remote hatch release and I�ve always missed it. Pressing the hatch release button and hearing the clunk of the release solenoid was very nostalgic.
I do have one more issue, the seat belt warning light on the dash is not working. The bulb works the wiring all checks out. I�ve tried two different audio alarm modules which is supposed to control the dash light but nothing.
I�ll also say I had a problem with Key Warning Buzzer switch in the steering column (part 7811092). NOS switches are like $80 on a popular internet auction site so I bought a OER part. I've had good and bad luck with OER. In this case the switch I got was not good and caused much sadness. It was made well enough, but the contacts ( the things that look like antennas) did not line up with the switch on the column. I did get it work but it was a pain.
I love what you are doing with this project! You make everything seem so easy and yet have a sense of calm when discussing the work you have put into it. I have a 2010 Camaro in which the AC evaporator took a dump on me and freon is leaking on the underside of the car. The AC system is bone dry now. The entire dash and windshield must come out in order to replace the evaporator with a new one. Removing and reinstalling the dash and airbags etc... is like working on the space shuttle and I'm frightened to do any of this. If I have the dealership do it... it will cost me $2900 plus tax! Yikes!
I’ve been debating if I was going to post this because this is something probably no one will care about but it’s part to the process and make for some good content.
A little background. When GM built these cars, they were dipped in light gray primer then painted. GM did not intentionality paint the undercarriage, but they would end up with some amount of over spray. I have seen some cars with a lot of overspray to the point it almost looks painted to cars with very little over-spray.
My car had very little over-spray, so the undercarriage was mostly gray. I found SEM 62243 Ez-Coat is a match for the primer gray color. I painted the undercarriage and was happy with the results. Then I got the bright idea to try to match the overspray. That was a mistake. I uses spray paint and what I found was the spray pattern was not fine enough. It did not look good. So I tried to fix it by adjusting my pattern and painting a little more. It looked terrible. My solution was to spray the entire undercarriage black. Now I have all-black undercarriage. It looked fine but was not correct. I told myself It was fine and finished putting the rear suspension together.
During this project I’ve been taking great care to restore it to the way it would have been in 83 and every time I looked under the car it would bother me.
I ended up taking everything apart and painted the underside the correct color. It was work I was not looking forward to but I’m glad it’s done. It only took me about 4 hours to remove everything and paint. Then about 3 hours the next day to put everything back together.
On a side note. The SEMS Light Green Part #62233 is a match for the green color of the fuel and brake lines.
Here are some pictures of the undercarriage. It looks much more original and turned out very well.
It has been one year since I started my restoration project.
Here are a few things I have learned so far along the way.
� Before starting I created a plan, I took into account the order of assembly, what needed to be installed when to not interfere with other parts. The plan was to start at the rear undercarriage, work my way forward under the car, the engine and front end. Move to the interior and finish at the back of the car. That did not happen, due to the time to track down parts and delays with getting some professional services, like getting the engine rebuilt. My plan is out the windows. I ended up jumping from task to task depending what parts I have handily.
� Parts are more expensive than I was expecting, I grew up in a time when GM parts for these cars where cheap because they where everywhere. That is not the case anymore. There are cheap parts out there, but they are CHEAP parts. Good quality or NOS parts are costly. I�m glad I bought a bunch of part 15 years with I got the car.
� Finding local professional services is more challenging than I was expecting. Again, I grew up in a time when there was a machine shop and autobody shop on every corner. That�s a bit of an exaggeration but I hope you get the idea, that�s not the case anymore. I don�t know if it�s just where I live but these types of services are much harder to find locally.
� I have not been one to participate in social networks and I don�t post much, but I have found FB a valuable tool for information and contacts for getting parts. I have also found youtube valuable for information on how to do things, which is something I would not have thought of 15 years ago.
That�s a lot of words, for those of you who prefer picture, here you go.
These are parts I got back from power coating. I dropped off 31 parts and when I went to pick them up, they brought out 16 parts. One of my fears was losing something and when they brought out only half the parts there was a moment of� shall we say anxiety. but they did have all the parts, they were put on a different shelf in the back.
Here is the catalytic converter hanger. The rubber had separated so I had to rebuild it. Fortunately the transmission was leaking so it was covered in trans fluid with preserved the metal parts. I just had to replace the rubber strap.
 05-24-2023, 10:15 PM


 I dissembled again and this time polished the wire with 2000 sand paper reassembled and this time it works!