When you click on links to various merchants on this site and make a purchase, this can result in this site earning a commission. Affiliate programs and affiliations include, but are not limited to, the eBay Partner Network.
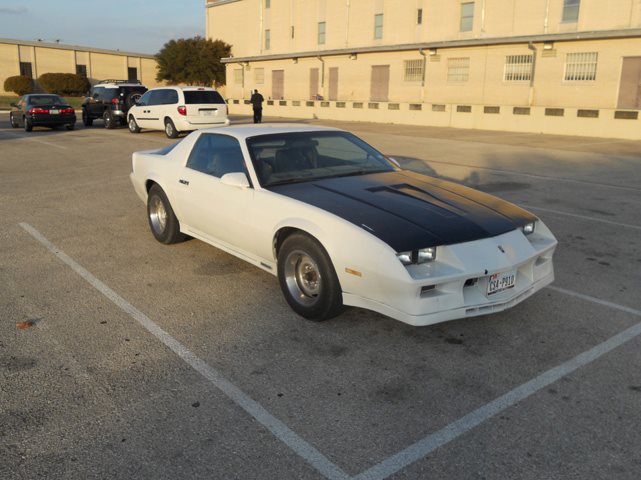
When I returned from Iraq in 2011, I had some money in the bank, and no car. I had always wanted a third gen Camaro, so I went on the internet and found an 83 Z28 for sale. I bought it, and started playing with it. Here's how the car looked when I first bought it. A little rough, but it had a straight body, ran and drove half decent.
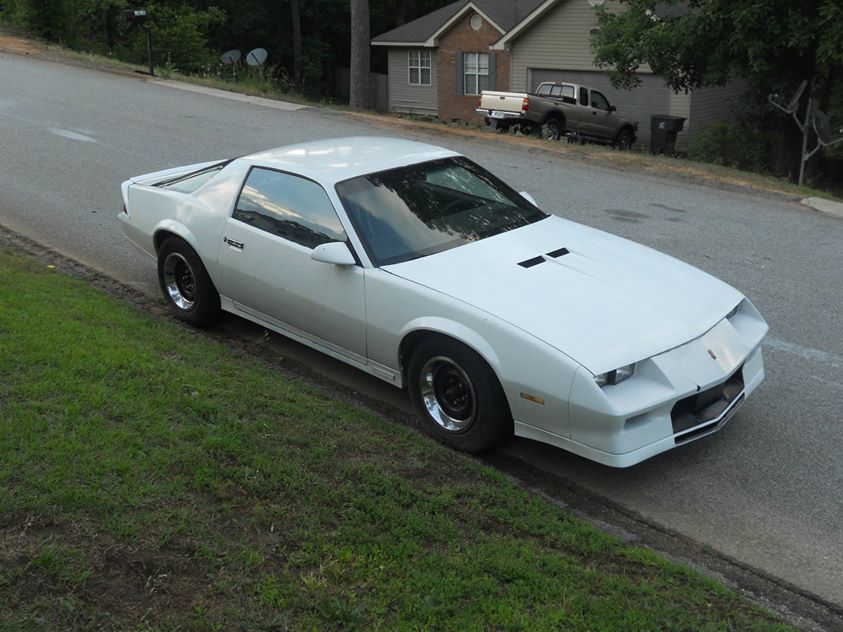
Fast forward a few years, and I've PCS'd from that duty station, bought a house, got married, and needed a second car. I had been using my truck for some time, but it was time to pull the Camaro back from my Dad's house and put it back on the street. A few months later, I had been tweaking things and had it running better and finally worked out all of the previous owner's "fixes". Here's a shot of how it looked:
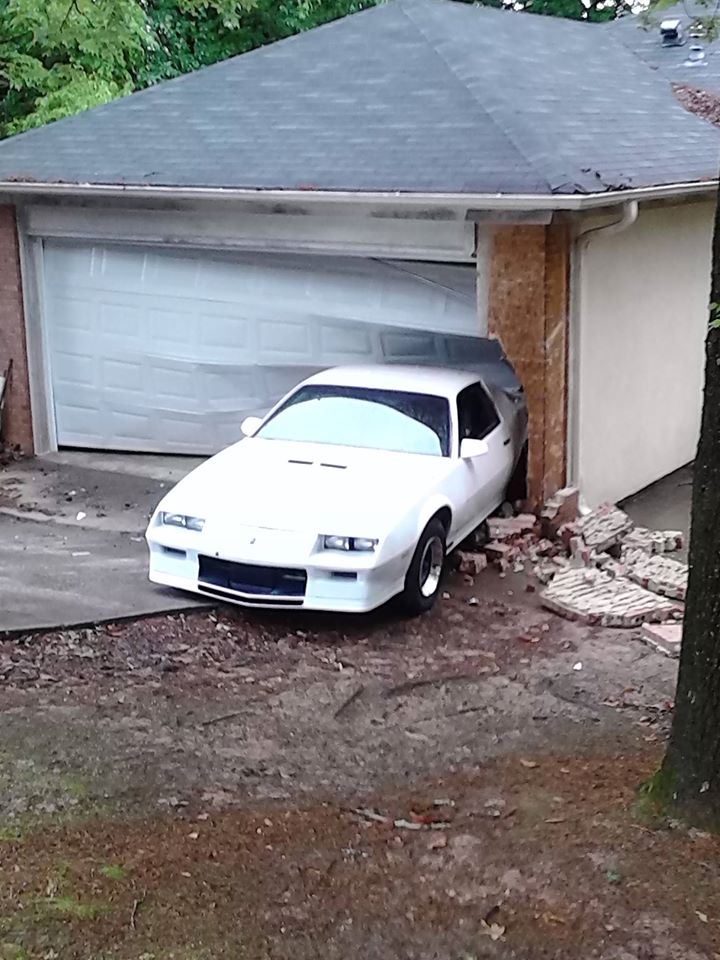
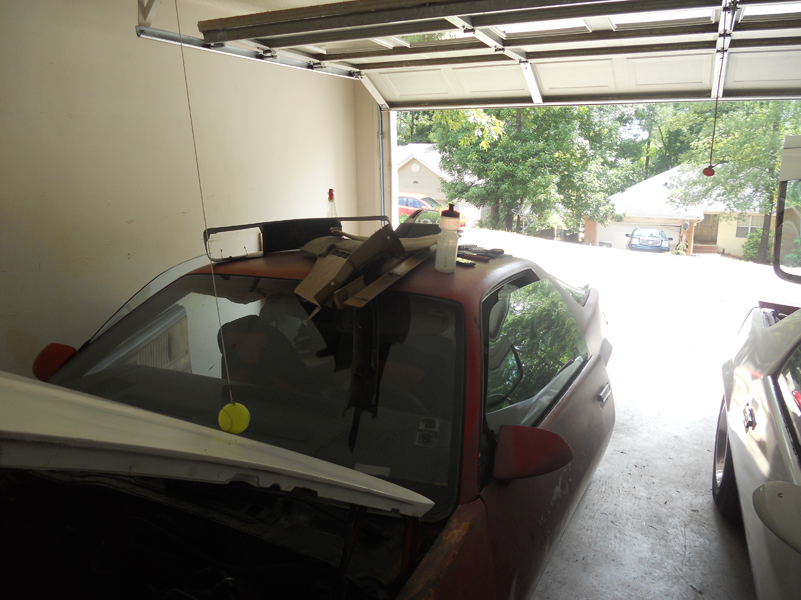
My house is on a hill. Yes, I bet some of you have already figured out what is coming, but here it is: Pulling into my driveway, my garage door clicker quit working. No big deal, or so I thought. I shut the car off, put it in gear, pulled the brake, and walked into my house to hit the button in the garage. I got around to my kitchen and heard a loud BOOM from outside. When I opened the door, this is what I found:
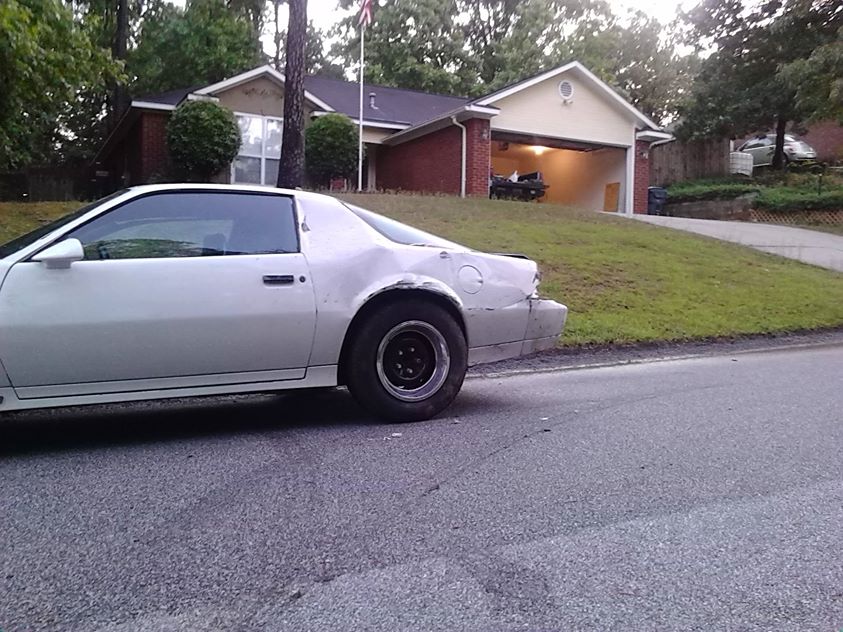
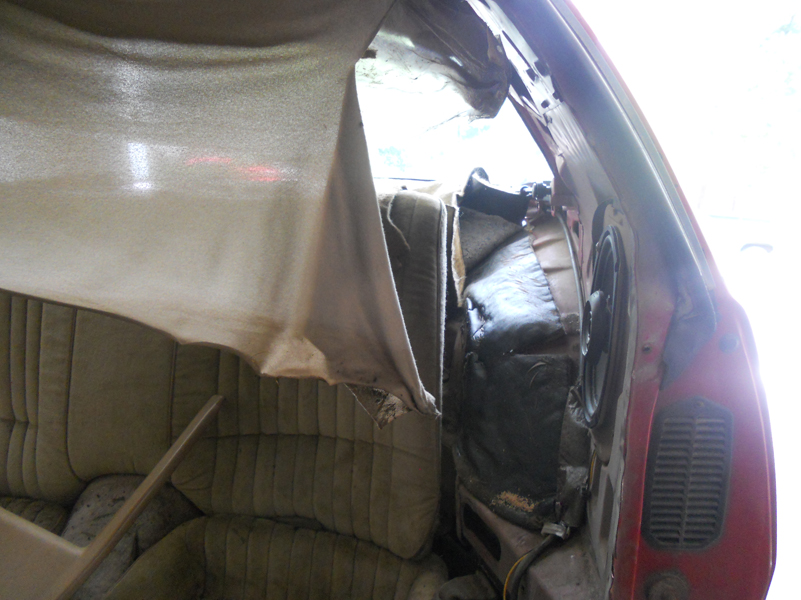
Yes, the car rolled down my driveway, crossed the street, and into my neighbor's house. Adding insult to injury, there's a BMW 5 series behind that garage door. The cops that came said the e-brake failed. When pulling the car out of my neighbor's house, the tow truck driver needed to reposition. When the brake was pulled to keep it in place, it popped right back down. Here's a shot of the side, where you can see how smushed up the quarter is.
Lots of people have said it can be fixed, but I really don't feel like fixing this car any more. This car is bad luck to me at this point. So, me being the thinker that I am, I thought to myself: "Self, there are tons of third gen shells out there people sell for NOTHING!" And I was right.
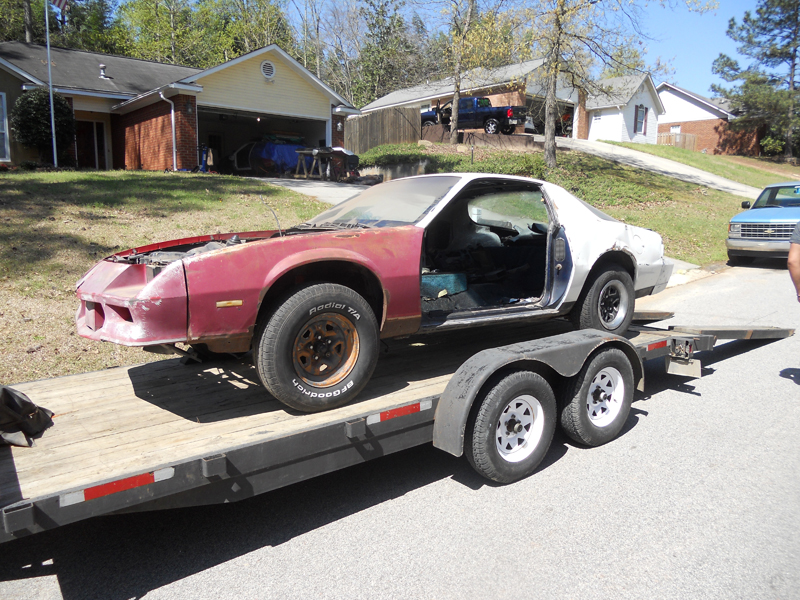
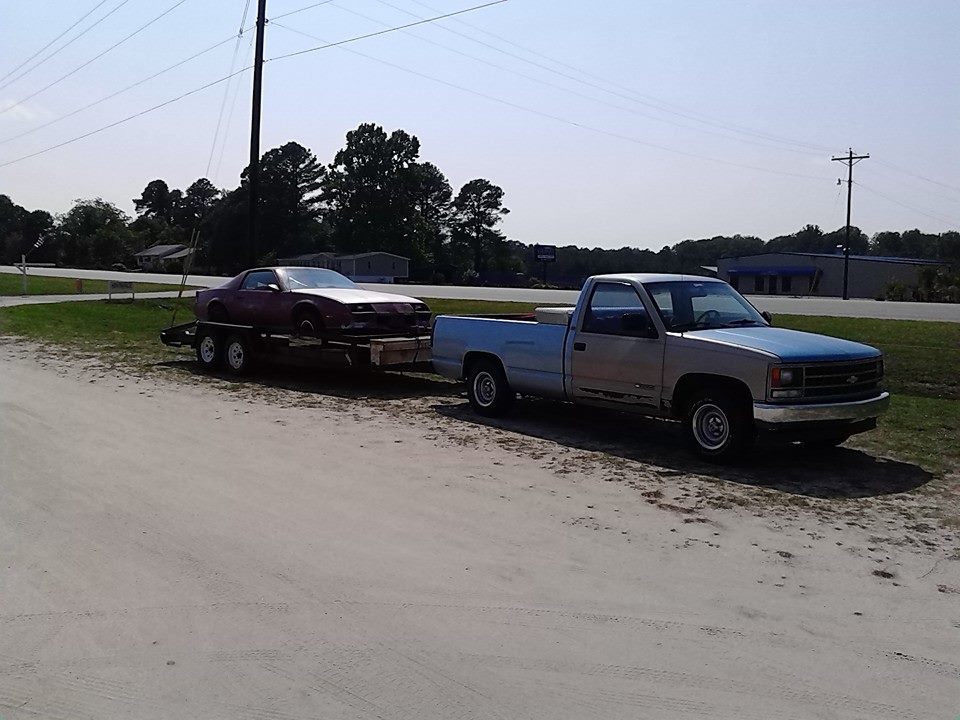
A few weeks passed, and once the depression of losing the car wore off, I decided that finding a shell to play with was the way I wanted to handle the situation. One night on a whim, I checked Craigslist for a shell. BOOM! I found an ad for a car an hour away, same year, hardtop like mine. Minus motor and transmission, but with an extra hood. I called the guy, and we agreed on a price. The next afternoon, I had a clean titled shell on my trailer, headed to the house.
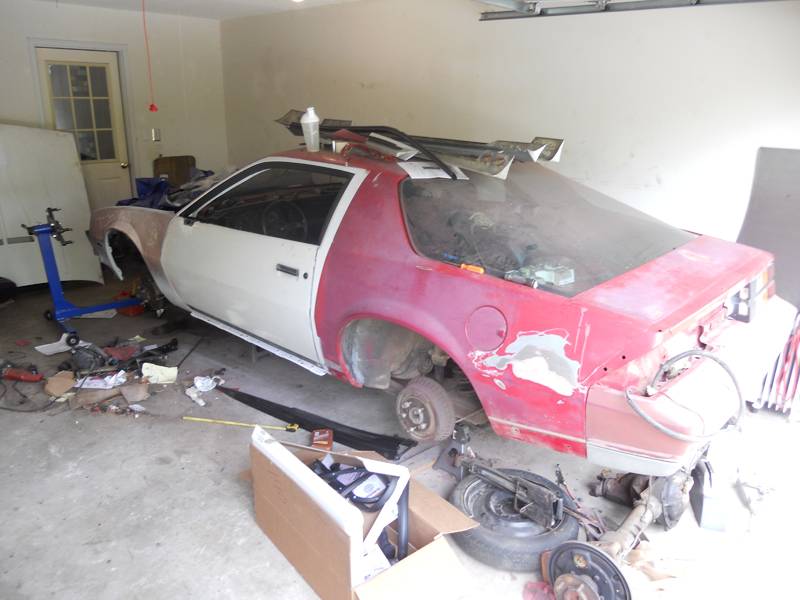
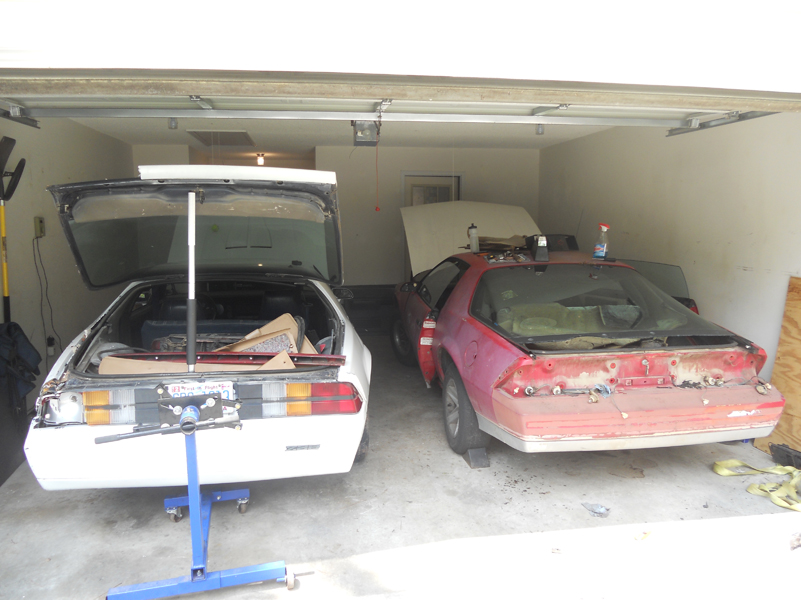
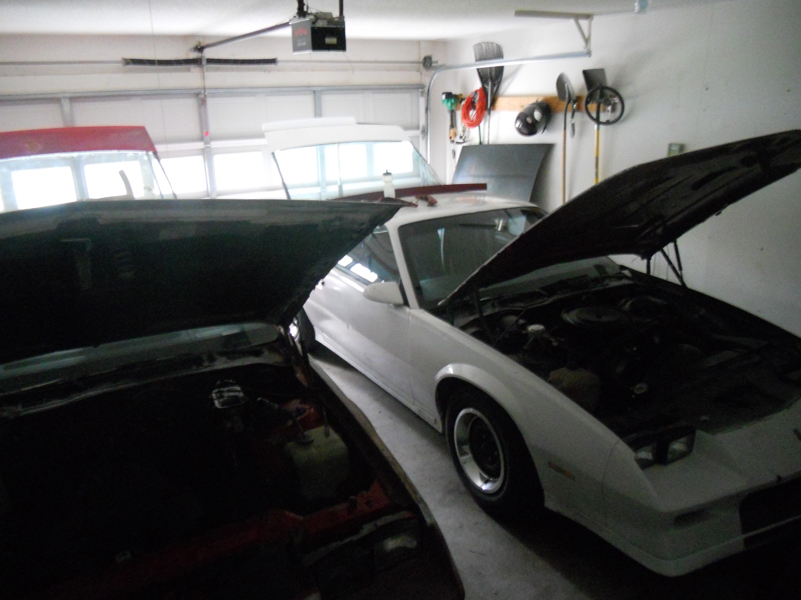
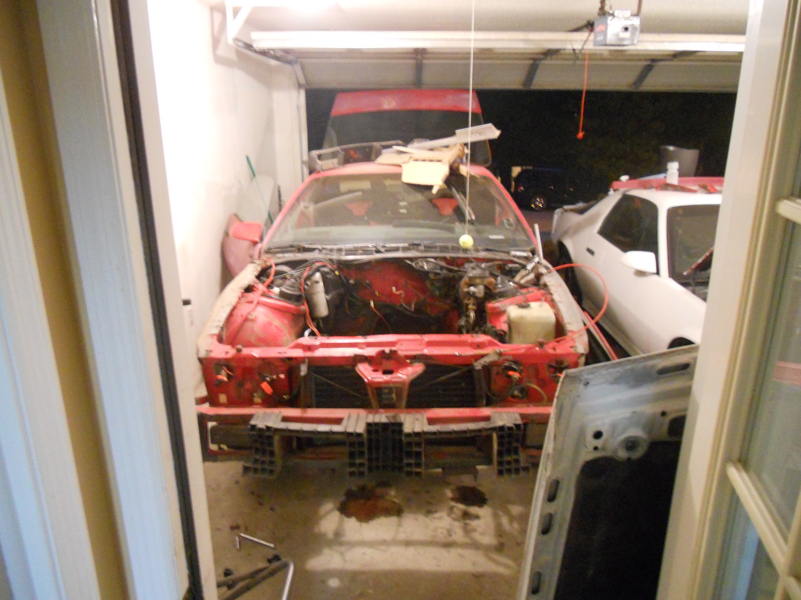
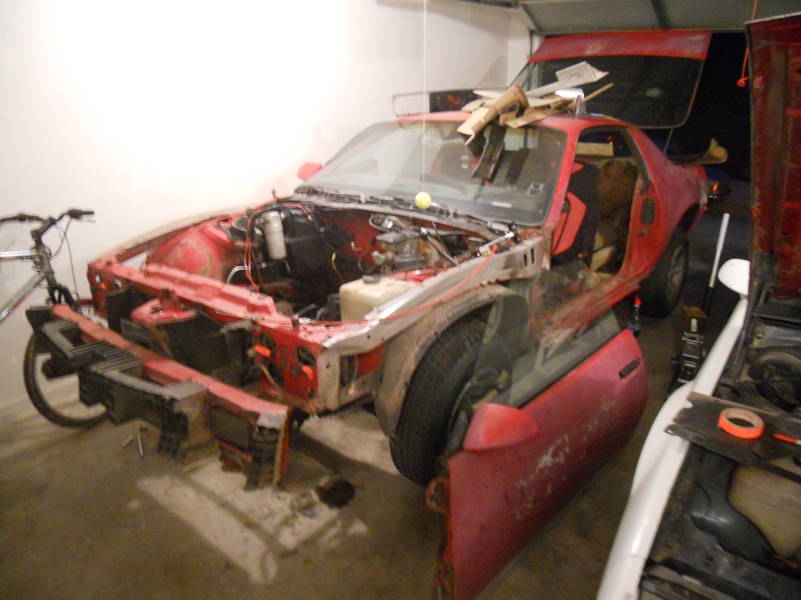
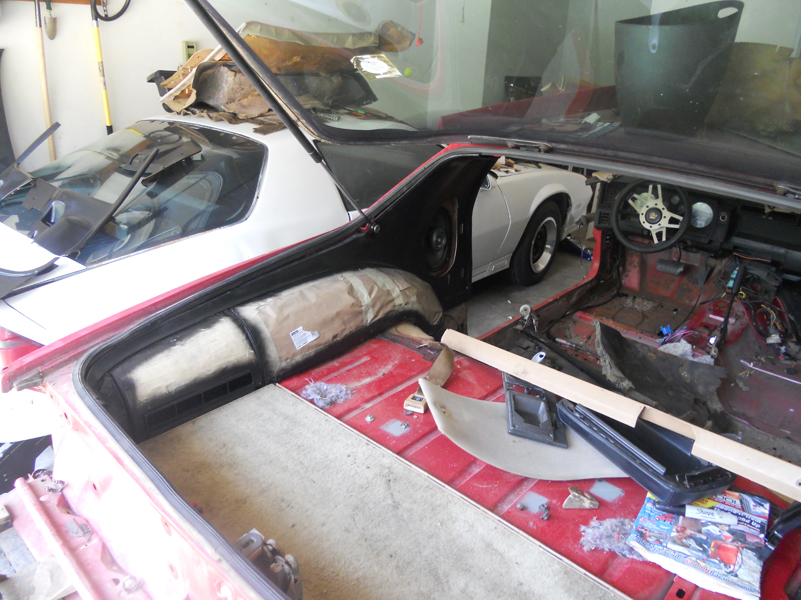
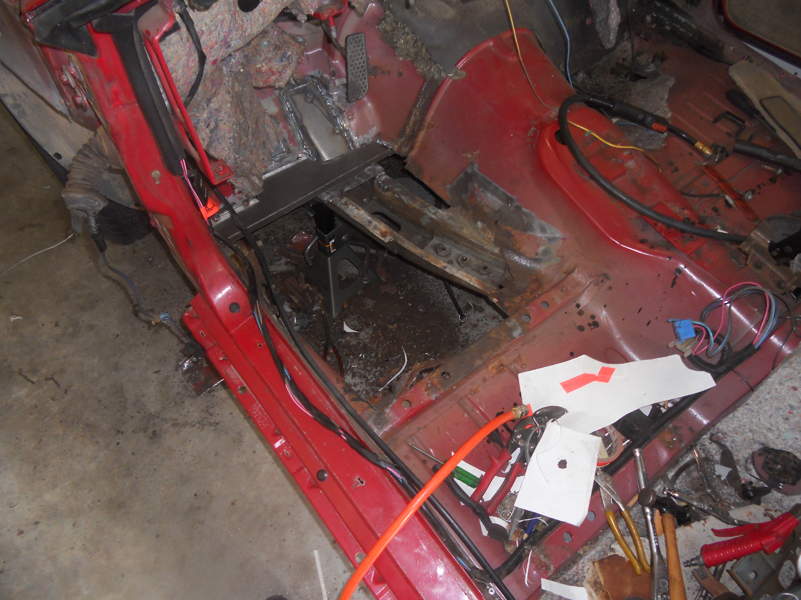
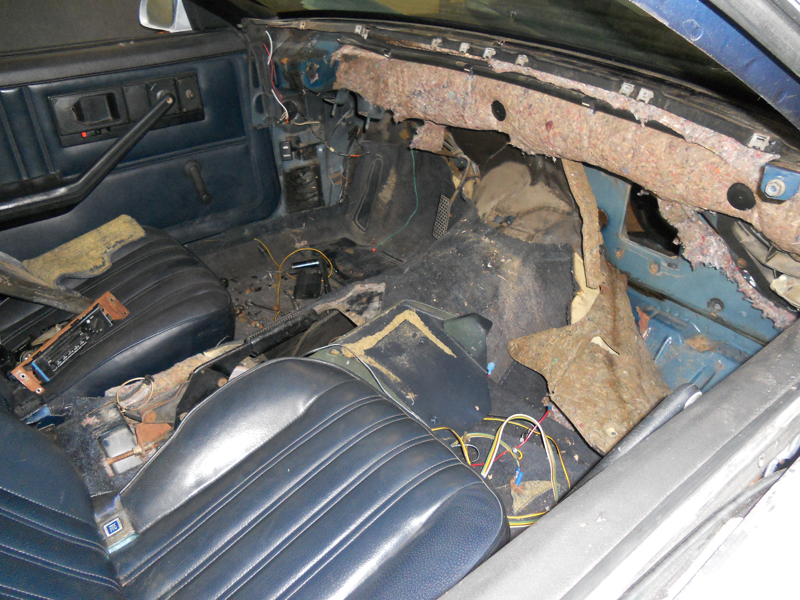
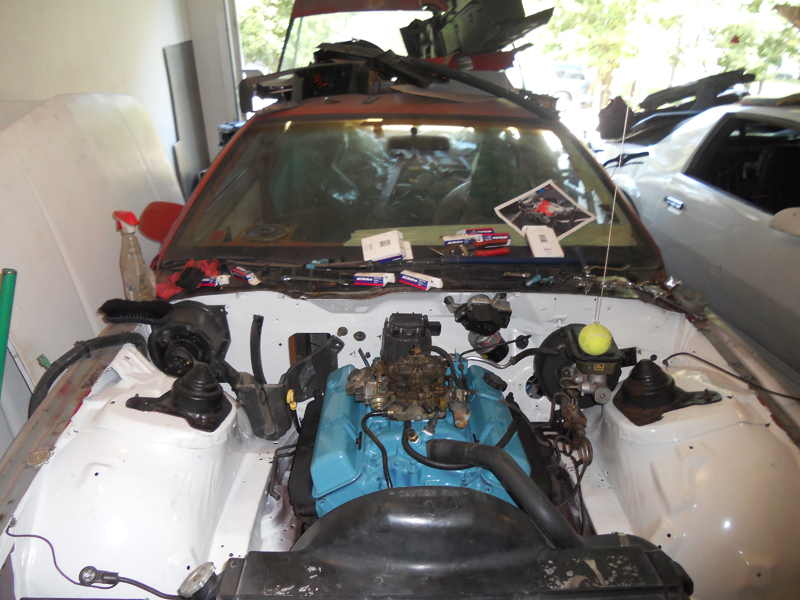
The Army takes a lot of my time, so it took until today to get to work on the cars. Today was day one of the new car teardown. So far the plan is to use as much out of the new shell as possible. I have a little bit of time to play with to get the car on the road, so I'm going through the car a bit more thoroughly than a simple engine & trans swap. Here's some pictures of the "new" car:
And, while I'm at it, here's some pics of the two in my garage. Some parts have already been swapped, like the hatch struts. The front bumper and some of the ground effects will be taken off the old car, also.
For the time being, I'm going to swap the 305 & T5 from my old car to get this one on the road. That is, of course, unless I find something better here.
My wife's immigration status is getting closer. She has her interview soon, and when she is eligible, we're going to buy her a car in her name. That will leave the truck free as my DD, and I can start REALLY playing with the Camaro.
The eventual plan is to drop in an LFX v6 from a 5th gen. I love unconventional!
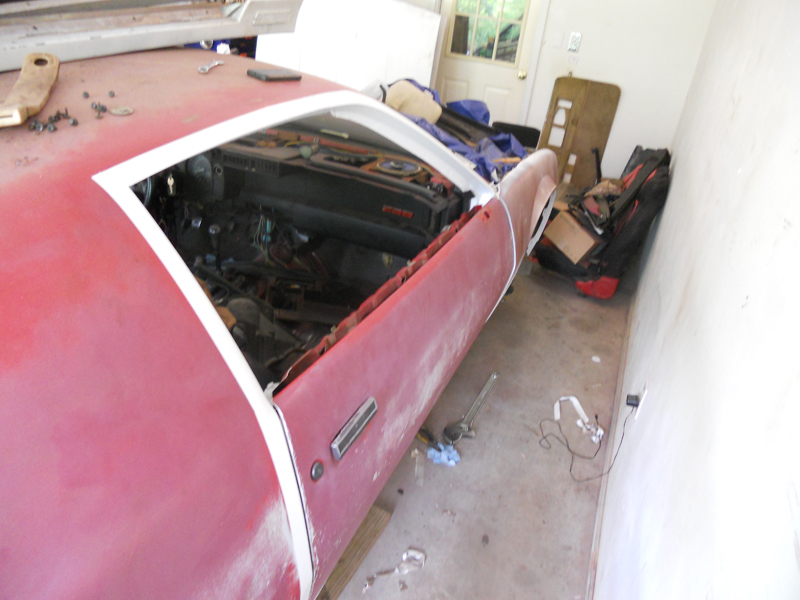
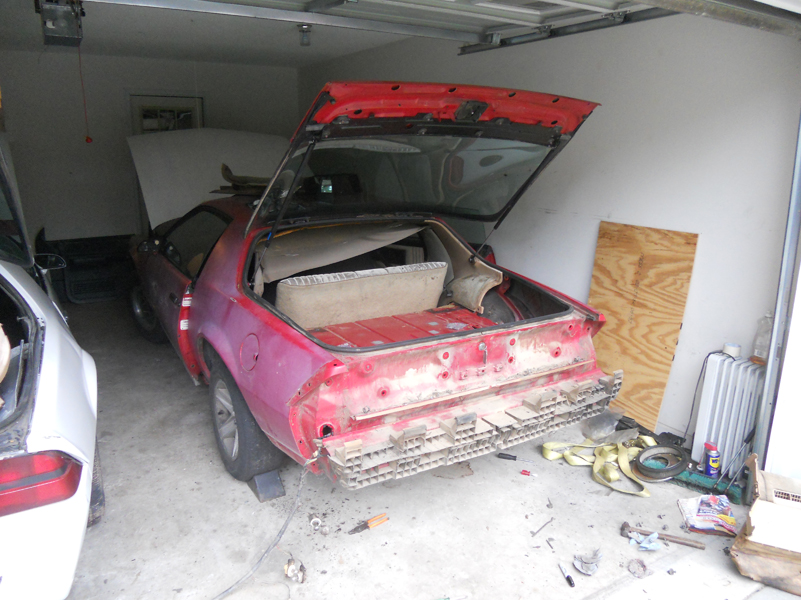
So a few weeks have passed since I bought this new car, and I am fairly happy with it so far. I've gotten the entire front clip off of it, and the driver's door. Most of the interior is out, also. I've got parts and pieces all over the garage and even more still stored in the trunks of both cars.
Surprisingly, the interior paneling was all very much intact, minus the clips being extremely brittle! I found some "Trim & Panel" paint at the parts store, and tested it out. I was surprisingly happy with the results. The panels in the car had carpeting on them, which is obviously the wrong color. I've still got some microfiber headliner material left over which I'm debating on using.
There were a few small surprises with the body that I wasn't expecting. The bottoms of the fenders were both rusted some. I'm not really upset by it, because I have another donor car to grab good parts off of. The flanges on the chassis will need a little work, but thankfully most of the rust was on the fender itself.
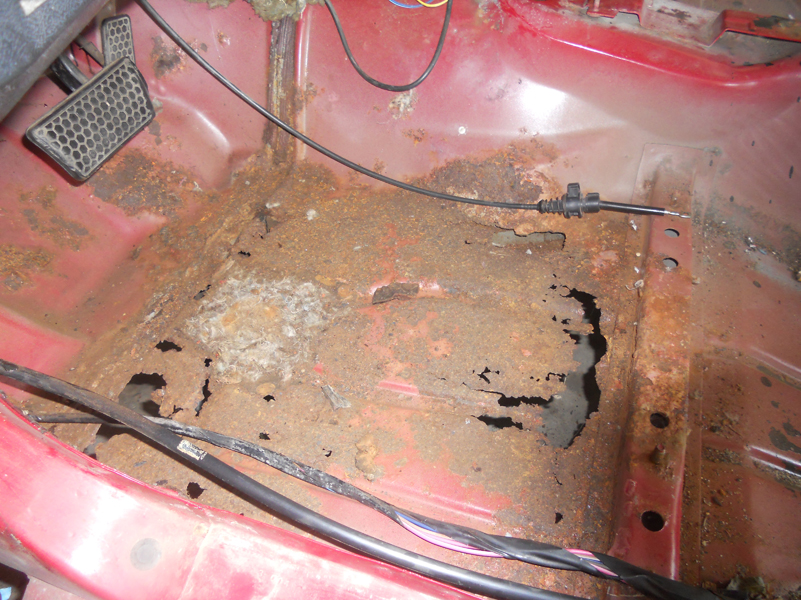
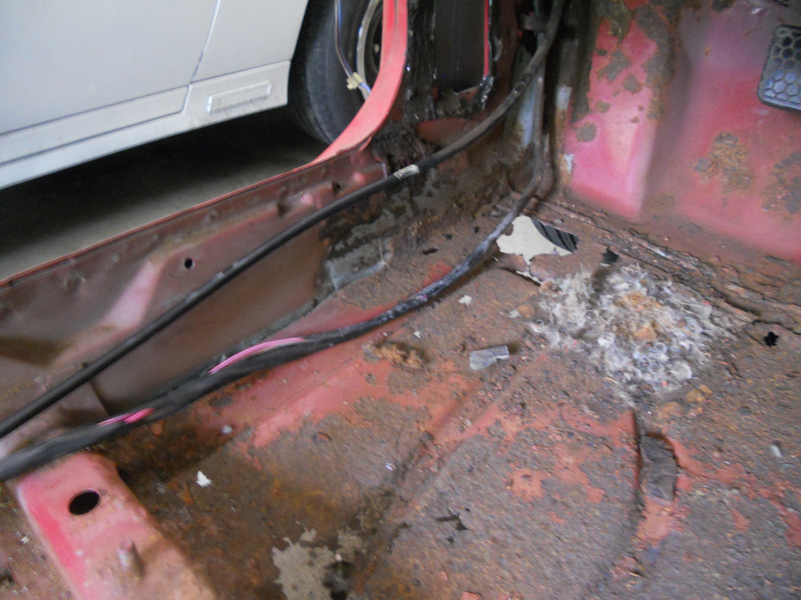
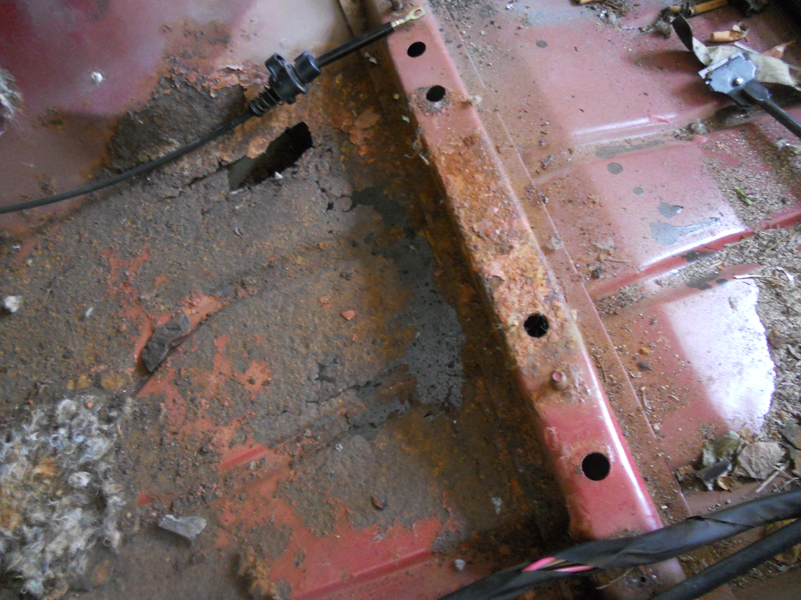
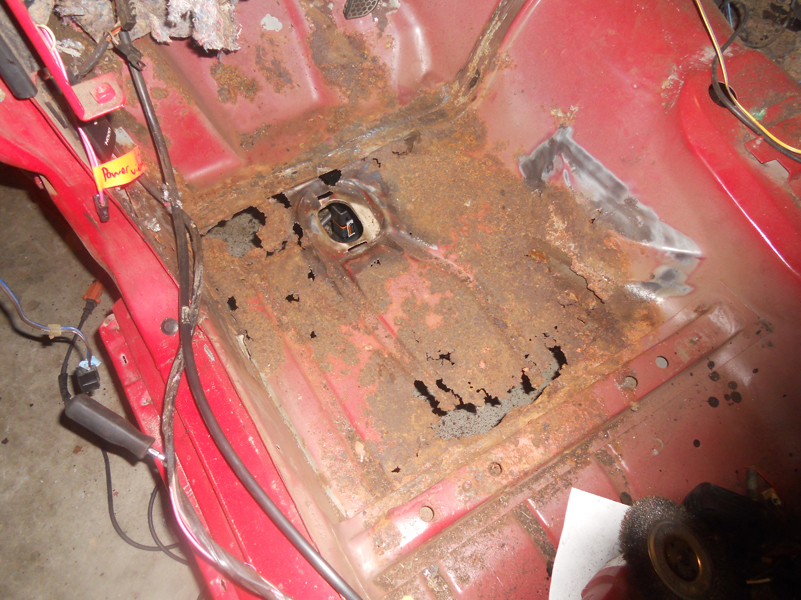
Bad news first: Cancer! Ripped the carpet out and saw this:
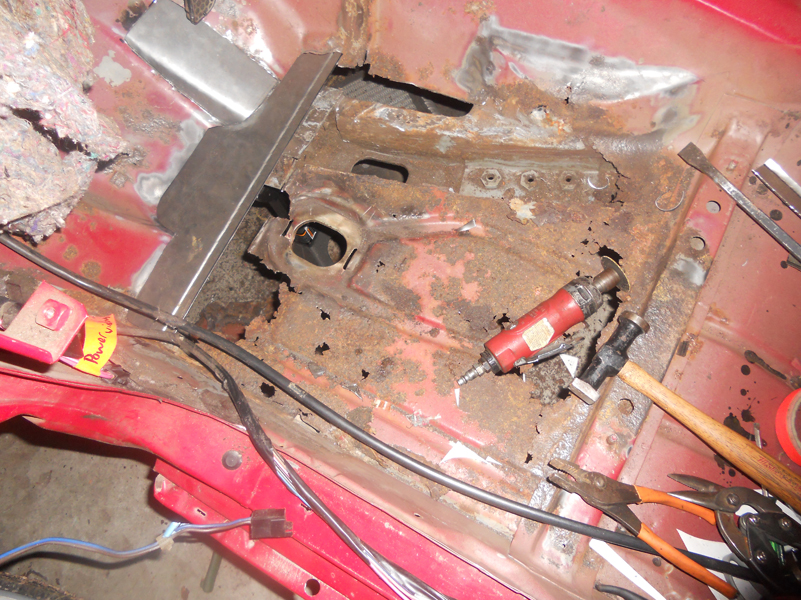
Good news: It isn't THAT bad. It didn't hit the rockers or firewall. Easily repairable, once I pick up my welder from my dad's house. Finding time is proving difficult with the state of the things in the Army right now. More pics of the rust:
While I've been kinda relegated to working on little stuff for the time being, I've started working on the interior some. I've taken the panels and painted most of them. I found a good trim and panel paint and it seems to really adhere well to the plastic pieces. The carpet has been all ripped off and I am in the process of replacing it with a really nice microfiber suede material that I did the headliner with on my old car.
I do have a question: This car was an automatic, my old was a stick. How much is involved in the swap and what all needs to be replaced? I was thinking since I'm this deep into the car, that I'd just replace the entire wiring harness. The only other difference between the two cars is that the new one has power windows. Any input?
Manual swap is pretty basic. Since you are already welding in some new floor pans, I would cut the tunnel out of the white car around the shifter hole. Then use that piece to trace and cut on the new car. This will leave you with a nice factory looking opening. Your shift boot will fit right on. Etc.
You will have to swap the pedals obviously. You will need to drill for the master cylinder on the firewall. Now...to me...this is the worst part of doing a manual swap. Because you get one shot at getting the holes drilled right in order for it to all bolt up and line up with the pedals.
Again...since you are welding on the floor pans...you might want to explore cutting the area out of the white car where the master cylinder mounts, and transplanting it. You dont have a motor in the new car, so that whole area is nicely accessible from both sides.
Depending on your welding ability, you will wind up with a very factory looking swap. Wiring isnt too bad. You'll need to plug in the clutch safety switch...wiring should be down in the driver kick panel area and should plug in. You'll need to wire in the reverse light switch. Of course, if you swap the whole harness, this is also already taken care of.
Only downside to my suggestions is, the white car will have big holes in it haha. So it kind of hurts you if you want to sell it as a clean shell. You can always just cut the hole for the shifter, and drill for the master cylinder. Plenty of threads on how to do that!
I've got other plans for the white car, so cutting parts out of it isn't really something I'm wanting to do. I consider myself a decent sheet metal fabricator, so that honestly doesn't seem like a big task. I'm swapping the entire wiring harness out between the cars, as I've put in a fair bit of work to reverse the white car's PO's "fixes" already. The entire interior is out of it at this point, and I'm in the process of going through the wiring on both cars.
The task that has me worried more than anything is going to be swapping out the automatic pedal assembly for the clutch pedal assembly and getting the linkage correctly. My car came with clutch linkage not hydraulics. I don't think it's going to be terribly complicated, but I haven't really even looked at it yet.
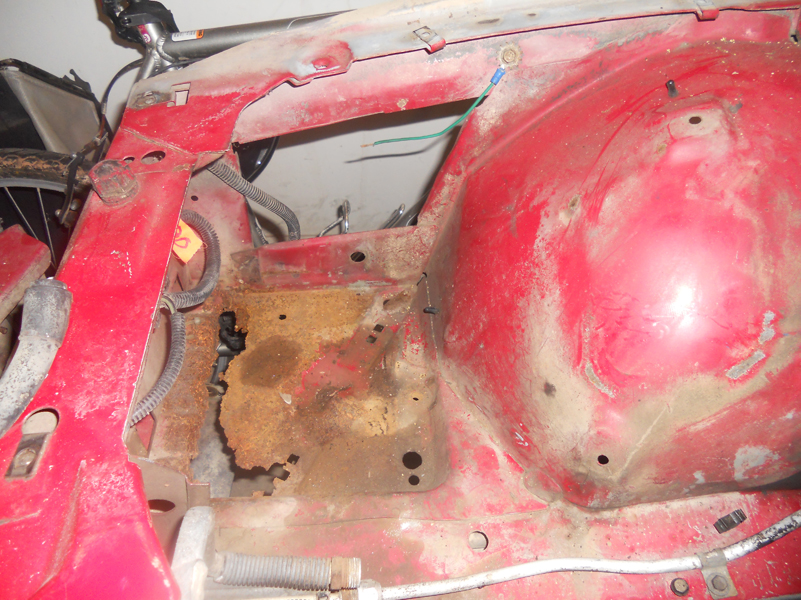
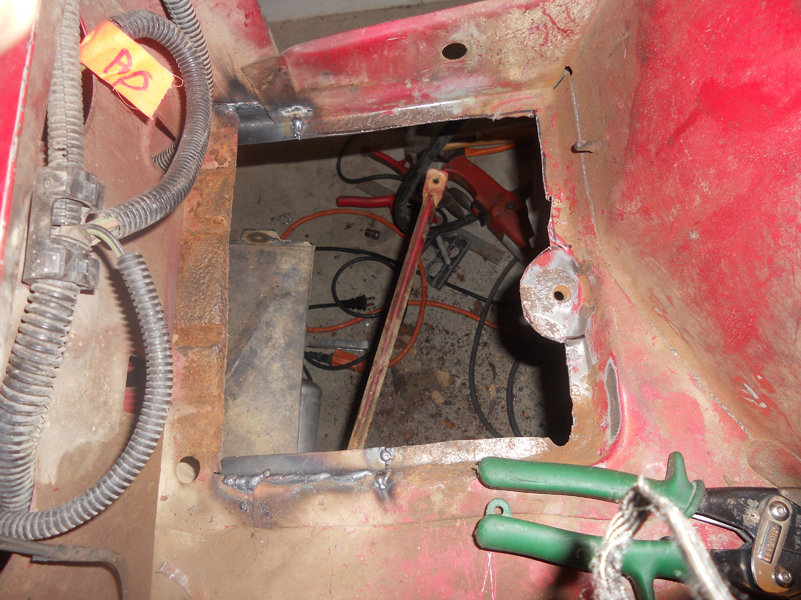
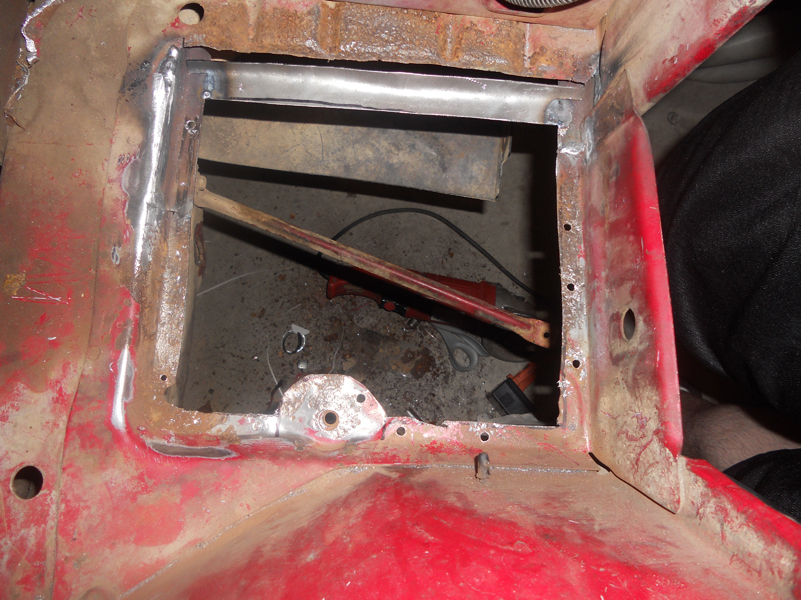
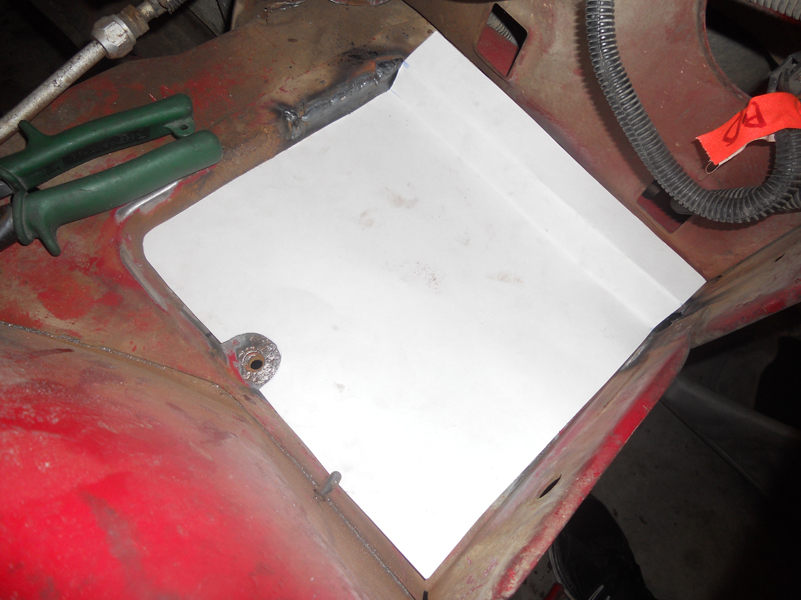
The chemotherapy has begun! Actually, the course is about over and it's about to be put into remission. Here are some pictures showing the replacement of the rusty battery tray. It still needs to be ground, primed, and painted, but it'll do for now.
Don't mind the scabbed welding in the last pictures. Welding onto metal that is less than perfect isn't exactly the easiest thing to do. I used 18 gauge metal for this and the floor pan (pics soon) for a little added strength. I need to get more gas so I can finish my floor pan today. Expect more pictures soon!
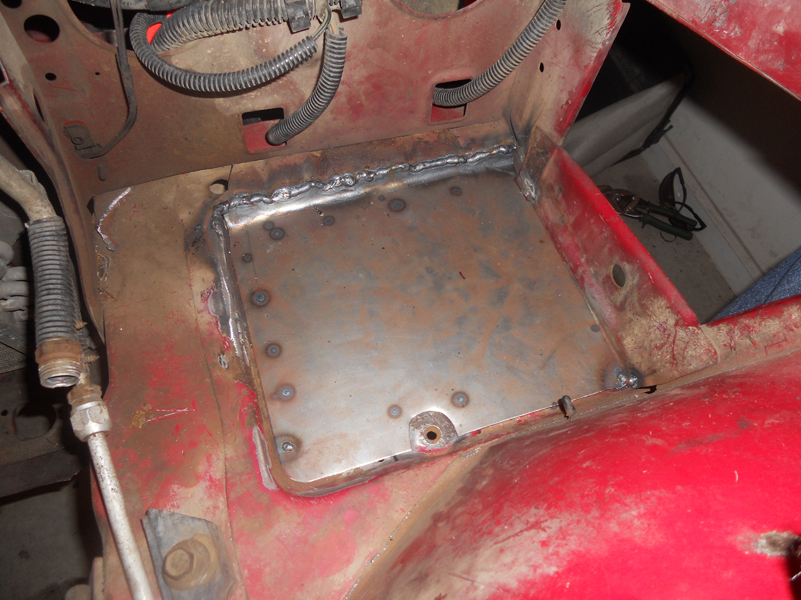
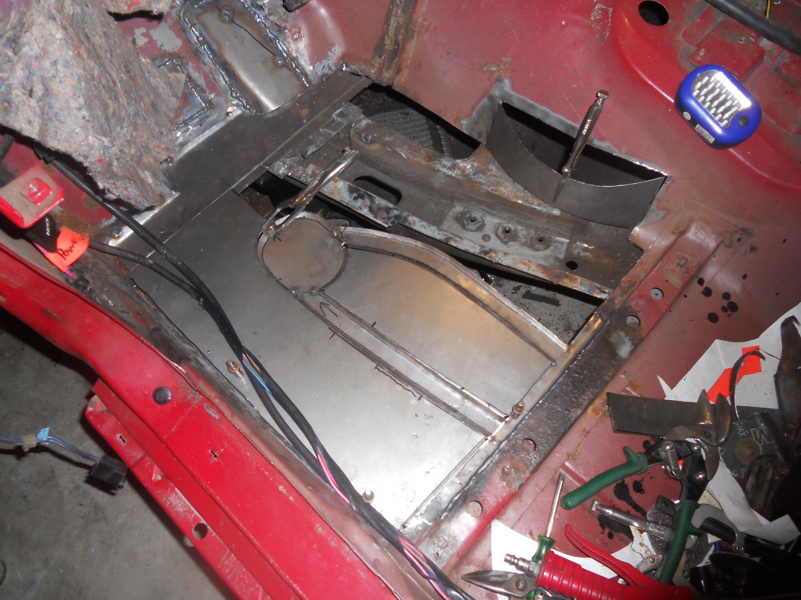
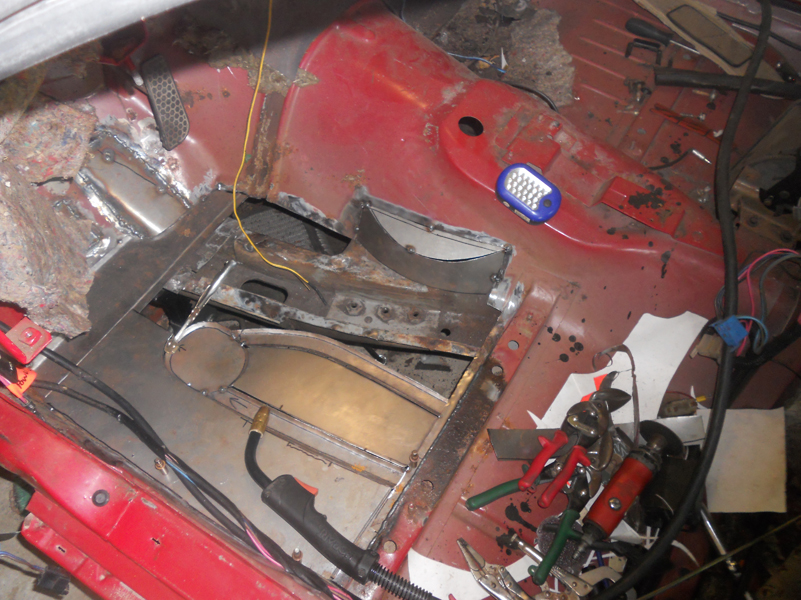
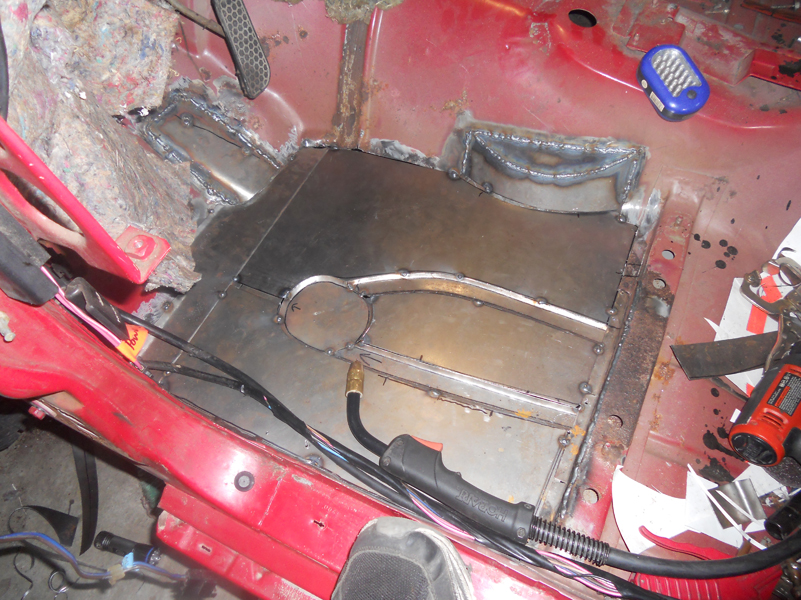
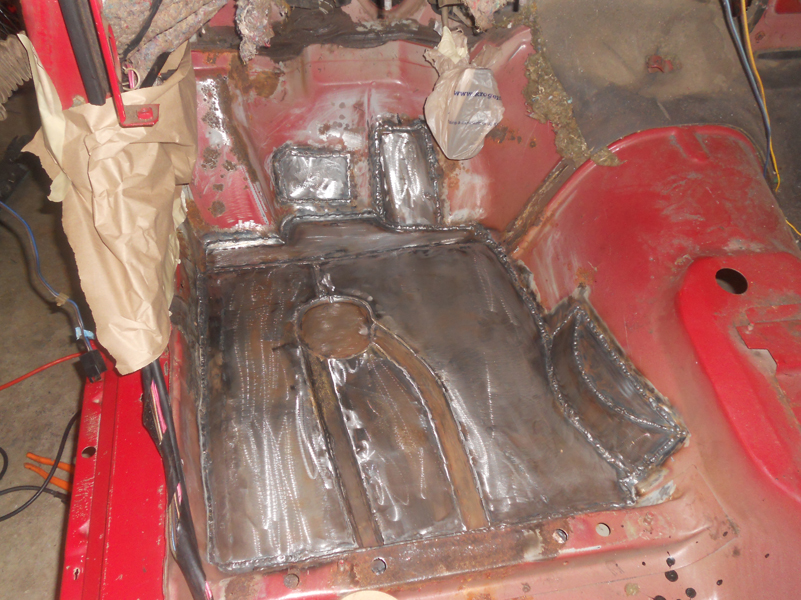
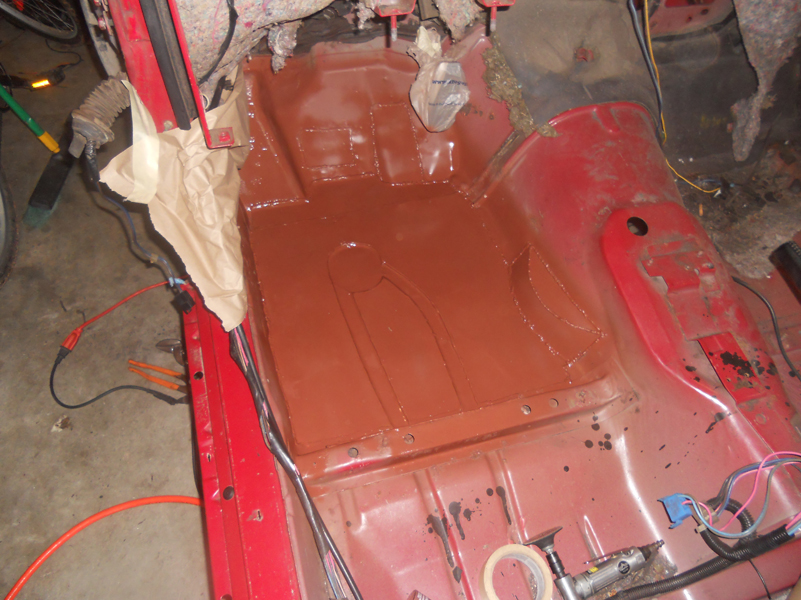
Floor pan is as done as it's going to get. I made it out of 18 gauge, so hopefully it will be at least as strong as the factory panel. Time will tell. Here are the pictures documenting start to finish:
I have to say that your car looks surprisingly well for a car that took down a brick wall.it seems like it would have been fixable for less work than you are doing now.just my opinion.
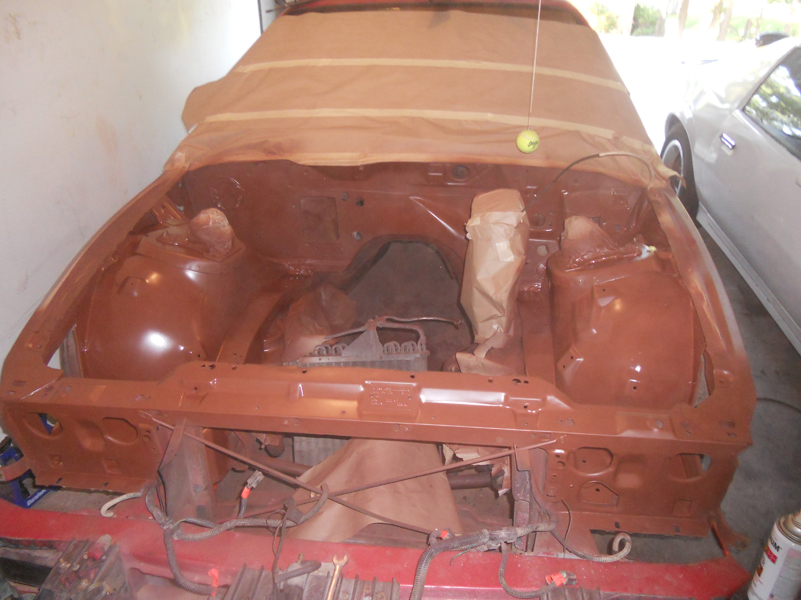
Engine bay has been painted. Going to let it harden and cure over the next few days before I start working on anything in the engine bay. I will probably be pulling the engine out of the old car this coming weekend. More to follow.
I have to say that your car looks surprisingly well for a car that took down a brick wall.it seems like it would have been fixable for less work than you are doing now.just my opinion.
I was thinking the same thing. Just a new quarter panel at worst and maybe the rear hatch. I don't know, were not there to see it in person. I had an 84 Z28 that hit a tree the exact same way while i was storing it at my mom's house years ago. She moved it out of the garage to get something and didn't set the brake and left it in neutral. It rolled out of the driveway and hit a tree across the street. The quarter panel, rear bumper and hatch got tweaked but I think it was only around $1200 to fix.
That was my thought too, but to each his own. Sometimes guys enjoy the challenge, and the work looks top notch--I'll say that. I wish I had the welding and painting skills. I'm working on it, little by little....
I had the same thing happen to me about 20 years ago, except I was extremely lucky. My car rolled down the driveway onto a busy street and luckily a curb stopped it with no damage to anyone or the car.
Sorry it's been a while since I've updated. The Army has been taking a LOT of my time lately with the BS going on in the sandbox.
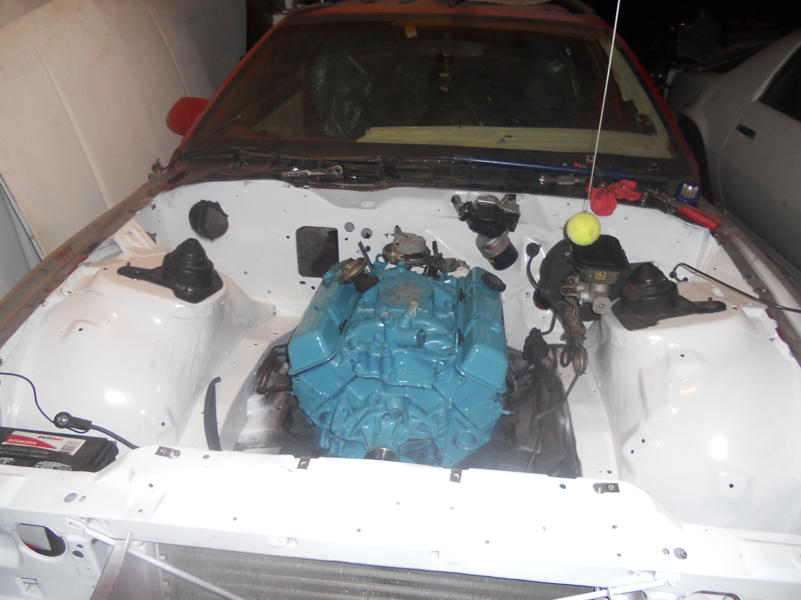
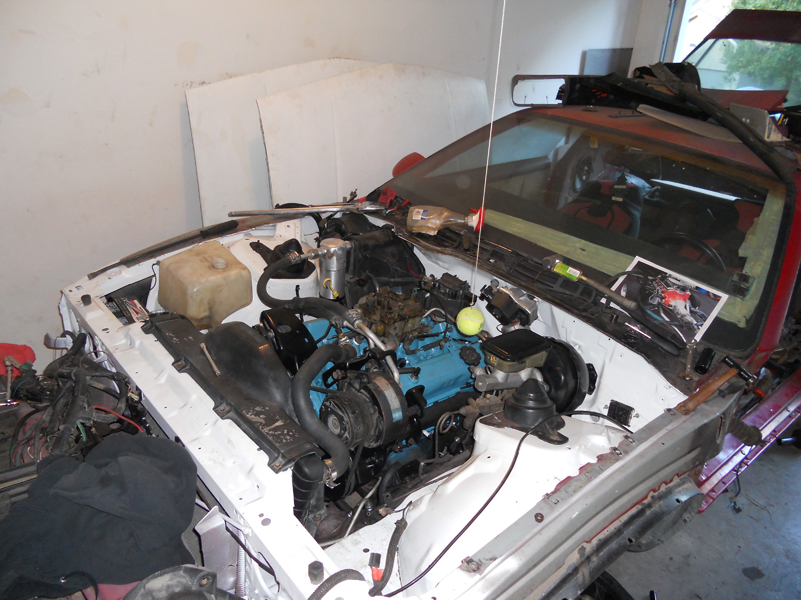
I've begun putting parts back into the new car's engine bay. The engine itself with some of the essentials have been bolted back up. I've even gotten my wife interested. She's been spending time with me in the garage lately, and even guided the transmission down the tunnel! Anyways, pictures below.
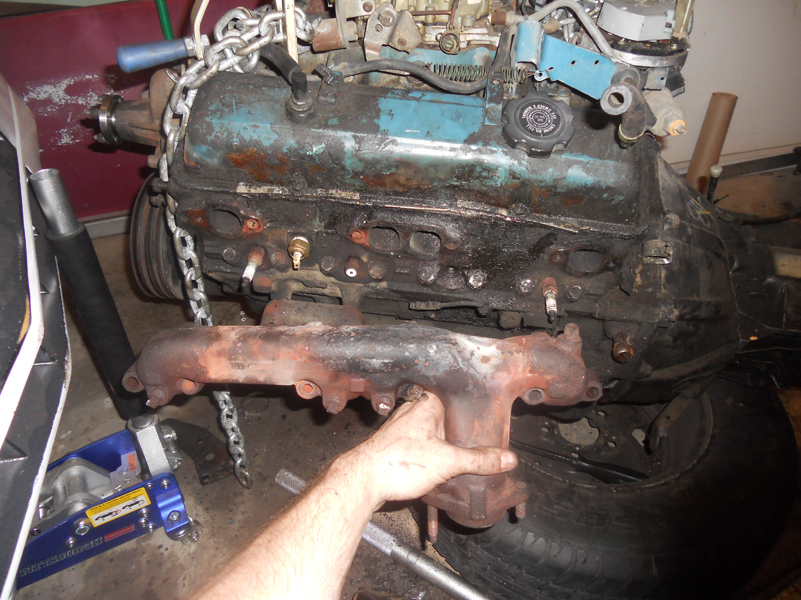
Engine & trans being pulled:
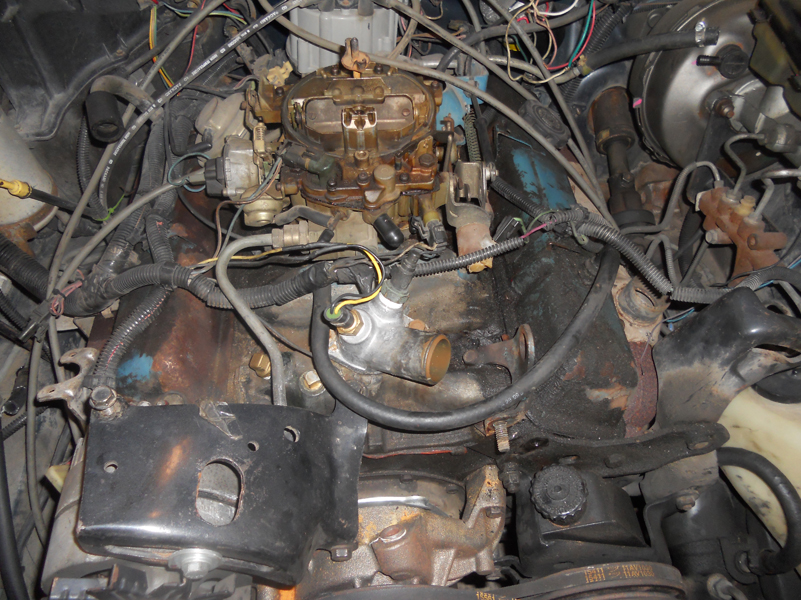
A few shots to show the 31 years of oil and grime:
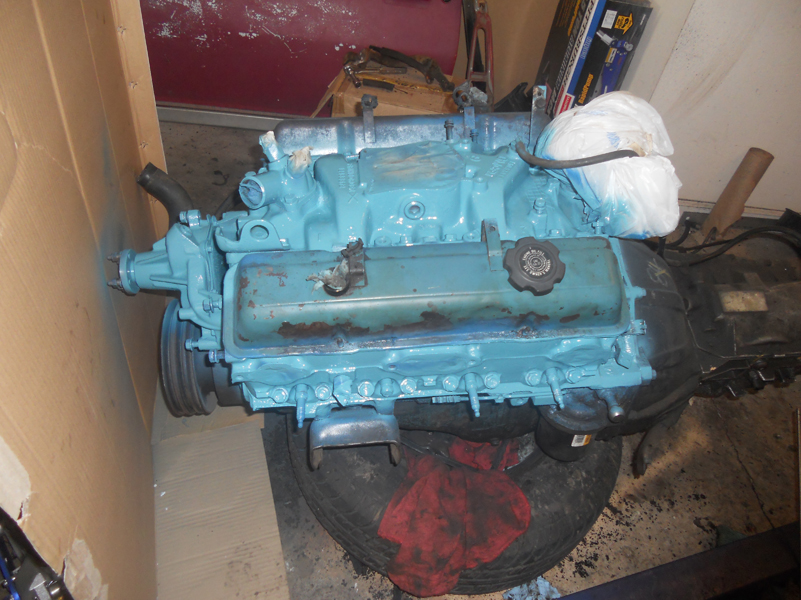
I had some trouble getting the engine paint color to come out right. Thread here (https://www.thirdgen.org/forums/afte...te-221-gm.html). In the end, I decided to just go with Pontiac Blue. Black is too cliche for my tastes, and orange is a bit out of the date range. Here's my engine (minus valve covers) painted up:
I think it looks pretty good in the car!
I also ended up buying a daily driver since I'm getting a little more in depth into the project than I thought. My sister-in-law is in town from Argentina, so this will work for me and they can take my truck. 1994 Saturn SL. Paid $1,000.
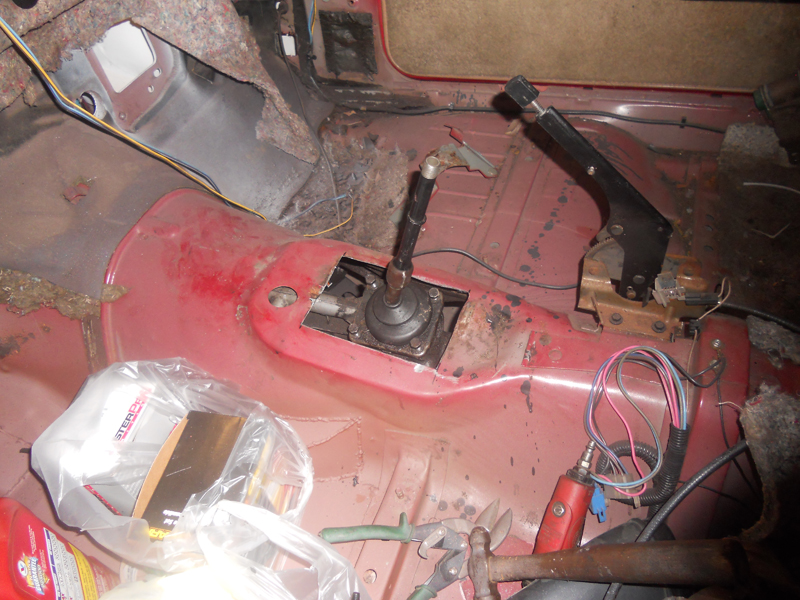
I haven't been able to get as much progress done with the car lately as I'd like to. Everything on my list that should be a simple "check the block" has given me a headache. FYI, swapping from auto to manual is NOT a simple part swap job, especially with an older linkage style clutch. For starters, the transmission tunnel needs some trimming. I made a template and transferred the hole into the new car. Brackets for the automatic shifter had to be cut out, so any chance of going back to automatic in the future will require some fab work. Here's a picture of the hole now. I still need to weld nuts on the bottom of the tunnel for the shifter boot.
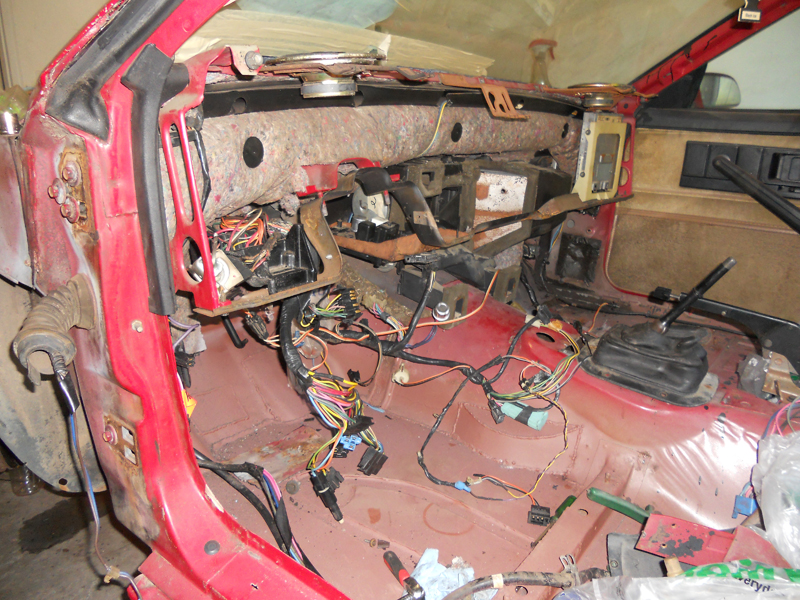
I had planned on swapping the wiring harness out of the wrecked car since I had already worked out most of the previous wiring bugs. The new car's harness is better suited for copper scrap at this point. I remember how much was involved in removing the dash and wiring from the new car, so when I stripped the wrecked car, I wrote down what I did, step-by-step. Once everything was out, I finished fixing previous wiring "repairs". The clutch safety switch wiring was cut for some reason and put back together with butt connectors and screw caps. Not to mention it was completely bypassed with a jumper wire! Other odds and ends wiring fubars were found here and there. I've begun to really see how afraid or SERIOUSLY uninformed some people are when it comes to wiring. Here's the wrecked car's dash now:
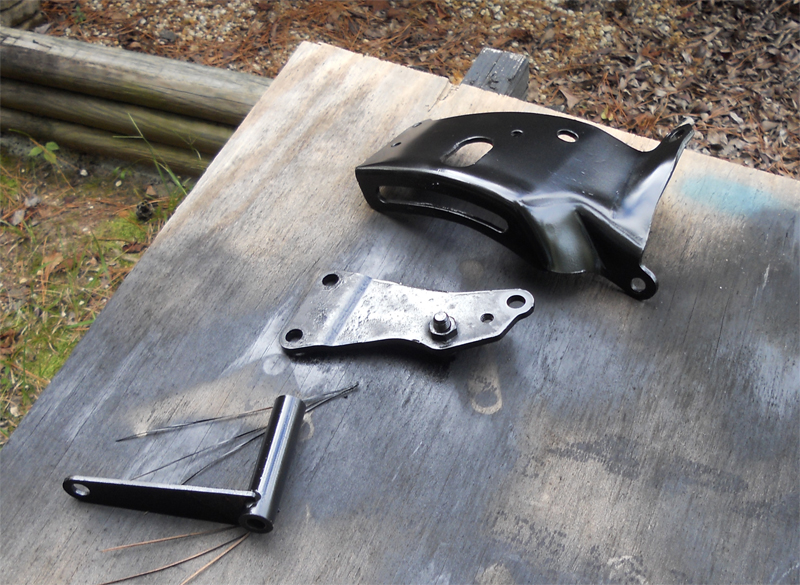
It took me a day or two to figure out the clutch linkage in the new car. It was hitting the brake booster. It took me a while to get it all figured out, and was driving me NUTS! All the parts were the same, brought over from the old car. Once that situation was handled, I started putting the dash back together. This is about as far as I've gotten in the little bit of time I've been productive lately.
I've put a few parts back in the engine bay. Some still need to be painted, others are regular tune-up parts (dizzy cap, plugs, etc). The car is starting to look like something!
When I took out my dash and replaced the wiring harness, I found that putting the harness on the back of the dash and putting all the vents on the dash after the harness makes it really easy to fit back into the car.
I was actually about to comment on that. I got quite a bit of work done today, but not as much as I would like to; the wiring harness is being quite a PITA! It just seems like there isn't any room for it, particularly in the area behind where the dash cluster would meet that top bracket. I'll try your suggestion and let you know how it goes!
Also, the lower bar that braces the whole dash needs to be on the dash as well. I screwed the fusebox and accessory box into the dash before putting it back in so it's pretty much a full unit ready to bolt in to the side brackets.
Your suggestion was the absolute right answer! That dash was incredibly easy once everything was in place and ready to go in as one piece! Here it is all in the car, minus the computer.
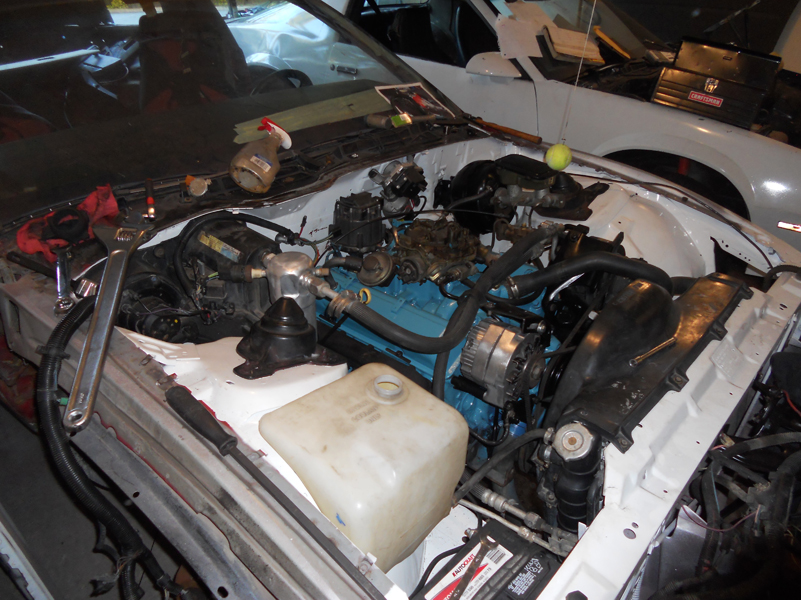
So the car: Wiring inside the car is completely done, I just need to hook up the console units. Under the hood, we're at about 85%. LOTS of parts were painted, including the exhaust manifolds, but not all. The stuff I left alone was the a/c compressor and carburetor. Other parts like the alternator were just buffed with a wire wheel. A few things need to be done to have it ready to fire up including plug wires, check torque of all major components, fluids, etc.
That's a pretty big project you got there but it's coming along great!
I know mine is coming along a lot better than I anticipated, but I have no where near that amount of work needing to be done compared to what you are stacked up against.
How did you paint the engine bay? Was that with a paint gun in your garage? Or did you use rattle cans? Either way it looks pretty good from the pictures, same with the engine too. I need to get my engine cleaned up, but since it runs well, I'm working on other things for the time being.
Looking great so far! That is quite a bit of work, somehow the sense of pride when it's done always seems worth it. Getting the wife involved always helps , "You're with me or against me!" Pontiac blue seems right at home in there. Also, your sheet metal work on the driver floor pan is amazing! At first I was wondering why you were doing it in sections, and bending lips in there. Reminds me of work we used to do fabricating electric signs, namely sign cabinets and raceways. The complete picture brought it together, you styled it for the original floor pan! Does the indented circle have a purpose?
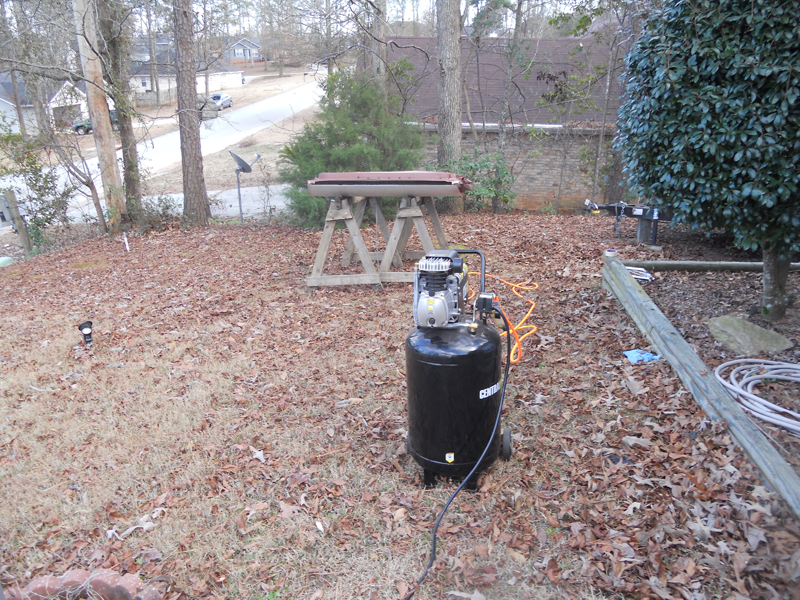
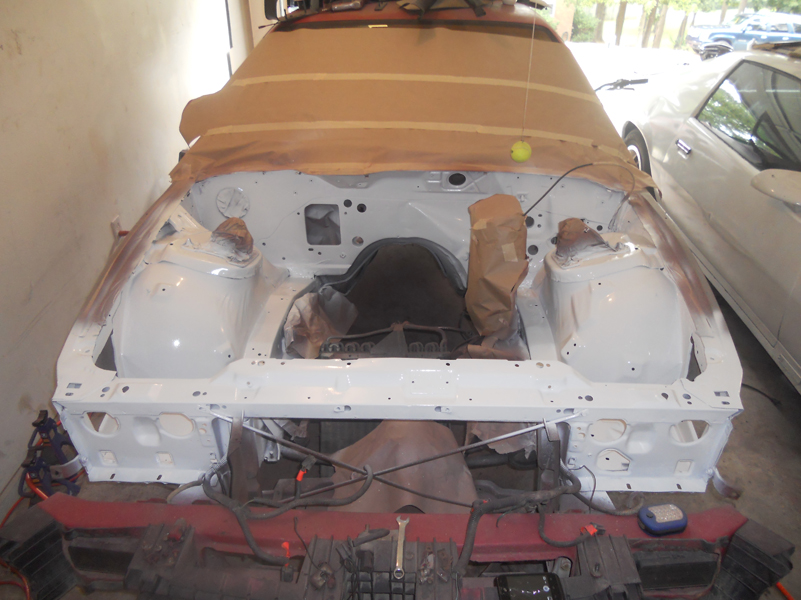
The engine bay was a simple scuff and shoot. I used my purple harbor freight gun and my neighbor's little dewalt nail gun compressor. It actually kept up pretty well if I took my time. I've upgraded to a larger 21gal compressor since then (gotta love harbor freight!). I'm actually pretty happy with how it came out, but the white is a bit harder to keep clean, even when just working on the car (d'oh!). But I like how it looks, especially with that blue engine. I think it's a really nice contrast compared to just black and white. My go-kart is straight black on white. It looks nice, but I really like the Pontiac blue engine in my Camaro.
For the floor pan, I was trying to go for an original look. There was a removable piece in the factory indent. I assume maybe for drainage, but I'm not sure. I destroyed mine trying to take it out. I may grab another one at some point in the future, but I'm not in a hurry. This floor pan is pretty stout with those character shapes in it. All the extra welding and the thicker sheet metal really gives it a rigidity that I don't think the original floor pan had.
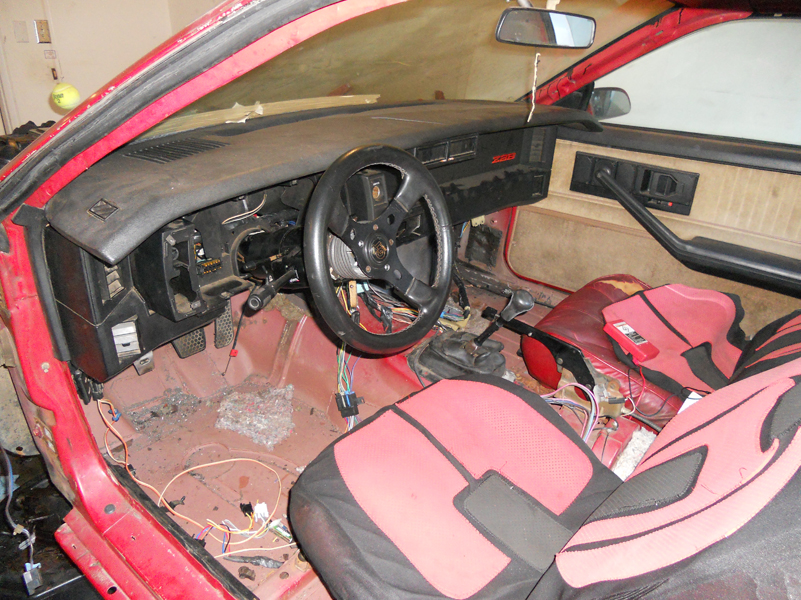
The wheel is a standard Grant wheel. It came with the car when I bought it. Not my favorite, but everything works, so for now it will stay on the car. Gotta get it running and driving at this point! Not a bad wheel, but a bit small, IMO. Of course, I have massive hands (I wear 2XL gloves).
I think the one in my car is a 13", but they also make a 12" version. Either way, too small for me. Here's the link to that wheel on their site if you're interested. http://www.grantproducts.com/products/view/73/
Looking great as usual! Glad to hear the dash went in very easyily.
Regarding the welding, what welder are you using? I need to replace all of my floors and figuring out the best welder to get for the job is kind of difficult. I've heard that some people are using the small Lincoln welders and say that they burn through the 1/8th metal pretty easily.
I'm using a 115v Hobart 140. Awesome welder! It can handle 1/4". More suited for the heavier side of home projects, like a floor pan made of 18 gauge metal. I think my welder setting for the floor pan was 3/35 with .030" wire. Maybe up or down a little on wire speed depending on what part of the pan I was welding. If people are burning through 1/8" metal with a welder this size, they need to rethink their strategy. That 1/8" metal can take quite a good deal of heat.
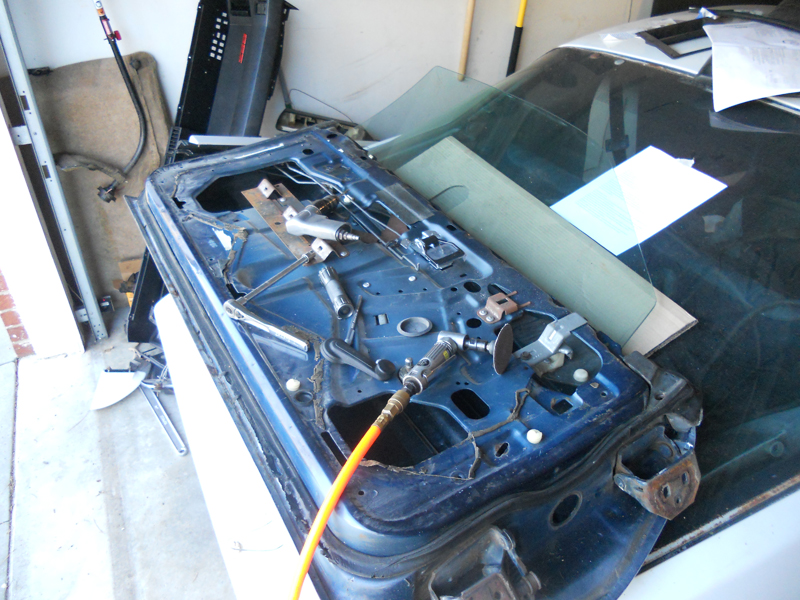
HAHA! I was hoping nobody would notice that. I had the can on the bumper so I could use it to keep it running once the bit of fuel I dumped down the carb dried up. How long does it need to run to prime the fuel lines? I wouldn't think very long, but it doesn't run on its own yet after about a minute of run time. I'll try again tonight with more gas in the tank.
I apologize that it's been such an incredibly long time since I've posted anything. I've been on my computer less and less lately. Fortunately, I've gotten quite a bit done in the last few months. Most of the mechanical stuff is complete, minus little last minute stuff like putting in new speakers and stuff. I had a bit of an issue with torque arms, but that has been sorted out. The only "major" issue left is getting the car to run off the gas in the tank. It still only runs on what I pour down the intake at this point
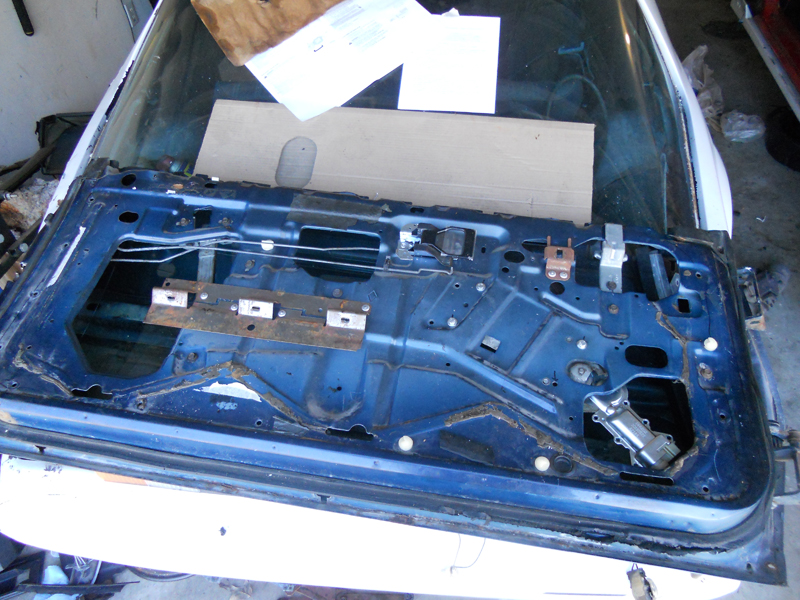
To power windows:
It was hard, but I said goodbye to my old car last week. I put the shell up for sale and someone came and picked it up a few days later.
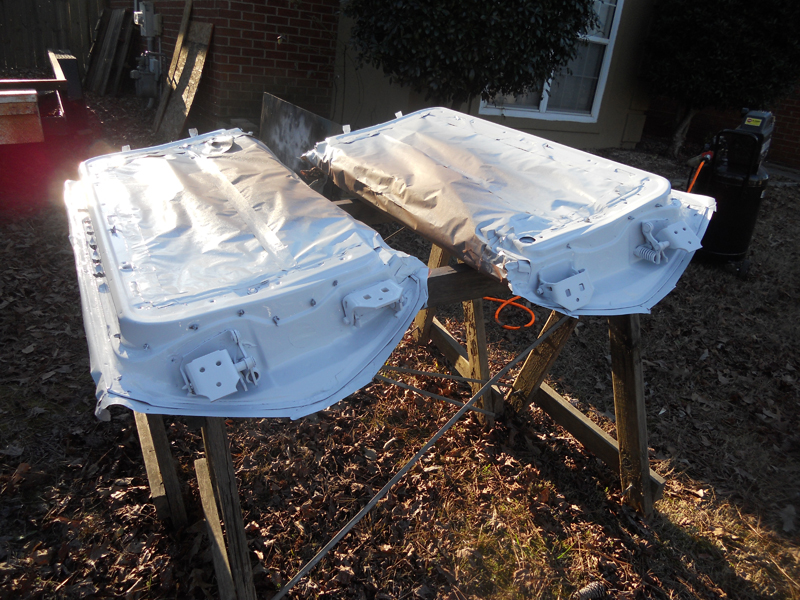
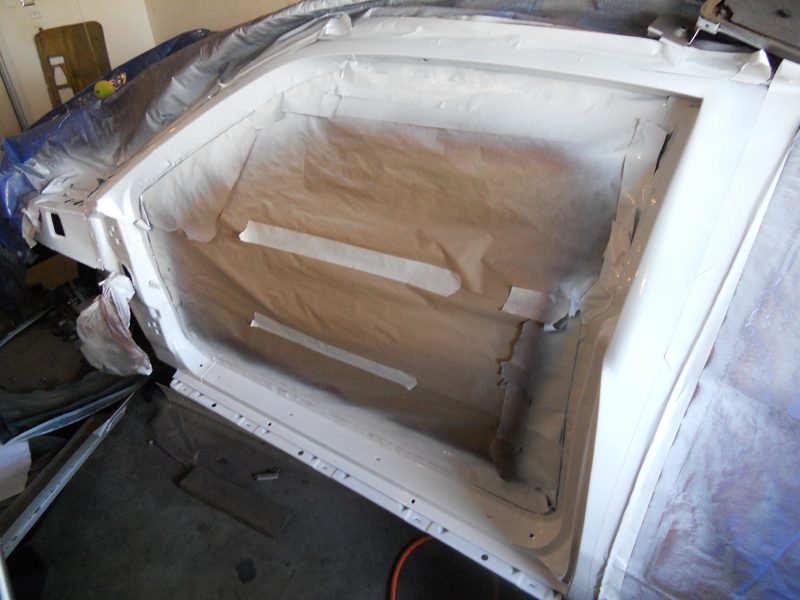
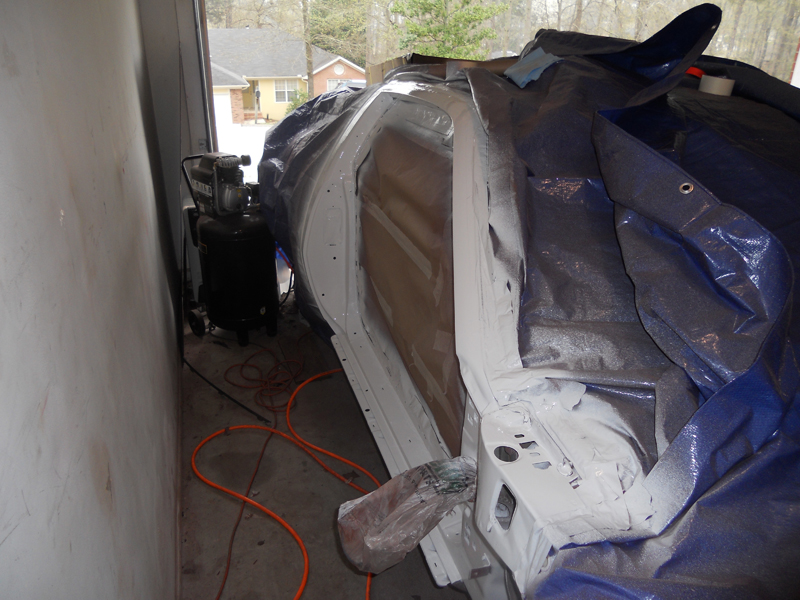
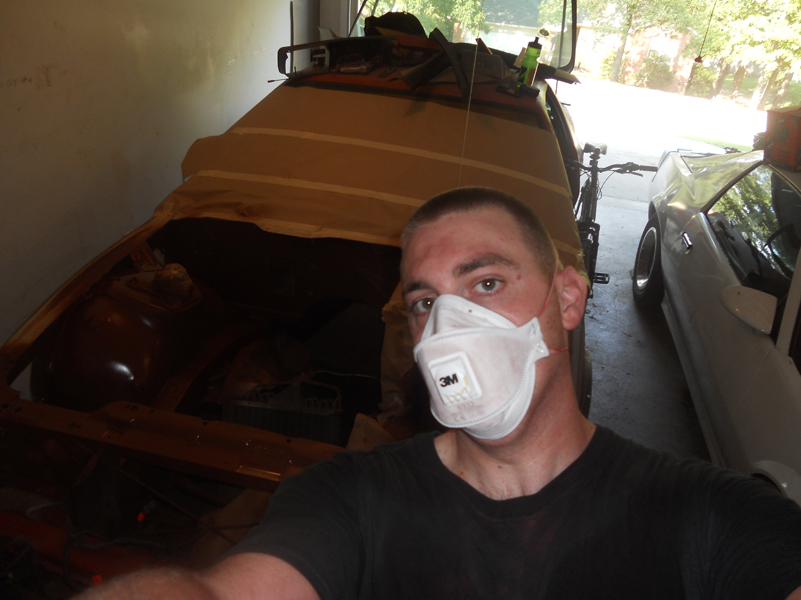
At this point, my main focus is paint. I'm not a particularly great painter, but I think given the circumstances, things are coming out okay. For example, small pieces get painted in my "paint booth" outside. All things considered, I couldn't be happier with how things are coming out.
I've done the insides of the doors:
Door jambs:
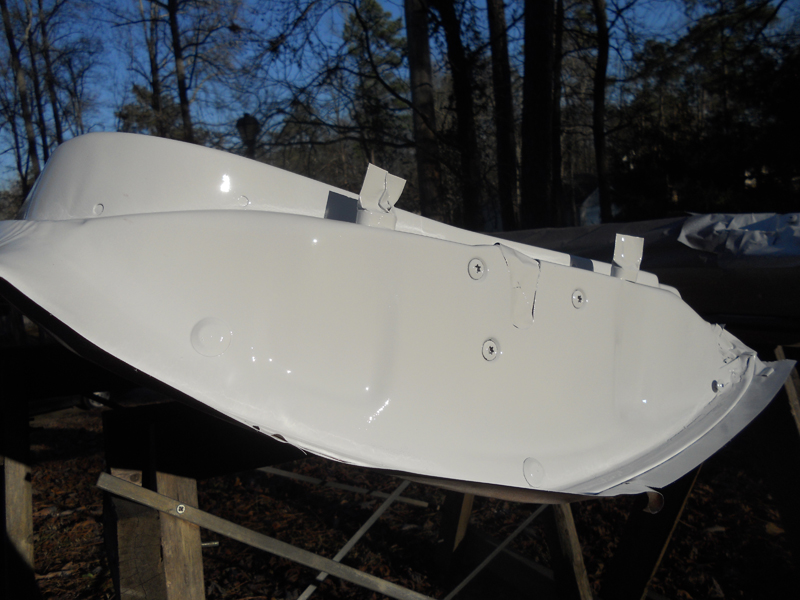
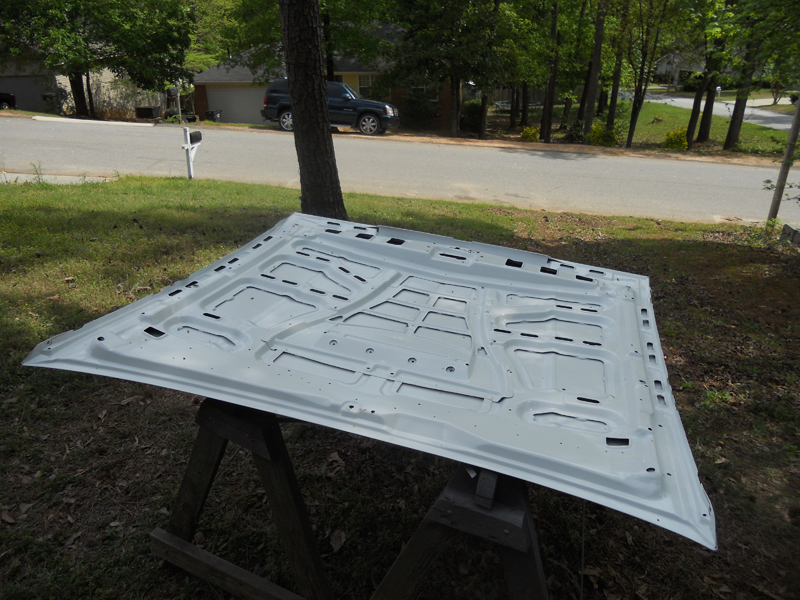
And every other crevace piece like the fender lips and hood (the hood sucked, by the way).
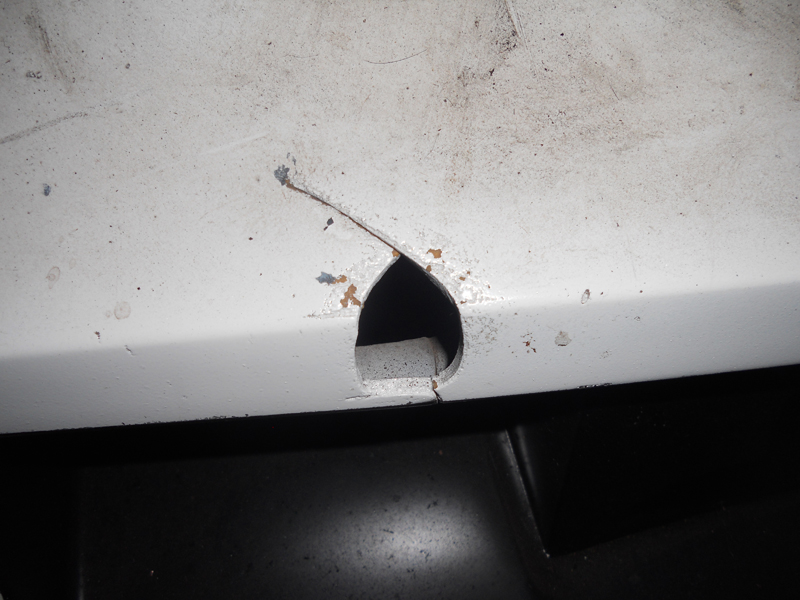
I think the hardest part of this paintjob is going to be fixing this hole in the nose. I cut out this same piece of the red nose I had and will attempt using some panel bond. Any tips here are appreciated!
For now, I've gotten the doors mounted and adjusted, and will be mounting the fenders soon. They're just loose on the chassis right now for motivation.
I had the same thing happen to me about 20 years ago, except I was extremely lucky. My car rolled down the driveway onto a busy street and luckily a curb stopped it with no damage to anyone or the car.
I had the same thing happen too. wonder if that e-brake was a recall?? I showed up at my friends house with ice cream. get in the house and hear thud!! I immediately think and know what the sound was. my e-brake just slammed down. I looked out his window and see my z rolling backwards down his street. it rolled about 400 feet. threw his neighbors wooden fence, jumped over some wooden rail road ties, just missing his boat, and slammed into a big old ash tree. here is the kicker.... if it didnt hit the tree..... it would of taken a swim in lake Minnetonka. I will have to post pics when i figure out how. I was heart broken. But, that started me on the build ive been doing over the past 10 years. anyways... wonder how many of us have had this happen... kinda funny now... but not really.
I didn't know there were separate designs in the parking brake. How much better is the newer design? Is it worth the trouble of changing over? I may add that to my list.
Just went through this whole post. Car looks great Flash2042. Keep the posts coming! I want to repaint my 89 Firebird at some point as well. GM paint in 1989 was garbage.
The car is getting much closer to completion! I figured out why the car wouldn't run on its own gas: No fuel in the bowl! I filled it up and now it runs just fine. Anyway, we're on to body work! I started by putting everything together and aligning it all, including the hatch and all the gaps. They came out incredible!
Lots and lots of body work later, the car is now in primer. I started by filling in the hole in the front bumper with this 3M panel bond. I cleaned the immediate area of all the paint, taped the back side off, and filled it in similar to how body filler is laid down. It sands really well! It came out pretty good, IMO.
Several weeks of body work later, we end up in primer. I've actually had to spray primer down twice now, unfortunately. I was moderately disappointed with the way the first two coats of primer came out. EVERY bit of bondo showed through, and it was fuzzy in several places (no other way to put it. it literally felt like sandpaper). I did some research and found the cause of both issues so I re-blocked the areas with the bondo, and then re-sanded the entire car with 400 grit paper. I laid the primer on a lot thicker this time (I was scared of runs on the first pass) and it came out MUCH nicer. I still have one spot to re-sand and hit with more primer, but it's very small. The only other issue is that I have some tiger stripes, but I hope sanding the primer with 600 before laying the color down will take that all out.
Wow nice job!! i have a question my rear hatch doesn't line up i was wonder what to do to get it to line up just unbolt it and fix it or is there more to do?
Wow nice job!! i have a question my rear hatch doesn't line up i was wonder what to do to get it to line up just unbolt it and fix it or is there more to do?
There's a tech article on this site called "hatch alignment 101" that I used to fix mine. It's a great article, works well. I can't find it to put a link in this message because they've moved stuff around here lately. Nose around a little, it'll pop up. You have to go through several steps, but it's not a hard job. The rear deck has to be separated from the hatch glass and spoiler, then moved independently into the proper position. The struts that hold the hatch up press backward with so much force, they actually dislodge the deck and move it back over time. I had mine off the other day, and leaned on it with all my weight I could put on it without bending it, and could not get it to move! Those things are frikkin' strong! And, that hatch is way heavier than you realize til you take the struts off and try to lift it by hand.
oh I think i know that article your talking about forgot where i saved that ill go looking for it again. Thanks for the replay and help.. mine is so far down its getting hard to close it you have to push up and slam it down for it close. oh and nice formula would have been my second choice had to go with Iroc Z tho.
I only got to put on three coats. Making the paint as thin as I did, I went through all my acetone and hardener. I would have grabbed more and laid down another few coats, but I had to pack for an Army school trip the next day. Now that I'm back, I'm not too unhappy with it. I think I'll just wet sand and buff what's on there now and roll with it. Hopefully it'll be okay.
From here, I've got carpet to lay down, seats to put in, side mirrors to put in, windows to adjust, and a few minor things like topping off fluids. It should be ready to hit the road before the 4th of July!
 05-31-2014, 06:21 PM

 So, me being the thinker that I am, I thought to myself: "Self, there are tons of third gen shells out there people sell for NOTHING!" And I was right.


 , "You're with me or against me!" Pontiac blue seems right at home in there. Also, your sheet metal work on the driver floor pan is amazing! At first I was wondering why you were doing it in sections, and bending lips in there. Reminds me of work we used to do fabricating electric signs, namely sign cabinets and raceways. The complete picture brought it together, you styled it for the original floor pan! Does the indented circle have a purpose?