My body thread
 05-25-2014, 09:43 AM
#1
Senior Member
Thread Starter

My body thread
Well, I have a bit of extra $, and I'm waiting on swap parts. I need new weather stripping on the car, but I don't want to put new stuff on and then ruin it taking it off to paint the car in 2 years... So I figure I may as well do the body while I'm waiting, and then I won't be so worried about rain this summer with new seals.
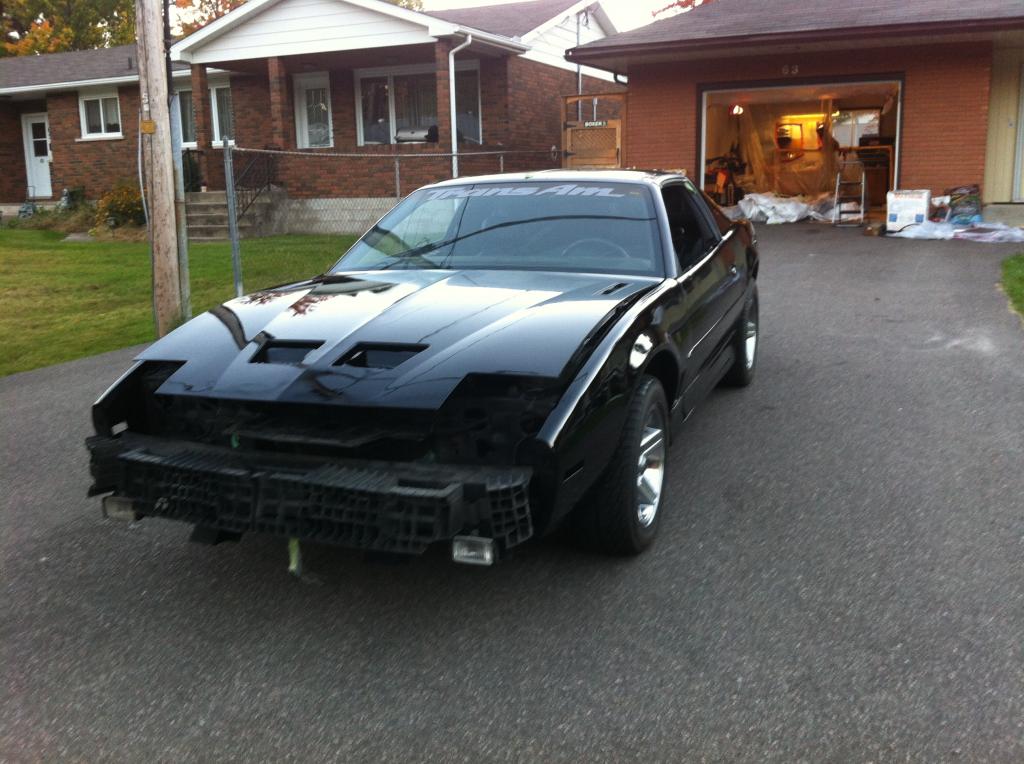
Car is in pretty decent shape over all, it has been repainted about 5 years ago from what I can tell. They basically did a scuff and shoot.
I'm fixing some rust, scuffing the rest and having MAACO do a single stage black paint job on the car. Also picking up a new fiberglass wing.
So, first bit of work is my A-pillar rust. I knew there was some bondo here, with the way it was bubbled up and evidence of it on the windshield trim.
Pulled the gasket out from around the windshield (heat gun and a flat head screwdriver worked great).
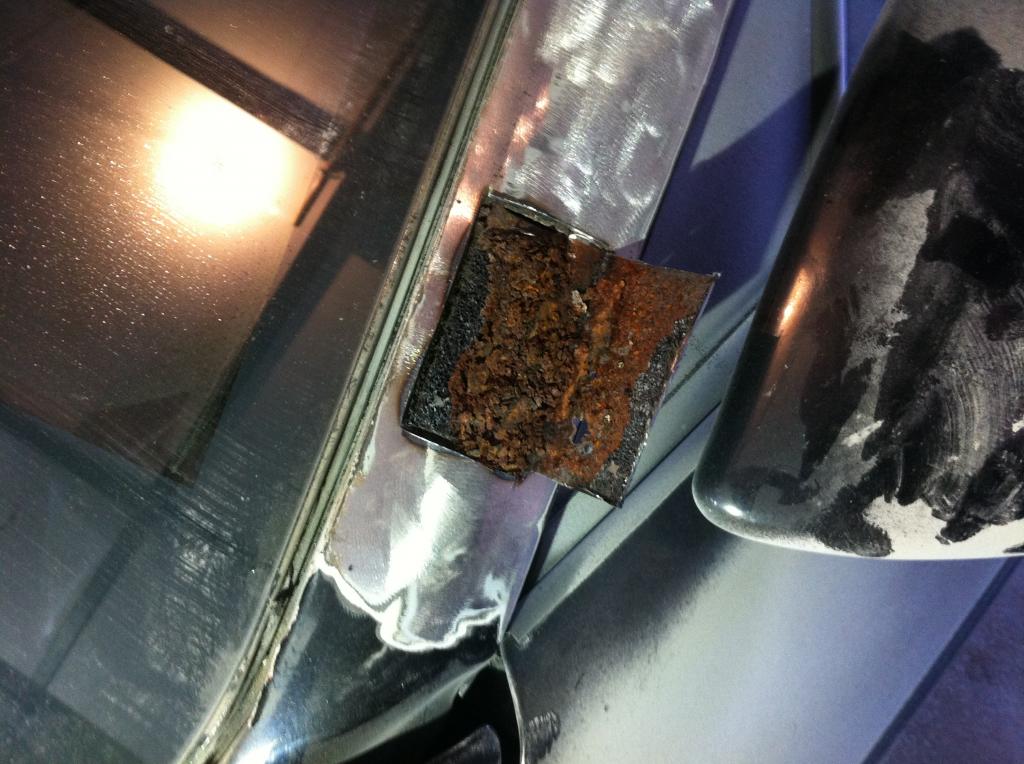
Ground down the paint/bondo and this is what I found:
Left pillar:
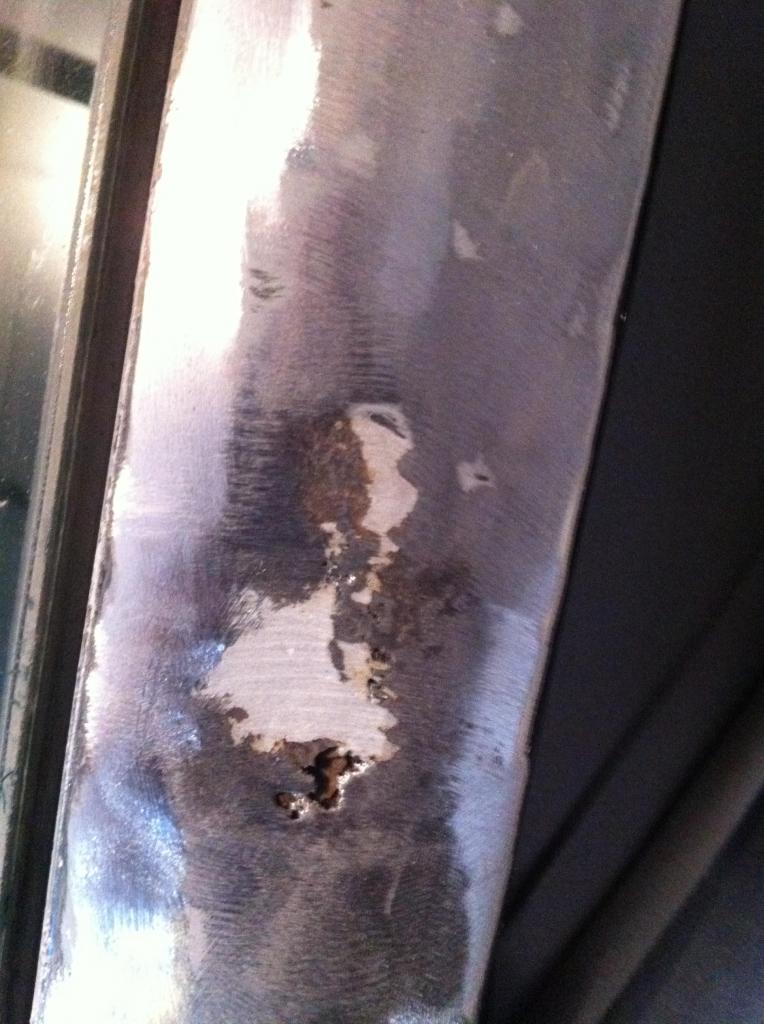
Right pillar:
So, the reason why we rust here, is it seems we T-Top guys get water in from the top of the pillar where the pin for the tops goes in, and then it runs down the inside, where there is foam that holds moisture.
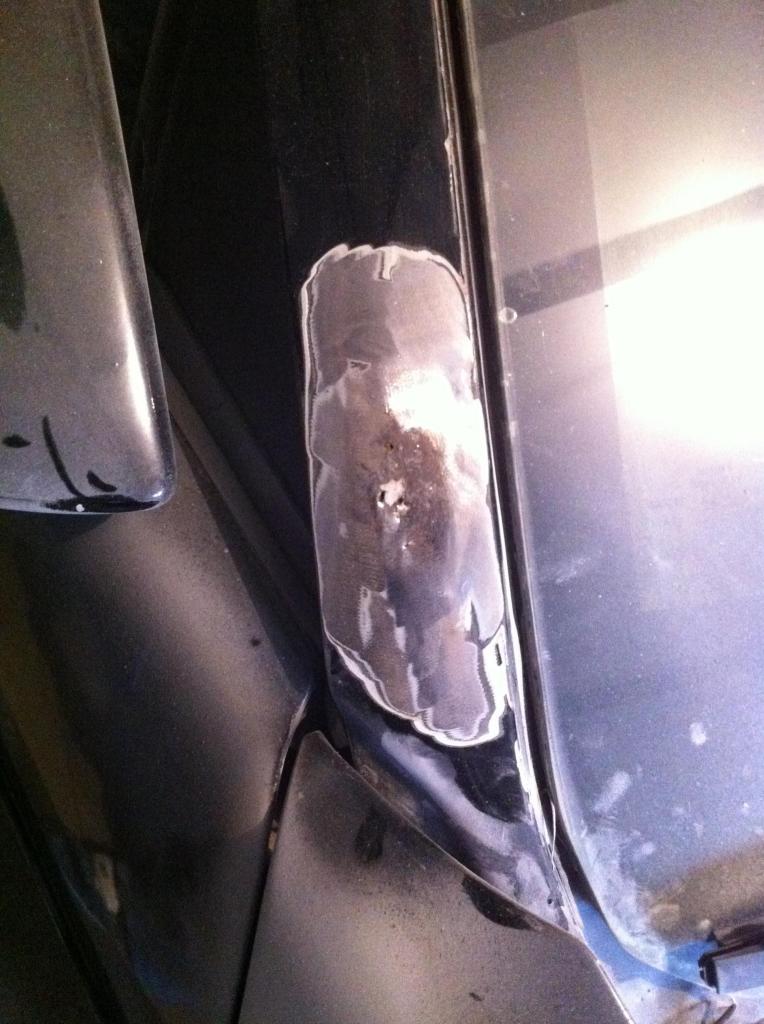
So, cut out the bad area (go a bit further than you think you need to so you get some good metal)
and weld in a patch.
This was done with my Lincoln 140 with flux wire. Lowest amp setting, low on wire feed. Small tacks, spread out and making sure to keep the temps down.
I used something called nozzle spray, to spray down the areas surrounding my welds to prevent the splatter from sticking anywhere and a wet rag over the windshield.
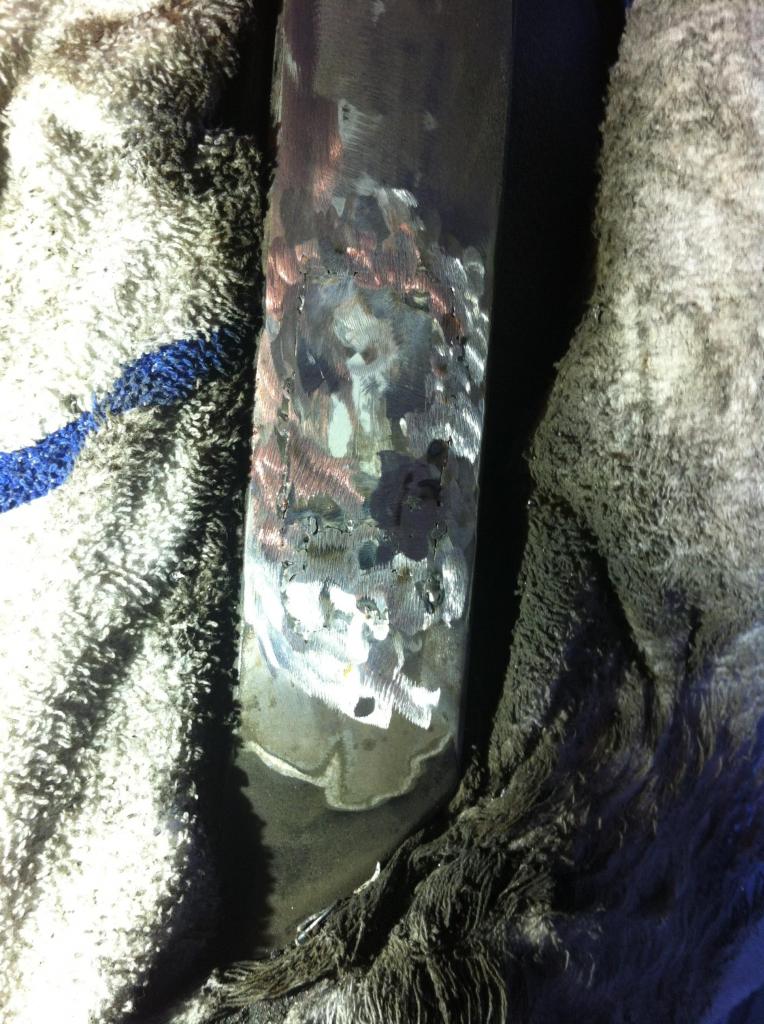
Ground down welds, and fill any pin holes.
Ensure you remove as much foam as you can so that it doesn't catch fire, and to prevent moisture from being held there.
Next step is filler, and hopefully there won't be rust here again!
So far, no real surprises in the car, I'll be updating as I go.
This paint job is intended to bring the car to a more presentable state and to stop any current rusting from progressing. It will be receiving a full strip and rotisserie job in a few years.
Car is in pretty decent shape over all, it has been repainted about 5 years ago from what I can tell. They basically did a scuff and shoot.
I'm fixing some rust, scuffing the rest and having MAACO do a single stage black paint job on the car. Also picking up a new fiberglass wing.
So, first bit of work is my A-pillar rust. I knew there was some bondo here, with the way it was bubbled up and evidence of it on the windshield trim.
Pulled the gasket out from around the windshield (heat gun and a flat head screwdriver worked great).
Ground down the paint/bondo and this is what I found:
Left pillar:

Right pillar:

So, the reason why we rust here, is it seems we T-Top guys get water in from the top of the pillar where the pin for the tops goes in, and then it runs down the inside, where there is foam that holds moisture.

So, cut out the bad area (go a bit further than you think you need to so you get some good metal)
and weld in a patch.

This was done with my Lincoln 140 with flux wire. Lowest amp setting, low on wire feed. Small tacks, spread out and making sure to keep the temps down.
I used something called nozzle spray, to spray down the areas surrounding my welds to prevent the splatter from sticking anywhere and a wet rag over the windshield.
Ground down welds, and fill any pin holes.
Ensure you remove as much foam as you can so that it doesn't catch fire, and to prevent moisture from being held there.
Next step is filler, and hopefully there won't be rust here again!
So far, no real surprises in the car, I'll be updating as I go.
This paint job is intended to bring the car to a more presentable state and to stop any current rusting from progressing. It will be receiving a full strip and rotisserie job in a few years.
 06-05-2014, 08:26 AM
#2
Senior Member
Thread Starter
Re: My body thread
Haven't taken enough pics.
I have the bumpers prepped... I was a bit too agressive at first on the front bumper, but ended up doing a final sand in 180 with the DA and my block to feather out the problem areas and to prep the surface for primer (with adhesion promoter first). I'll then block it out with 400.
Passenger side door hinge was rebuilt the other night, will do the drivers side soon.
Having issues with my schedule in actually getting time to work on the car. Plus I've been having compressor issues (bought it used, and found there is sludge in the tank that I've been battling to fix). What I'll be doing is from the tank run 50' of hose through a bucket of cold water and then have my water/oil filter, then my regulator and then run a hose dedicated for spraying.
I'm going to be using this as my gun:
Using delfleet by PPG which requires a 1.3-1.7 tip so I figure I'm right in the middle with that tip and the gun gets lots of good reviews for cheap.
my only question so far is what sealer to use? I'm planning on the PPG omni line MP237 sealer under the delfleet, except the delfleet isn't listed to go over the sealer... But, I'm going to assume its fine as the delfleet is listed to go over "cured finishes".
Opinions on that? If I wait a couple hours after spraying sealer I should be good I assume.
Picked up a glass wing, going to block out whatever coating is on there with 180 and prime it when I do the bumpers and body work, and block it down with 400 too.
06-05-2014, 10:35 AM
#3
Re: My body thread
had a similar issue like this in my thread here: https://www.thirdgen.org/forums/body...ater-leak.html
what i found with mine, was that it was in the only area with no primer on the inside. my water issue also was there from water getting stuck behind the windsheild and eating all the way through. its probably too late for you to go at it now, but i had some significant structural problem with my A-pillar from the rust, which i fixed by using another A-pillar to fix it.
what i found with mine, was that it was in the only area with no primer on the inside. my water issue also was there from water getting stuck behind the windsheild and eating all the way through. its probably too late for you to go at it now, but i had some significant structural problem with my A-pillar from the rust, which i fixed by using another A-pillar to fix it.
06-05-2014, 11:30 AM
#4
Senior Member
Thread Starter
Re: My body thread
Yep, saw your thread and it made me nervous. Wasn't nearly as bad as yours. I poked and prodded around in the A frame and it looks good. I pulled the windshield gasket out and there is no sign of anything similar to your issue... Which made me happy, as I'm supposed to be doing my LS1 swap but I somehow ended up doing body work first.
06-08-2014, 06:19 PM
#5
Senior Member


Join Date: Jan 2003
Location: Ireland
Posts: 616
Likes: 0
Received 0 Likes
on
0 Posts
Car: 82 Pontiac Firebird s/e
Engine: 2.8 V6
Transmission: TH200C
Re: My body thread
Had the same problem on mine on both A pillars. I used that No Heat Transfer putty to protect the glass and welded in plates.
Unlike your cars mine is a hard top and don't know how rust started there. I also pulled out as much of that foam as I could.
Unlike your cars mine is a hard top and don't know how rust started there. I also pulled out as much of that foam as I could.
06-19-2014, 09:25 AM
#6
Senior Member
Thread Starter
Re: My body thread
Progress has been stopped due to a broken collar bone, looking to get back in to the garage next week, only a little bit of body work left.
I have a Finishline 4 gun kit on the way.
I'm wondering about sealer. I'm using either MP282 high build primer or MP182 urethane surfacer over my body work... If I 400 or red scuff the entire car, can I just use a coat of this stuff as my "sealer"? Obviously I'll sand it with 600 wet after, before I paint.
This isn't a question due to cost, this is because I don't want to spray a bad job on the sealer and have it mess up my final result.
I went to the MAACO I've been talking to. An $800 job turned in to $1300, plus I have to rent a trailer twice and it's a two hour drive, so by the time I factor in trailer rental and gas, I'm over $1500... And I wasn't impressed with their example of single stage they showed me and said it can't be cut/buffed because they burn through it. So I'm just doing it myself.
Last edited by WTR388; 06-19-2014 at 09:29 AM.
07-11-2014, 07:56 AM
#7
Senior Member
Thread Starter
Re: My body thread
Been making progress.
Body work done, primed work areas and wet sanded that with 600 as dry paper would clog up.
Car scuffed in 400/grey scotchbrite and tonight I'll finish scuffing the smaller pieces that are off the car.
Setting up my booth tonight as well.
My paint guy really knew his stuff it seemed, and he told me to spray my sealer and my single stage with a 1.3 tip, but it appears on the BASF site it states a 1.5 tip for my single stage. Really not sure what to go with!
I'm using Limco supreme 3 single stage.
Trending Topics
07-14-2014, 12:51 PM
#8
Senior Member
Thread Starter
Re: My body thread
Well. I learned a lot this weekend.
I was trying to beat a storm (that never happened) and got rushed. I ended up painting the car in less than ideal conditions, and learned about the finishline 4 gun set up.
First, I was battling dry spray like mad while painting the car. I just couldn't get a nice build up of material, did 2 coats like this... Well, the little hole in the lid of the cup ended up being plugged. Once I got that working the paint flowed out perfectly.
However, I have lots of trash... I was watching bugs land in my paint. The weather was really not co-operating. It's frustrating because I have sections of the car that are absolutely flat and perfect, and then there is trash in other spots.
So, I'm wet sanding again with 600 and trying take #2 on my booth. Now that I have this gun figured out, and learned a few things I'll be sure this second take works.
I had set up a portable garage as a negative pressure style booth, but it was a little more hastly done than I planned. Issue with this, is if it's not perfectly sealed you're pulling in trash from everywhere.
So, this next go-around, I'm setting up in the actual garage. Plastic lining the walls, venting out under neath the garage door and setting up a plastic wall at the other end with filtered box fans as my intake. This will be positive pressure.
I'll be sure to wear a new paint suit and clean everything before hand. And no painting unless conditions are right.
I'm sure most of this could be cut and buffed out, but I think the best is to wet sand this trash and the couple dry spray areas out and then spray 2 nice flowed coats on and that is that.
Positives: Car looks pretty good from a few feet away, I now know how this gun shoots (which is friggin awesome), I know I like spraying the Limco, and I've now learned a few things... Which is the point of DIY.
I'm considering spraying the car in sections this time. Masking off everything but the front end, paint that and let it cure, then the day after, mask off the front and paint the rest. This is for a few different reasons such as having a smaller area to concentrate on painting, I'll be moving around the car less to keep wet edges flowing, I'll be working the compressor a lot less (less heat/moisture build up etc). Since this is just a single stage gloss black, colour match isn't really hard.
If I just do the final spray all at once, I'm only setting up once, getting it done and doing clean up once...
Thoughts?
07-14-2014, 01:20 PM
#9
Junior Member
Join Date: Oct 2012
Location: Jacksonville FL
Posts: 26
Likes: 0
Received 0 Likes
on
0 Posts
Car: 1987 Firebird
Engine: 2.8L V6
Transmission: 700R4
Axle/Gears: 3.23
Re: My body thread
It may behoove you to go in sections, since its just a solid color single stage paint, like you brought out it'll help you keep your wet edge because otherwise you will definitely see stripes from not keeping a wet leading edge.
And since your spraying in your garage, i would assume you've cleared out things so as to not get over spray on them. therefore the floor should be clear and i would recommend hosing down the garage floor, a wet floor will trap dirt and trash that could otherwise land in your paint, usually from the over spray from your gun kicking it up.
also post pics, would be good to see your setup and how it turns out.
07-14-2014, 09:17 PM
#10
Supreme Member
iTrader: (3)
Join Date: May 2005
Location: Southern IL
Posts: 1,942
Likes: 0
Received 0 Likes
on
0 Posts
Car: 88 GTA "Cocaine"
Engine: 350 tpi
Transmission: 700r4
Axle/Gears: 3.27
Re: My body thread
I would spray at first light in the morning less bugs and dew on everything to trap the dust. spraying panel by panel is a pain in the a$$. you can keep a wet edge if you use the proper temp hardeners and reducers.
07-15-2014, 07:47 AM
#11
Senior Member
Thread Starter
Re: My body thread
Started wet sanding with 600 last night. Took me close to 3 hours to do the hood, as I took it right down todally 100% smooth... However, that means it would take me like 20 hours to do the car that way.
I think what I'll do is wet sand with the 600 to removed the trash and then 400DA the dry spray and orange peel out of it, just to cut down on the time. Purpose for me to wet sand before is to reduce dragging dirt particles under the 400.
I'm going to do the booth in the garage this time. I'll use the 3M plastic masking material so any overspray sticks to it.
I'll have the garage door half way open with filters under neath it, and I'll set my 3 box fans up high at the opposite end. They will have the allergen furnace filters on the booth side of the fans, fans blowing air in. The filters will cut down on velocity and turbulance as well as filter.
I'll lay a tarp down on the floor, and tuck tape all seams of the plastic ceiling/sides so it's one contained plastic bubble. For a man door I'll just cut a slit and use some spring clamps to hold it shut.
I'll likely paint the car in a single go, with the bumpers on. Do it early morning (like I had originally intended to before things went off plan). If I'm set up the night before with only needing to tack off the car, spray down the floor and start the compressor, it should be better.
I'm thinking that part of my issue with the paint not laying flat and flowing out was the temperature. My last booth was basically a green house, it was 30 degrees out so inside it was at least 35 (95 for you americans) but likely higher. Being in the garage and in the morning should keep it cooler as well.
A buddy and I painted my motorcycle a few years ago in his garage on a nice calm day, all we did was blow out the garage, wet the floor down and then paint... Not a spec of dust in that paint.
If it wasn't for the volume of area being painted in a smaller space, I would just set up plastic on a nice day and spray, but I'm trying to limit the over spray.
Last edited by WTR388; 07-15-2014 at 07:51 AM.
07-15-2014, 04:39 PM
#12
Supreme Member
iTrader: (3)
Join Date: May 2005
Location: Southern IL
Posts: 1,942
Likes: 0
Received 0 Likes
on
0 Posts
Car: 88 GTA "Cocaine"
Engine: 350 tpi
Transmission: 700r4
Axle/Gears: 3.27
Re: My body thread
if you are doing it in cooler temps you want to wait like a half hour between coats.
07-16-2014, 08:17 PM
#13
Senior Member
Thread Starter
Re: My body thread
Prep sure has gone faster this time around (I'm tired of sanding, so I bought a stack of 400 paper for the DA and as soon as one starts to dull up I switch so it's going pretty fast).
Just some wet sanding to do on curved surfaces/edges and it's ready for another wash down.
This orange peel was very "pit" like, basically pinhead sized craters, mostly on the hood. I have pretty much all of it out, but a few are still barely there. I don't think they are enough to worry about when I go to spray again, they should easily fill in.
Little miffed at myself, but most of this would have polished out, as the majority of the paint was actually decent, I must have just been too drawn to the bad parts... Wasn't sure it would have buffed though since I haven't done a cut and buff job before. But, now I know.
I'm hoping to set up again next monday, I'll take some pictures of the set up and see what you guys say, and then I'll wait until I have the right weather to spray. Luckily we're having a cool spell, so that should help! It gets very humid here, and our soil is basically fine beach sand everywhere so things collect dust pretty fast with any kind of breeze.
Last edited by WTR388; 07-16-2014 at 08:44 PM.
07-16-2014, 11:42 PM
#14
Member
Re: My body thread
Just make sure the temp isn't too cool. Paint flashes off pretty slowly around 70 degrees. Something you can try to keep sand/dirt out of you paint is to wet down the garage floor a bit. Not soaking wet obviously, just enough so that crud on the ground doesn't get kicked and land on your paint while your are spraying.
Good luck
Good luck
07-17-2014, 10:32 AM
#15
Senior Member
Thread Starter
Re: My body thread
I'm going to aim to paint on Wednesday next week if the weather forecast holds out and hopefully my leave gets approved.
Wind is at 6mph in the opposite direction as the garage door, 70% chance of showers (keeping the dust down) and 86 degrees outside.
Wind is at 6mph in the opposite direction as the garage door, 70% chance of showers (keeping the dust down) and 86 degrees outside.
09-25-2014, 12:27 AM
#16
Senior Member
Thread Starter
Re: My body thread
Well, things sort of got in the way... My LS1 swap sort of happened since someone bought my T5, and I'll be doing the whole Army move around thing here soon.
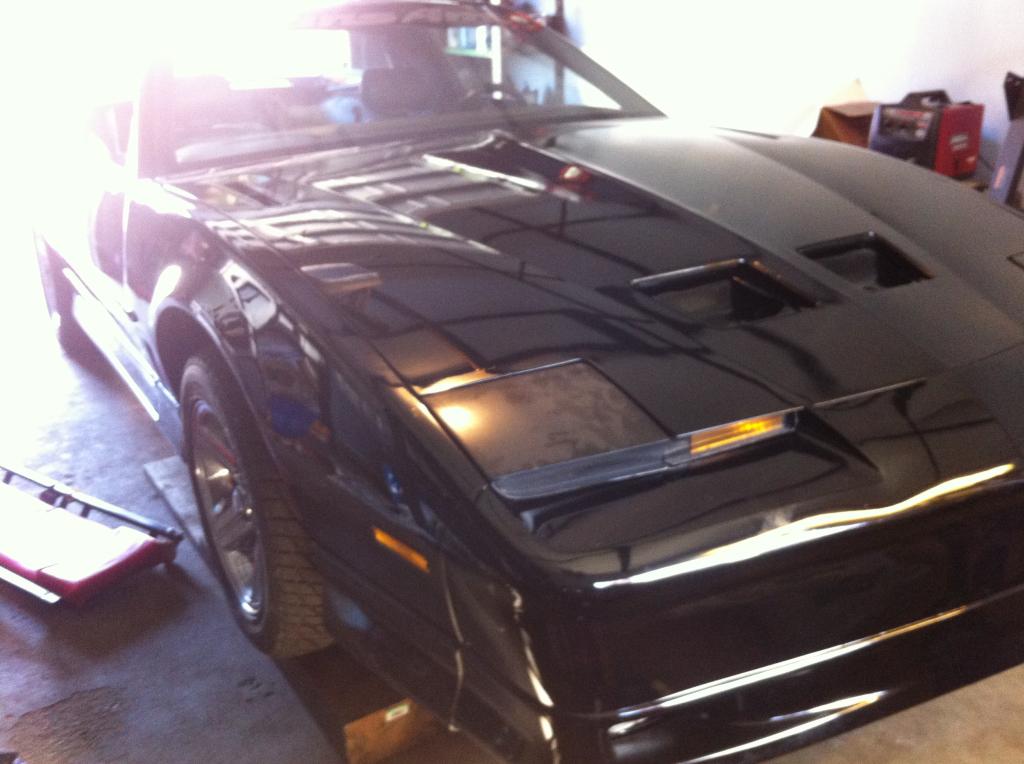
But, I set up my booth in the garage (way way better set up this time) and took what I learned from my first attempt and sprayed the front bumper and wing tonight.
Took it slow, watched my distance and did my best to get no runs, or dry spray, which I succeeded! Just had to slow that gun down.
Of course, the room mates GF let the dog in to the garage after I had said keep the dog inside while I'm spraying so I got a hair on the wing... Which I can hide with some pinstriping lol.
It's seriously like glass, I'm super happy aside from a couple dust spots and one fisheye, but compared to last time this is great.
Only thing that concerns me is this Limco single stage sure seems to scratch easy.
Tomorrow I spray the rest of the car and will have some pics of my set up and hopefully some good results.
10-28-2014, 07:27 PM
#17
Senior Member
Thread Starter
Re: My body thread
Here is my paint booth in the garage:
3 20" box fans through furnace filters... I would like to use more fans next time, but they did work.
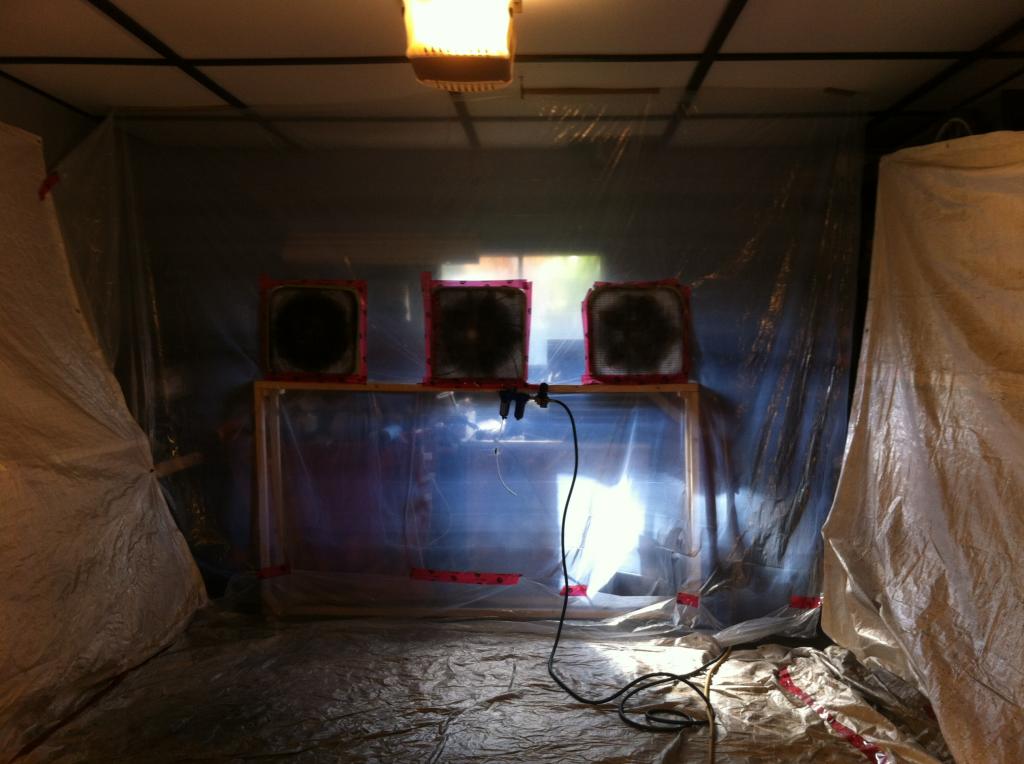
The gf helping me mask up. I blew it out under the garage door through the thinner fiberglass type filters. It cleared out the over spray ok. Big lesson learned was to make the booth way bigger than you think you need.
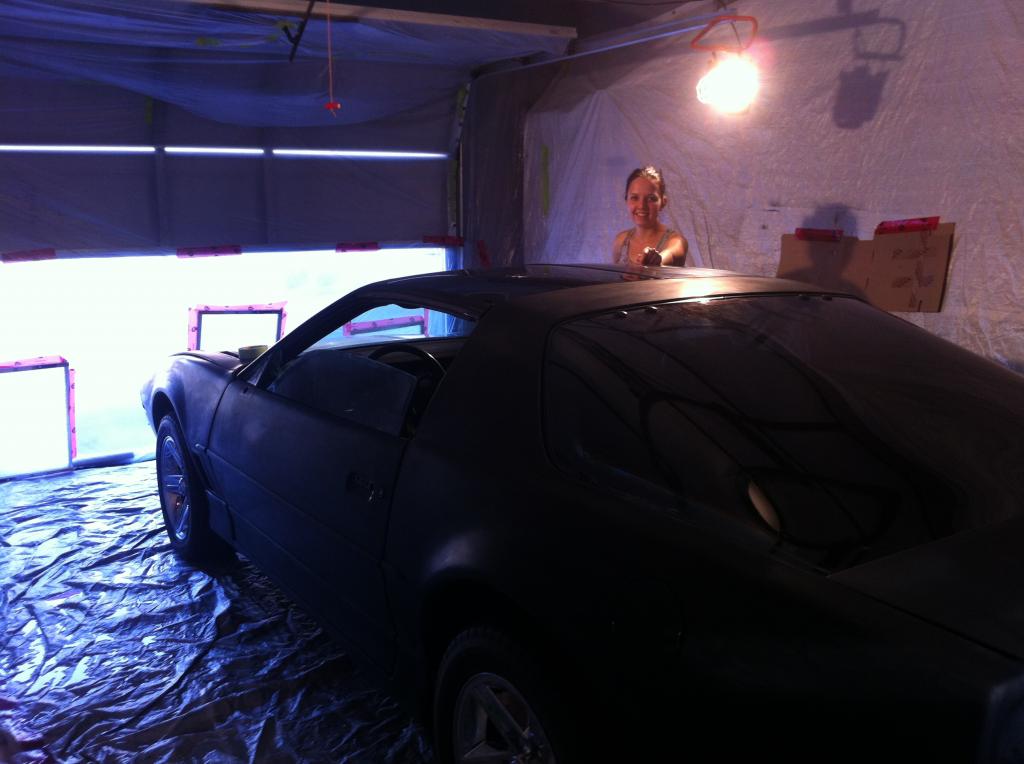
This is how bright it was in the garage, two 500W halogens and whatever bulb is in the ceiling. The white tarps helped a lot.

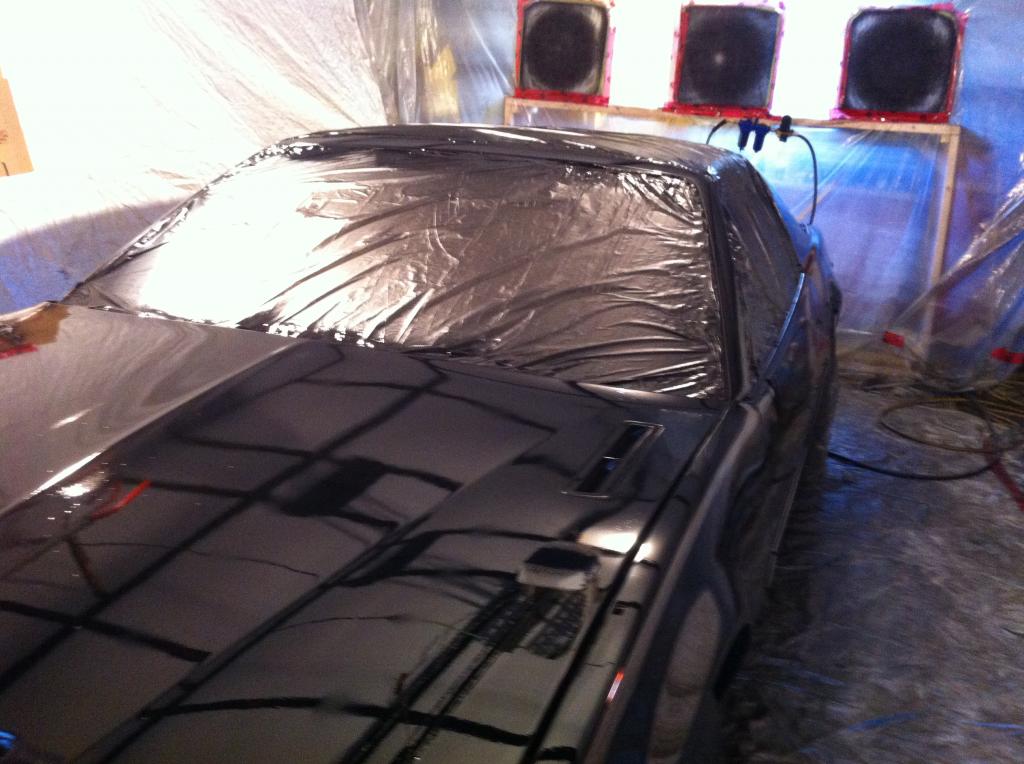
First coat... And you can see bugs (again!). I stopped, we wet sanded the next day with a light scuff everywhere else and started again... Lesson is to NEVER paint at night.
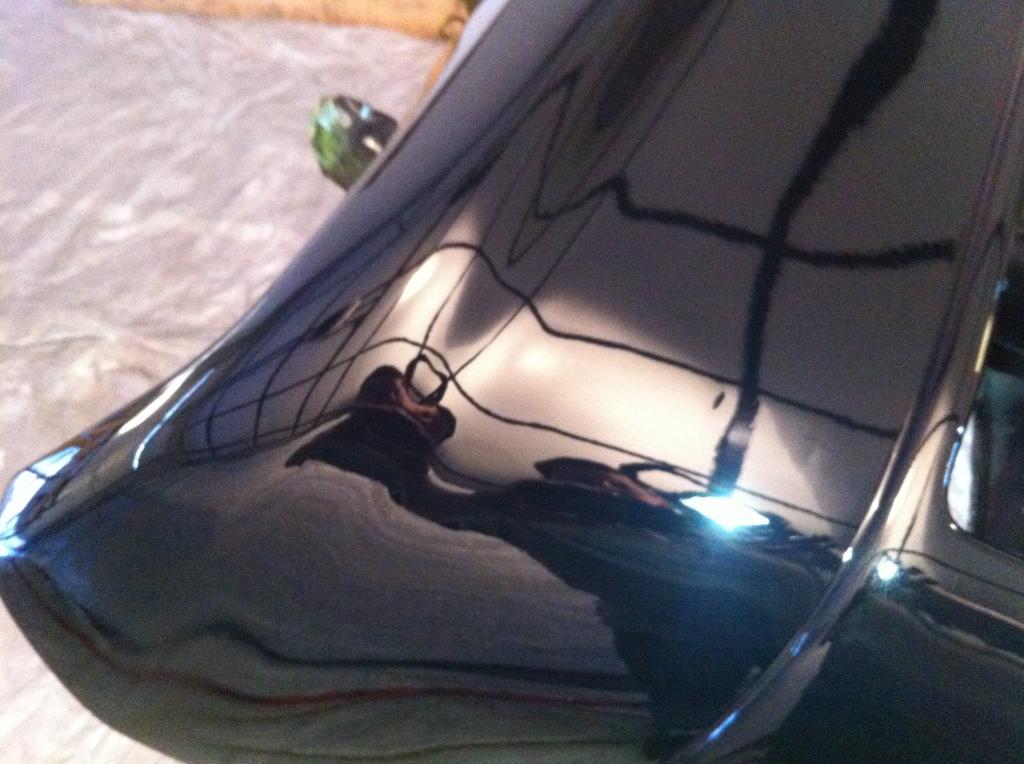
Heres part of the bumper... for my second time spraying I'm happy.
Outside for some fresh air!
Not sure if this is overspray or what on my headlight covers... It's also the same on my hood vents. So, those will be getting sanded again and painted whenever it is I get time at home... I'll set up a tiny booth in the garage using the frame from my easy up shelter. Part of the off colour is dust.
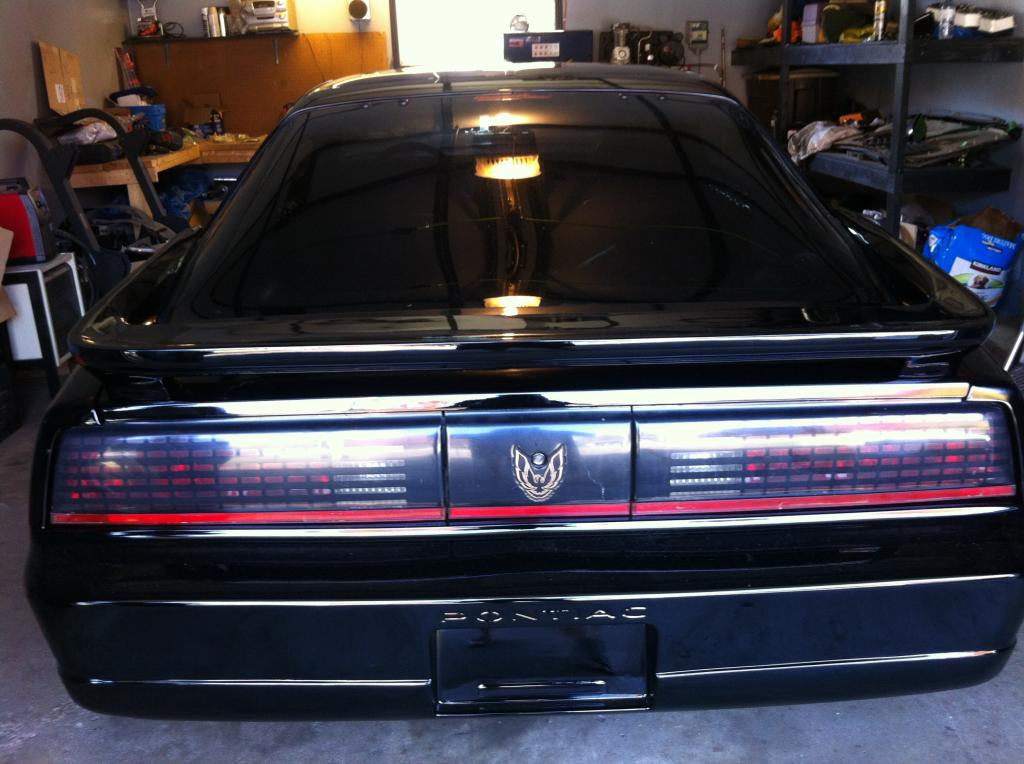
The rear is possibly my favourite part of these cars... I've always been a rear end kind of guy. I'm going to replace that cracked tail light filler.
Here it is, assembled after the first drive with the LS1 in it.
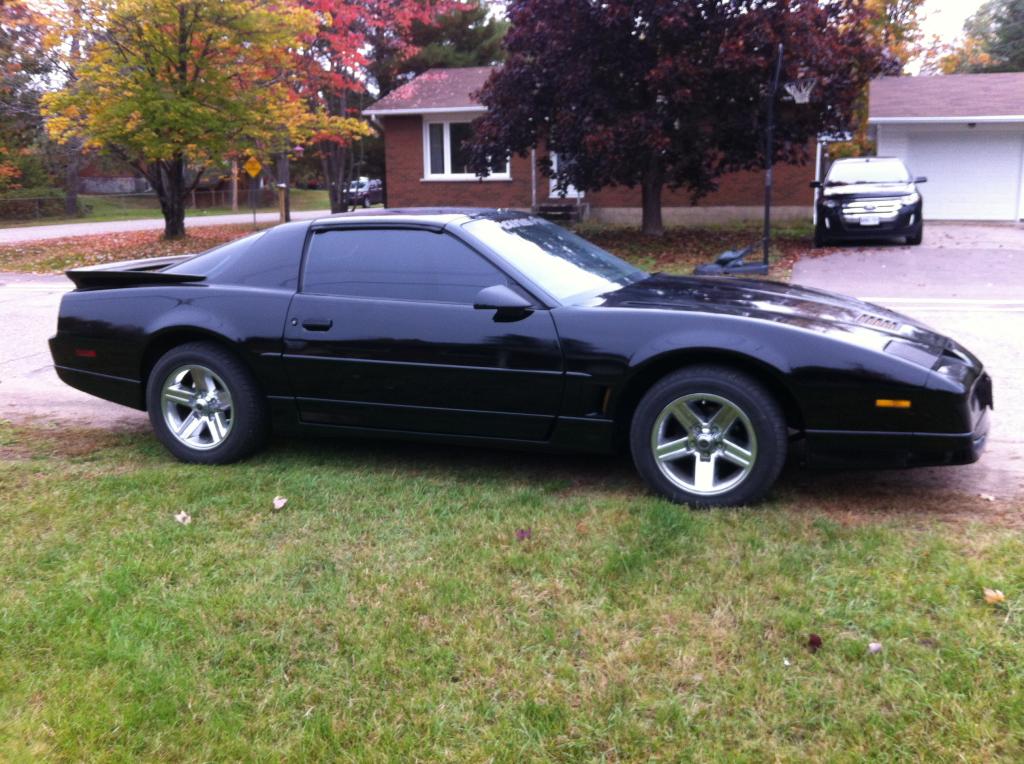
It needs wet sanding, a cut and buff. Some of it is perfect, the rest is ok... I could live with it how it is.
I'll be lowering the car a little bit, 17" cast year one gold snowflakes, some tasteful gold pinstriping and that's it for the body really.
So much work, I did what is basically 2 big projects in about 3 months (the body work and the LS swap)... I'll pace myself from here on out.
The gun I used was a DeVilbiss finishline4, fed from my 5hp 60gal compressor, ran through 50' of hose to my oil/water seperator with a dessicant stage, then my spray gun only hose through another filter at the gun with 23psi at full pull on the regulator at the gun.
The compressor was borderline in order to spray enough without a dry edge (got a bit in the middle of the hood).
Next time I paint it should be much better, I learned immensely through this... And I REALLY hate sanding.
3 20" box fans through furnace filters... I would like to use more fans next time, but they did work.

The gf helping me mask up. I blew it out under the garage door through the thinner fiberglass type filters. It cleared out the over spray ok. Big lesson learned was to make the booth way bigger than you think you need.

This is how bright it was in the garage, two 500W halogens and whatever bulb is in the ceiling. The white tarps helped a lot.

First coat... And you can see bugs (again!). I stopped, we wet sanded the next day with a light scuff everywhere else and started again... Lesson is to NEVER paint at night.

Heres part of the bumper... for my second time spraying I'm happy.

Outside for some fresh air!

Not sure if this is overspray or what on my headlight covers... It's also the same on my hood vents. So, those will be getting sanded again and painted whenever it is I get time at home... I'll set up a tiny booth in the garage using the frame from my easy up shelter. Part of the off colour is dust.

The rear is possibly my favourite part of these cars... I've always been a rear end kind of guy. I'm going to replace that cracked tail light filler.

Here it is, assembled after the first drive with the LS1 in it.

It needs wet sanding, a cut and buff. Some of it is perfect, the rest is ok... I could live with it how it is.
I'll be lowering the car a little bit, 17" cast year one gold snowflakes, some tasteful gold pinstriping and that's it for the body really.
So much work, I did what is basically 2 big projects in about 3 months (the body work and the LS swap)... I'll pace myself from here on out.
The gun I used was a DeVilbiss finishline4, fed from my 5hp 60gal compressor, ran through 50' of hose to my oil/water seperator with a dessicant stage, then my spray gun only hose through another filter at the gun with 23psi at full pull on the regulator at the gun.
The compressor was borderline in order to spray enough without a dry edge (got a bit in the middle of the hood).
Next time I paint it should be much better, I learned immensely through this... And I REALLY hate sanding.
12-08-2014, 09:47 PM
#19
Senior Member
iTrader: (2)
Join Date: May 2002
Location: Hollywood, FL
Posts: 504
Likes: 0
Received 0 Likes
on
0 Posts
Car: '88 Black GTA, T-tops, digital dash
Engine: 5.7 TPI w/custom chip
Transmission: 700R4
Axle/Gears: 9 bolt 327 posi
Re: My body thread
Man, it looks great, awesome job!

Thread
Thread Starter
Forum
Replies
Last Post
Street Lethal
Power Adders
634
04-30-2019 12:14 PM