My polishing projects
 12-10-2013, 09:26 PM
#1

My polishing projects
I started doing polishing about 3 tears ago and have gotten good results and not exceeding 220 grit. So thought I would share some stuff I am in the process of doing.
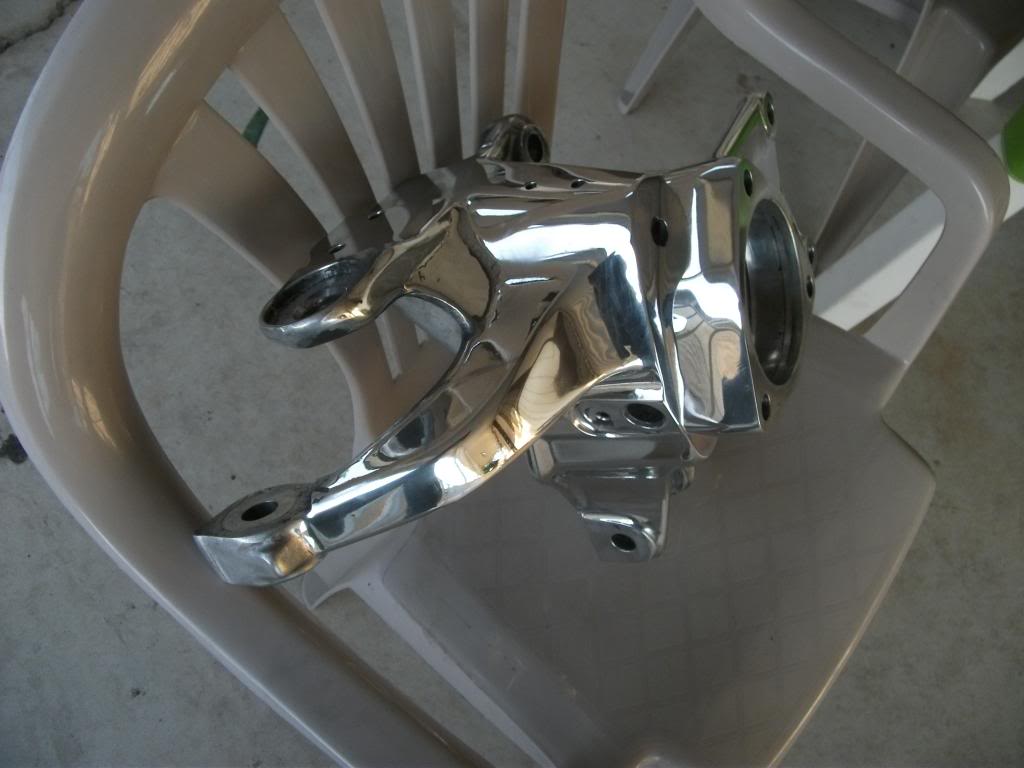
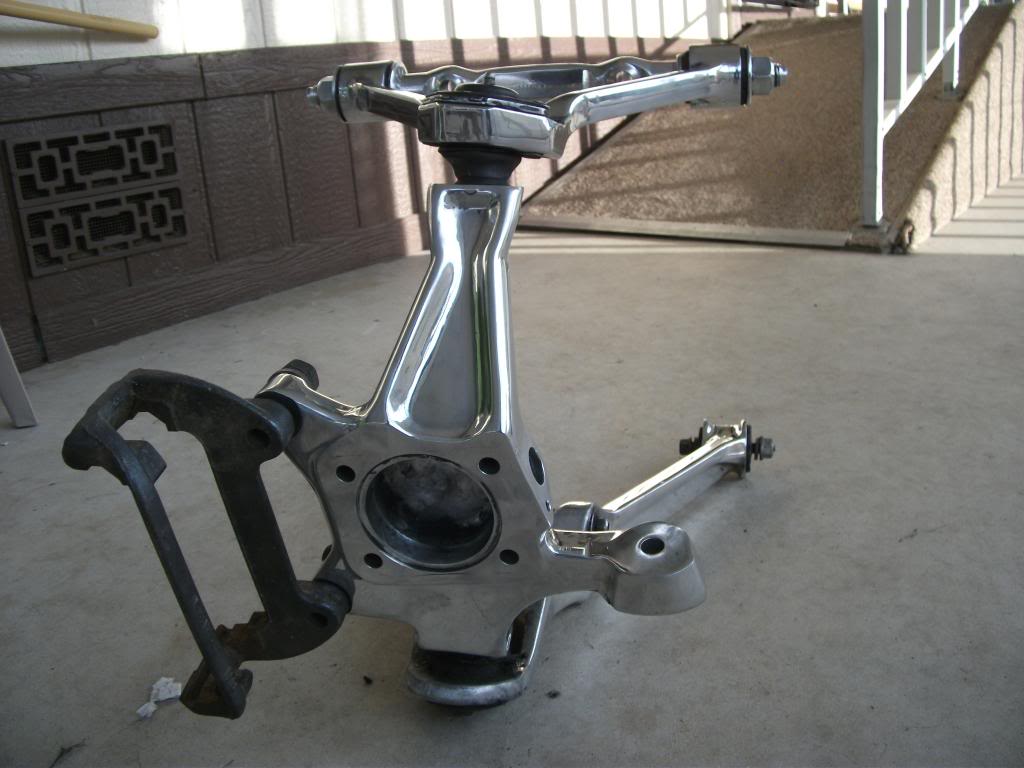
90 vette rear knuckle, doing all of the rear suspension
dogbones
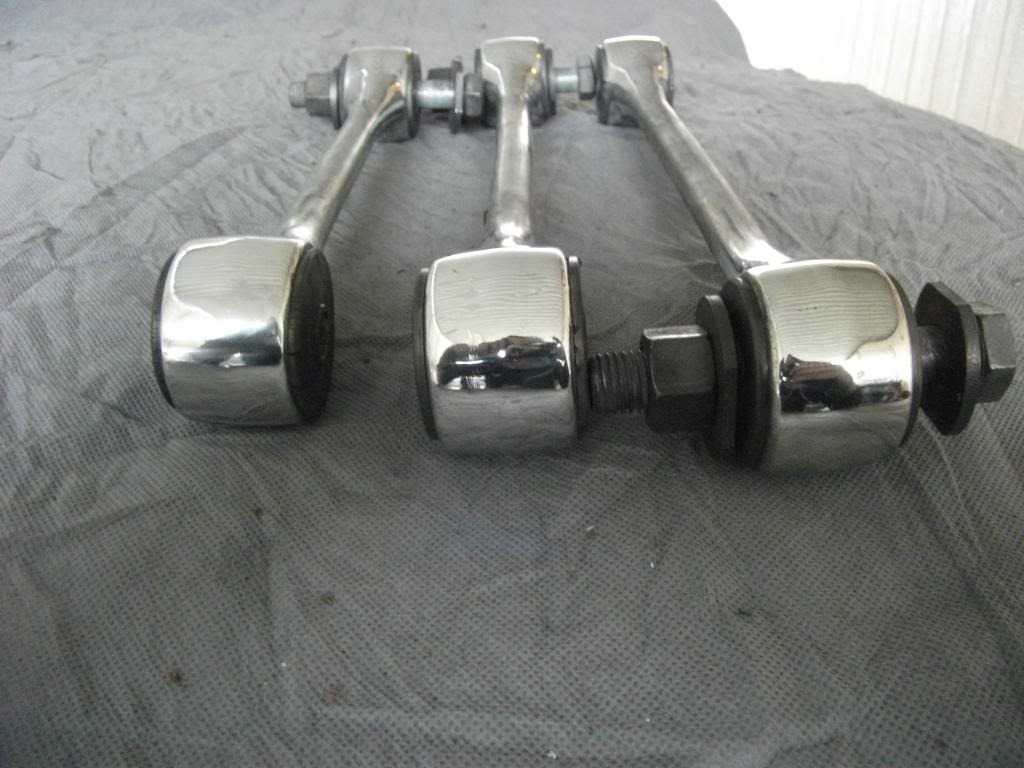
1/2 shaft
front suspension
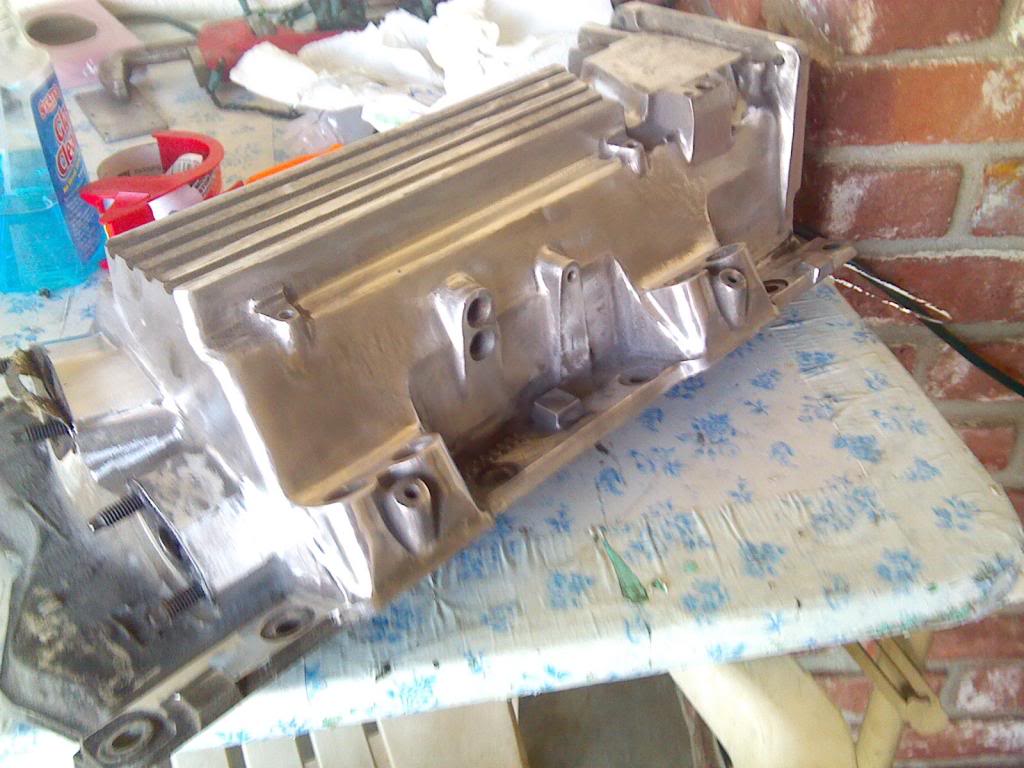
start of a 1990 TPI no polishing done just in sanding stages
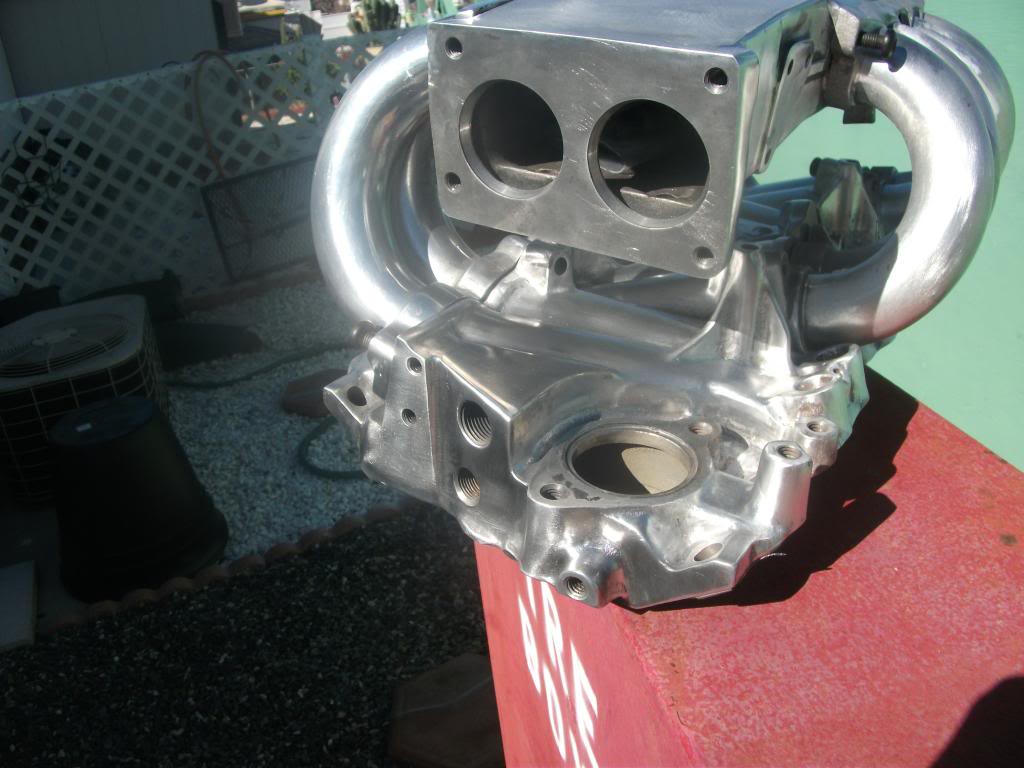
3800 start of a intake manifold
Crossfire and LT1 manifold.
Crossfire will have base and injectors polished and air cleaner chromed
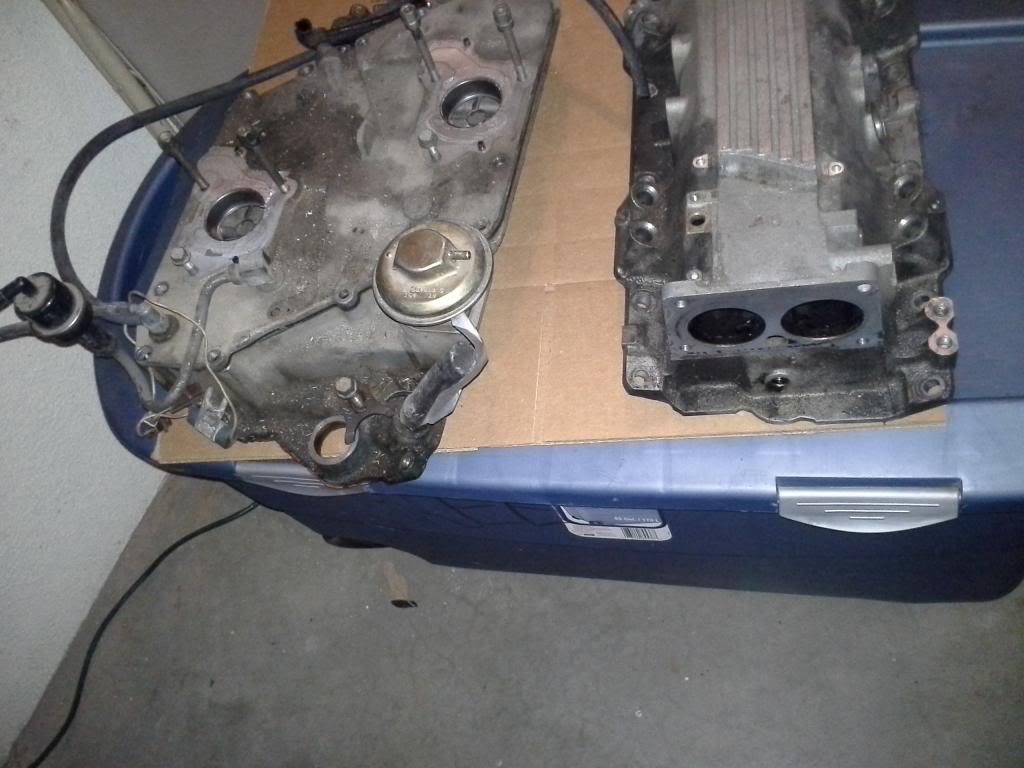
start of sanding the LT1 manifold
Just purchased this LT1 manifold for a 100 it will also be polished and used on my camaro
90 vette rear knuckle, doing all of the rear suspension

dogbones

1/2 shaft

front suspension

start of a 1990 TPI no polishing done just in sanding stages

3800 start of a intake manifold


Crossfire and LT1 manifold.
Crossfire will have base and injectors polished and air cleaner chromed

start of sanding the LT1 manifold

Just purchased this LT1 manifold for a 100 it will also be polished and used on my camaro


 12-11-2013, 03:09 PM
#3
Member

iTrader: (1)

Join Date: May 2008
Location: Cincinnati, OH
Posts: 172
Likes: 0
Received 0 Likes
on
0 Posts
Re: My polishing projects
That's great work! I have done a couple of projects but did not have good luck unless i went way up to 2000 grit. How are you getting such great results with 220 grit?


Trending Topics
12-11-2013, 03:50 PM
#8
Re: My polishing projects
Emery compound will easily remove 120-220 grit sanding marks.
12-11-2013, 05:43 PM
#9
Junior Member

Join Date: May 2003
Location: Cincinnati area
Posts: 79
Likes: 0
Received 1 Like
on
1 Post
Car: 1988 Iroc-Z / 1992 RS
Engine: 5.7 TPI / L03 TBI
Transmission: 700r-4 / 700r-4
Axle/Gears: 9 bolt 2.77 posi / 10 bolt 2.73
Re: My polishing projects
What type of buffing wheels you use? What compounds?
12-11-2013, 06:11 PM
#11
Supreme Member
iTrader: (1)

Join Date: Sep 2010
Location: Georgetown TX
Posts: 1,928
Likes: 0
Received 0 Likes
on
0 Posts
Car: Base 91 'bird
Engine: 3.1 v6
Transmission: 4L60
Axle/Gears: 9-bolt 3.27 & PBR
Re: My polishing projects
I've spent hours on one valve cover and it's nowhere near a shine! Or even smooth everywhere. When do you stop sanding and start polishing?


 12-13-2013, 04:56 PM
#16
Member
iTrader: (1)
Join Date: May 2008
Location: Cincinnati, OH
Posts: 172
Likes: 0
Received 0 Likes
on
0 Posts
Re: My polishing projects
What kind of compound do you use on the buffer?
I would love to see a video of you polishing a part, especially one with lots of curves and crannies. I've been putting off doing my tpi runners because of all the time the plenum took. I can't figure out how to get into the little spaces
I would love to see a video of you polishing a part, especially one with lots of curves and crannies. I've been putting off doing my tpi runners because of all the time the plenum took. I can't figure out how to get into the little spaces
Last edited by fyrebird68; 12-13-2013 at 05:00 PM.
12-13-2013, 05:10 PM
#17
Re: My polishing projects
What kind of compound do you use on the buffer?
I would love to see a video of you polishing a part, especially one with lots of curves and crannies. I've been putting off doing my tpi runners because of all the time the plenum took. I can't figure out how to get into the little spaces
I would love to see a video of you polishing a part, especially one with lots of curves and crannies. I've been putting off doing my tpi runners because of all the time the plenum took. I can't figure out how to get into the little spaces

 12-17-2013, 03:19 PM
#21
Member
iTrader: (4)
Join Date: Nov 1999
Location: Fox Lake, IL
Posts: 273
Likes: 0
Received 1 Like
on
1 Post
Car: 1988 camaro sports coupe
Engine: Fast Burn 385
Transmission: 700r4
Axle/Gears: 9 bolt w/ 3.27 gears
Re: My polishing projects
looks like he's using emery (grey bar) on a stiff sisal buffing wheel. The emery being so abrasive and the grinder going three times faster than a polisher is why he sands so little. Tripoli on a polisher is the recommended first step for aluminum, at least on the polishing boards I've been on. So abrasive a compound on a stiff wheel, spinning three times faster than a polisher, will leave waves on a flat surface, resulting in a fun house mirror finish. He's fine with curved parts, but using that method on a flat surface will leave a lot of waves...don't ask how I know. I ruined that wheel! ha
I'd be interested to see what Jeff's work would look like if he followed with tripoli and white...especially on the rear knuckle, which seems to have a lot of time into it. I'm somewhat surprised he managed to do that with a grinder. I shot a bar of tripoli clear across my garage like a bullet when I tried a grinder! Swear if it didn't hit a stud it might have ended up outside! haha I waited until harbor freight had a sale and picked up a polisher for like $20 bucks. Made my polishing less intense! haha Good work Jeff...you're a brave man.
I'd be interested to see what Jeff's work would look like if he followed with tripoli and white...especially on the rear knuckle, which seems to have a lot of time into it. I'm somewhat surprised he managed to do that with a grinder. I shot a bar of tripoli clear across my garage like a bullet when I tried a grinder! Swear if it didn't hit a stud it might have ended up outside! haha I waited until harbor freight had a sale and picked up a polisher for like $20 bucks. Made my polishing less intense! haha Good work Jeff...you're a brave man.
12-17-2013, 11:39 PM
#22
Re: My polishing projects
looks like he's using emery (grey bar) on a stiff sisal buffing wheel. The emery being so abrasive and the grinder going three times faster than a polisher is why he sands so little. Tripoli on a polisher is the recommended first step for aluminum, at least on the polishing boards I've been on. So abrasive a compound on a stiff wheel, spinning three times faster than a polisher, will leave waves on a flat surface, resulting in a fun house mirror finish. He's fine with curved parts, but using that method on a flat surface will leave a lot of waves...don't ask how I know. I ruined that wheel! ha
I'd be interested to see what Jeff's work would look like if he followed with tripoli and white...especially on the rear knuckle, which seems to have a lot of time into it. I'm somewhat surprised he managed to do that with a grinder. I shot a bar of tripoli clear across my garage like a bullet when I tried a grinder! Swear if it didn't hit a stud it might have ended up outside! haha I waited until harbor freight had a sale and picked up a polisher for like $20 bucks. Made my polishing less intense! haha Good work Jeff...you're a brave man.
I'd be interested to see what Jeff's work would look like if he followed with tripoli and white...especially on the rear knuckle, which seems to have a lot of time into it. I'm somewhat surprised he managed to do that with a grinder. I shot a bar of tripoli clear across my garage like a bullet when I tried a grinder! Swear if it didn't hit a stud it might have ended up outside! haha I waited until harbor freight had a sale and picked up a polisher for like $20 bucks. Made my polishing less intense! haha Good work Jeff...you're a brave man.
I did some corvette rims once and kept them on car and ran them at about 30mph and sat on my stool with cold beer and did a whole set in about 2 hours.
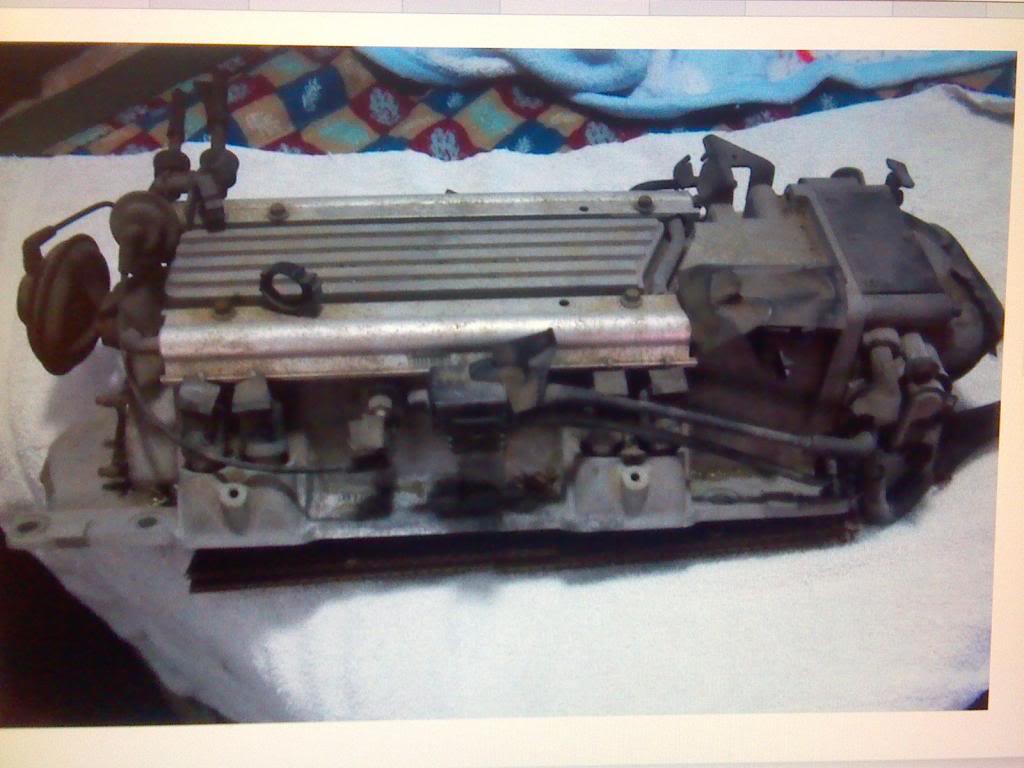
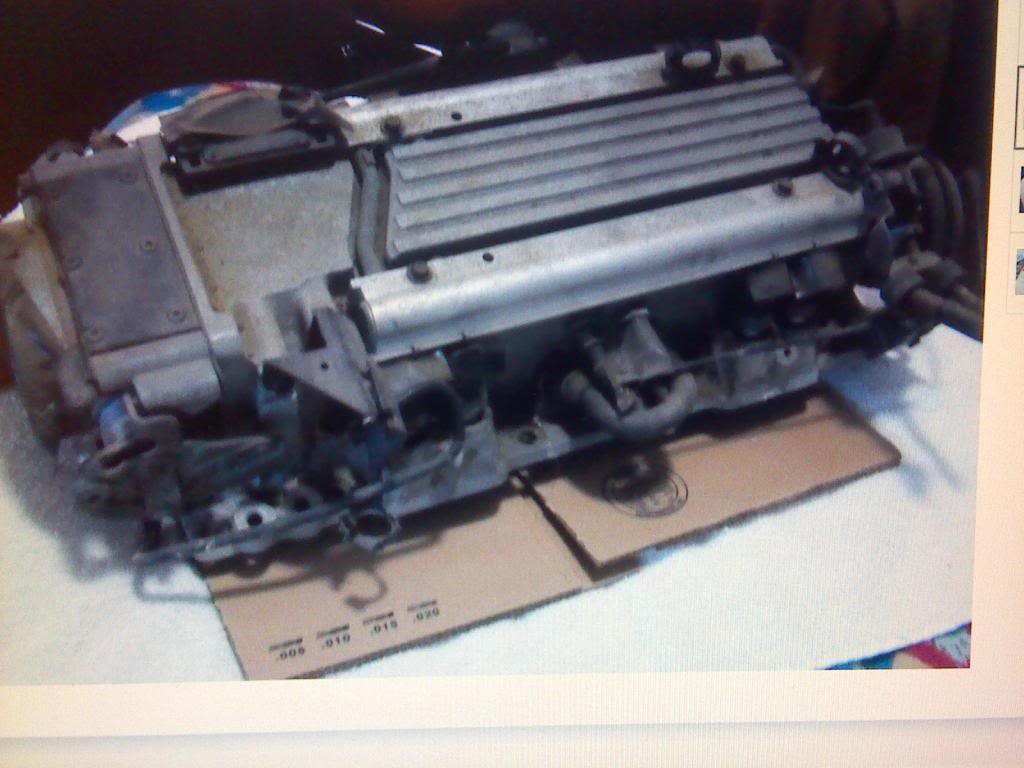
here is a good comparrison of a 1990 vette motor between polished and grungy.
If you look at the a/c bracket you can see the hose reflection. The magnesium valve covers though not finished got a chrome shine as did the fuel rail and thermostat housing


 12-19-2013, 02:49 AM
#27
Banned
iTrader: (2)

Join Date: Mar 2008
Location: Colorado
Posts: 135
Received 0 Likes
on
0 Posts
Car: 1985 Camaro Sport Coupe
Engine: 2.8 - Bored/Stroked, Pacesetters
Transmission: 5 spd Manual
Axle/Gears: Stock
Re: My polishing projects
Hey man, where did you get the 1" (?) sanding tool for your grinder? That looks very cool to use. Thanks and all of your work is amazing! Not sure I have the patience lately to do such good work!
**EDIT**
Nevermind, I found the tool on Harbor Freights site.
http://www.harborfreight.com/1-2-hal...der-92158.html
**EDIT**
Nevermind, I found the tool on Harbor Freights site.
http://www.harborfreight.com/1-2-hal...der-92158.html
Last edited by 5215; 12-19-2013 at 02:53 AM. Reason: NVM
12-22-2013, 07:24 PM
#28
Re: My polishing projects
your work looks incredible! i'm going to try and polish up my spare plenum i have. I have one question for you though, Jeff; how would you suggest going about doing the throttle body, its so small, just do the whole thing with a dremel?
12-23-2013, 02:56 PM
#29
Re: My polishing projects
Looking at your pics, you can hide a lot of flaws in pics, you do have waves and plenty of scratches.
The statement about using 2000 grit and not being able to remove the compound because the scratches are too fine, is incorrect. The compound is nothing more than a fine sanding medium. When properly polished, there isn't any compound left on the surface and there isn't any haze. Haze can come from heat build up.
Stopping at 220 grit isn't abnormal. It's the choice of wheels and compounds that determine the finish. Get rid of the grinder and invest in a buff jack.
When polishing, it should give a mirror reflection without distortion. This is what my clients have come to expect and that's what they receive.
There is a difference between a maintenance polish and a service polish. Yours is a maintenance finish and will require maintenance over time. It will oxidize and not resist the dirt/crud accumulation.
You have a good start.
12-23-2013, 04:11 PM
#30
Re: My polishing projects
Looking at your pics, you can hide a lot of flaws in pics, you do have waves and plenty of scratches.
The statement about using 2000 grit and not being able to remove the compound because the scratches are too fine, is incorrect. The compound is nothing more than a fine sanding medium. When properly polished, there isn't any compound left on the surface and there isn't any haze. Haze can come from heat build up.
Stopping at 220 grit isn't abnormal. It's the choice of wheels and compounds that determine the finish. Get rid of the grinder and invest in a buff jack.
When polishing, it should give a mirror reflection without distortion. This is what my clients have come to expect and that's what they receive.
There is a difference between a maintenance polish and a service polish. Yours is a maintenance finish and will require maintenance over time. It will oxidize and not resist the dirt/crud accumulation.
You have a good start.
The statement about using 2000 grit and not being able to remove the compound because the scratches are too fine, is incorrect. The compound is nothing more than a fine sanding medium. When properly polished, there isn't any compound left on the surface and there isn't any haze. Haze can come from heat build up.
Stopping at 220 grit isn't abnormal. It's the choice of wheels and compounds that determine the finish. Get rid of the grinder and invest in a buff jack.
When polishing, it should give a mirror reflection without distortion. This is what my clients have come to expect and that's what they receive.
There is a difference between a maintenance polish and a service polish. Yours is a maintenance finish and will require maintenance over time. It will oxidize and not resist the dirt/crud accumulation.
You have a good start.
Last edited by Jeffs82TA; 12-23-2013 at 04:22 PM.
12-23-2013, 05:20 PM
#31
Re: My polishing projects
I don't take pictures of the finished parts and I don't have anything on hand right now. I usually get most parts after the first of the year when people see how much they have to spend after the holidays. I do more than just car parts, for example I do casket hardware, brass and rubber mouthpieces and custom composite casts, along with lenses for headlights/taillights.
I polish anything that someone wants smooth and shiny.
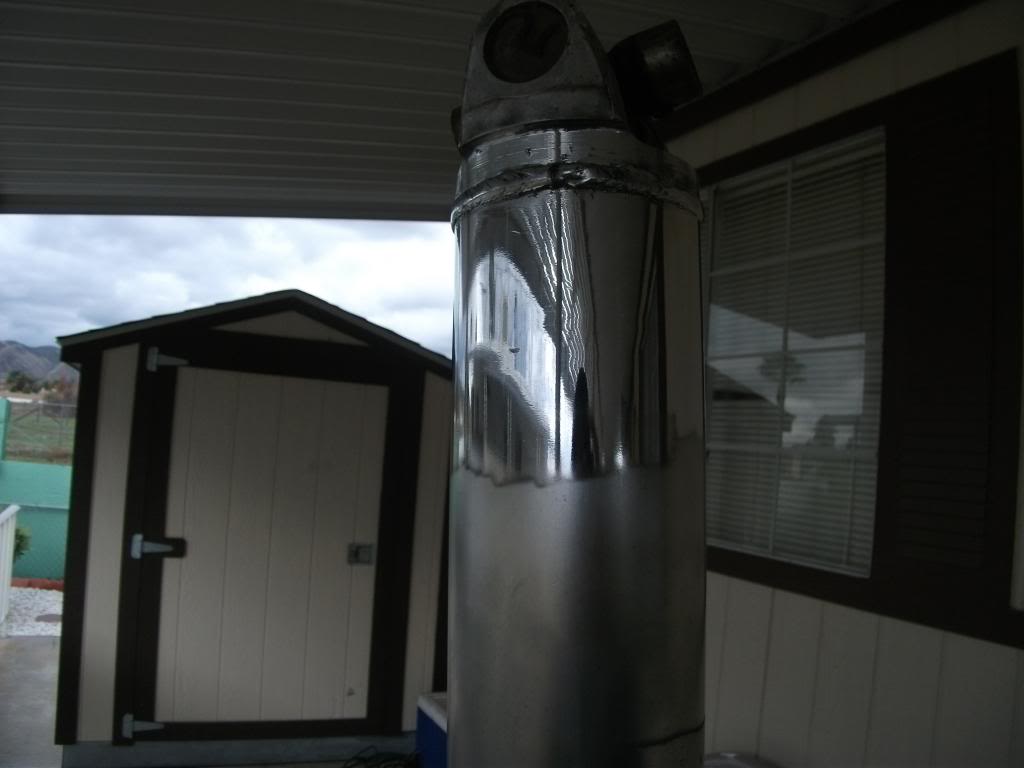
I've done tankers, trailers, semi fuel tanks and wheels, and rare dash lenses.
I have polished all the non-ferrous materials along with stainless, glass, plastics and raw steel used for molds and forming presses.
I might have a partly polished flywheel cover somewhere or maybe an aluminum pen I made. Let me see and I'll get a pic for you.
I polish anything that someone wants smooth and shiny.
I've done tankers, trailers, semi fuel tanks and wheels, and rare dash lenses.
I have polished all the non-ferrous materials along with stainless, glass, plastics and raw steel used for molds and forming presses.
I might have a partly polished flywheel cover somewhere or maybe an aluminum pen I made. Let me see and I'll get a pic for you.
12-23-2013, 05:37 PM
#32
Re: My polishing projects
Here are a couple pics of custom pens. Not the best pics, just what I had in my library.
All of the metal is alum. The red is a composite material and if you look closely at the shine line, it is smooth along the edges which indicates a scratch-free surface. These are inspected with a 10x loop by the customer.

These are once-fired 50 cal. BMG cases also made into custom pens. One has the alum. tip and the other is a solid copper tip.


Again, look at the shine line. Smooth edges. There are finger prints on them, I didn't wipe them down before photographing.
All of the metal is alum. The red is a composite material and if you look closely at the shine line, it is smooth along the edges which indicates a scratch-free surface. These are inspected with a 10x loop by the customer.
These are once-fired 50 cal. BMG cases also made into custom pens. One has the alum. tip and the other is a solid copper tip.
Again, look at the shine line. Smooth edges. There are finger prints on them, I didn't wipe them down before photographing.
12-23-2013, 06:20 PM
#33
Re: My polishing projects
Here are a couple pics of custom pens. Not the best pics, just what I had in my library.
All of the metal is alum. The red is a composite material and if you look closely at the shine line, it is smooth along the edges which indicates a scratch-free surface. These are inspected with a 10x loop by the customer.
These are once-fired 50 cal. BMG cases also made into custom pens. One has the alum. tip and the other is a solid copper tip.
Again, look at the shine line. Smooth edges. There are finger prints on them, I didn't wipe them down before photographing.
lets see aluminum you have polished that has been pitted, gouged and hit by things. Mine aren't totally finished and while they have scratches those can be removed
 compared to how they were its a 100% improvement.
so lets see some aluminum you have done that has had years of abuse on it.
12-23-2013, 06:37 PM
#34
Re: My polishing projects
True, they are not from under a hood. Have you ever worked raw alum.? This was machined and polished.
Have you ever worked once-fired brass? These things are very oxidized, dinged badly, and scratched heavily. Yes, they receive the same process as any part that comes from a car.
Like I said, I don't take pics of my work. I don't need to post it for the ego boost.
Instead of posting a bunch of pics of half finished parts, why not actually finish one and then post it? How about you send me any part you like and I will properly polish it to a finished stage, ready to install and send it back to you? Then you can see in person, how it should look. No poor quality pics to hide the flaws.
I never stated your stuff didn't look better, but it can be even better.
You have a good start.
 12-23-2013, 07:06 PM
#36
Re: My polishing projects
The first thing I would do is get a buff jack. It seems you are doing quite a bit off work and that would help you greatly. It helps to keep a even stroke and a flat surface.
Have you tried something like a surfacing wheel or the adhesive compounds? The adhesive compounds give you a flexible, coarse grit wheel that acts more like a flexible sandpaper. These are used mostly on jacks.
The use of ventilated wheels will help reduce heat and are available in most materials. There is a cut stroke along with a color stroke and these used together give the effect of two compounds from one and it cleans the part.
Quality wheels and compounds. One wheel per compound.
As mentioned, a jack will greatly help, I have four of them. That keeps me from having to change wheels all the time.
The last part you posted has a decent shine, but it could be better. And looking at the reflections, there are waves in the surface. It looks good if all the person wants is a shine, but for the high end street rods, muscle cars and show cars, there has to be more than that.
There are times that require hand work before the wheels touch the part. If it starts flat and smooth, it's easier to maintain that surface.
It's a progressive process and takes time to get it just right.
Like I said, your stuff looks nice, but I'm very picky as I have to be.
I do a lot of restoration work, but there are times clients want a new part polished. Either a rough cast or an anodized part. Most Lokar parts are clear anodized. A lot of wheels are cleared.
Sorry, a little long winded.
12-27-2013, 06:30 PM
#37
Re: My polishing projects
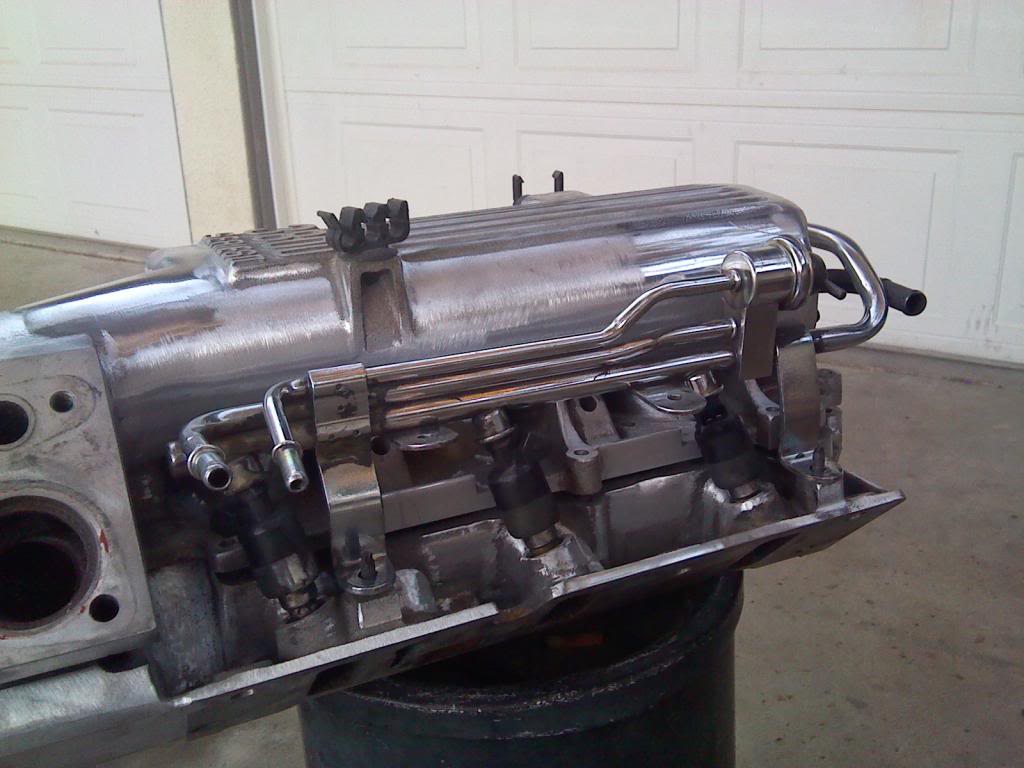
i had decided to do this myself on my spare plenum....now i figure i'd share my progress....took me about a total of 45 min to an hour for this, cuz its harder than you think to learn how to polish from the internet lol, theres no advice or walkthroughs i could find lol. once i figured it out, it went pretty easily.


12-27-2013, 07:07 PM
#38
Re: My polishing projects
i had decided to do this myself on my spare plenum....now i figure i'd share my progress....took me about a total of 45 min to an hour for this, cuz its harder than you think to learn how to polish from the internet lol, theres no advice or walkthroughs i could find lol. once i figured it out, it went pretty easily.
That's a good start. I recommend getting high quality compounds and wheels. It makes it go faster and the finished product is better. Show it when you have it finished.
12-27-2013, 07:22 PM
#39
Re: My polishing projects
You don't need high quality compounds and wheels. The op is using harbor freight and achieving good results. I have some harbor freight sticks too that seem to work well enough. Just get a decent tool to run the wheels with.
12-27-2013, 08:31 PM
#40
Re: My polishing projects
If well enough is satisfactory for you... sorry.
To get the best results, you need quality products. HF isn't known for quality, but you can get well enough from them. I refuse to settle for the well enough or good mentality. Do it right or don't do it at all. Always strive for better.
12-27-2013, 08:58 PM
#41
Supreme Member

Join Date: Feb 2006
Location: Sanctuary state
Posts: 1,780
Likes: 0
Received 27 Likes
on
24 Posts
Car: 67 ******mobile
Engine: 385 Solid roller
Transmission: T-56
Axle/Gears: 4.11
Re: My polishing projects
For a home DIY with and improvising with tools looks good
Depends one ones opinion of what looks "good".
I commend the op on giving it a go not as easy as it looks is it lol.
A professional polish job costs money for a reason you should see some of the equiptment used
not everyone can afford that
Yeah getting alll the scratches machining marks out etc takes some good equiptment but unless someone knows a "good" polish job his will wow 90% of people that see it.
Takes a hefty investment of time and money to put all that together.
If youre starting out and want to take it further try these guys tarheelparts.com
They will tell you what you need and guide you. Most the internet info on polishing is BS and getting someone with a shop to tell you how will NEVER ever happen.
Kudos for taking the time to try it, not easy
Now try some 30 yr old rough cast parts thats always fun. If you can get one of those to look like glass without a bunch of ripples or lines youre getting good. Something to strive for
Getting those to look good can be tough.
Watch that buffer,(stand up kind) was finishing a bracket for someone the other day, girlfriend breaks the cardinal sin of coming in the garage while Im working . Took a nanosecond of lapse of though and WHAM wheel grabbed the bracket. Just heard it ricocheting never saw it. One of those could kill ya.
Be careful and have fun!
You don't need high quality compounds and wheels.
I commend the op on giving it a go not as easy as it looks is it lol.
A professional polish job costs money for a reason you should see some of the equiptment used
not everyone can afford that
Yeah getting alll the scratches machining marks out etc takes some good equiptment but unless someone knows a "good" polish job his will wow 90% of people that see it.
Takes a hefty investment of time and money to put all that together.
If youre starting out and want to take it further try these guys tarheelparts.com
They will tell you what you need and guide you. Most the internet info on polishing is BS and getting someone with a shop to tell you how will NEVER ever happen.
Kudos for taking the time to try it, not easy
Now try some 30 yr old rough cast parts thats always fun. If you can get one of those to look like glass without a bunch of ripples or lines youre getting good. Something to strive for
Getting those to look good can be tough.
Watch that buffer,(stand up kind) was finishing a bracket for someone the other day, girlfriend breaks the cardinal sin of coming in the garage while Im working . Took a nanosecond of lapse of though and WHAM wheel grabbed the bracket. Just heard it ricocheting never saw it. One of those could kill ya.
Be careful and have fun!
Last edited by cuisinartvette; 12-27-2013 at 09:28 PM.
12-27-2013, 09:14 PM
#42
Re: My polishing projects
You don't need quality oil either... to each their own.
If well enough is satisfactory for you... sorry.
To get the best results, you need quality products. HF isn't known for quality, but you can get well enough from them. I refuse to settle for the well enough or good mentality. Do it right or don't do it at all. Always strive for better.
If well enough is satisfactory for you... sorry.
To get the best results, you need quality products. HF isn't known for quality, but you can get well enough from them. I refuse to settle for the well enough or good mentality. Do it right or don't do it at all. Always strive for better.
12-27-2013, 09:27 PM
#43
Re: My polishing projects
The hardest part of working with old materials, is the oxidation. It has to be removed and that means removing metal to get rid of the pitting.
Cast parts are harder to polish than billet material. The alloy also plays a big part in how it finishes.
Using a buffing jack is dangerous...getting a catch not only is dangerous, but can ruin several hours of work in an instant.
Not all information on the net is BS. There are some very informative websites, but it's best to get training in person. There is just too much to explain all of the details in writing.
The plenum that is posted above.... should take approx. 4-6 hours to complete to a show shine.
The OP has a good start and with what he has accomplished, I believe he can improve and get that perfect shine. As stated, for most people, what he has done would be perfect for their needs.
12-27-2013, 09:35 PM
#44
Re: My polishing projects
Do you still not have any pictures of your finished polished items other than small pens and 50 BMG cases? Arguments about do it this way or not at all or use this tool/product that's the best or else ___ are incredibly hollow. For polishing it makes no difference who's name is on the product, what country it's from and how much it cost; if a tool can spin the wheel of a proper material up to speed with a compound of the required abrasiveness you are good to go. (and to quote Obama) "...Period."
Cheap compounds are inconsistent and have less abrasive material. Purchase your wheels and compound from China and continue to wonder why your finish is inferior.
So where are the parts you have polished?
12-27-2013, 10:32 PM
#45
Re: My polishing projects
But if on the internet you want to argue that it is only a show car finish if when viewed from a foot away from your face you don't see any waves and/or scratches or cloudiness while looking at it under natural light AND (of course) fluorescent/incandescent light than fine i will concede that it does not fit your imaginary description. Meanwhile I will live in realville where when viewed from the average distance of 4-6' once installed you will not see any scratches/cloudiness/waves.
This guy is doing great work and you want to try to nit-pick his work because of a tool he is using or a compound. Unbelievable.

 12-28-2013, 06:26 PM
#47
Member
iTrader: (4)
Join Date: Nov 1999
Location: Fox Lake, IL
Posts: 273
Likes: 0
Received 1 Like
on
1 Post
Car: 1988 camaro sports coupe
Engine: Fast Burn 385
Transmission: 700r4
Axle/Gears: 9 bolt w/ 3.27 gears
Re: My polishing projects
I don't think Smokin' is being too critical. The suggestions offered up were relevant to those seeking a better than average finish. Nothing I've read on metal polishing threads, contradicts his suggestions. While I agree that not having a car part polished doesn't help, what he speaks of really isn't disputed by professional polishers. Sure, he might not be tactful in his final responses, but nothing was wrong with his initial observations and suggestions. There are visible waves and scratches, a grinder spins too fast, the more scratches you remove the better your finish will be, and a cloudy surface is not caused by the buffer not removing compound from fine marks.
What part of any of that is wrong? The visible waves and scratches that you can see? The tool he�s using that spins too fast? The fact he should follow with another wheel/finer compound? The correction of what doesn�t cause a cloudy finish? If you research, this is knowledge that those who polish are readily willing to share. I would suggest anyone looking to polish parts visit the caswell website forums and research for yourself. Everyone has their own ways to go about it, but there are some agreed upon principals in regards to polishing that some might want to follow. If nothing else, you get an idea of the process a professional would take. The suggested recommendations earlier aren�t wrong.
Perhaps no one ever comments on the grade of a polish NOT being showcar quality, but a showcar finish has a noticeable differance. If one were to google �mirror finish polishing� at look at the work on their website, it looks much different than a typical polished aluminum. For all intents and purposes a mirror finish is far from required, but if you�re willing to put in more time, you�ll get better results.
Waves don�t disappear with distance and cloudiness never clears from distance. Cloudiness actually increases from distance, it gets clearer, the closer you get to the part. Also, cloudiness remains unless you go back and remove the imperfections that cloud the finish with a more aggressive compound or you start over and sand again. You cannot improve the clarity of any finish with metal polish or fine compounds. They�re too fine to remove the imperfections clouding the finish. Your finish is clouded by imperfections deflecting light. Those imperfections can be removed with more than a few minutes of sanding. The clarity has more to do with the preparation of the surface, than it has to do with how fast you can spin a buffing wheel. High speed polishing won't clear a finish.
12-28-2013, 07:33 PM
#48
Re: My polishing projects
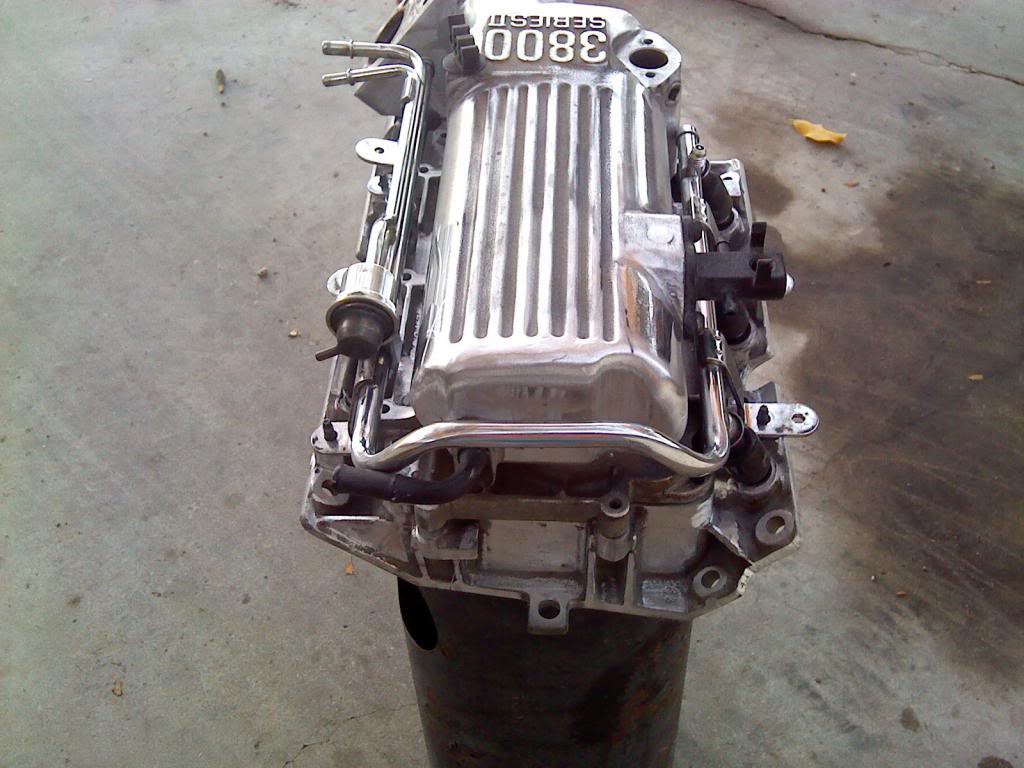
from start to finish:
beginning

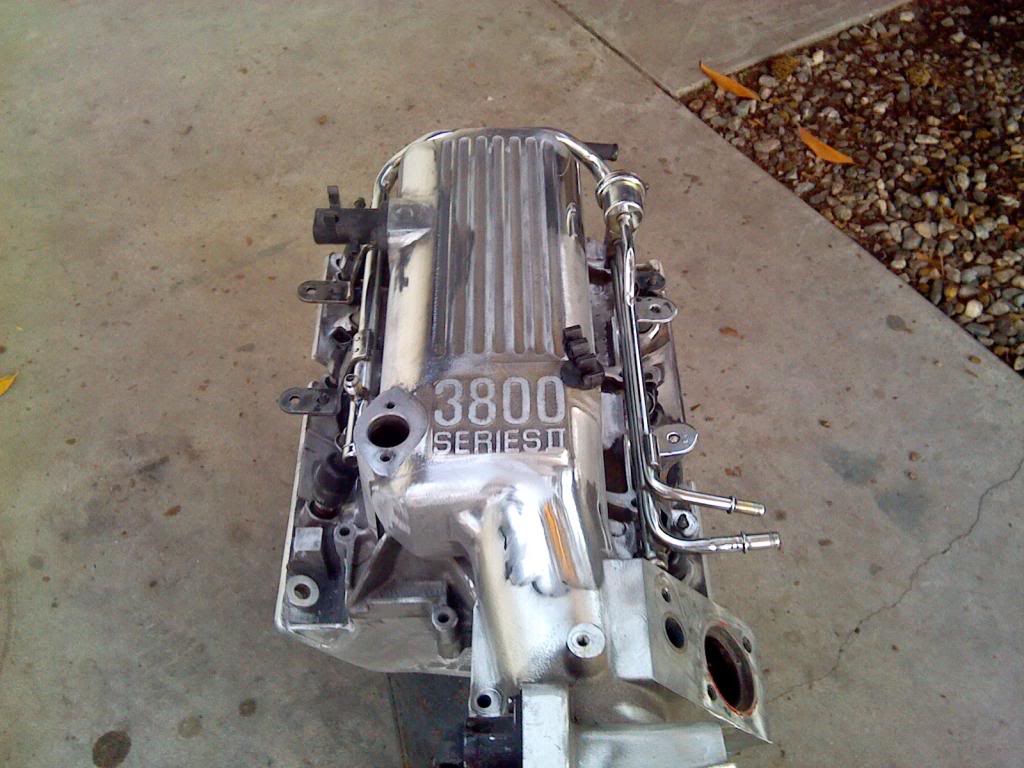
end:


going to go to the fuel rail next, then see if the intake manifold the original owner had is salvageable (he cross threaded a fuel rail bolt in and subsequently broke it while its stuck)
Jeff: I'm working on an '87 project now, the heads i just bought are for an 87, isn't that when they changed the intake manifold bolt pattern if i remember correctly? as much as yours looks way better than mine, i think i'll have to stick with this project.
beginning
end:
going to go to the fuel rail next, then see if the intake manifold the original owner had is salvageable (he cross threaded a fuel rail bolt in and subsequently broke it while its stuck)
Jeff: I'm working on an '87 project now, the heads i just bought are for an 87, isn't that when they changed the intake manifold bolt pattern if i remember correctly? as much as yours looks way better than mine, i think i'll have to stick with this project.
12-28-2013, 10:48 PM
#49
Re: My polishing projects
Discluding sanding it took me five mins to polish (using my cheap, worthless, can't do the job right, chinese made Eastwood and HF supplies) this and no one in real life is going to look at it and say "well it's polished but it's not a show car polish finish." Only on the internet would someone say something that ridiculous.
But if on the internet you want to argue that it is only a show car finish if when viewed from a foot away from your face you don't see any waves and/or scratches or cloudiness while looking at it under natural light AND (of course) fluorescent/incandescent light than fine i will concede that it does not fit your imaginary description. Meanwhile I will live in realville where when viewed from the average distance of 4-6' once installed you will not see any scratches/cloudiness/waves.
This guy is doing great work and you want to try to nit-pick his work because of a tool he is using or a compound. Unbelievable.
from start to finish:
beginning
end:
going to go to the fuel rail next, then see if the intake manifold the original owner had is salvageable (he cross threaded a fuel rail bolt in and subsequently broke it while its stuck)
Jeff: I'm working on an '87 project now, the heads i just bought are for an 87, isn't that when they changed the intake manifold bolt pattern if i remember correctly? as much as yours looks way better than mine, i think i'll have to stick with this project.


Thread
Thread Starter
Forum
Replies
Last Post
bigjay89gta
Engine/Drivetrain/Suspension Parts for Sale
12
10-15-2015 08:04 AM
LT1Formula
Engine/Drivetrain/Suspension Parts for Sale
7
10-08-2015 08:34 PM