Detailed
 05-27-2012, 03:40 PM
#1
Detailed
I spent around 20 hours detailing my Camaro over these past two days and I finally finished a couple hours ago. Figured I'd do a little write-up detailing the processes and products used, along with techniques. I use a lot of stuff from the Chemical Guys line, so unless otherwise noted, the products listed are CG. Microfiber towels are either cheap, throwaway O'Reilly ones (interior/jambs/wheels/tires) or Pak-Shak (everything else).
I always start with the interior. I actually did the grunt work on cleaning the plastics a few weeks ago, which took three hours, so that saved me a lot of time these past two days. For a garage queen that only gets driven when clean and which only sees the nicest of weather and the nicest of roads for a couple thousand miles a year, I couldn't believe how filthy the interior was after sitting in an undisturbed garage for the better part of four years. I was scrubbing the plastics with diluted all purpose cleaner on an MF and even after 6-7 times, the towel was still turning brown with dirt. Keep in mind my car was stored with the windows up as well.
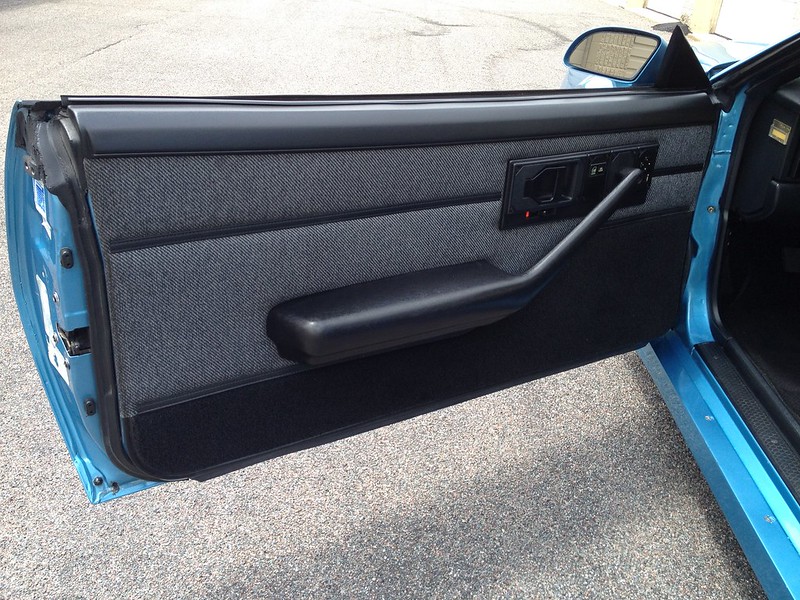
Wiping all the plastics down with a diluted all purpose cleaner is the first thing I do, so I spent a little time today doing that. I then followed that with some Silk Shine dressing on everything. I then decided to take care of the inside of the glass all around, since I could see a haze on it from the inside. I find that most glass cleaners are a hassle, and usually the best thing to use is just a dry, clean MF towel. After this, I used a Shop-Vac on everything, and then I was ready for a liquid extractor on the seats and carpets.
I have never used an extractor before; the year I bought my car I shampooed the seats by hand, but that was futile, so I never bothered again since the seats seemed pretty clean. After 35k miles with the T-tops off and 13 years, I was wrong. I decided last time I was in there that I should try renting a Rug Doctor from the grocery store, so I got one for about $27. For those considering using one of these, I spent six hours steaming and went through three bottles of Anti-Foam and two bottles of upholstery cleaner (I used this on the carpet as well)--I used the Rug Doctor brand solutions. Total cost was around $50.
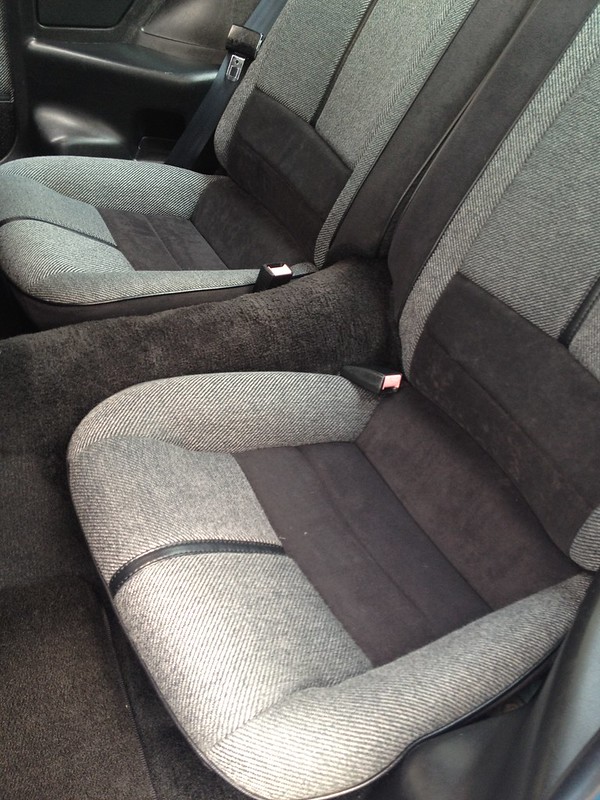
The rug doctor has an optional hand tool for an additional $3, and the machine is really easy to use and works quite well. I thought my seats were clean, and I pulled out 7-8 tanks of dark brown water. For 13 years I've had a stain on the crushed velvet/velour/whatever it is on the passenger seat bottom. It came right out with the rug doctor. The stain is gone now. You'll need about 6 hours for the seats to dry out when you are done.
Overall, I was very impressed with the rug doctor. The nozzle has a clear portion on the vacuum part of it so you can see what is coming out of your seats, and you can see the liquid being sucked out from behind the fabric--it gets deep down into the fabric and gets sucked back out through; it looked kind of cool. You can't erase 150k miles of seat time, but you can pull a lot of slime out. My seats feel much cleaner to the touch now, and I would highly recommend renting one of these once a year to anyone; I will definitely do this once a year now. One technique tip--keep the nozzle moving quickly across the seat as you are spraying/vacuuming. You need to move it at 1 foot per second, which seems fast, but is necessary. Less than that and you end up with the solution spraying out and foaming badly, and running all over the place. It was a messy first hour trying to dial it in before I realized I was pulling the nozzle back too slowly but after that it worked really well. Here are a few finished interior shots. I wasn't planning on doing a write-up so I didn't take any process pics of this, and these are just quickie washed out iPhone pics with the car next to a row of white storage garages reflecting the sun:


I always start with the interior. I actually did the grunt work on cleaning the plastics a few weeks ago, which took three hours, so that saved me a lot of time these past two days. For a garage queen that only gets driven when clean and which only sees the nicest of weather and the nicest of roads for a couple thousand miles a year, I couldn't believe how filthy the interior was after sitting in an undisturbed garage for the better part of four years. I was scrubbing the plastics with diluted all purpose cleaner on an MF and even after 6-7 times, the towel was still turning brown with dirt. Keep in mind my car was stored with the windows up as well.
Wiping all the plastics down with a diluted all purpose cleaner is the first thing I do, so I spent a little time today doing that. I then followed that with some Silk Shine dressing on everything. I then decided to take care of the inside of the glass all around, since I could see a haze on it from the inside. I find that most glass cleaners are a hassle, and usually the best thing to use is just a dry, clean MF towel. After this, I used a Shop-Vac on everything, and then I was ready for a liquid extractor on the seats and carpets.
I have never used an extractor before; the year I bought my car I shampooed the seats by hand, but that was futile, so I never bothered again since the seats seemed pretty clean. After 35k miles with the T-tops off and 13 years, I was wrong. I decided last time I was in there that I should try renting a Rug Doctor from the grocery store, so I got one for about $27. For those considering using one of these, I spent six hours steaming and went through three bottles of Anti-Foam and two bottles of upholstery cleaner (I used this on the carpet as well)--I used the Rug Doctor brand solutions. Total cost was around $50.
The rug doctor has an optional hand tool for an additional $3, and the machine is really easy to use and works quite well. I thought my seats were clean, and I pulled out 7-8 tanks of dark brown water. For 13 years I've had a stain on the crushed velvet/velour/whatever it is on the passenger seat bottom. It came right out with the rug doctor. The stain is gone now. You'll need about 6 hours for the seats to dry out when you are done.
Overall, I was very impressed with the rug doctor. The nozzle has a clear portion on the vacuum part of it so you can see what is coming out of your seats, and you can see the liquid being sucked out from behind the fabric--it gets deep down into the fabric and gets sucked back out through; it looked kind of cool. You can't erase 150k miles of seat time, but you can pull a lot of slime out. My seats feel much cleaner to the touch now, and I would highly recommend renting one of these once a year to anyone; I will definitely do this once a year now. One technique tip--keep the nozzle moving quickly across the seat as you are spraying/vacuuming. You need to move it at 1 foot per second, which seems fast, but is necessary. Less than that and you end up with the solution spraying out and foaming badly, and running all over the place. It was a messy first hour trying to dial it in before I realized I was pulling the nozzle back too slowly but after that it worked really well. Here are a few finished interior shots. I wasn't planning on doing a write-up so I didn't take any process pics of this, and these are just quickie washed out iPhone pics with the car next to a row of white storage garages reflecting the sun:
Last edited by puma1552; 05-27-2012 at 04:51 PM.
 05-27-2012, 04:20 PM
#2
Senior Member
Join Date: Jul 2011
Location: FL
Posts: 834
Likes: 0
Received 0 Likes
on
0 Posts
Engine: 355 Super Charged
Transmission: B&M Streetfighter
Axle/Gears: 4th gen 342
Re: Detailed
Its so clean it smells clean thru the computer, lol
Looks great, I love chemical guys products, You are right about not using the high quality towels for the jambs and such. I wash the AutoZones ones and use them just for that purpose.
Looks great, I love chemical guys products, You are right about not using the high quality towels for the jambs and such. I wash the AutoZones ones and use them just for that purpose.
Last edited by 91 Droptop; 05-27-2012 at 04:32 PM.
05-27-2012, 04:29 PM
#3
Re: Detailed
I then moved to the exterior.
The body of the car was in great shape overall and had minimal marring/swirls; therefore I opted to skip using a cutting polish with an orange cutting pad, and start with a finishing polish on a white pad (slightly less abrasive than an orange). Normally I would cut with orange and speed 6 on my Porter Cable 7424 XP and do the finishing polish with a white pad and speed 5, but this time I decided to do the finishing at speed 6 since it was the only polishing step. The pads I use are Chemical Guys Hexlogic 5.5" foam pads with one of their urethane 5" backing plates.
Before I could start buffing though, I had to strip off any old wax and take care of any bonded contaminants to make sure I was starting with clean paint. For the wash I used CG's Citrus Wash and Gloss, which strips all old wax off (excellent lubricity too). Wheels were cleaned with Diablo wheel gel and a cheap Napa brush. I use two wash mitts--one for wheels, one for the body. I use a Pak Shak MF mitt for the wheels, and a Race Glaze sheepskin mitt for the body.
I got lucky in that the body needed no clay. I clayed the wheels, but couldn't feel any bonded contaminants on the body, so I saved a few hours claying and re-washing, but normally you'd want to get some detailing clay, spray it generously with a lubricant, spray a 2'x2' section of the body with some lubricant, and just run the clay back and forth with no pressure, just the weight of the clay. As you clay you can hear the bonded contaminants rubbing against the clay. When you can't hear it anymore, the paint is clean and you can wipe up the lubricant and do another spot. It's a good idea to wash the car again to get rid of any clay residue.
I then pulled the car into the garage and used 3M blue painters tape to tape off most of the trim, emblems, etc. so they wouldn't get burned by the buffer. I then fired up the 1000W halogen light. This is a MUST for paint correction, and it was only $30. Each bulb is 500W. This is a harsh light that will show everything. Too many n00bs make the mistake of skipping the halogens, this should be #2 on the list behind the polishing machine itself. Sunlight won't work as well, and polishing should be done in the shade.
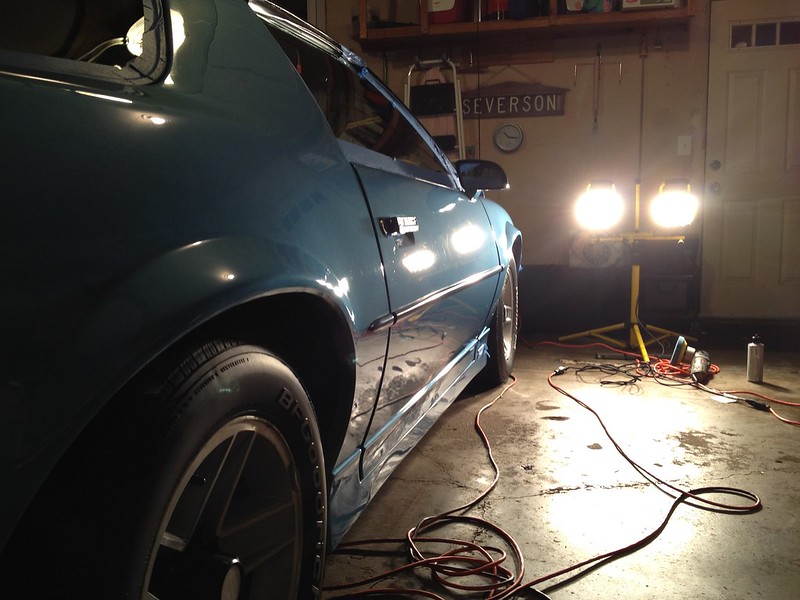
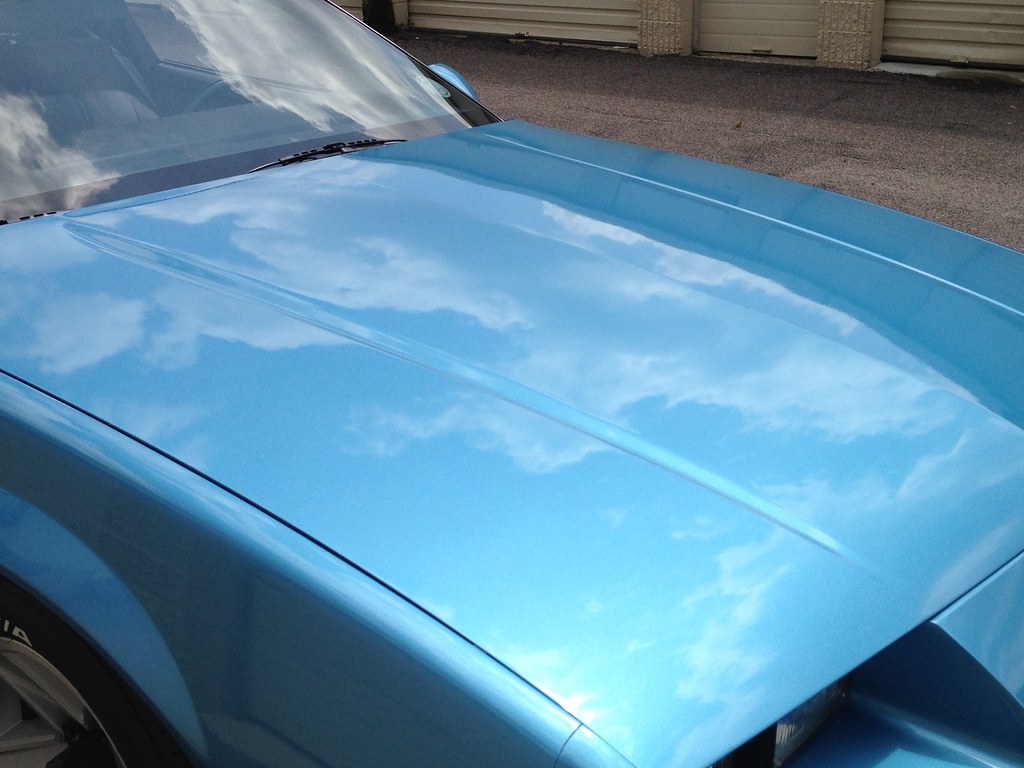
I started with the aforementioned white pad and V38 finishing polish. I sprayed the pad with some Pad Conditioner, and then I put five "dots" of polish on my pad. I spread it around a 2'x2' area with the PC on speed 1, and then with the PC on the body of the car, increased it to speed six, pressing down with medium to heavy pressure. I like to make 5-6 overlapped passes, in alternating directions. I'll go side to side, then up and down, then side to side, etc. until I see the polish breaking down to the point it's almost dry and just looks like a barely-there wax film. Then I used clean MF towels to wipe the polish off before moving to the next section. Use the halogens to see what kind of paint correction you are getting. I got about 90% correction this weekend:

You will see there are no swirls in the above pic. That is pure, clean, polished paint and nothing else. No wax, glaze, sealant--nothing. Just polished paint under 1000W lighting. Another thing to note--this is only the third time I have buffed a car with a DA, which is proof positive that a DA is foolproof and impossible to do damage with. A rotary is another story, and shouldn't be in the hands of a beginner. I won't touch one anytime soon, but I feel completely confident even pressing down hard on speed 6 with my Porter Cable. The first car I buffed was my Mustang with its factory black paint; I was really nervous to crank the PC to speed 6, and then press down on top of that, particularly on a black car and having zero experience, but the car turned out beautiful so don't worry.
A few quick process pics:


After I finished the polishing, I glazed the car to fill in any other slight micro-marring on the car. I used EZ Creme glaze for this, with a blue pad and speed 4, with light hand pressure. Again, I broke it down like polish. Each polish step and the glaze step take about two hours each. When this was done, I used Jetseal 109 to seal the car, on a black pad and speed 4, using only the weight of the machine--let the machine do the work here. I personally find that below speed 4, the PC bogs down too easily and won't spin, which can be frustrating. The Jetseal was not broken down like the polish and glaze; rather for this particular sealant you have to just apply it and wait 15 minutes, then buff it off with a clean towel and wait 20 minutes before the next coat, so I just applied it to the whole car (door and trunk jambs included) and then buffed it off. Different sealants may work differently.
After two coats of sealant, I finally put the buffer away and I finished the car off with two coats of CG's 50/50 paste wax, applied with a standard foam applicator. This wax is as smooth as butter and does not require hazing; you just buff it on with an applicator in a circular motion, and buff it off with a clean MF towel right afterwards. I personally do a panel at a time, and I do both coats on the panel right after each other to close the panel out before moving to the next.
After this, I do my own QA/QC check, combing over the car carefully to inspect the results. I like to go around the car once more with a new MF towel and just polish the car with the towel to make sure I haven't missed any spots. I take this a panel at a time as well, making sure to open any adjacent panels and tracing around the edges of each panel (i.e. opening the hood to get the top edge of the fender). I take the tape off the car after applying sealant, but it can be left on until after waxing also. I use Q-tips and toothpicks where necessary to get any product out of any tiny cracks and when I've circled the car and then cleaned up the exterior glass and trim (it gets pretty dirty during the buffing process) and I'm satisfied, the lengthy body process is considered finished. Don't forget to seal/wax the door/trunk jambs, as well as the wheel well edges.
I then did the wheels. Same deal--glaze, two coats of sealant, and two coats of wax, but I used Wheel Guard wax for this.
After this, I did hit all the black trim and weatherstripping with a couple coats of G6 Hypercoat, and then wiped the excess off. I also hit the front fender liners with this. After that, I used Westley's Bleche-White on the white letters of the tires (2x), and then dressed the tires three times in G6 for a nice black look.
Finally, I spent an hour using damp towels and Grime Reaper under the hood, trying to clean up what I could. Not a lot to be done with our engine bays, but you can at least spend an hour a couple times a year just wiping as many of the plastic wire looms and hoses down as you can to give it a bit cleaner look.
All in all I spent around 20 hours, noting that I didn't have to clay and rewash, use cutting polish, or spend a lot of time with the interior plastics. All in all I would be closer to 30 hours had I had to do all of that.
The body of the car was in great shape overall and had minimal marring/swirls; therefore I opted to skip using a cutting polish with an orange cutting pad, and start with a finishing polish on a white pad (slightly less abrasive than an orange). Normally I would cut with orange and speed 6 on my Porter Cable 7424 XP and do the finishing polish with a white pad and speed 5, but this time I decided to do the finishing at speed 6 since it was the only polishing step. The pads I use are Chemical Guys Hexlogic 5.5" foam pads with one of their urethane 5" backing plates.
Before I could start buffing though, I had to strip off any old wax and take care of any bonded contaminants to make sure I was starting with clean paint. For the wash I used CG's Citrus Wash and Gloss, which strips all old wax off (excellent lubricity too). Wheels were cleaned with Diablo wheel gel and a cheap Napa brush. I use two wash mitts--one for wheels, one for the body. I use a Pak Shak MF mitt for the wheels, and a Race Glaze sheepskin mitt for the body.
I got lucky in that the body needed no clay. I clayed the wheels, but couldn't feel any bonded contaminants on the body, so I saved a few hours claying and re-washing, but normally you'd want to get some detailing clay, spray it generously with a lubricant, spray a 2'x2' section of the body with some lubricant, and just run the clay back and forth with no pressure, just the weight of the clay. As you clay you can hear the bonded contaminants rubbing against the clay. When you can't hear it anymore, the paint is clean and you can wipe up the lubricant and do another spot. It's a good idea to wash the car again to get rid of any clay residue.
I then pulled the car into the garage and used 3M blue painters tape to tape off most of the trim, emblems, etc. so they wouldn't get burned by the buffer. I then fired up the 1000W halogen light. This is a MUST for paint correction, and it was only $30. Each bulb is 500W. This is a harsh light that will show everything. Too many n00bs make the mistake of skipping the halogens, this should be #2 on the list behind the polishing machine itself. Sunlight won't work as well, and polishing should be done in the shade.
I started with the aforementioned white pad and V38 finishing polish. I sprayed the pad with some Pad Conditioner, and then I put five "dots" of polish on my pad. I spread it around a 2'x2' area with the PC on speed 1, and then with the PC on the body of the car, increased it to speed six, pressing down with medium to heavy pressure. I like to make 5-6 overlapped passes, in alternating directions. I'll go side to side, then up and down, then side to side, etc. until I see the polish breaking down to the point it's almost dry and just looks like a barely-there wax film. Then I used clean MF towels to wipe the polish off before moving to the next section. Use the halogens to see what kind of paint correction you are getting. I got about 90% correction this weekend:
You will see there are no swirls in the above pic. That is pure, clean, polished paint and nothing else. No wax, glaze, sealant--nothing. Just polished paint under 1000W lighting. Another thing to note--this is only the third time I have buffed a car with a DA, which is proof positive that a DA is foolproof and impossible to do damage with. A rotary is another story, and shouldn't be in the hands of a beginner. I won't touch one anytime soon, but I feel completely confident even pressing down hard on speed 6 with my Porter Cable. The first car I buffed was my Mustang with its factory black paint; I was really nervous to crank the PC to speed 6, and then press down on top of that, particularly on a black car and having zero experience, but the car turned out beautiful so don't worry.
A few quick process pics:
After I finished the polishing, I glazed the car to fill in any other slight micro-marring on the car. I used EZ Creme glaze for this, with a blue pad and speed 4, with light hand pressure. Again, I broke it down like polish. Each polish step and the glaze step take about two hours each. When this was done, I used Jetseal 109 to seal the car, on a black pad and speed 4, using only the weight of the machine--let the machine do the work here. I personally find that below speed 4, the PC bogs down too easily and won't spin, which can be frustrating. The Jetseal was not broken down like the polish and glaze; rather for this particular sealant you have to just apply it and wait 15 minutes, then buff it off with a clean towel and wait 20 minutes before the next coat, so I just applied it to the whole car (door and trunk jambs included) and then buffed it off. Different sealants may work differently.
After two coats of sealant, I finally put the buffer away and I finished the car off with two coats of CG's 50/50 paste wax, applied with a standard foam applicator. This wax is as smooth as butter and does not require hazing; you just buff it on with an applicator in a circular motion, and buff it off with a clean MF towel right afterwards. I personally do a panel at a time, and I do both coats on the panel right after each other to close the panel out before moving to the next.
After this, I do my own QA/QC check, combing over the car carefully to inspect the results. I like to go around the car once more with a new MF towel and just polish the car with the towel to make sure I haven't missed any spots. I take this a panel at a time as well, making sure to open any adjacent panels and tracing around the edges of each panel (i.e. opening the hood to get the top edge of the fender). I take the tape off the car after applying sealant, but it can be left on until after waxing also. I use Q-tips and toothpicks where necessary to get any product out of any tiny cracks and when I've circled the car and then cleaned up the exterior glass and trim (it gets pretty dirty during the buffing process) and I'm satisfied, the lengthy body process is considered finished. Don't forget to seal/wax the door/trunk jambs, as well as the wheel well edges.
I then did the wheels. Same deal--glaze, two coats of sealant, and two coats of wax, but I used Wheel Guard wax for this.
After this, I did hit all the black trim and weatherstripping with a couple coats of G6 Hypercoat, and then wiped the excess off. I also hit the front fender liners with this. After that, I used Westley's Bleche-White on the white letters of the tires (2x), and then dressed the tires three times in G6 for a nice black look.
Finally, I spent an hour using damp towels and Grime Reaper under the hood, trying to clean up what I could. Not a lot to be done with our engine bays, but you can at least spend an hour a couple times a year just wiping as many of the plastic wire looms and hoses down as you can to give it a bit cleaner look.
All in all I spent around 20 hours, noting that I didn't have to clay and rewash, use cutting polish, or spend a lot of time with the interior plastics. All in all I would be closer to 30 hours had I had to do all of that.
Last edited by puma1552; 05-27-2012 at 05:03 PM.
05-27-2012, 04:29 PM
#4
Re: Detailed
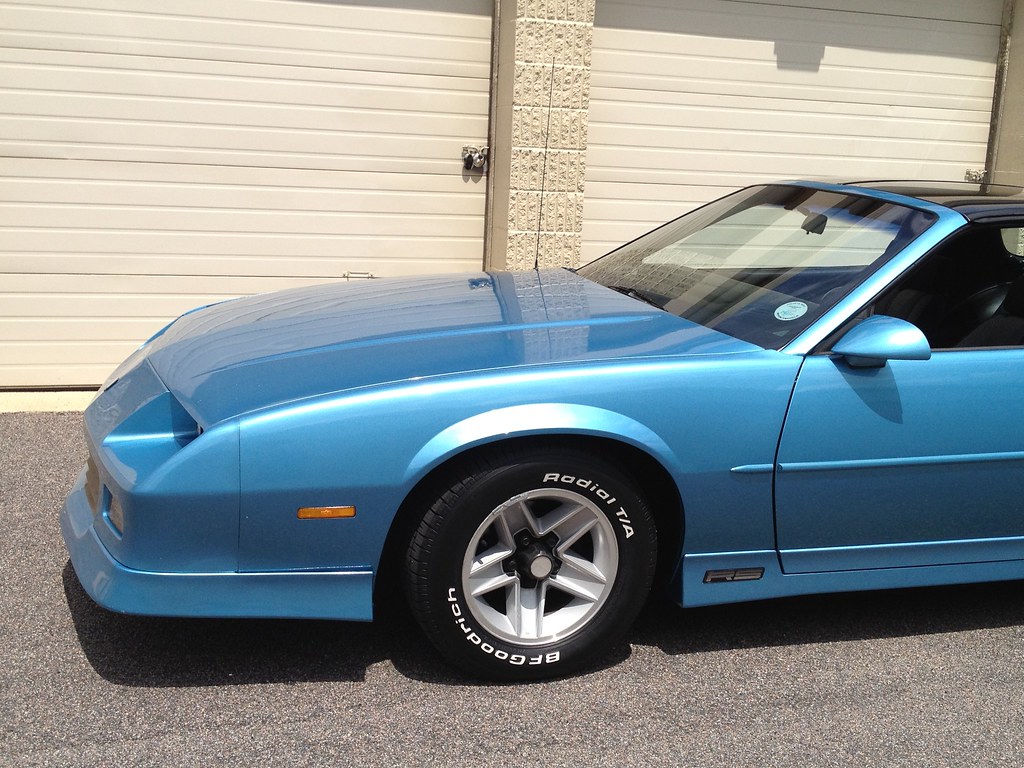
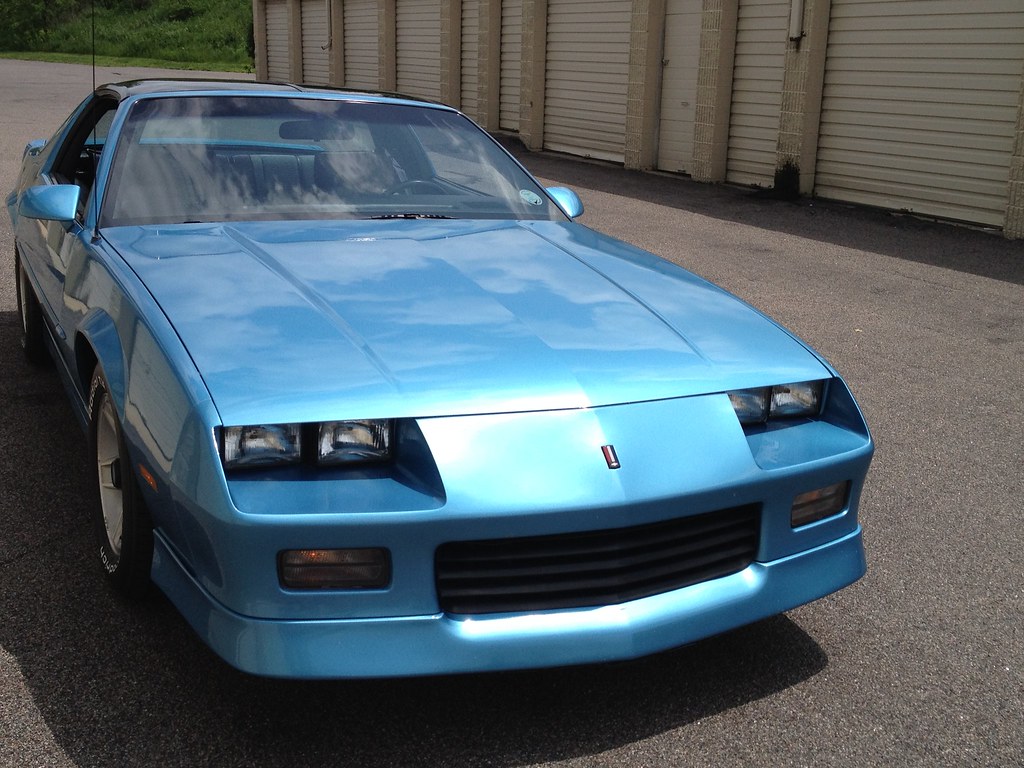
Here are a couple so-so iPhone pics of the finished product from when I took it to put it away. Again not the greatest pics, nor the best time of day. It was also kind of hazy and not really full-on sunny with the sun darting in and out of the clouds, but you can still see how the car gleams:


Last edited by puma1552; 05-27-2012 at 05:05 PM.
05-27-2012, 04:41 PM
#5
Re: Detailed
Products used:
Interior:
Green Clean APC
Silk Shine Interior Dressing
Rug Doctor w/Hand Tool
Rug Doctor Upholstery Cleaner
Rug Doctor Anti-Foam
Body:
Race Glaze Sheepskin Wool Wash Mitt
Pak Shak MF wash mitt (for wheels)
Five Gallon Wash Bucket (2)
Grit Guard (2)
Citrus Wash/Gloss Soap
Porter Cable 7424 XP
5" Backing Plate
5.5" Hexlogic White Pad
5.5" Hexlogic Blue Pad
5.5" Hexlogic Black Pad
Pad Conditioner
V38 Finishing Polish
EZ-Creme
Jetseal 109
50/50 Paste Wax
Clay (not used)
Luber (not used)
Wheels:
Citrus Wash/Gloss Soap
Diablo Wheel Cleaner Gel
Napa Brush
EZ-Creme Glaze
Jetseal 109 Sealant
Wheel Guard Wheel Wax
Tires/Trim:
Westley's Bleche-White Tire Whitener
G6 Hypercoat Exterior Trim Dressing
Engine Bay:
Grime Reaper APC
Underbody:
Full five minute power wash at the local coin car wash, lol.
Last edited by puma1552; 05-27-2012 at 05:07 PM.
05-27-2012, 04:44 PM
#6
Re: Detailed
Also, for the wash, I use the two-bucket method with a grit guard in each bucket. The idea is to have one bucket of clean, soapy wash water, and another bucket full of water to wash your mitt in. Grit Guards go in the bottom of the bucket to help trap dirt and make it settle out in the bottom of the bucket so it doesn't get on your wash mitt and get rubbed all over the car, inducing marring. To do the two bucket method, dip your mitt in the clean, soapy water, squeeze it out a bit over the car to let the soapy water run on the car by itself, and then wash. Then dunk the mitt in the dirty water bucket, rubbing both sides of the mitt against the Grit Guard at the bottom to loosen any dirt particles you pulled off the car. They will settle on the bottom. Then take the mitt out of that bucket, squeeze it out, and put it in the clean bucket and continue to wash the car. It sounds like a hassle, but it's pretty easy.

Trending Topics
 05-27-2012, 05:13 PM
#9
Re: Detailed
Thanks; the interior looks great for 150k miles of seat and sun time, but unfortunately the seats and seat belts will never look like a those in a 10k mile car. I wish I had been able to buy the car new.
For a 20 year old normal/decent paint job, it doesn't look too bad I have to say.
Some people find detailing therapeutic, those people are crazy. This is grueling work and I had a free pass on a good bit of the work compared to when I did my Mustang, (cutting polish, etc.) and I still can't move, I'll be in pain for days. But on the other hand it's so easy to take care of a car. Just suck it up for a couple days a couple times a year and your car will look good forever and last a very long time.
I hate the work, but I absolutely love the results.
The car has gotten a lot of love lately to get it back on the road and up to par. In the last few weeks it's had new tires, a new idler arm, an alignment, a new K&N breather, a new PCV valve, all the fluids flushed except for the tranny, and maybe one or two other things that slip my mind. A good buffing and steam cleaning tops it off. Still need to get the AC looked at, a fuel filter, and an oil pressure sending unit though. Hopefully later this season.
Last edited by puma1552; 05-27-2012 at 05:17 PM.
 05-28-2012, 10:07 AM
#11
Re: Detailed
Overall I'm pretty happy with the CG stuff. There is a ton of great stuff out there (Menzerna, M105/205, etc.) but as they say, when you find something that works stick with it...no sense in spending thousands on every different line.
05-28-2012, 11:39 AM
#13
05-29-2012, 03:38 PM
#14
Re: Detailed
Thanks, I'm on vacation this week so I took it out this morning hoping to get some better pics, but the sun never poked through and I'm pretty sure my point and shoot camera is worse than the one in my iPhone...will try again later this week when it's sunny.
Kinda wish I never sold my DSLR (sig pics were taken with that).
Kinda wish I never sold my DSLR (sig pics were taken with that).
05-29-2012, 04:57 PM
#15
COTM Editor

iTrader: (11)
Join Date: Mar 2006
Location: WINDSOR, CO
Posts: 4,098
Likes: 0
Received 12 Likes
on
12 Posts
Car: 91 Z28, 87 SC, 90 IROC, 92 RS
Engine: LS1, 305 TPI, L98, NADA
Transmission: T56, 700r4's, and NADA
Axle/Gears: 3.89, 3.42, 3.23, NADA
Re: Detailed
Looks great! Hard work appears to have been worth it!
05-29-2012, 05:38 PM
#16
Senior Member
Join Date: Jul 2011
Location: FL
Posts: 834
Likes: 0
Received 0 Likes
on
0 Posts
Engine: 355 Super Charged
Transmission: B&M Streetfighter
Axle/Gears: 4th gen 342
Re: Detailed
Over the years I have had pleanty of automotive finish saleman stop by and try and get me to use or try their line. I have found that CG have a great line of body shop safe products, no one hasseling me to at least give them a try. I use basicly Chemical Guys and 3M, I have 3 buffers now 2 Random and one high speed Dewalt to buff wet sanded panels.
You can spend tons of money like you said, every time a new line of product comes out, I like the fact I order a case here and there when needed. What I do not understand is why for the price, a lot of people still use the stuff you buy at the auto parts store
You can spend tons of money like you said, every time a new line of product comes out, I like the fact I order a case here and there when needed. What I do not understand is why for the price, a lot of people still use the stuff you buy at the auto parts store
05-29-2012, 07:43 PM
#17
Member

Join Date: Sep 2008
Location: Atlanta
Posts: 178
Likes: 0
Received 1 Like
on
1 Post
Car: 1992 Z28
Engine: 305
Transmission: 5 speed
Axle/Gears: 3.42
Re: Detailed
I bought my car from a smoker. I spent hours cleaning the inside. I was going to rent a rug doctor but I have a bissell carpet/upholstry cleaner. I did the seats about six times, the headliner once, door panels and the carpet. It truely makes a difference. A lot can be said for upholstry that is cleaned twice a year. I also feel you on the outside detailing. My 92 is red and it looked terrible. After a day of wet sanding and another day of buffing, the car looks like a million bucks. Detailing is not as fun as it used to be when I was younger but it makes or breaks a car. With these cars teetering on the desirable side the clean, well maintained, original cars are going to be the ones wanted.
05-30-2012, 03:43 PM
#18
Re: Detailed
Got the car out again this morning. Had a bit more sun, but it was still pretty brisk going 65 mph with the T-tops off and heat on full blast since it was only around 50 degrees...I put about 200 miles on the car today, it's running and driving just beautifully.
By this time I probably should've wiped the brake dust off the wheels and re-dressed the tires, but oh well...I just wanted to get it out and drive it again this morning. iPhone pics, and in case you're wondering what the sticker in the windshield is, it's a Car Craft Summer Nationals 2001 sticker...should be making an appearance there this July for the first time in 11 years:


By this time I probably should've wiped the brake dust off the wheels and re-dressed the tires, but oh well...I just wanted to get it out and drive it again this morning. iPhone pics, and in case you're wondering what the sticker in the windshield is, it's a Car Craft Summer Nationals 2001 sticker...should be making an appearance there this July for the first time in 11 years:
Last edited by puma1552; 05-30-2012 at 03:59 PM.
07-17-2012, 12:47 AM
#20
Member
iTrader: (2)
Join Date: Mar 2009
Location: Wisconsin
Posts: 297
Likes: 0
Received 1 Like
on
1 Post
Car: 1984 Firebird (89 Formula Clone)
Engine: 357
Transmission: m29 T56
Axle/Gears: 3.27 9 bolt Borg Warner.
Re: Detailed
Beautiful car puma, im right over in wisconsin, let me know if your ever in the area! My car used to be original Maui Blue 
07-17-2012, 09:40 AM
#21
Supreme Member

Join Date: Apr 2012
Location: Streetsboro Oh
Posts: 1,353
Likes: 0
Received 1 Like
on
1 Post
Car: 1987 T/A WS6 T-Tops/92 RS
Engine: LB9/3.1
Transmission: 700R4/700R4
Axle/Gears: 2.73/3.23
Re: Detailed
Such a clean nice looking car, you said it has 150K on the clock?
07-18-2012, 09:56 PM
#22
Junior Member

Join Date: Aug 2010
Location: Guelph, Ont
Posts: 49
Likes: 0
Received 0 Likes
on
0 Posts
Car: 1984 Trans am
Engine: 305 H.O.
Re: Detailed
That thing looks awesome!!! Mine has a few dents/scratches/***k'ups in it, good for you spending alot of time on it.
10-20-2012, 01:24 PM
#23
Junior Member

Re: Detailed
Great detail and very enlightening thread, thanks for sharing your products and photos. I like your work
10-21-2012, 04:09 PM
#25
Senior Member

Join Date: Feb 2009
Location: USA
Posts: 885
Likes: 0
Received 0 Likes
on
0 Posts
Car: 1989 SS
Engine: LT1+1500$ hooker exhaust
Transmission: T56
Axle/Gears: 3.42 bogger
Re: Detailed
Great pictures all in beautiful HD, what camera are you using if i may ask?
10-21-2012, 06:42 PM
#27
Senior Member
Join Date: Feb 2009
Location: USA
Posts: 885
Likes: 0
Received 0 Likes
on
0 Posts
Car: 1989 SS
Engine: LT1+1500$ hooker exhaust
Transmission: T56
Axle/Gears: 3.42 bogger
10-21-2012, 07:04 PM
#28
Senior Member
Re: Detailed
Speechless. Thats the cleanest RS in the world. I am so jealous but dont have nearly the amount of patience to clean my paint like you did.
PROPS!
P.S. What camera setting do you have your 4S on? Do you have HDR on? Trying to figure out why your pics are so clear.
PROPS!
P.S. What camera setting do you have your 4S on? Do you have HDR on? Trying to figure out why your pics are so clear.
Last edited by Motown; 10-21-2012 at 07:10 PM.
10-21-2012, 07:30 PM
#29
Junior Member

Re: Detailed
Wow, what a great looking car! Thank you for the write up! Your hard work really paid off. 
10-21-2012, 10:52 PM
#30
Member
iTrader: (3)
Join Date: Oct 2009
Location: Newton, Massachusetts
Posts: 314
Likes: 0
Received 3 Likes
on
3 Posts
Car: '83 Sport Coupe
Engine: 360
Transmission: T5
Axle/Gears: 10 bolt 3.73 TrueTrac
Re: Detailed
Just saw this post. The originality is just so beautiful. One of the few time capsule Camaros out there, and it is good to see it thriving at 150+ k miles. If I ever have the chance to own an original car, it will stay that way. Keep enjoying her, and great write-up!
10-22-2012, 09:42 AM
#31
 10-24-2012, 09:00 AM
#34
Junior Member

Join Date: May 2010
Location: Upstate Ny
Posts: 60
Likes: 0
Received 0 Likes
on
0 Posts
Car: 1999 Formula Hardtop
Engine: 6.2 forged ls3 Procharged
Transmission: t56 Magnum
Axle/Gears: midwest chassis fab 9/3.50
Re: Detailed
nice work , i love my 7424xp , Ive stepped up to using m105 and m205 and the results are amazing and have been using collinite 845 for the wax. I'm thinking about switching to the microfiber pads as you don't need separate orange and white pads anymore .
10-24-2012, 09:04 AM
#35
Senior Member
iTrader: (3)

Join Date: Oct 2012
Location: SC
Posts: 725
Likes: 0
Received 0 Likes
on
0 Posts
Car: '87 IROC-Z | '99 SS
Engine: LB9 | LS1
Transmission: 700R4 | T56
Re: Detailed
Using the MF pads, you will still need refining step. If your combo has been working for you, stick with it. Keep in mind, you shouldn't bee needing to go over the finish with an aggressive pad and M105 often as you would be compromising the clear after a while.
10-24-2012, 04:22 PM
#36
Moderator
Re: Detailed
My 7424 didn't work too well on my neighbors '89 using the M205. I ended up getting out my Flex with the wool pad and the 3M Rubbing compound. I compounded his entire car. We then used the Flex with a finish polish pad and 3m Finesse It polish. This really brings up the shine, but easily leaves halo or ghosting marks in the finish. Follow that up with the 7424 and the Meguiars 205 to remove the halo/ghosting and the car looks like it just came out of the paint booth. It's amazing what a little bit of time and effort will show. Looks good Puma. Now it's time to put the car away for the winter since you've had all summer to enjoy the shine.
10-28-2012, 02:28 PM
#37
Junior Member
Join Date: May 2010
Location: Upstate Ny
Posts: 60
Likes: 0
Received 0 Likes
on
0 Posts
Car: 1999 Formula Hardtop
Engine: 6.2 forged ls3 Procharged
Transmission: t56 Magnum
Axle/Gears: midwest chassis fab 9/3.50
Re: Detailed
id like to step up to a flex but i have no one to teach me , i know it can cut times down by quite a bit . any reaosn you didnt try m105 with the 7424?
10-28-2012, 02:40 PM
#38
Moderator
Re: Detailed
Because I didn't have it. My car had such minor marks that I only ordered the m205. I also didn't heavy cut pads or wool pads for the 7424 like I did for the Flex. My Flex is about 25 years old, so I have all the 3M pads I need for that. The 7424 I use strictly for final finishing now.
11-02-2012, 07:33 PM
#39
Re: Detailed
My 7424 didn't work too well on my neighbors '89 using the M205. I ended up getting out my Flex with the wool pad and the 3M Rubbing compound. I compounded his entire car. We then used the Flex with a finish polish pad and 3m Finesse It polish. This really brings up the shine, but easily leaves halo or ghosting marks in the finish. Follow that up with the 7424 and the Meguiars 205 to remove the halo/ghosting and the car looks like it just came out of the paint booth. It's amazing what a little bit of time and effort will show. Looks good Puma. Now it's time to put the car away for the winter since you've had all summer to enjoy the shine.
Thanks guys.
11-02-2012, 08:07 PM
#40
Member
iTrader: (2)
Join Date: Sep 2010
Location: Buffalo NY
Posts: 297
Likes: 0
Received 0 Likes
on
0 Posts
Car: 1985 Trans AM
Engine: 350 ATK Performance
Transmission: T56
Axle/Gears: Eaton 3.73
Re: Detailed
Great write up! For the windows try Castle. That's what we use at my shop. Nice looking Camaro also.

Thread
Thread Starter
Forum
Replies
Last Post
Linson
Auto Detailing and Appearance
12
10-01-2015 09:50 PM